Deploy a REACT app with Flask API backend on Kubernetes Cluster - Part 1
Deploy a REACT app with Flask API backend on Kubernetes Cluster
Recently I started learning React Framework for web development. I really like how easy it is to build a frontend using the Component pattern in React. If you don’t know what React is, it is a frontend web development framework developed by Facebook. It really simplifies the way how frontend is built. So while learning this I thought why not have a post on a react app deployment.
When it comes to deployment, why not on Kubernetes, the most used system to deploy and manage containerized applications. This post will give you the knowledge to easily deploy an app built using React framework connected to a backend API built on Flask using Python. This will be actually a series of two posts since the process is too long to fit in one post. Both of the posts together should give you a good understanding of the app deployment on Kubernetes cluster using Jenkins.
When there is an App, there will be a data source too. Here I will be using MongoDB as the data source to which the frontend will connect via the API. This whole stack will be deployed on a Kubernetes cluster as separate deployments.
Without further delay lets jump in to the interesting stuff. As always the whole code base is available on my Github Repo Here
Pre-Requisites
Before we start there are a few pre-requisites you need if you need to follow along the setup. If you are using this as a guide for your work, these may already being setup for you.
- An AWS account
- Jenkins running on a server
- A private container registry. You can use Docker hub too but the Docker images pushed wont be private. If you need private container registry, you can setup a GitLab account. I will be using the same
- A CHEF manage account for node bootstrapping. It is free for learning purposes
- CHEF installed on local system and on the Jenkins system
- Docker installed on the Jenkins system
Apart from the setups you should have some basic knowledge of:
- Kubernetes
- Docker
- Jenkins
- AWS
I will be explaining everything in detail but to fully understand you should understand the basics.
What are we building
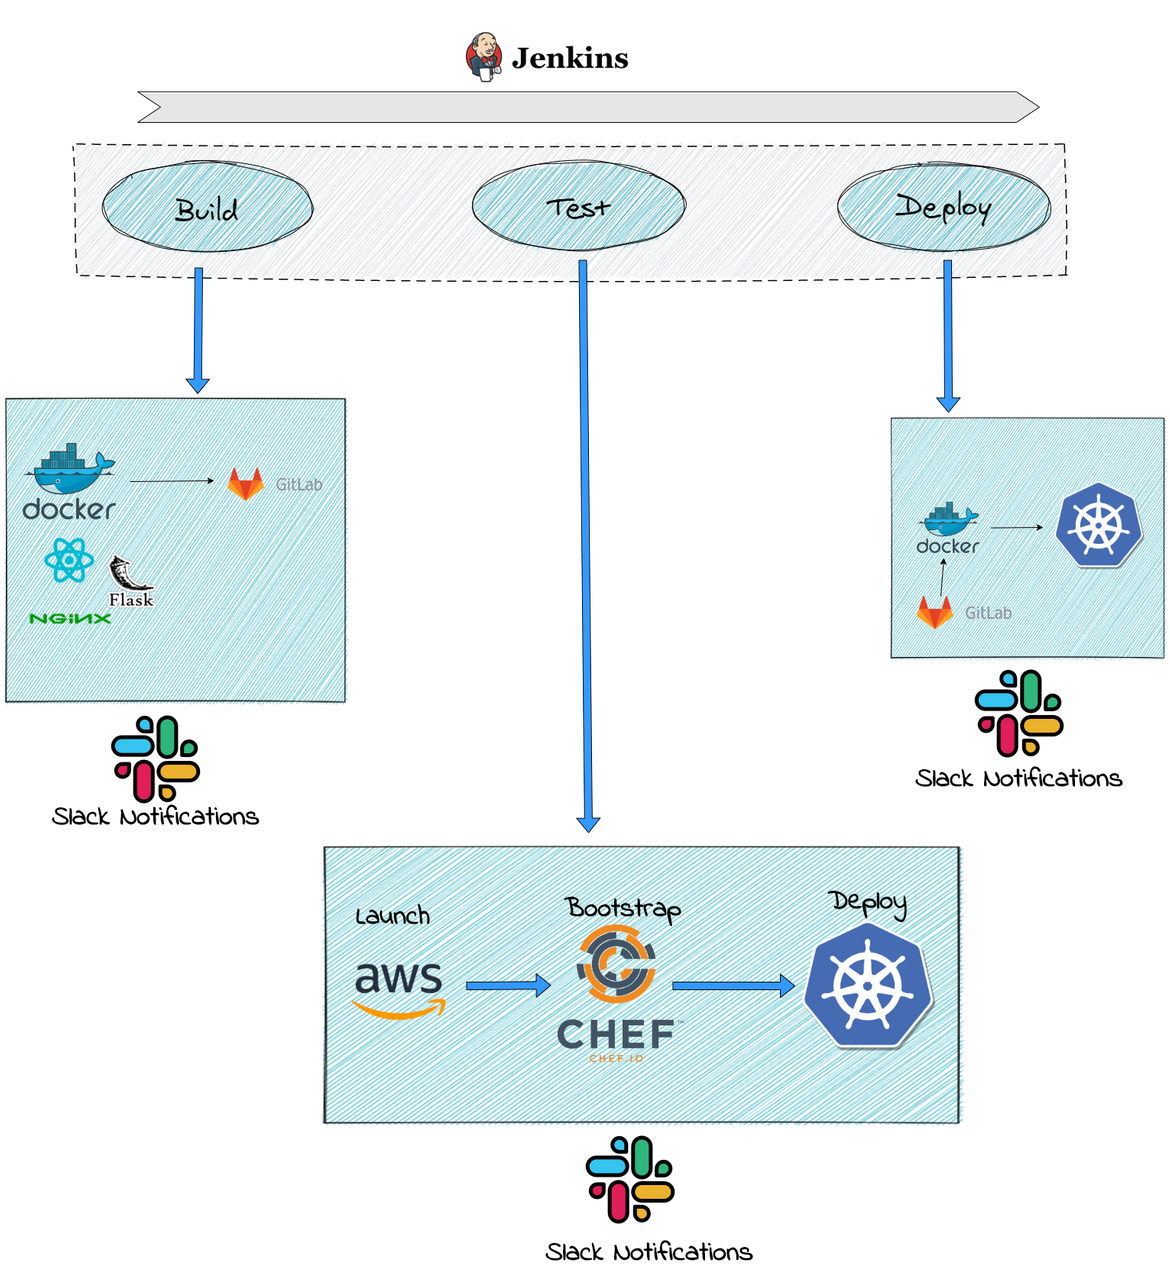
Below architecture image will give an overall idea of what I will be building to deploy the app on a Kubernetes cluster.
At a high level to complete the deployment process to a Kubernetes cluster, these are the steps which I will be describing in this series of 2 posts:
- A Jenkins pipeline to handle and automate the whole deployment process
- Build the custom Docker images and push to a private registry on GitLab
- Launch nodes for the Test Kubernetes cluster, bootstrap using CHEF and deploy the app to the test Kubernetes cluster
- Finally deploy the app to the Production Kubernetes cluster
What is the App about
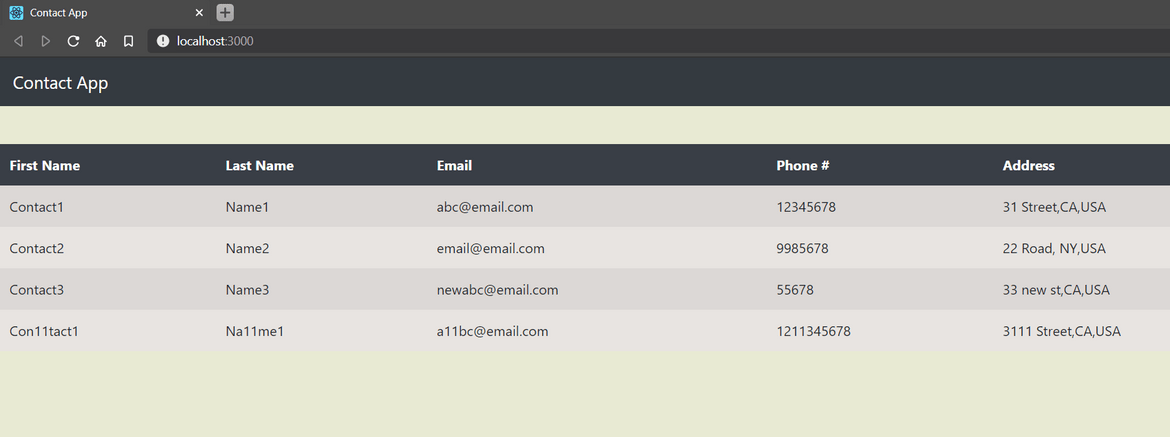
Let me first describe the app which I will be deploying. I developed a simple React app which will show Contact records stored in a Mongo database. The frontend of the app is developed using React framework. Frontend connects to the database via an API. The API is built on Flask framework which is the web framework for Python.
Overall App architecture
This will help you understand the overall architecture of the app.
- Frontend: The frontend is built on React framework. For the UI components, React-Bootstrap is used. It calls the API endpoints to show the Contact records on the Table. The code for the frontend is in the folder ‘contact-appv1’ of the repo
- API: The API is built on Flask framework using Python. It connects to the Mongo DB using Pymongo. There is one API endpoint which will query all contacts from the Mongo DB and respond back with the records in JSON format. The API contains only one endpoint: ‘/allcontacts’. The code for the frontend is in the folder ‘flask_api’ of the repo. The API is being served via Gunicorn which exposes the Flask API endpoint.
- Database: This is the data store. I am using Mongo DB to store the Contact records. I have create a new collection in Mongo DB for the Contacts.
All these components of the whole Application are built as separate Docker images. Lets discuss about that a bit.
App Components as Docker Images
Below let me describe how each of the components are built as Docker images which we will deploy later to the Kubernetes cluster.
- Docker Image for Frontend Client(Dockerfile-clientV2): The Docker image for frontend is based on Nginx. It will route the incoming requests to show the React app and also serve the API endpoint. There is a custom config file for the Nginx Docker container to customize the request routing.
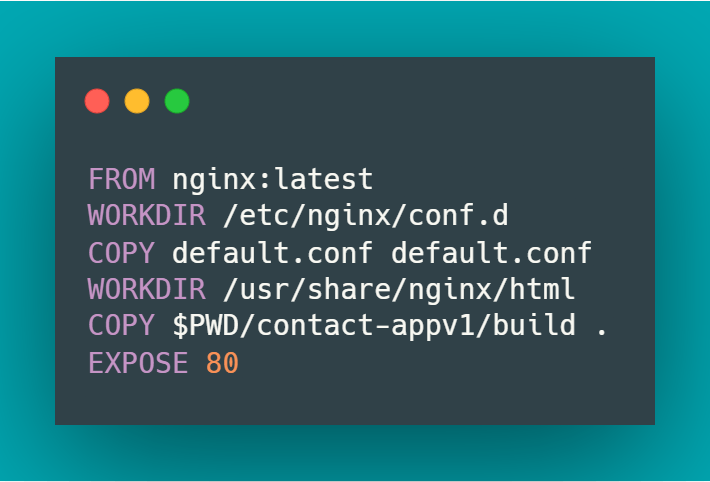
Below are the steps which gets executed when the image is built:
- Copies the static web page files for the front end to the html folder of the Nginx container
- Exposes port 80 to route the incoming requests
- Copies the custom config file in the Nginx container to customize the routing
To build the image run the following command in the codes folder of my Github repo. Clone the repo locally to run your commands in the folder. Before you can run this make sure to run a build to generate the static files in the build folder which will be copied to the image.
docker build -t <image_name_youwant> -f Dockerfile-clientV2
- Docker Image for API(Dockerfile-api): For the API the image is based on an Ubuntu Image. The image has all the packages installed and the Flask app started.
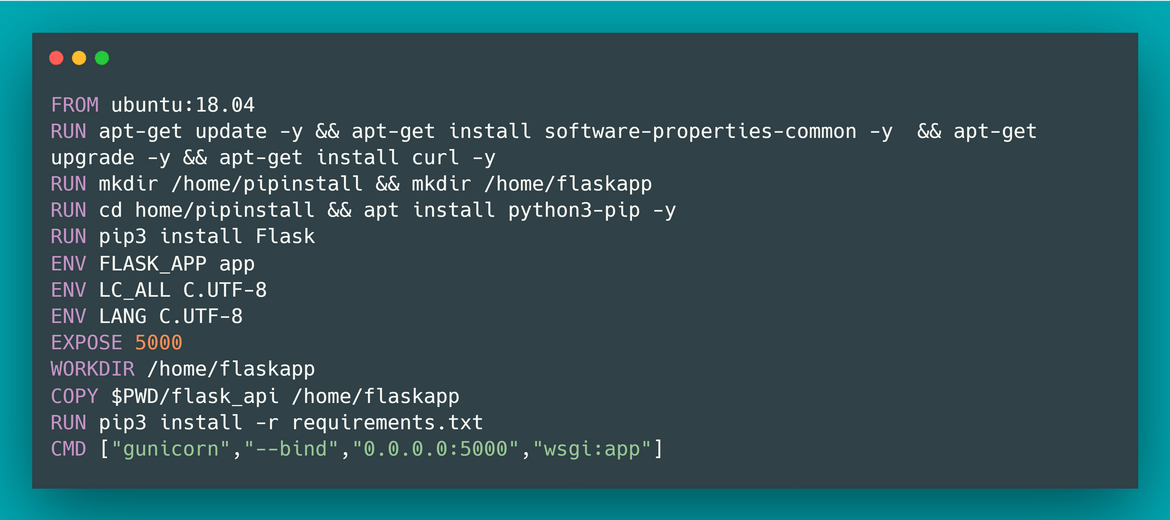
Below are the actions performed when the image is built:
- On the Base ubuntu image, install Python and Flask
- Copy the API code files from the folder to the app folder on the image
- Install all the dependencies for the API application
- Start the Flask app and serve with Gunicorn
- It also exposes port 5000 to serve the API endpoint
To build the image run the following command in the codes folder of my Github repo. Clone the repo locally to run your commands in the folder.
docker build -t <image_name_youwant> -f Dockerfile-api
- Docker Image for Mongo DB: I am using the un-customized docker image for Mongo. The docker containers are launched form the vanilla image. The container is launched using some basic parameters for authentication to specify the credentials.
All of the custom images have to be pushed to a container registry for Kubernetes to pull the images. I am using GitLab container registry to store my custom images.
App Architecture on Kubernetes Cluster
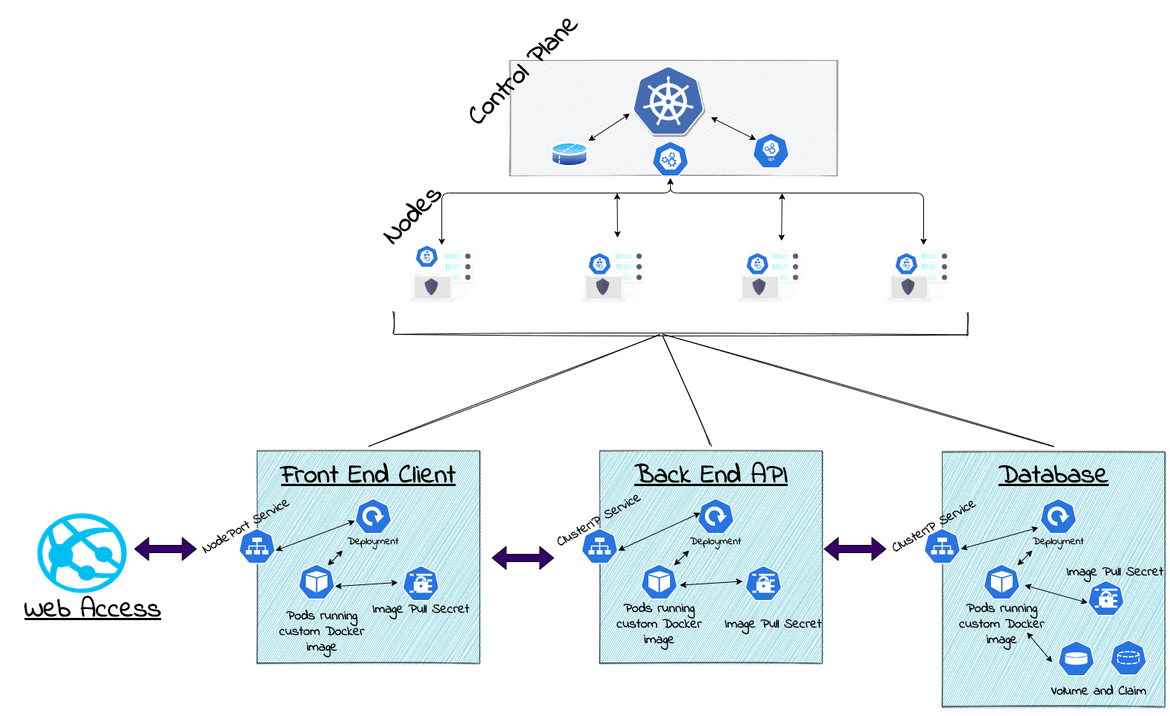
Now that we know the basics about how the app is designed, lets see how the app architecture is orchestrated on a Kubernetes cluster. The app components are deployed as separate deployments. To enable communication between the pods from each deployment, Services are created to expose the Pod within the cluster. This image show the overall structure of the deployment on Kubernetes:
Let me explain each of the components in detail.
App Components
All of the Kubernetes resources are defined in the YAML file (ReactappKubeV2). When deploying to the cluster, this file will be applied to launch all the resources.
-
Database:
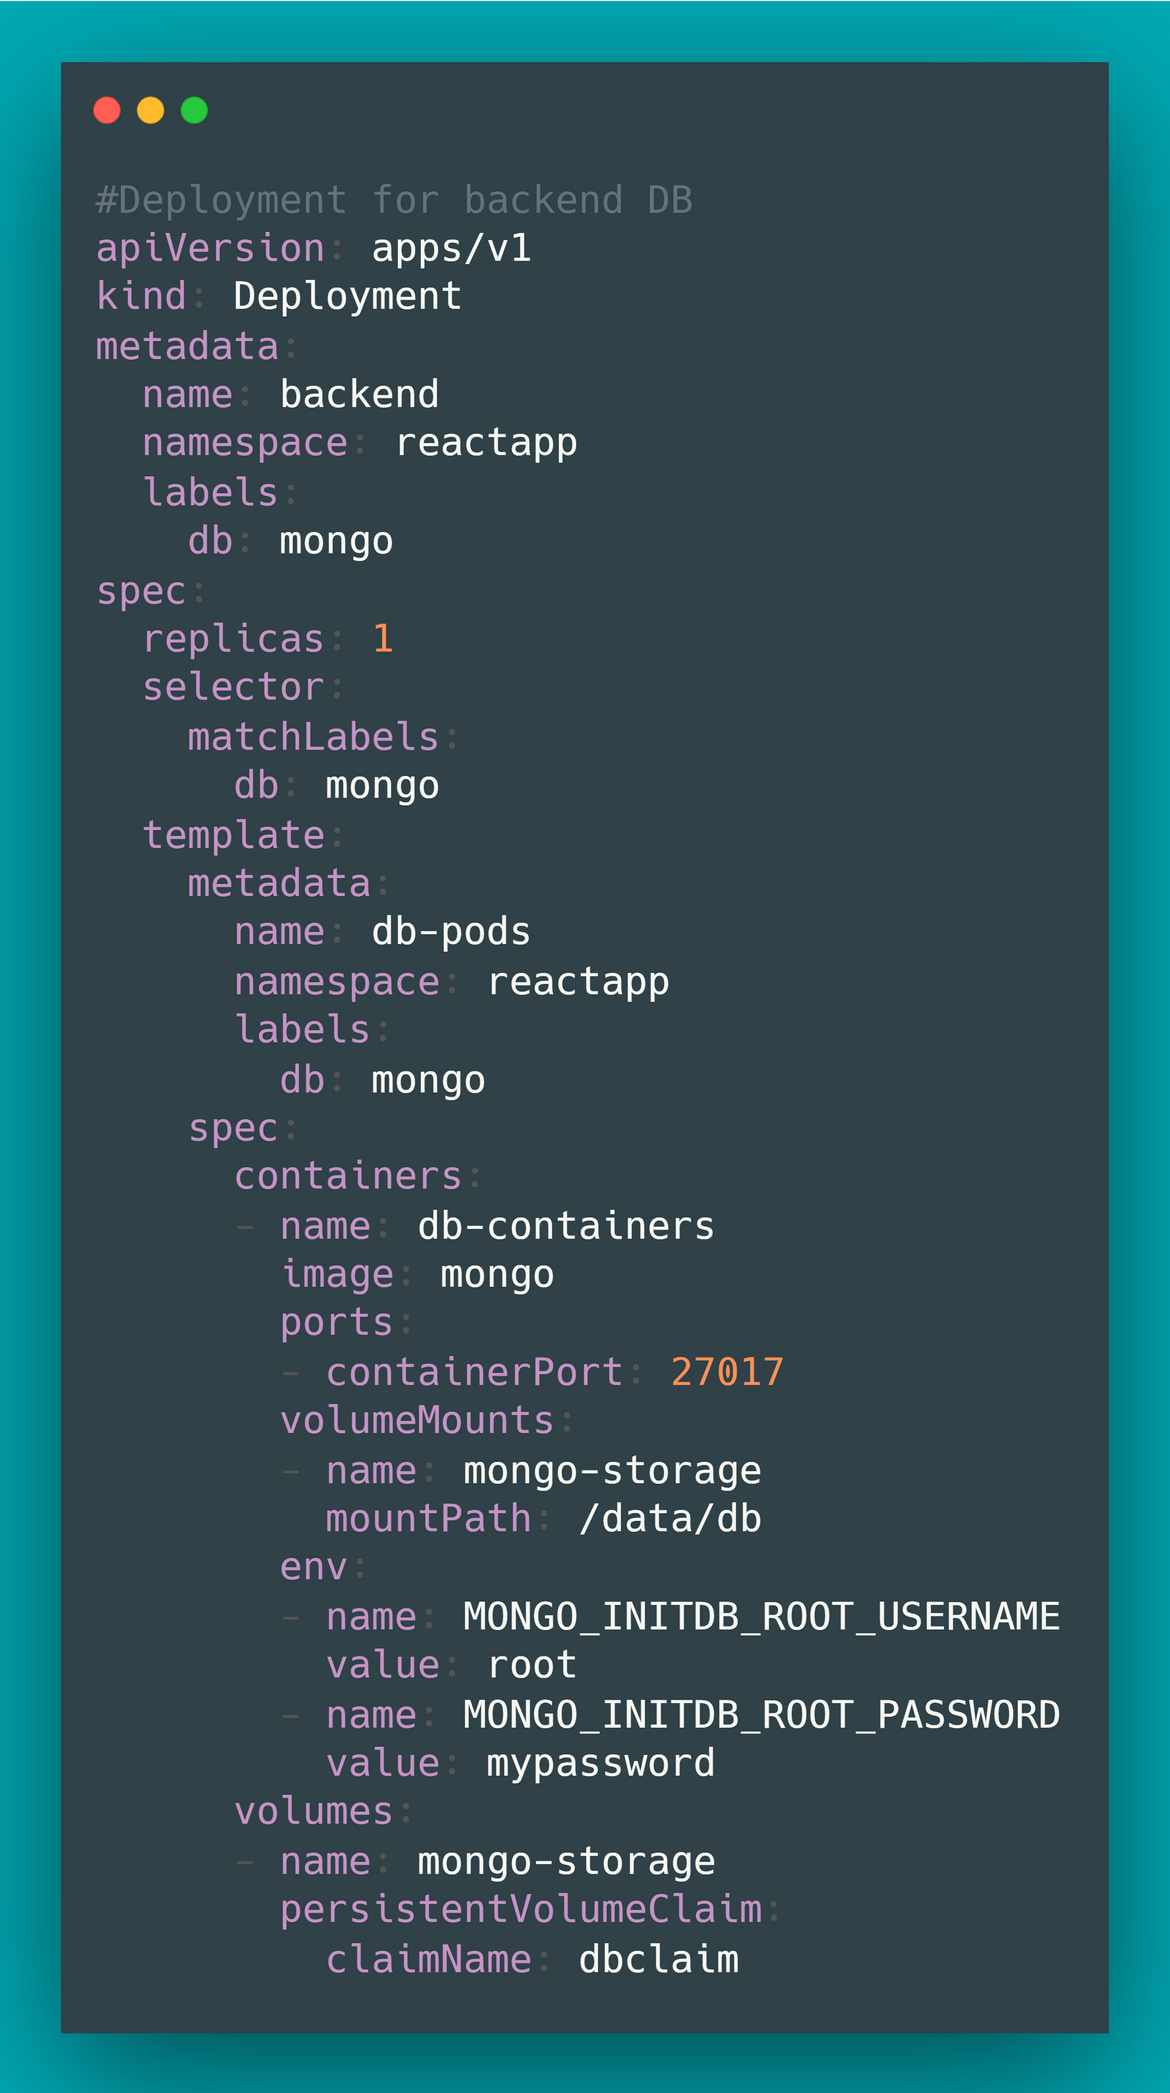
For the database, the deployment launches pods based on Mongo image. To make the database pods work, there are some subcomponents launched too:
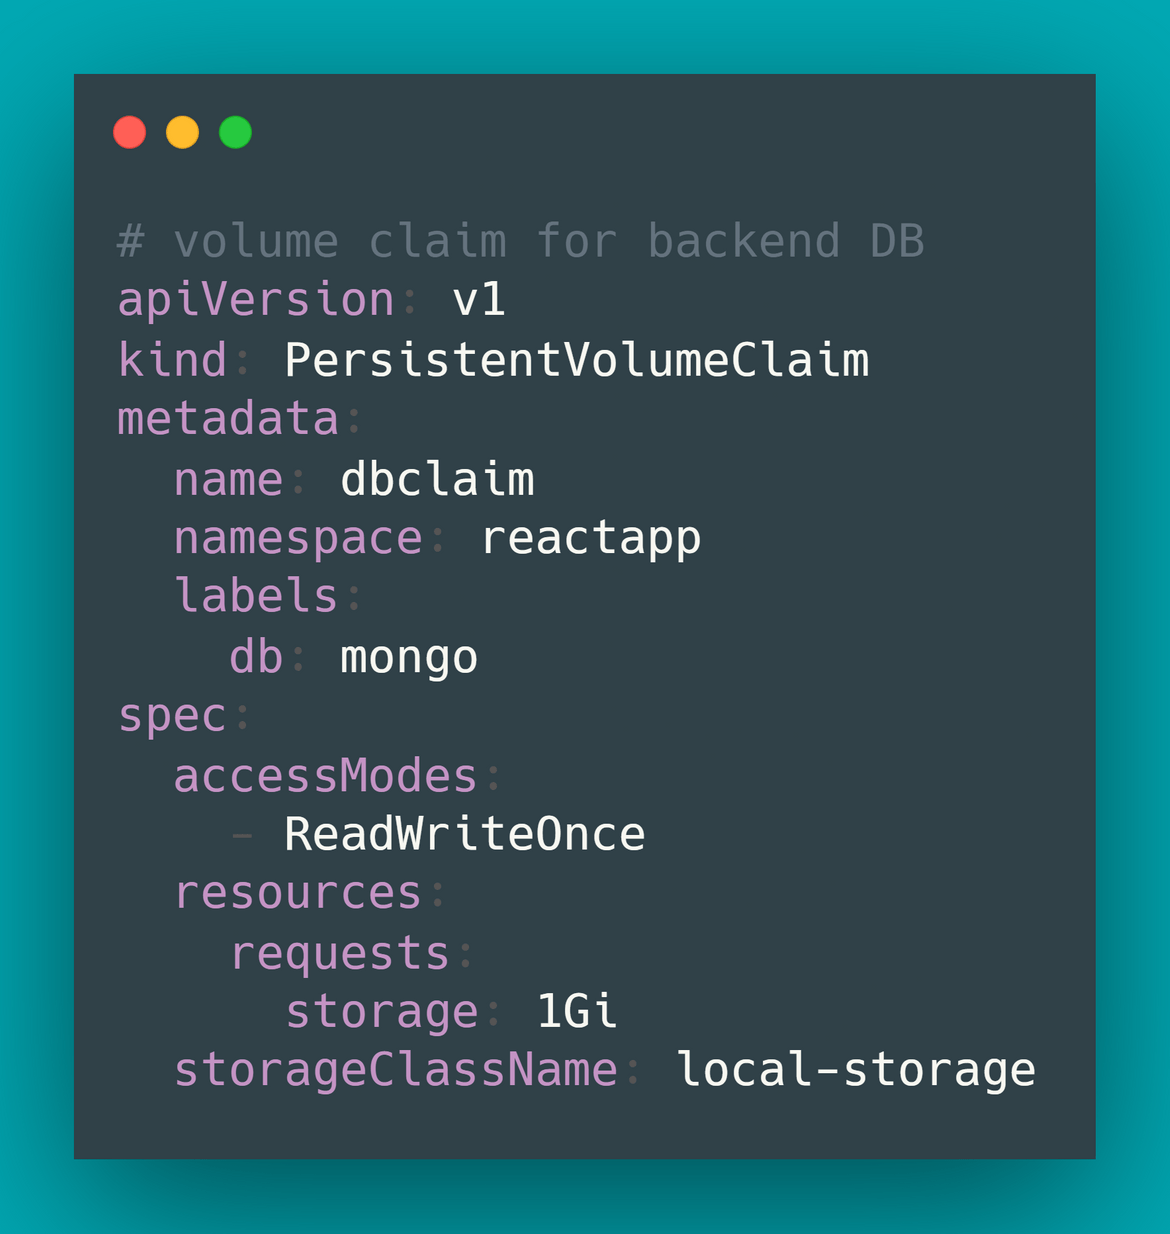
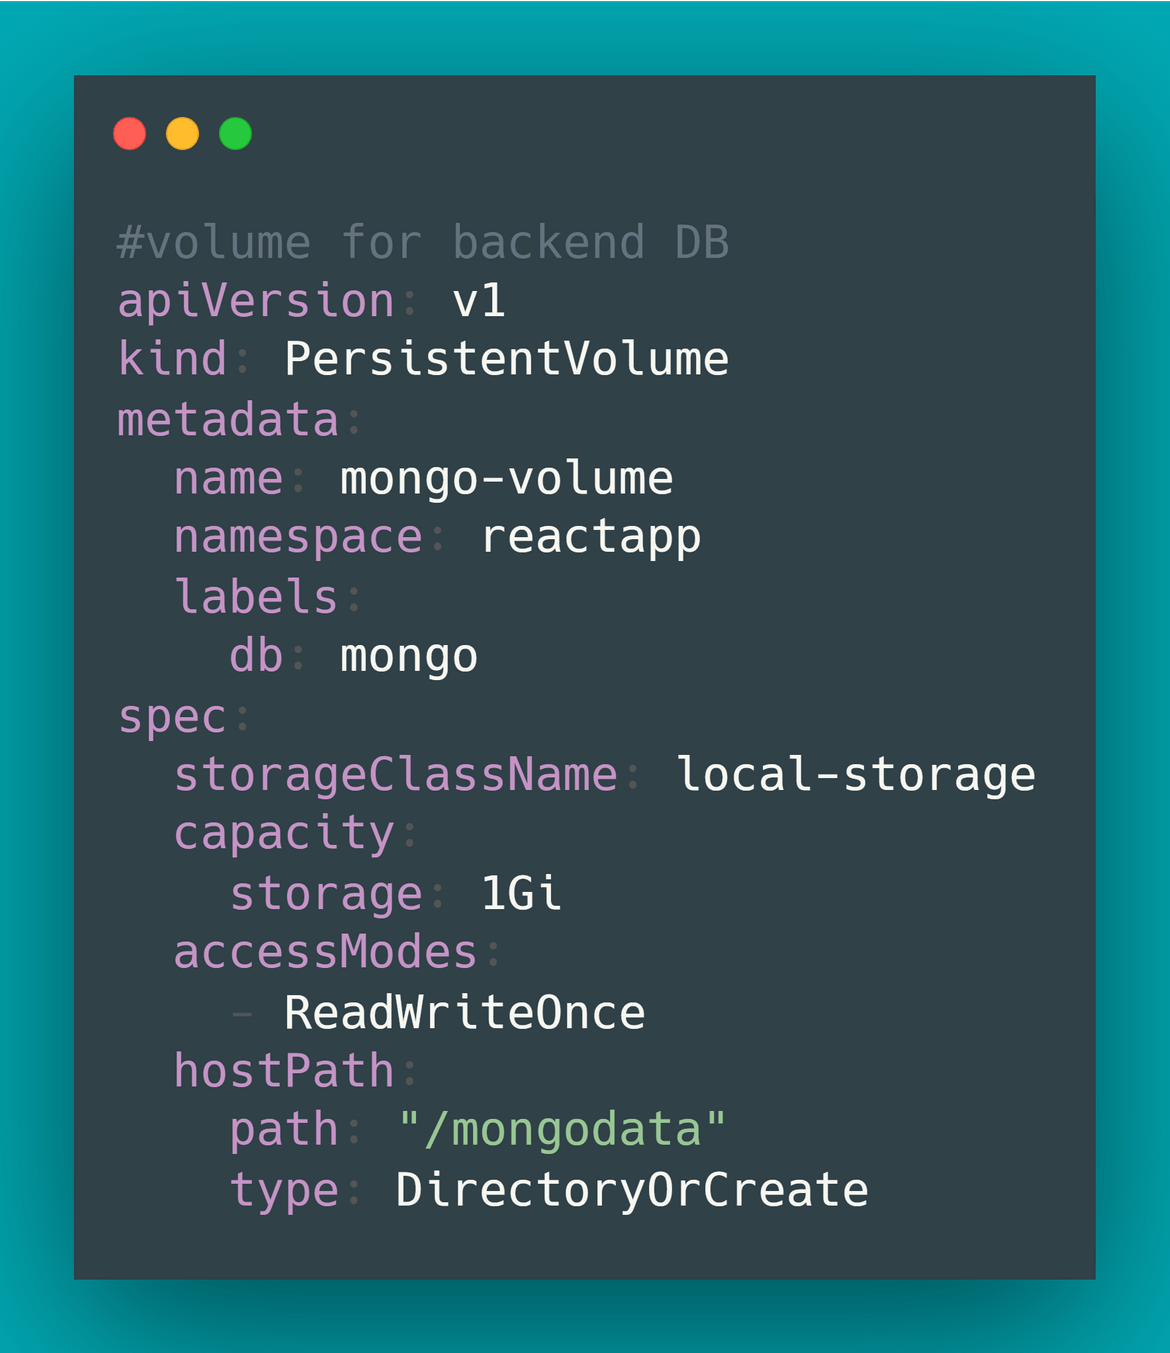
Volume: To persist the data of the database beyond the lifecycle of the pods, I mapped a volume to the database pod. For the volume I am creating PersistentVolumeClaim to allocate the memory and a PersistentVolume to claim the memory. The PersistentVolumeClaim will bound to this volume. Read more about Kubernetes volume Here.
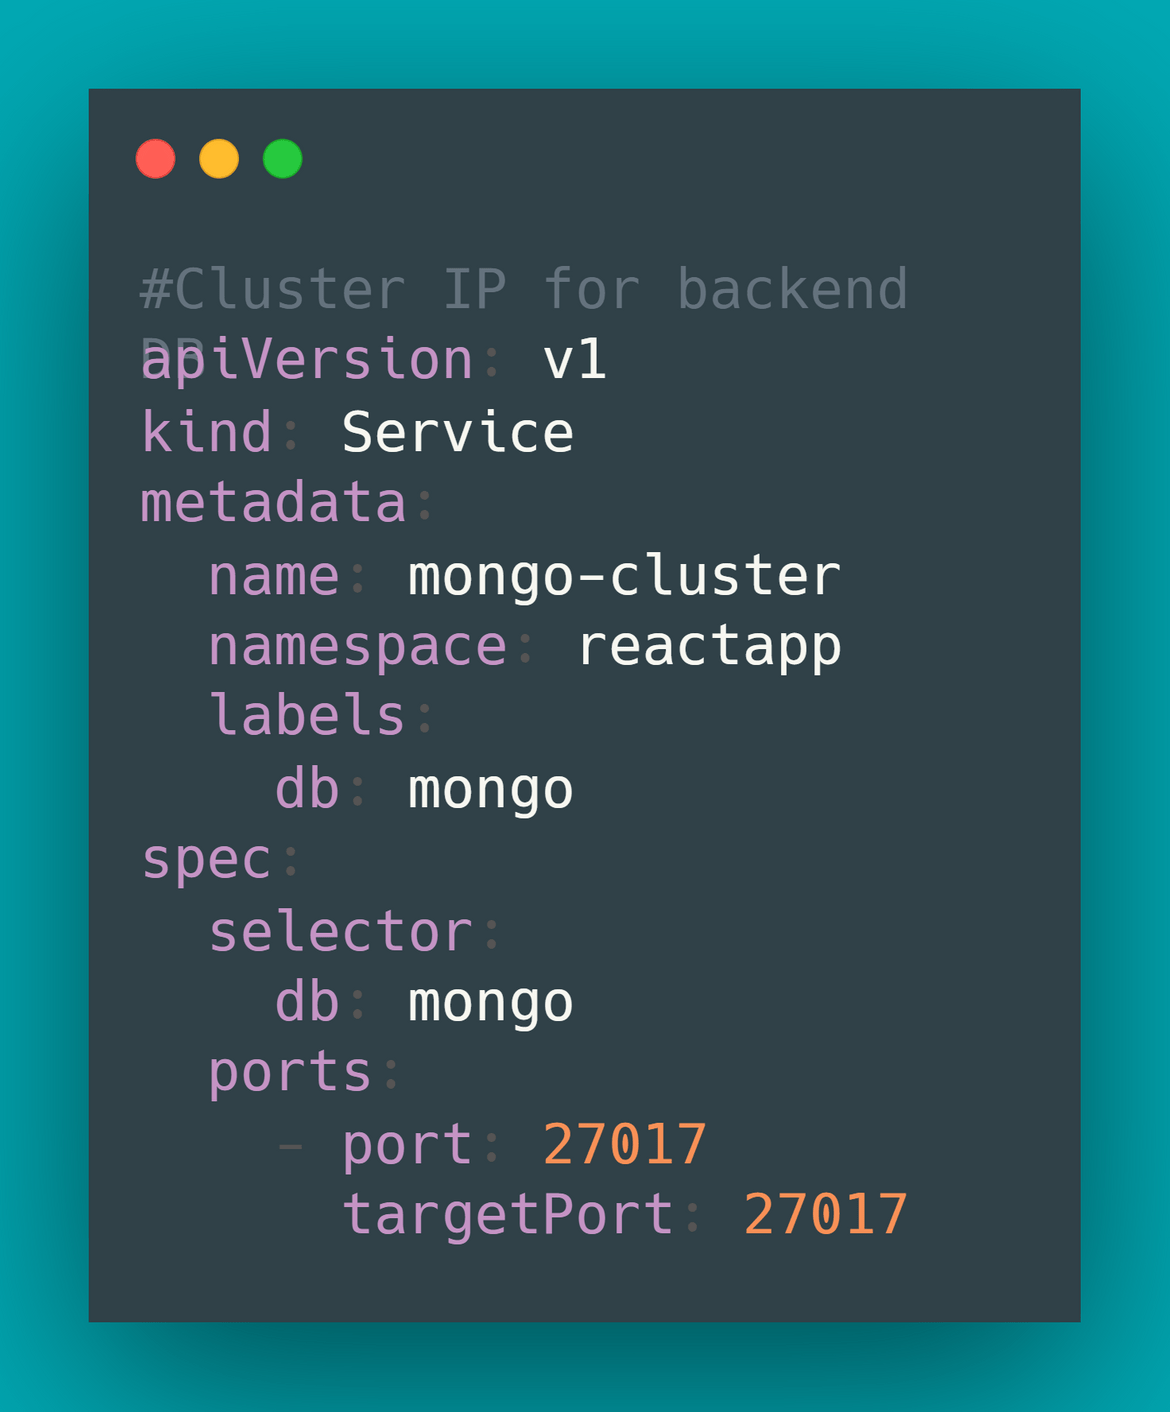
Cluster IP: To expose the database pods through the network so other components of the stack can access it, a Cluster IP service is created which exposes the port 27017 of the mongo pods(this is the standard port for mongodb).
Finally I am creating a deployment which will launch the mongo DB pods using the above sub-components. I am providing some default username/password to login to the DB. You can change that to something else.
-
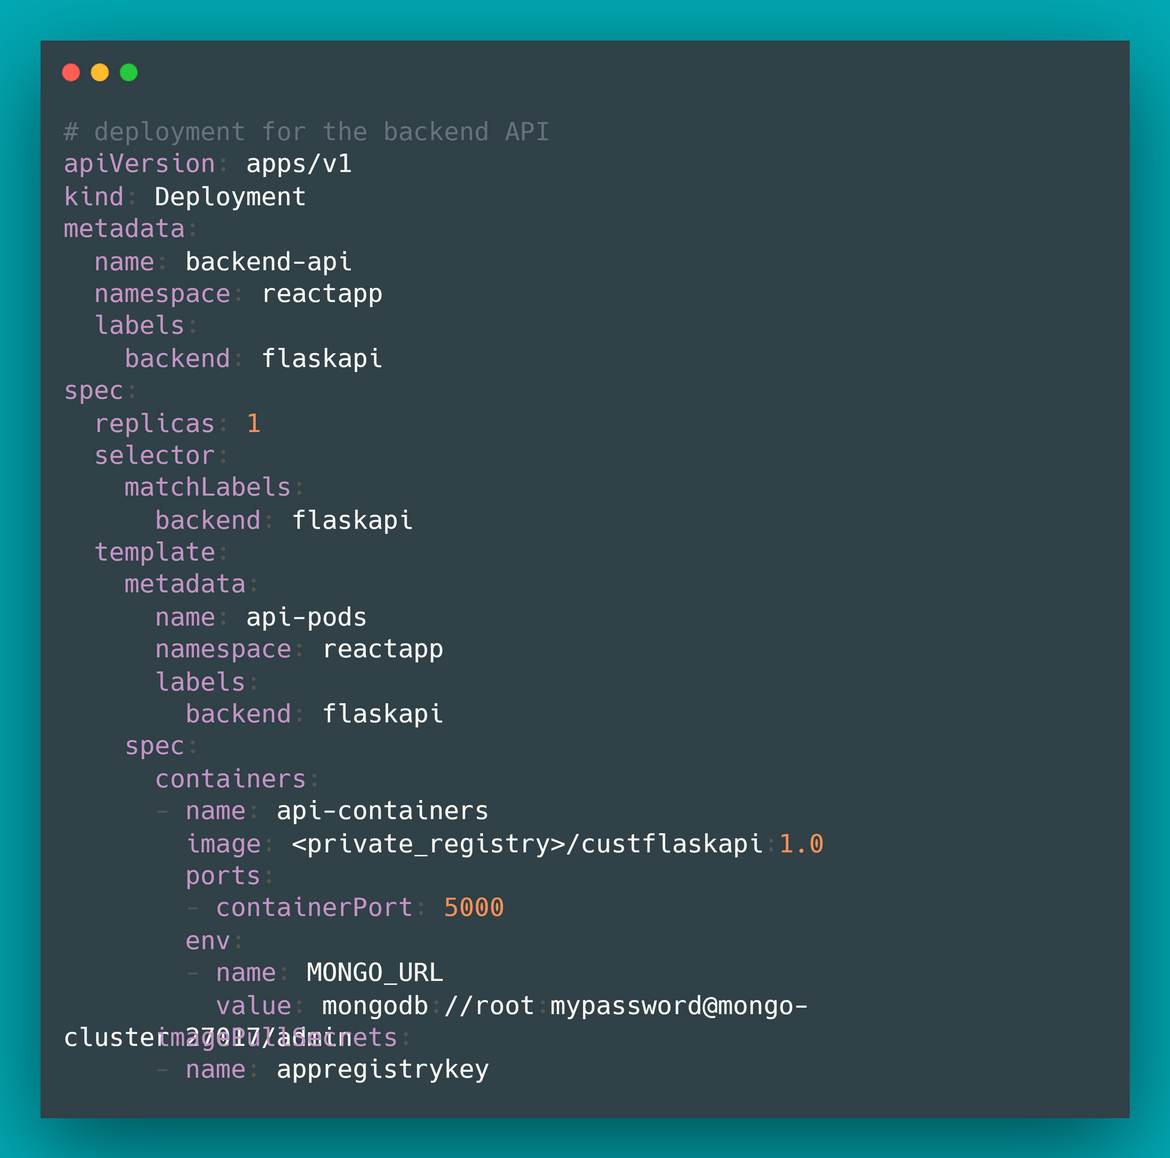
Flask API:
For the API, a deployment is created based on the custom API image which we built earlier. The custom image is built and pushed to a Container registry. I am using GitLab Container registry here. The deployment pulls the custom image from the GitLab registry. There are some sub-components too which are created and needed by the API deployment:
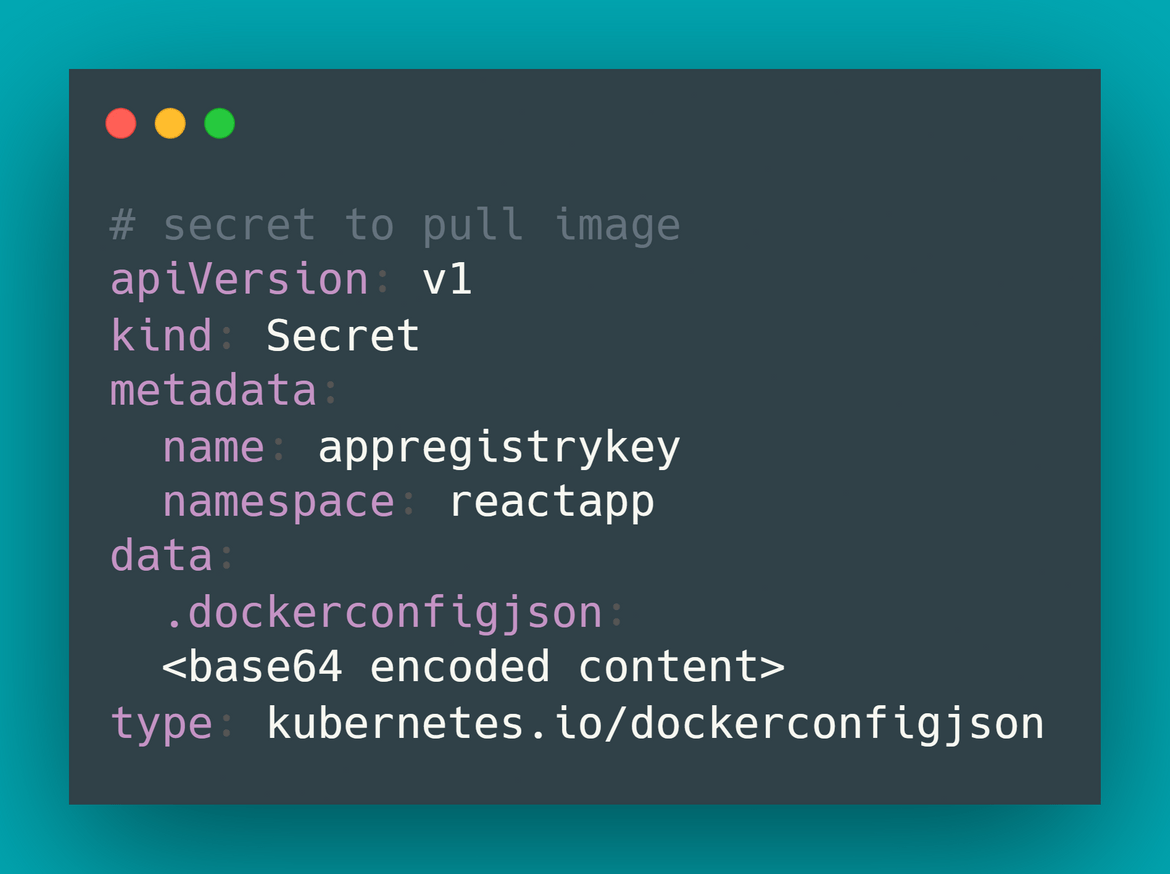
Image Secret: For the deployment to pull the image from the private container registry on GitLab, it needs to provide the credentials. I created a Secret resource providing the Docker credentials file as input. The credentials file contains the credentials to connect to GitLab registry. To get the base64 encoded file content, run the following commands:docker login #once prompted login with crdentials base64 ~/.docker/config.json # this will show the base64 encoded content on the terminal. Copy that in YAMLI copied the encoded content in the YAML file to create the secret
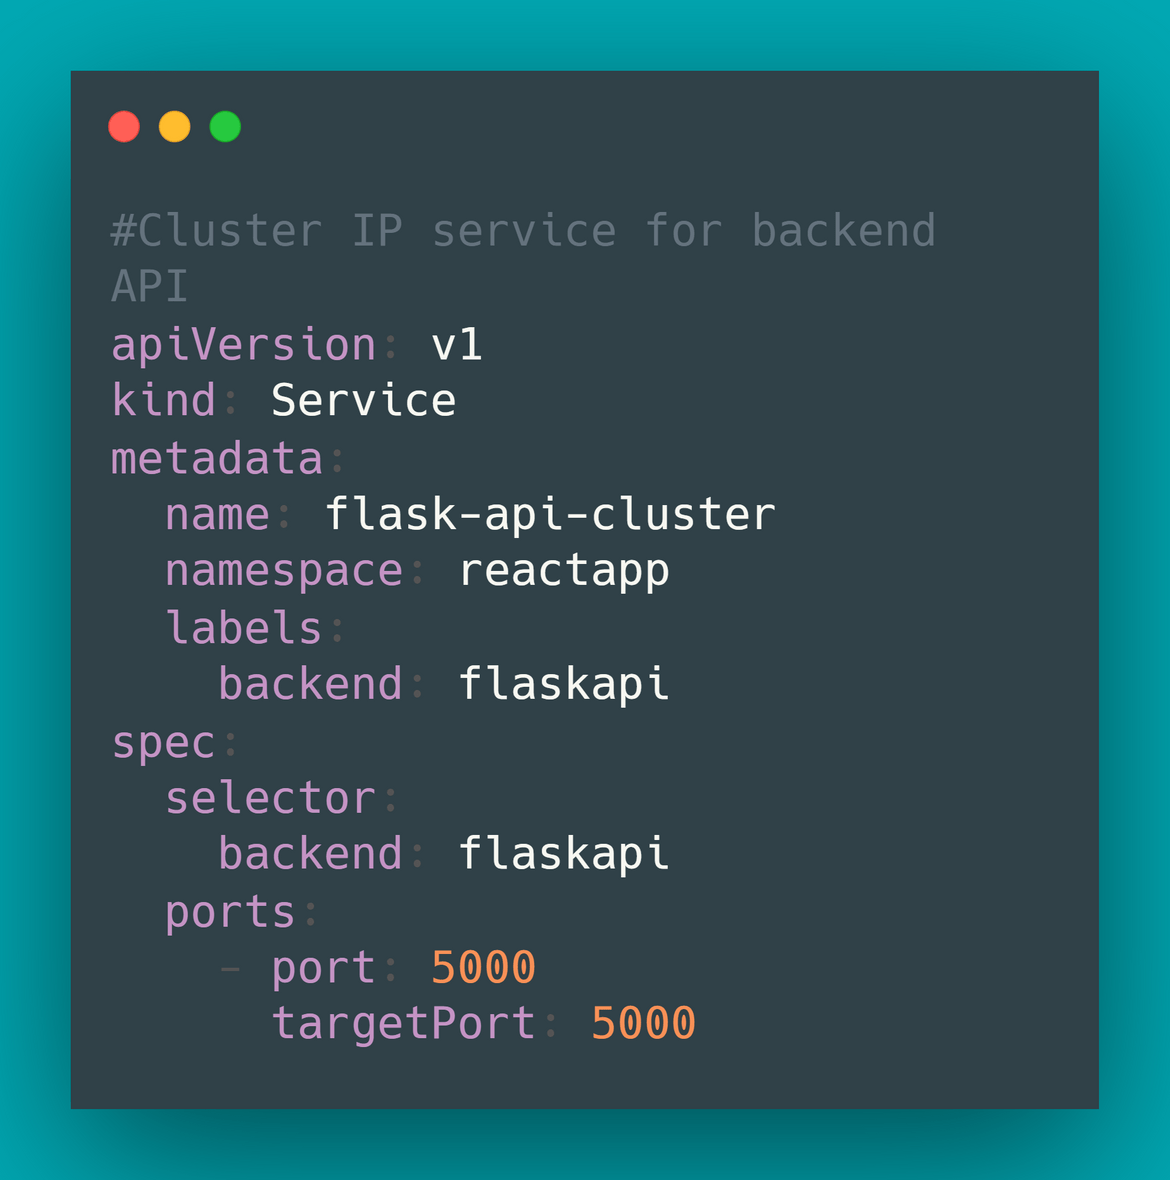
Cluster IP: I have created a Cluster IP resource to expose the API endpoint within the cluster. This endpoint will be accessed by the frontend to request for the data. It exposes port 5000 which is the default port through which a Flask app is served.
I have also added an optional NodePort service in the YAML file which is in the repo. If you want to access the API directly from any API tool, this Nodeport service will expose a port on the node through which the API can be accessed publicly. As a caution make sure proper auth is in place if you are planning to expose the API publicly. This part is optional because as I explain later on, there will be an endpoint exposed publicly using the Nginx deployment too.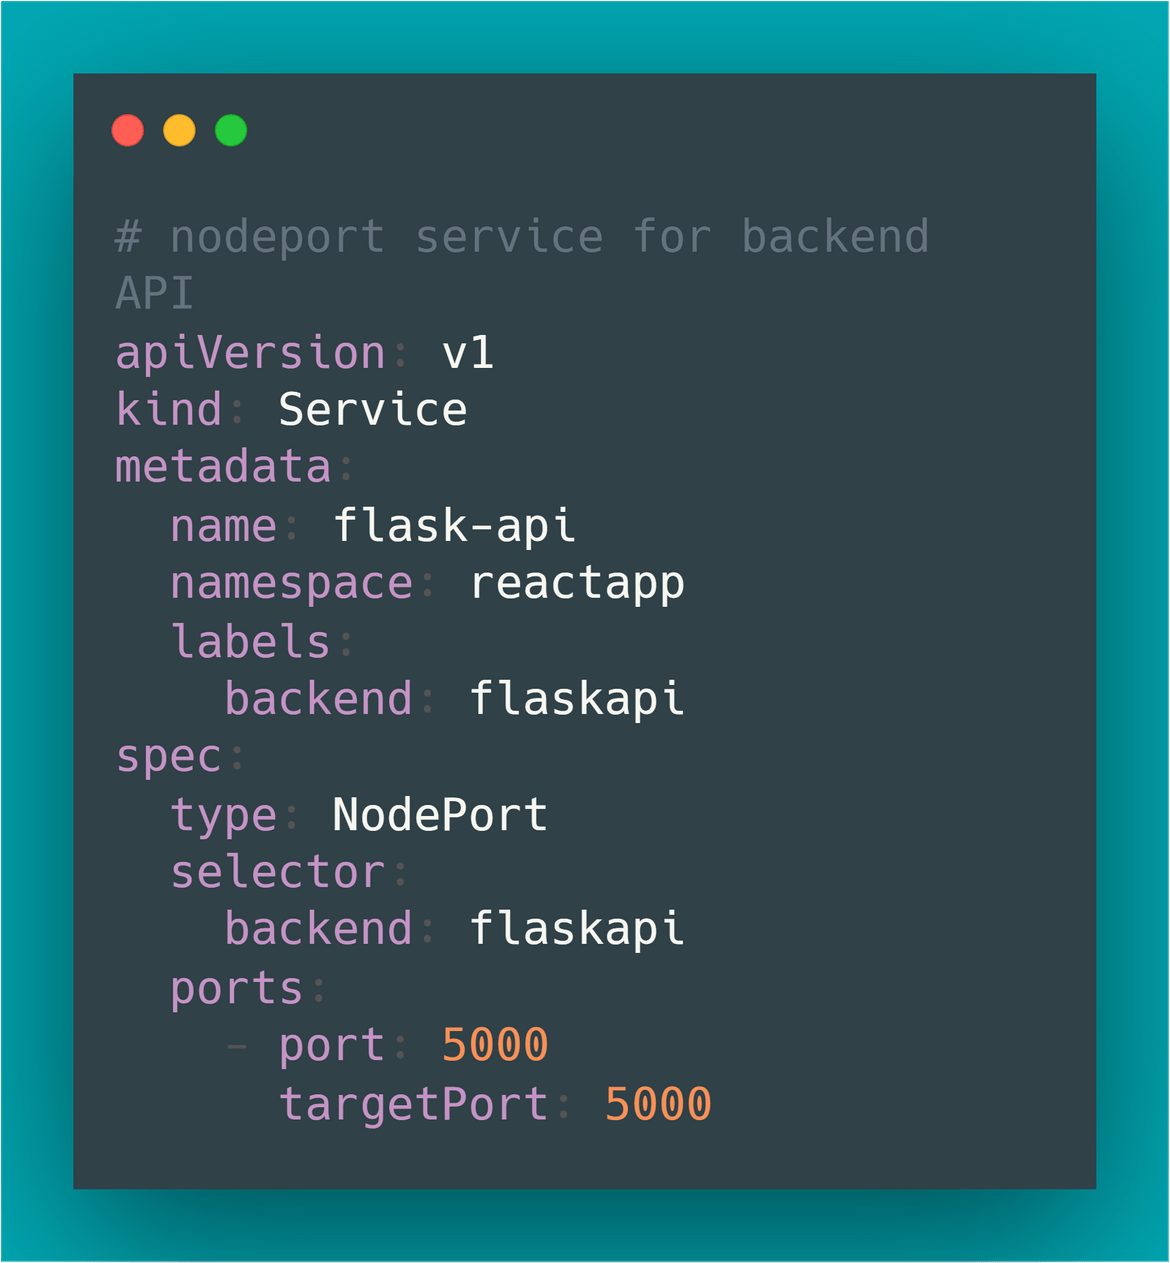
For the actual API deployment resource, I am using the custom API image for the containers. The URL for Mongo DB is passed as an environment variable so the API can connect. Remember you only need to pass the Cluster IP service name for mongo which we created earlier as the Domain for the Mongo URL. I am also passing the image secret(explained earlier) to the container so that it is able to pull the image from the private registry.
-
Front end client:
For the frontend I created a deployment resource based on the custom Nginx image we built earlier. This is also using the same Secret created above to pull the image from the private registry. The custom Nginx image routes requests to two paths based on the custom config file copied while building the image:
# This is routing to the web pages built from the React app
location / {
     root   /usr/share/nginx/html;
     index  index.html index.htm;
     try_files $uri $uri/ /index.html;
 }
# This is routing to the cluster IP service for the API
 location /allcontacts {
     proxy_pass http://flask-api-cluster:5000/allcontacts;
 }
The sub-resources created for the Front end deployment are below:
NodePort to expose frontend: The frontend should be accessible publicly. So I created a NodePort service which exposes a port on the node to enable access to the Nginx service. Nginx will route the requests accordingly based on the config file above. Port 80 is exposed on the Pod by the service and it maps to a higher range Port on the node. So the app can be accessed by navigating to http://<nodeipdns>/.
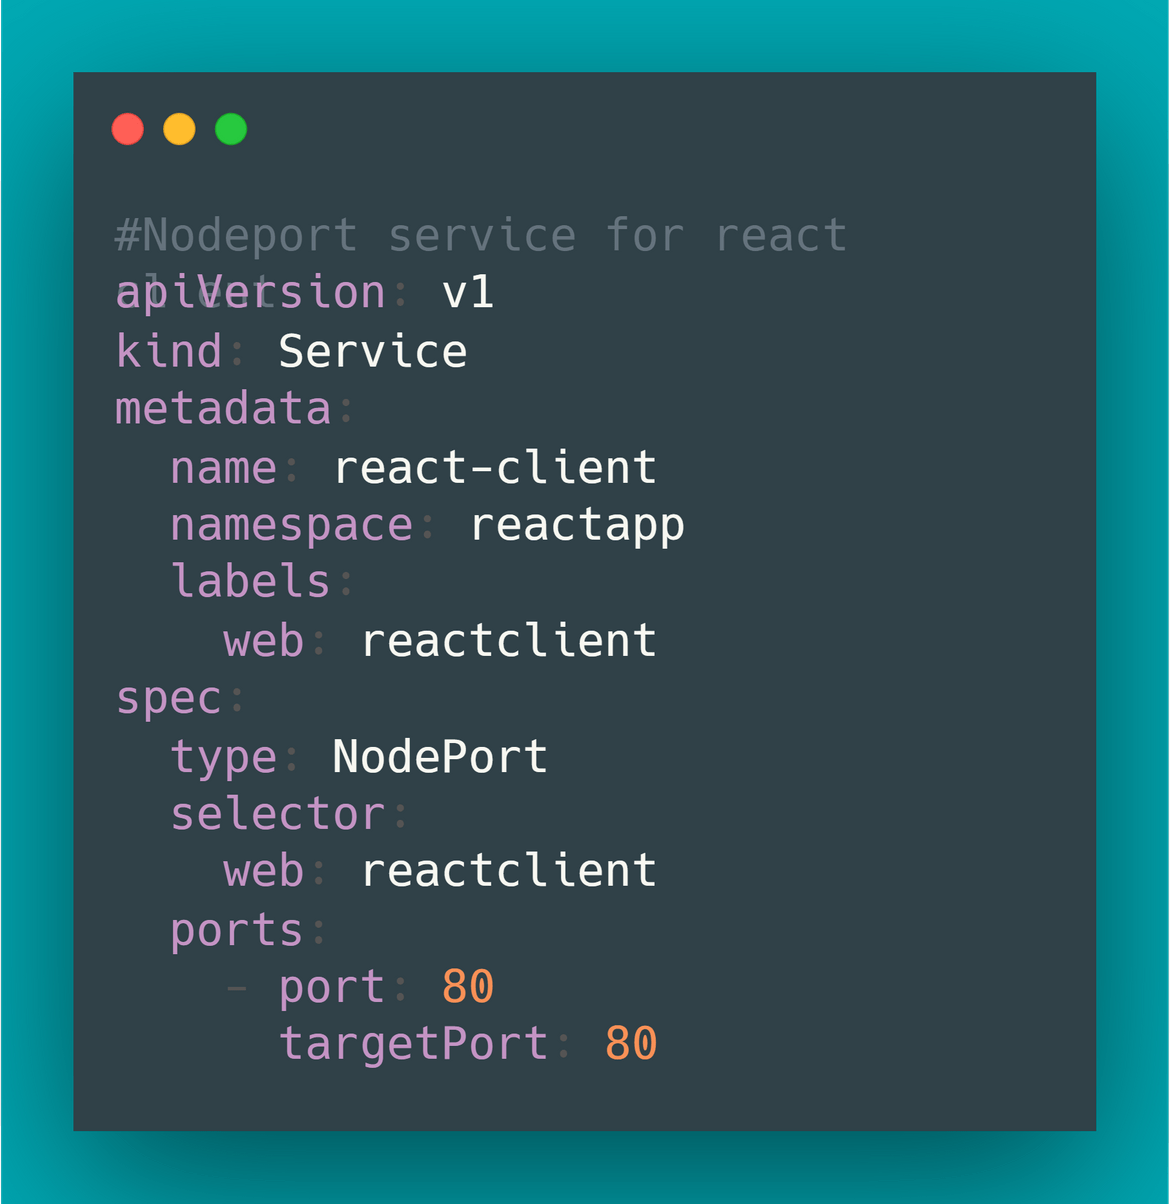
With that, finally I create the deployment resource for the front end. The deployment launches pods based on the custom nginx image. I am passing the Secret for it to be able to pull the image from the GitLab registry.
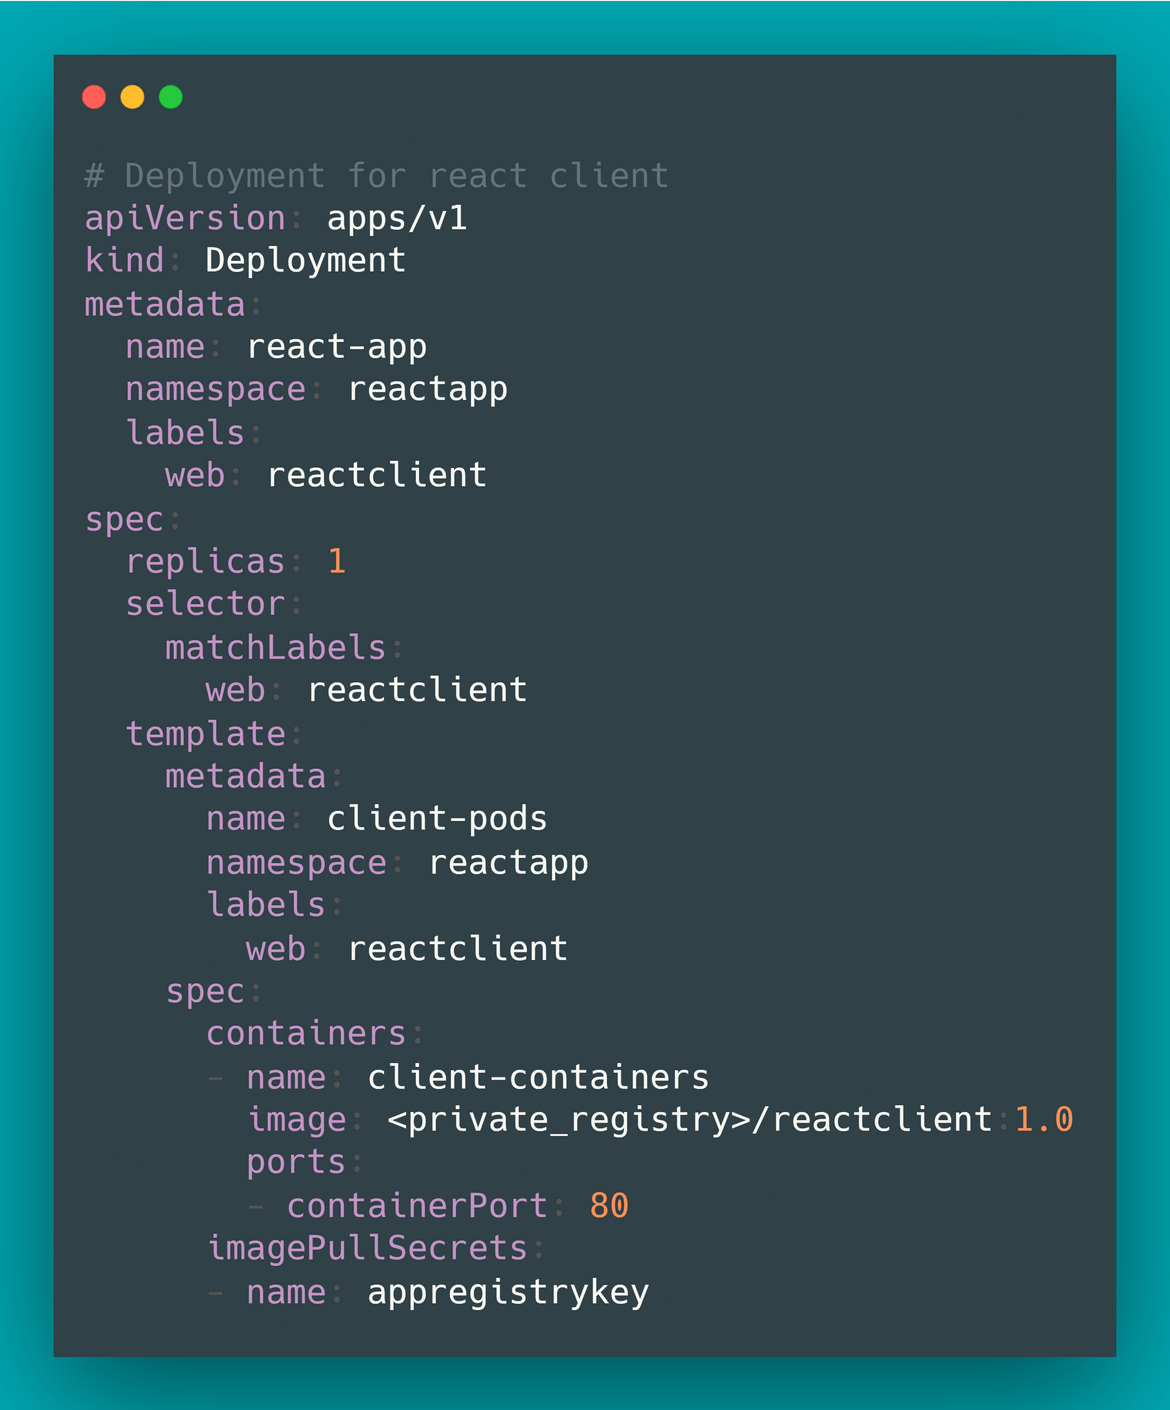
That should provide a good explanation of all the components/resources I am deploying on the Kubernetes cluster to build the whole application stack. Now lets move on to deploying these resources so we have a working app.
How Do we deploy
Now that we have an understanding of the stack which we are deploying, we will design the process to deploy all the above resources on a Kubernetes cluster. I will be automating the deployment using Jenkins. Jenkins will take care of building the Docker images, deploying to a test cluster and then deploying to Production cluster. I will be explaining the whole process in my next post.
Conclusion
In this part of the post-series I went through the app and the app architecture describing how the React app and the backend will be deployed to a Kubernetes cluster. Hope this gave you a basic understanding of how a basic app can be architected to be deployed to Kube cluster. In next post I will be going through the process of deploying the app to the cluster using Jenkins. Below are the topics which I will be covering in the next post:
- Describe the Jenkins flow for the deployment
- Step by step setup of the whole flow and run a deployment to a cluster
Keep an eye for my next post if you want to see the “endgame” (not the movie). For any questions or issues, please reach out to me from the Contact page.
