Deploy a REACT app with Flask API backend on Kubernetes Cluster- Part 2- Jenkins Flow
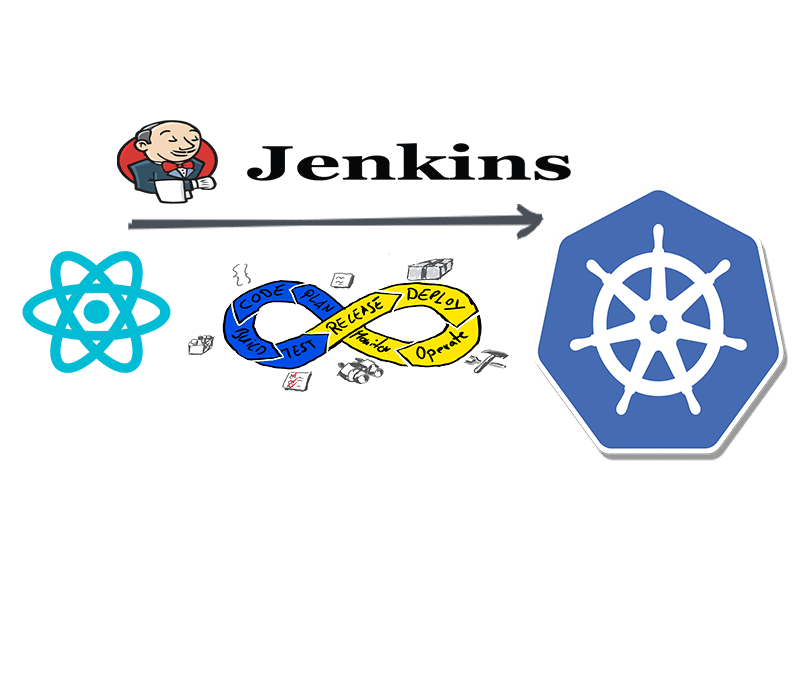
Deploy a REACT app with Flask API backend on Kubernetes Cluster- Part 2- Jenkins Flow
This post is the second part of an earlier post where I described the app and the Kubernetes components to be deployed on a Kubernetes cluster. Check the earlier post Here
This is the final part of the series where I will be going through steps to deploy the Kubernetes components described in the above post to Kubernetes cluster. I will be using a Jenkins pipeline to deploy the Kubernetes resources to a cluster and make the react app accessible from a node endpoint. For simplicity I have simplified the Jenkins steps. These steps are good for normal practice but if you want to use this in a Production environment there are some changes needed which I will try to explain as I go through the steps.
Without further delay lets jump in to the interesting stuff. As always the whole code base is available on my Github Repo Here
Pre-Requisites
Before we start there are a few pre-requisites you need if you need to follow along the setup. If you are using this as a guide for your work, these may already being setup for you.
- An AWS account
- Jenkins running on a server
- A private container registry. You can use Docker hub too but the Docker images pushed wont be private. If you need private container registry, you can setup a Gitlab account. I will be using the same
- A CHEF manage account for node bootstrapping. It is free. Get it Here
- CHEF installed on local system and on the Jenkins system
- Docker installed on the Jenkins system
Apart from the setups you should have some basic knowledge of:
- Kubernetes
- Docker
- Jenkins
- AWS I will be explaining everything in detail but to fully understand you should understand the basics.
Little bit of Revision
Lets refresh our memory about the app architecture which I will be deploying here. Below is the whole app architecture showing each Kubernetes resource which we will be deploying to the cluster.

All these components will be deployed to the Kubernetes cluster via Jenkins.
The Deployment Flow
Now that we have an understanding of the stack which we are deploying, we will design the process to deploy all the above resources on a Kubernetes cluster. I will be automating the deployment using Jenkins. Jenkins will take care of building the Docker images, deploying to a test cluster and then deploying to Production cluster. I will be explaining the whole process below. There are two separate flows for Test and Production deployments. In real life scenario the testing and production flows will be part of the same pipeline and will be automated as a single flow. But for this post, I have separated them out to have a better understanding of what is happening in each of the flows.
Test Environment Flow

In this flow the app is built and deployed to a test Kubernetes cluster. There are some pre-requisites which need to be setup before this flow can execute and complete. I will go through the setup steps in detail in a later section:
- A test Kubernetes cluster already launched. No need to add any nodes, just the control plane should be configured and ready
- A container registry for the Docker images
I have created the whole flow in a Jenkinsfile. The file is part of my repo(Jenkinsfile). A Jenkins pipeline can be created from the repo and this Jenkins file can be selected to trigger the pipeline.
Lets go through each step of the Test flow:
-
Environment Variables:
There are few environment variables which are set and pre-defined before the pipeline is ran. These will be used by various tasks in the pipeline.

-
Build Stage:
In this stage we will build the custom docker images from the code files in the same folder. My repo contains the Dockerfiles needed and the code files required for the images.
Below are the steps which gets executed in this stage:

- Uses the preset credentials for the container registry, which is exposed as environment variable for this stage
- Performs a login to the Docker container registry using the Credentials environment variables
- Builds the Docker image for the backend API and pushes the image to the container registry
- Builds the Docker image for the frontend client and pushes the image to the container registry
- Copies the Kubernetes YAML file to an S3 bucket. This is the location from which the deployment steps will pull the Kubernetes file
- If something fails, send out a Slack message to a specific Slack channel. If all goes well, sends a success message to the same Slack channel
-
Launch Test node Stage:
In this stage I will be launching a node which will be added to the Test Kubernetes cluster. The test deployment will happen on this test node and once testing is finished, this node will be destroyed.
Below are the steps which will get executed in this stage:

- Using the Cloudformation stack for the Node, launch the new EC2 instance on AWS. The details for Subnet and Security group is read from the environment variables. The node IP and the CF stack ID is stored in two environment variables to be used later on for subsequent steps.
- The CF template also makes sure the Elastic IP is associated to the launched node
- If there is some issue in the step, the stack is deleted and a Slack message is sent out denoting the failure. On successful launch, a Slack message is sent out too
-
Bootstrap the test node:
In this stage I will prepare the newly launched node so that it is ready to join the Kubernetes cluster and finally join the node to the cluster. To run the commands on the node, I am using CHEF. There is a CHEF cookbook in the repo which I am using to bootstrap the node. Since CHEF provides an easy way to SSH into the node, I am using that to SSH and run other commands on the node too.

- Navigate to the CHEF cookbook folder. Copy the different SSH keys needed for the SSH connection to node from the S3 Bucket.
- Bootstrap the node using the CHEF role defined in the cookbook. This will install all necessary dependencies and will install Kubernetes on the node
- Using CHEF tool called knife, SSH to the node and run the Kubeadm join command which we stored on one of the environment variables. This attaches the node to the existing test Kubernetes cluster
- If something fails, send out a Slack message to a specific Slack channel. If all goes well, sends a success message to the same Slack channel
-
Deploy to the test Kubernetes cluster:
- Using knife, ssh to the master node for the test cluster and download the Kube YAML file from the S3 bucket to local folder
- Then the app is deployed to the cluster which spins up pods on the new node we bootstrapped. Using the Kube YAML we developed earlier, the full stack is deployed on the cluster. I am using CHEF to SSH to the node and run the kubectl apply command
- If something fails, send out a Slack message to a specific Slack channel. If all goes well, sends a success message to the same Slack channel
-
Pause for testing:
Once the deployment is done on the cluster and the app is up and running, the pipeline is paused to give time for the testing. The pause time can be configured in the timeout.

If the testing is success, the confirmation is clicked on the prompt and the flow moves to the cleanup stage. If some issue is detected, it can be aborted and the flow aborts. On abort of the process, it deletes the node which was launched and sends out a Slack message accordingly.
-
Cleanup Stage:
Once the testing completes and if everything is fine, before we move on to the Production deployment flow, in this stage I will cleanup the node which was launched for the testing. According to the outcome a Slack message is sent to the Slack channel with the details of the S3 bucket where the Kube YAML is stored(if testing is success).


Here is an example of all the Slack messages sent during this stage:

Production Flow

In this flow the app is deployed to the Production cluster. Based on the Kube YAML path which was sent across on the Slack channel, the Production Jenkinsfile is updated to provide the Kube YAML name. This YAML will be downloaded from the S3 bucket and then be used to deploy the Kubernetes resources on the Production cluster. This deployment will perform a rolling deployment if the same app deployment already exists. Before running the Production part of the deployment make sure these pre-requisites are met:
- A Production Kubernetes cluster already launched with a control plane and as many nodes as you want
- Proper IAM role is assigned to the Production control plane cluster
- Update the environment variables in the Jenkinsfile accordingly
I have created the whole flow in a Jenkinsfile. The file is part of my repo(Jenkinsfile). A Jenkins pipeline can be created from the repo and this Jenkins file can be selected to trigger the pipeline.
Lets go through each step of the Production flow:
-
Environment Variables:
There are few environment variables which are set and pre-defined before the pipeline is ran. These will be used by various tasks in the pipeline.

-
Deploy Stage:
In this stage the Kube YAML file is downloaded from the S3 bucket to a local folder which was mentioned in the environment variables. Using this file, and via knife, we SSH to the Production master node and deploy the app. This performs a rolling deployment of the app and updates the resources. If there are any issues, Slack message is sent out to a channel.
- Use a pre-defined credential which is defined in the environment variable to SSH to the master node
- Use knife to SSH to the master node and run the deploy commands

-
Validation Stage:
In this stage we perform a basic validation to check if the deployment was fine and the app is working. I have kept the steps simple as below:
- SSH to the Master node using Knife
- Get the Nodeport service port for the frontend
-
Execute a wget on the endpoint to get a valid result. To run the curl a temporary busybox pod is launched The validation result will be on the Jenkins logs
kubectl get svc/react-client -n reactapp


Setup Walkthrough
Enough with the theory and now lets get on with setting up the whole infrastructure and the Jenkins pipeline. Below image will help understand the different parts of the architecture and what we will be launching as services.

To better understand the below process, I suggest clone my GIT repo to get all the relevant files to your local system and modify accordingly based on below explanations.
git clone <git_url>
cd local_folder
Before we start setting up the components there are some pre-requisite steps and services which are required by the flows and have to be launched ahead of time:
- Upload or create the SSH key to AWS as this will be used by the CF template to launch nodes.

- Setup the Manage CHEF account and generate the knife config file and ssh key file. Save the files in the local .chef folder in the chef_cookbook folder in my repo:


Make sure the cook book is uploaded to the CHEF manage account to be used for bootstrapping later:
cd chef_cookbook/kubenode/cookbooks/nodesetup
berks install
berks upload- Create an IAM user from AWS console which will be used in the Jenkinsfile to launch the nodes and work with the S3 bucket to upload/download the Kube YAML files. Note down the Access keys for the IAM user and update on the Environment variables for both of the Jenkinsfiles. I have given administrator access to this user.


-
Create two S3 buckets on AWS:
- Bucket 1 to store the Kube YAML file
- Bucket 2 to store the SSH keys used by various steps of the Jenkins flow. Upload the CHEF key files and the node SSH key files to this bucket

Note down the names and make sure to update the bucket names and the key names in the Jenkinsfiles. I have specified placeholders in the file in my repo where the change needs to be done. Also make sure to upload the CHEF keys, knife file and the SSH key created above, to the S3 bucket for keys.

-
Allocate a new Elastic IP and update the details in the CF template to launch the node(deployec2networkv1kube_nodeV1)


Also update the IP in the nginx config file in the codes folder from my repo(default.conf).

- Create an IAM role to be associated to the Control plane nodes for the Test and Production clusters

- Create a credential in Jenkins to store the SSH key for the Production master node. This will be used by the Production Jenkins flow to SSH and deploy the app.

Make sure to change the Credential name in the Prod Jenkinsfile according to your setup:

- Setup the Docker image registry. I have used Gitlab:


Once we have all the Pre-requisites set up, lets dive in to setting up the cluster and run the deployment.
Setup Kubernetes Cluster
First we need to have a cluster where we can deploy our app. Rather we will need two clusters:
- A test Cluster for test environment
- A production cluster for production environment


I wont go into the details about launching these clusters. One of my earlier posts can help with the steps to launch the above cluster setup. Find the post Here
At a high level here are the steps:
- Launch the Production cluster instances and network using the CF template in my repo: deployec2networkv1kube_clusterV2.json
- Launch the Control plane node for the test Kubernetes cluster using the CF template: deployec2networkv1kube_masterV1.json

- Make sure the IAM role we created above is associated to the two control plane nodes in both clusters

- Configure the clusters following the steps from my above post
-
I have included CHEF recipes in the repo which can be used to bootstrap the nodes and install the required dependencies. Run the below command in the chef_cookbook folder to bootstrap the launched nodes for the cluster:
knife bootstrap <node_ip> --ssh-user ubuntu --sudo --identity-file "identity_file_path" --node-name <node_name> --run-list 'role[kubenode]'
- Once bootstrapped run the commands to initialize both clusters
- Update the Jenkinsfile environment variables accordingly to update the node names and the Subnet ID, Security Group ID
- For the test flow Jenkinsfile, update the Kubeadm join command with the command from the steps above


Setup Jenkins pipeline
Once we have the clusters launched, next we have to setup the Jenkins pipeline. I have already included the Jenkinsfile needed in the repo. Keep the same folder structure but you can update other details accordingly in the files. Before the pipeline can be setup, various details need to be changed in the Jenkinsfiles:
-
Test Jenkinsfile
Change these in the environment variables:
- REGISTRY_URL: To your specific docker image registry
- AWSACCESSKEYID,AWSSECRETACCESSKEY,AWSDEFAULTREGION: From the IAM user
- EC2KEY: The key name which was created earlier in AWS
- KUBEADMCOMMAND: Kube adm command to join the Test cluster
- MASTERNODE: The master node name for the Test cluster. This node is from the CHEF bootstrap command which was ran above for the test cluster master node
- SUBNETID,SGID: Details from the Test cluster network which we launched above
-
In the bootstrap stage, update the key names accordingly
aws s3 cp <s3_address_for CHEF key>
aws s3 cp <s3_address_for node SSH key>
aws s3 cp <s3_address_for knife file>
-
Production Jenkinsfile (Jenkinsfile_prod)
Change these environment variables accordingly:
- MASTERNODE: The master node name for the Production cluster. This node is from the CHEF bootstrap command which was ran above for the Production cluster master node
- AWSACCESSKEYID,AWSSECRETACCESSKEY,AWSDEFAULTREGION: From the IAM user created above for AWS
- DEPLOYCOMMAND: Change according to scenario
- KUBEFILENAME: Update to the filename from the slack message. This file name will only be available after the Test flow is success and the Kube file name is sent on Slack message
- LOCALFILENAME: The local filename where the Kube file from S3 will be copied. Change accordingly
Once the files are updated, these can be used to setup the pipeline. Make sure to commit the folder to a GIT repo preferably Github.
git add .
git commit -m "initial"
git push -u origin master
Follow these steps to setup the pipeline form the above Github repo:
- Login to the Jenkins application
- Create a new pipeline for the test environment

- Select the Github repo as the source for the pipeline.

- Follow the same above two steps to create the pipeline for Production environment too. Select the Jenkinsfile according to the Production pipeline(Jenkinsfile_prod).
- Once done there should be two pipelines


Execute Pipeline and test
Now we are done with all our setup steps. We can go ahead and run the pipelines to deploy the app to the Kubernetes cluster. The test pipeline has to be executed first so that the docker images are built and pushed to the registry. Then the Production pipeline can be executed to finally deploy the app to Production.
-
Run the Test pipeline:
- Select the Test pipeline from the Jenkins dashboard and click Run. This should start running the pipeline.


-
Once the pipeline reaches the pause stage, the application would have been deployed to the test cluster.

To test the application, first get the Nodeport value from the test cluster master node. SSH to the test master node and get the nodeport value from this command. The test node IP can be found from the slack message sent after the deployment:kubectl get svc/react-client -n reactappTest the application by navigating to :
http://<test_node_ip_dns>:<nodeport_value>
We need some data in the database to be shown on the page. I added a Contact by connecting to the mongo Nodeport service from Mongo Compass. Get the Nodeport for the Mongo deployment:kubectl get svc/mongo -n reactappConnect to to the Mongo endpoint from Mongo atlas on your system to get into the DB. Add Contact records to the ‘contacts’ collection.

Once added the record will show up on the App page:

- Based on the outcome of test Accept or abort from the pipeline prompt. Accordingly a Slack message will be sent out. If success the Slack message will contain the S3 address for the Kube YAML file
- Select the Test pipeline from the Jenkins dashboard and click Run. This should start running the pipeline.
-
Deploy to Production:
- Update the S3 path from the earlier Slack message to the environment variable(KUBEFILENAME) in the Prod Jenkinsfile
- The Elastic IP which was created earlier, associate that to the Production cluster node now
- Commit and push the changes to the Github repo
- From the Jenkins dashboard, now open the Jenkins PROD pipeline and execute the pipeline

- This will deploy the Kubernetes resources to the Production cluster. If there was already the same deployment present, this will update the deployment in a rolling fashion.
- Based on the validation output a Slack message will be sent out to the Slack channel denoting the completion of the deployment
-
Get the nodeport value for the node:
kubectl get svc/react-client -n reactappHere is a view of all the services along with their ports. You should be able to get the Nodeport value from this:
kubectl get svc -n reactapp


Here are some examples of the Slack messages which are sent out at various points of the flow:

The Production application can be accessed at
http://<elastic_ip>:<nodeport_value_react_client>

This completes the pipeline setup and the deployment to the Production cluster. Now the pipelines can be executed anytime any updates to the App need to be deployed to the Kubernetes cluster. For further changes or updates to the app, below process can be followed:
- Make the updates locally to the apps in the respective folders
- Since this will be built into a new Docker image, update the image tag in Jenkinsfile build stage

- Make sure to update the image tags in the Kube YAML file too
-
Once all changes are done, push the changes to Github:
git add . git commit -m "updated" git push - Run the Test pipeline
- Test the deployment to Test and if working fine, pass the prompt
- Get the Kube YAML file name from the Slack success message

- Update the Kube YAML name on the Production Jenkinsfile environment variable and push the changes to Github again
- Open Jenkins Production pipeline and run the pipeline
- This will deploy the changes to the Production Kubernetes cluster. Monitor the Slack messages for any failures

This process can be further automated by adding Github hooks where the pipelines will get triggered automatically once the changes are committed to the Github repository. The steps to create the hook can be found Here
Conclusion
With this I come to the end of the deployment flow where we deployed a full stack React app backed by a Flask API to a Kubernetes cluster. This is a very long process when being setup for the first time. You will be facing errors when running the pipeline and will need to work through the errors. For any issues in the pipeline you can reach out to me and I will be glad to help. One point to note here is that this is not a Production level pipeline or cluster. If you want to use this for your production there needs to be many other changes to the pipeline and the Kubernetes cluster. For any help you can reach out to me from the Contact page. On high level this guide should help you in getting up and going with a simple deployment process on Jenkins and deploy easily to a Kubernetes cluster.