How to Convert a React App to a Mobile app and Persist session cookies using React-Native Webview or a PWA
In this post I am switching gears from my general cloud technology posts towards a bit of app development. Recently while I was working on one of my side projects, developing a React app, I faced an issue to persist the cookies on the app when opened on mobile. I wanted to convert the React app to an installable android app and provide a persistent login for the user. I didn’t want to develop a whole new app for mobile using React Native and just re-use the React web app which I built, as an app on mobile.
In this post I will be going through the process and steps which I followed to make it work for me. I figured this may help someone having similar issue. These are the parts I will be covering in this post:
-
Convert the React web app to a mobile app using React-Native and Webview (I will cover an Android app)
- Handle Cookies from Webview
-
Convert the React web app to an installable PWA(Progressive Web Application) via TWA(Trusted Web Activity)
- Handle cookies in the PWA/TWA
The sample codes which I used in this post is available on this Github repo: Here. You can go through the code to have a basic understanding. But for this, critical part will be how to convert the app to an installable mobile app and keep the cookie storage feature intact. You can use your own code too and follow through these steps.
Pre-Requisites
To follow through the steps, there are few pre-reqs which you will need on your system. I wont be going through details of how to install these but provide documentation link for each:
- Install NodeJS. Get it Here
- npm or yarn installed on your system. NPM should get installed with NodeJS. If you prefer Yarn, get it Here
- Install the Expo CLI for React native development. Get it Here
Apart from the installations, you will need some basic React framework understanding if you are here to learn this for first time.
About the App
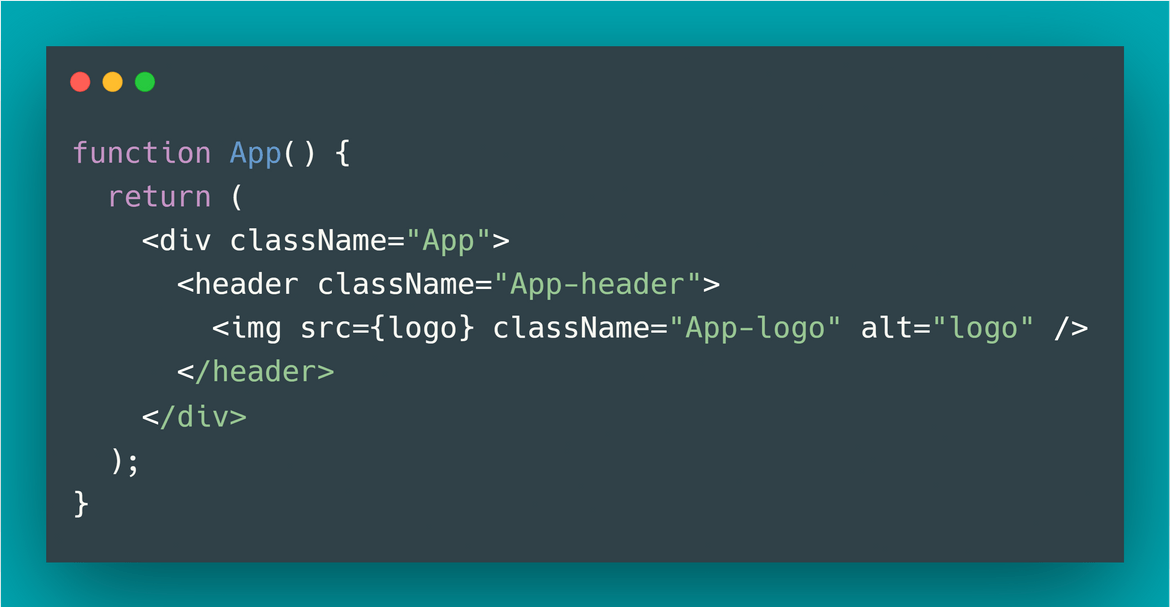
I will be using the default sample React app which gets created when a React app is generated by create-react-app. The sample app code can be found in the Github repo. I added few lines in that code to set some cookie values which we can test and try to persist.

Build the App
Lets prepare the React app first so we can use it in the later sections. To generate the basic React app, run the below command after navigating to your desired folder on your local system:
npx create-react-app mytestappThis will start generating the app. Based on system power it may take a while to complete. Once complete, navigate to the folder:
cd mytestapp At this point if you want to edit the app , you can edit the files accordingly. I edited the app and kept just the React logo.
Add Cookie storage feature
Once we have the app generated, lets add the part where a cookie gets set and cookie gets loaded. We will be mocking the scenario where a session token is stored as a cookie. Below are the steps we will add to the app so we can test the cookie persistence:
- When the app loads, it reads a stored cookie named: ‘reactfromblog’. If a cookie is found, the cookie value is printed on the console. If there is no cookie stored, it prints undefined on the console
- The app also sets a cookie name ‘reactfromblog’ with a value. Next time the app is loaded, this set value is printed on the console.
To add the cookie related functions we have to install a npm package. Run this command to install the cookie package:
npm i universal-cookie --saveOnce installed, edit the App.js code to add the relevant codes. The edited app can be found in my Github repo.
Lets test the app. To run it run the below command in the same app folder:
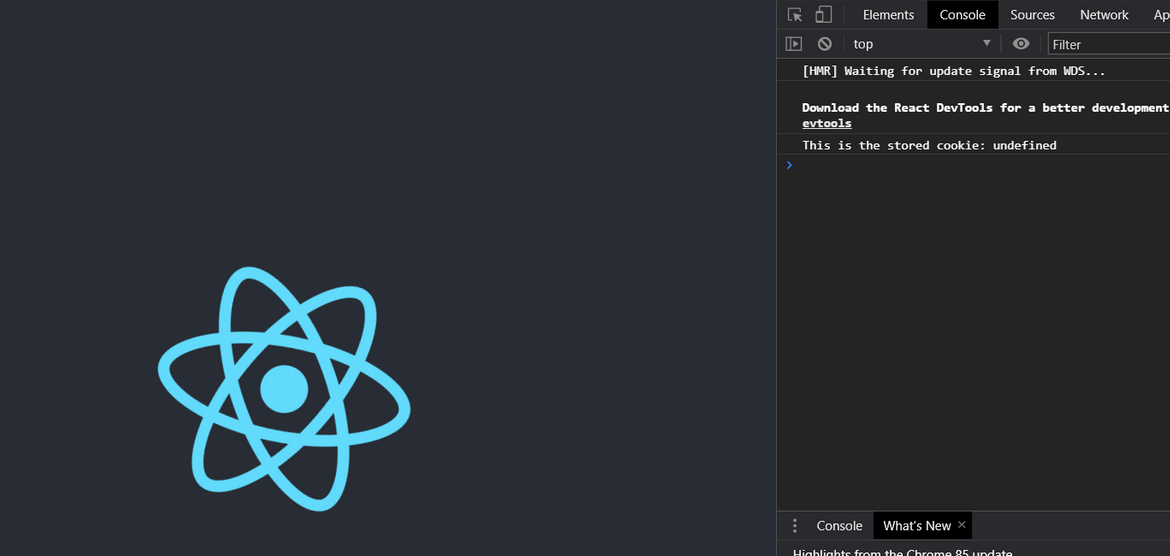
npm start The app should open on a browser at http://localhost:3000/. If you check the browser console it will print the undefined cookie since first time the cookie is not set:
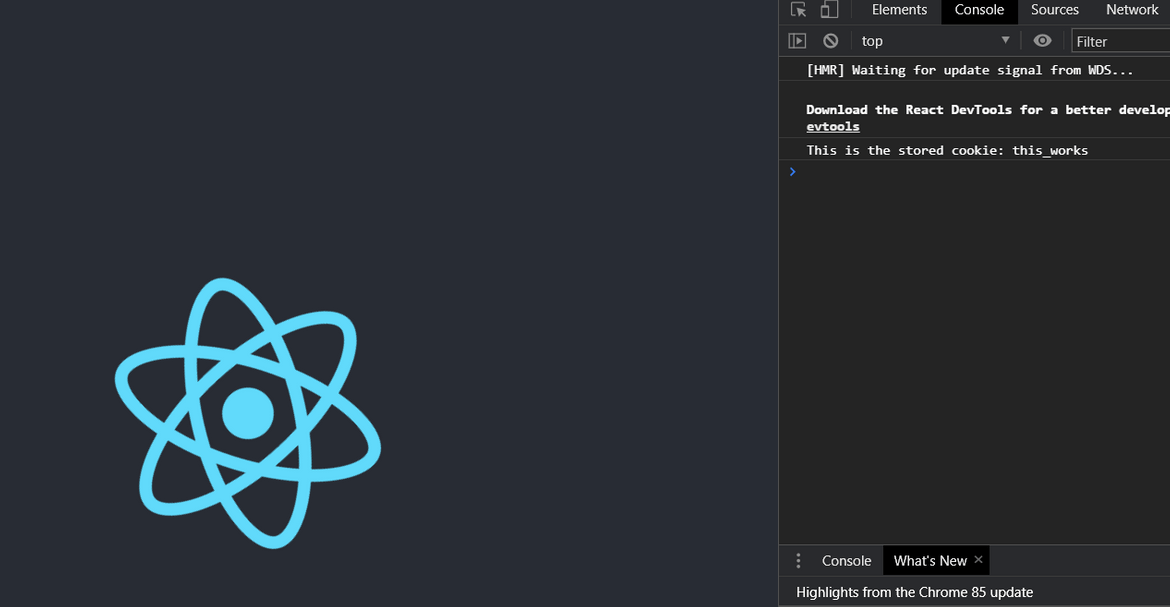
Reload the page to view the stored value of the cookie:
Deploy the App
Once we are satisfied with the app, lets deploy it to a web server so we can access it easily and use the same URL for our mobile apps. There are multiple options which you can use to deploy. I am using Codesandbox and Netlify both interchangeably to deploy and host the app.
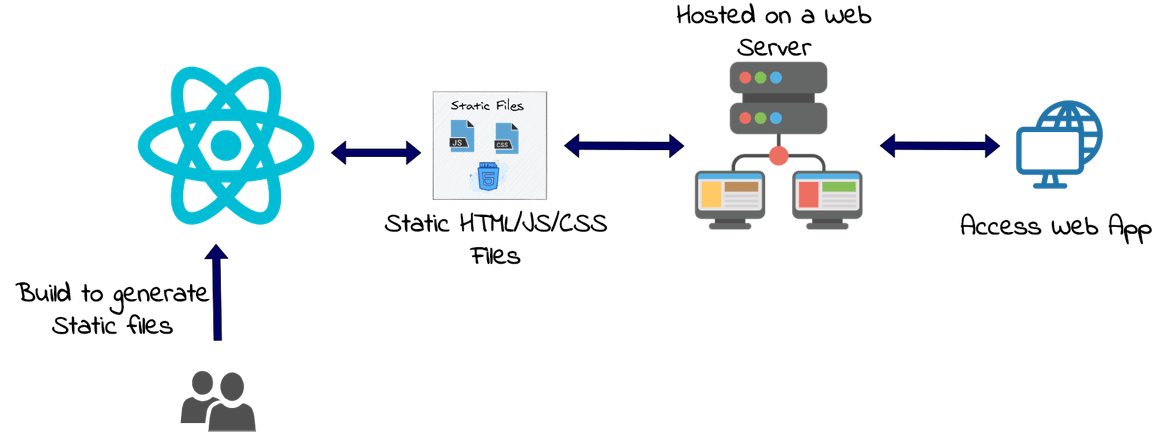
Steps I followed to deploy the app to the server:
-
Build the static files from the react app. Run the below command:
npm run build - The static files will be generated in the ‘build’ folder
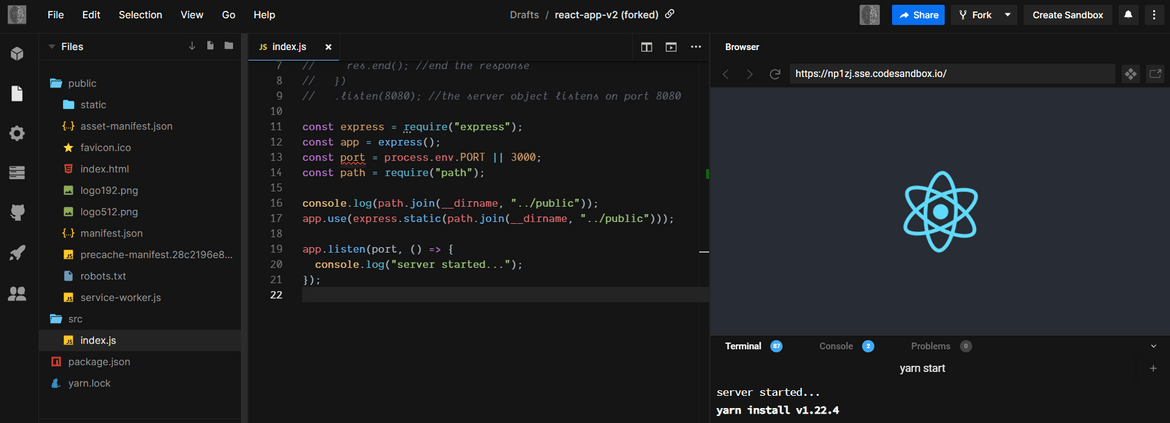
- I created a nodejs-express server on Codesandbox and hosted the static files in the public folder of the nodejs app
Convert using React-Native and Webview
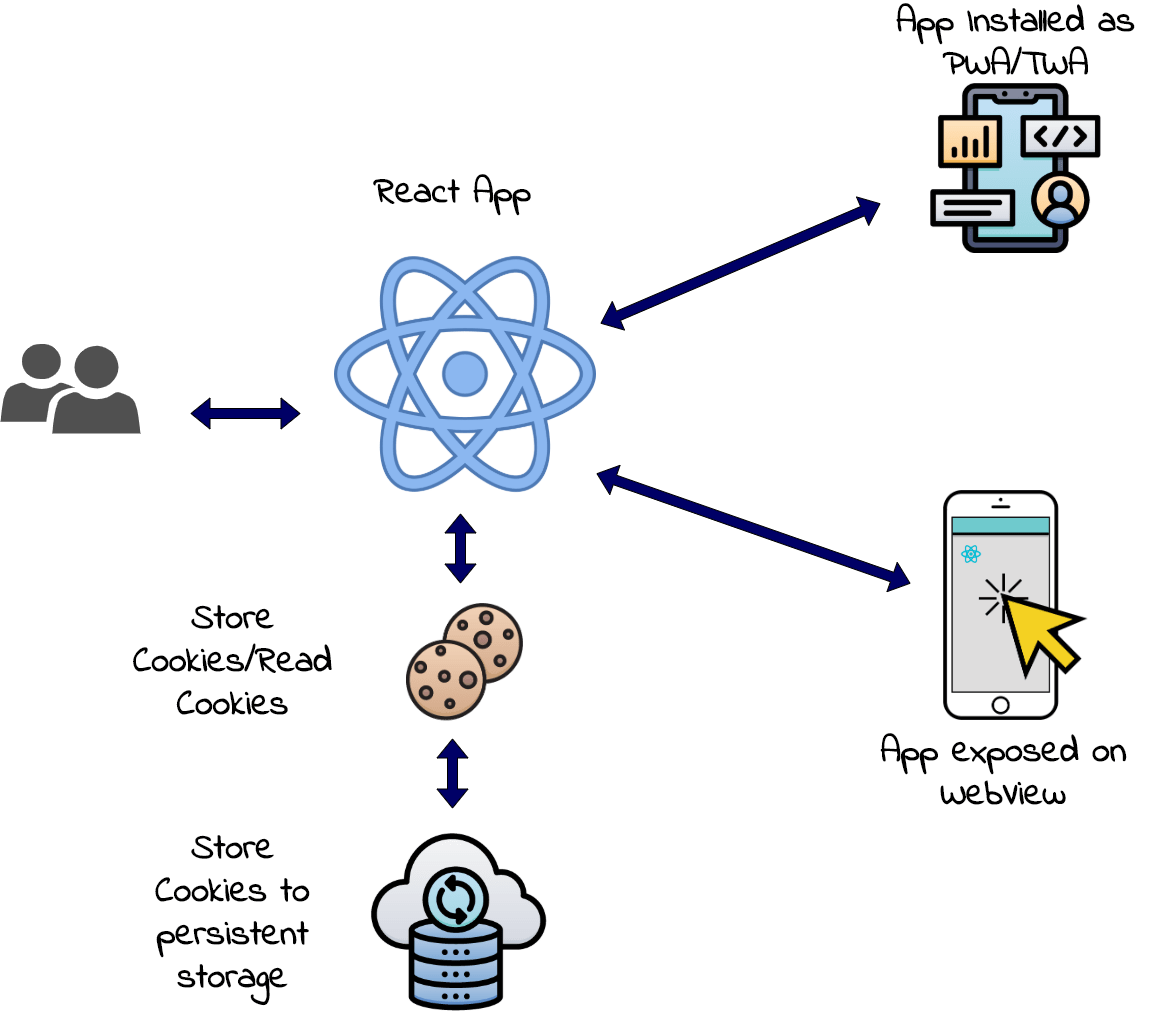
Now that we have the app, lets walk through the first method to convert the app into an Android app using Webview and persist the cookie on a mobile. Below image shows a high level view of the process which we will follow for the conversion:

- Generate the React Native app: In this step we will be generating the React Native app using Expo CLI.
- Add the Webview: In this step we add the Webview to the React native app. The webview will be loading the app which was developed in the last step
- Test the app: Next we will test the app in developer mode using Expo client on an Android phone.
- Generate the APK file: Finally we will be generating the APK file so we can install and test the app on a mobile.
Process Walkthrough
Lets get on with the process and walk through each of the steps. Before following through the steps make sure all the pre-requisites are installed on your system and you have an Android mobile phone handy to test the app. Also for all my steps I have used npm. But if you prefer to work on yarn, the steps are pretty much the same.
Generate the React Native App:
In this step we will generate the React-Native app which will be used to expose the earlier built React app as Webview. I am using Expo CLI to generate the app and manage the app lifecycle of compiling and publishing. There are other ways to generate the app too but I prefer using expo for simpler apps. I wont get into details about Expo or basics of React-Native much and you can find more details Here. Run the below command in a folder on your local system where the app will be created:
expo init mobileapptestI have selected the basic managed workflow for the app for simplicity to demonstrate here. You can select other options according to what you are comfortable with.

Once the app generation is complete, navigate to the app folder so we can move on to the next step to make changes to the code.cd mobileapptest
Add the Webview component to the app:
Lets add the Webview to the app which will expose the earlier deployed React app and we can open the React app as the React-Native app. Before we can add the Webview, there is a package we need to add to the app. Run the following command to add the package:
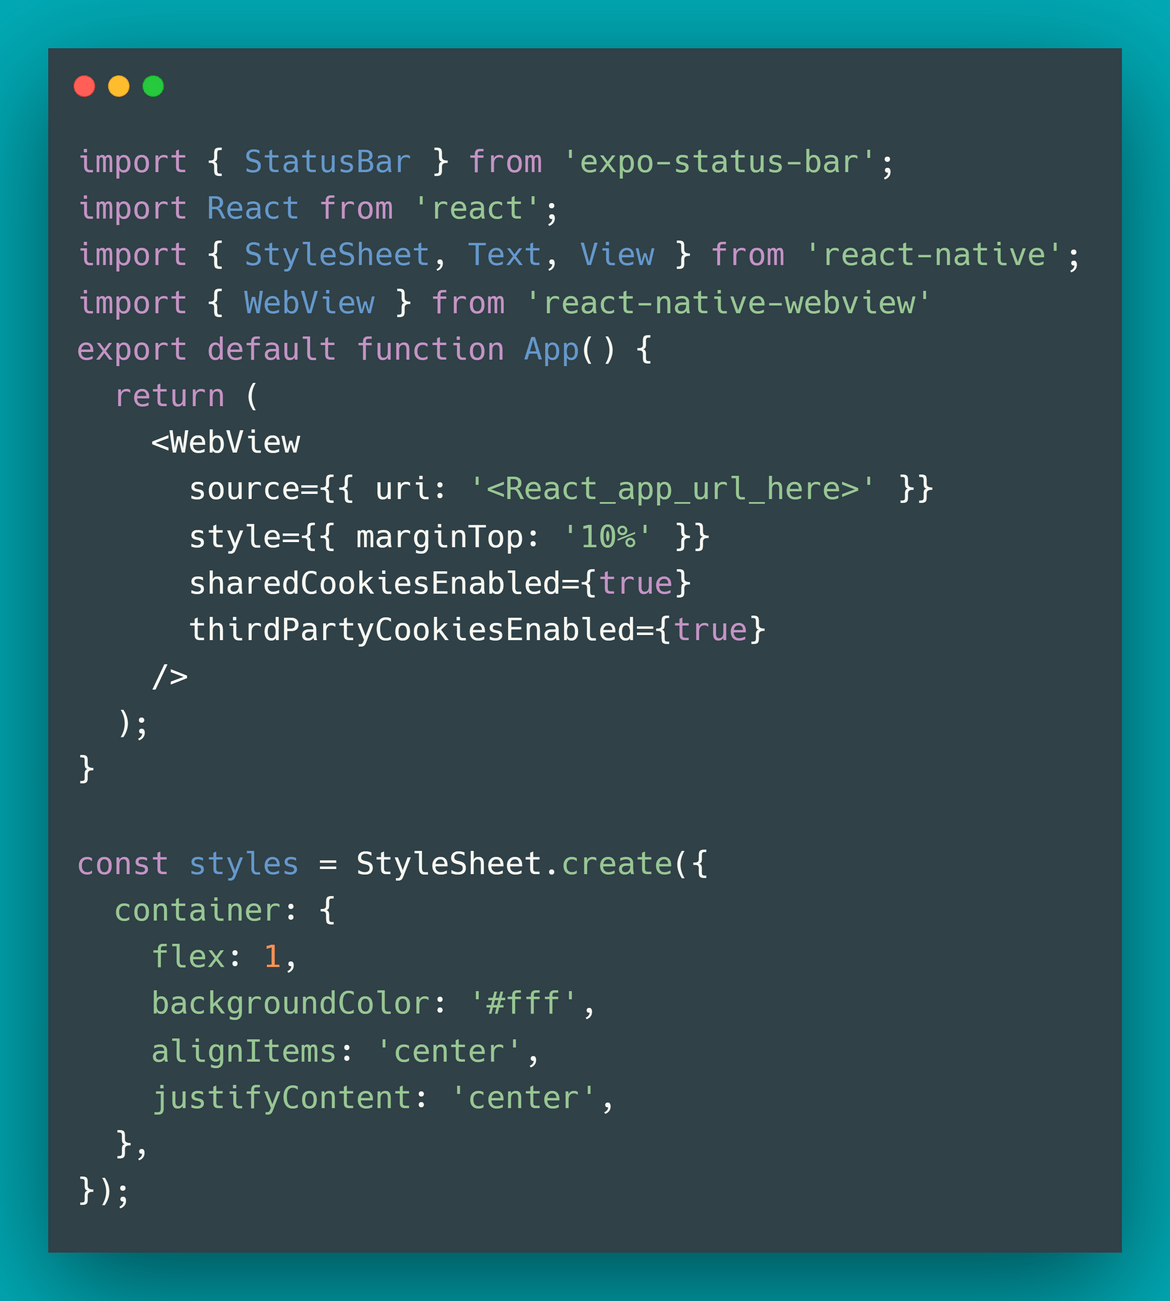
expo install react-native-webviewOnce the package is installed, open the code folder in an editor of your choice and edit the App.js file to add the Webview as below. I have specified the location in the code where you will have to replace the URL from your deployed React app which was deployed earlier. For this post, I deployed my React app to a Codesandbox nodejs-express server.
I will come to the cookie related code parts in a later step. For now, replace the React app URL with your app URL. Once the change is done we are ready to move to the next step.
Test the App:
At this point we are ready to test the app on developer mode and see how it opens up on a mobile phone. Before you can test the app on your mobile phone, make sure you have installed Expo client on your phone. More details Here. Once you have it installed, run the below command inside the app folder:
expo startThis should start compiling the app and once complete will give you the QR code to open the app on your mobile.
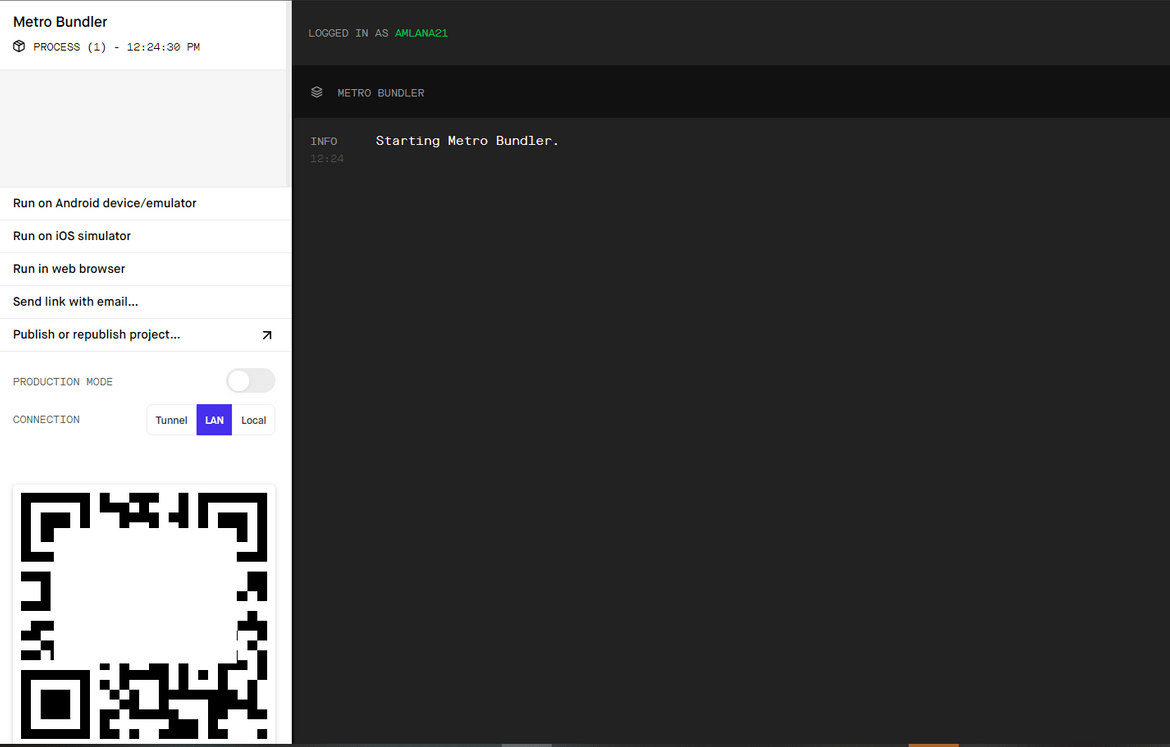
Open the Expo client on your mobile and scan this QR code to open the app on your mobile. You should see the React app loading as the mobile app on your mobile phone.
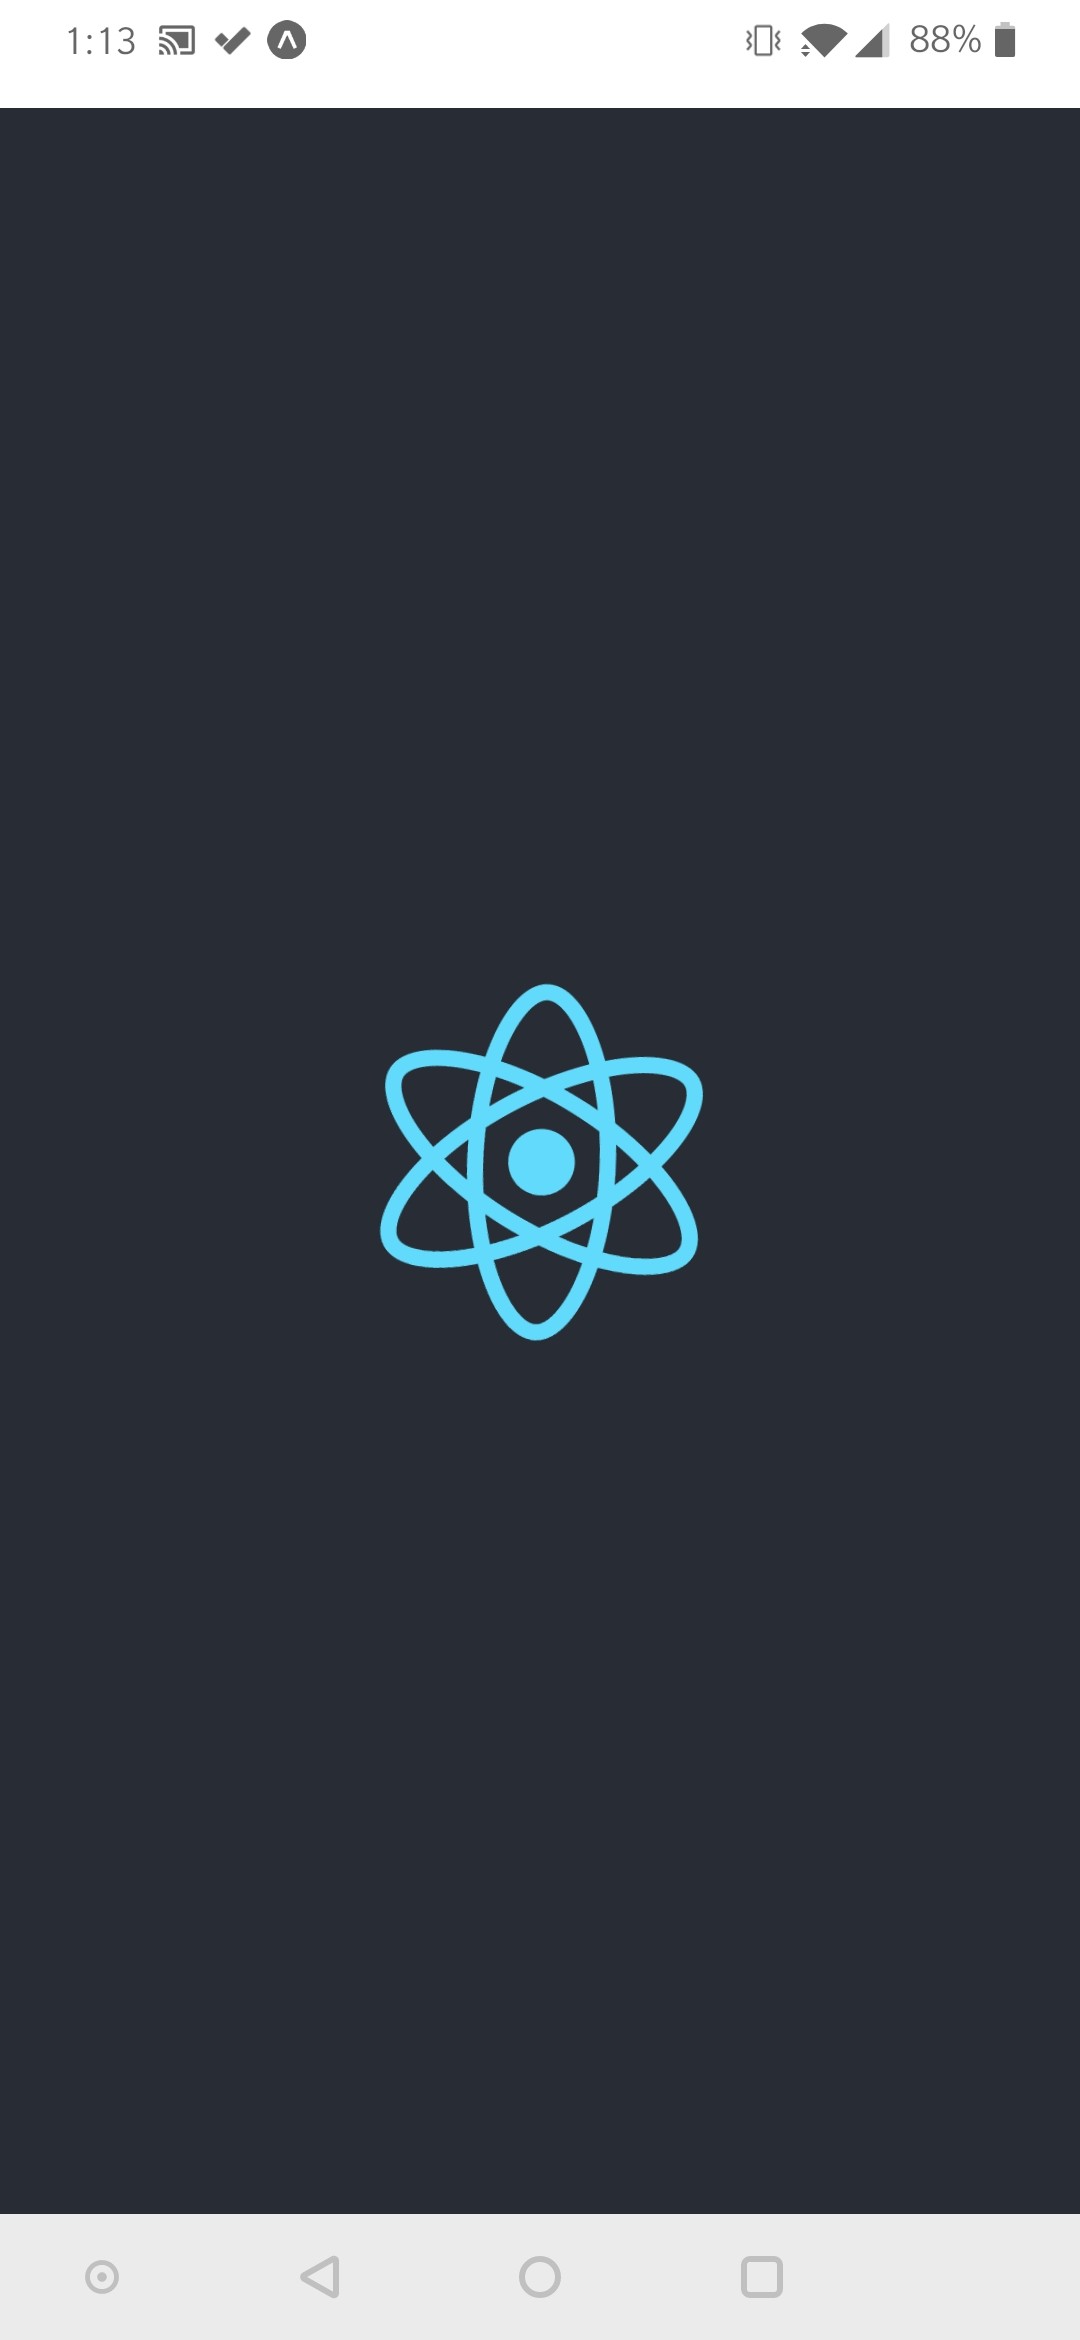
We have a working app now which we can test. Next we move on to the step to add a cookie persistence to the app.
Cookie Persistence and Testing
I am storing a sample cookie which will mock a scenario of an user session token stored as cookie. Earlier when we edited the code for the Webview there were few lines which were added specific for cookie storage. Lets see those:
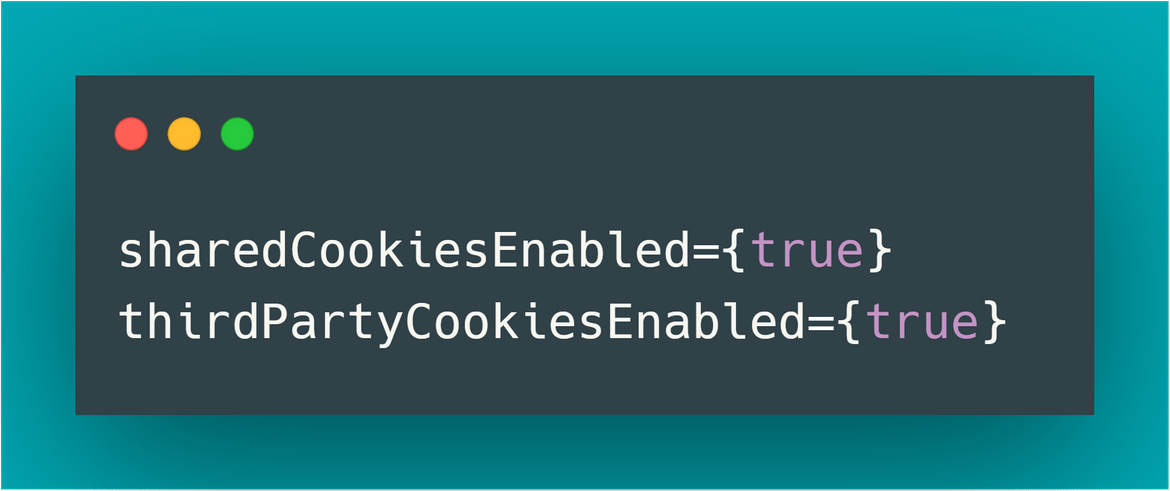
These two lines will enable the Webview component to store cookies on the mobile app. This will also allow any third party cookie to be stored too if any are set by the React app. These lines enable the cookies set by the React app to use the mobile phone storage and get stored for persistence.
Generate APK File
We have the app complete and ready to be published now. We wont be publishing to Play store in this post. I will be generating the apk file which I will install on my mobile phone and test the app. I am covering the Android part of the app but similar steps can be performed to get an installable file for IOS. For the APK generation there are multiple ways which can be followed for an Expo generated app. Since we are using the Managed workflow option in this app we have two options to follow for building the APK:
I will be using the expo build servers to build the APK. More details for the build process can be found Here.
Lets start building the APK:
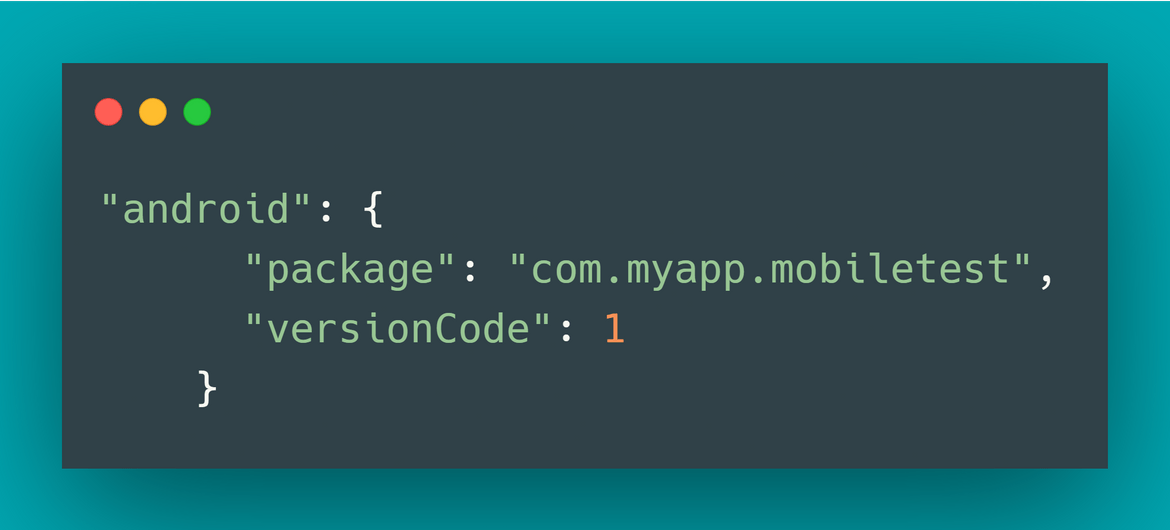
- Make sure to add the below lines to App.json file of the app to denote the Android package details:
-
Exporting Files and Hosting:
Before we can run the build process, we will have to export and host the static files of the app to a hosting location from where Travis CI can pull the files for the APK. I am using Netlify to store the static files and using that URL in the export command. You can use any hosting solution of your choosing. I created a Netlify site and passed that site URL to this below command:
expo export --public-url <your_web_url>Once it finishes, take the contents of the ‘dist’ folder in the mobile app folder and upload these to the web hosting URL which you used above. I am uploading the dist folder to the Netlify site.

-
Run the Build:
Once the files are uploaded to the web server, run the below command to start the APK build on the expo servers:
expo build:android -t apk --public-url <web_host_url>/android-index.jsonThis will ask you to register a new account with Expo and login. Once logged in it will start the build on Expo and place the build in a queue. You can check the job status by logging in to the Expo web UI at https://expo.io/.

Based on current build queue it may take a while for the build to complete on Expo server. You can check the build queue at https://expo.io/turtle-status:

Once the build finishes, the APK file should be available on the build job from the Expo Web UI. Download the APK file to be installed on mobile phone later on. Login to the expo web UI and go to the specific build job:

-
Alternative Build Method using CI:
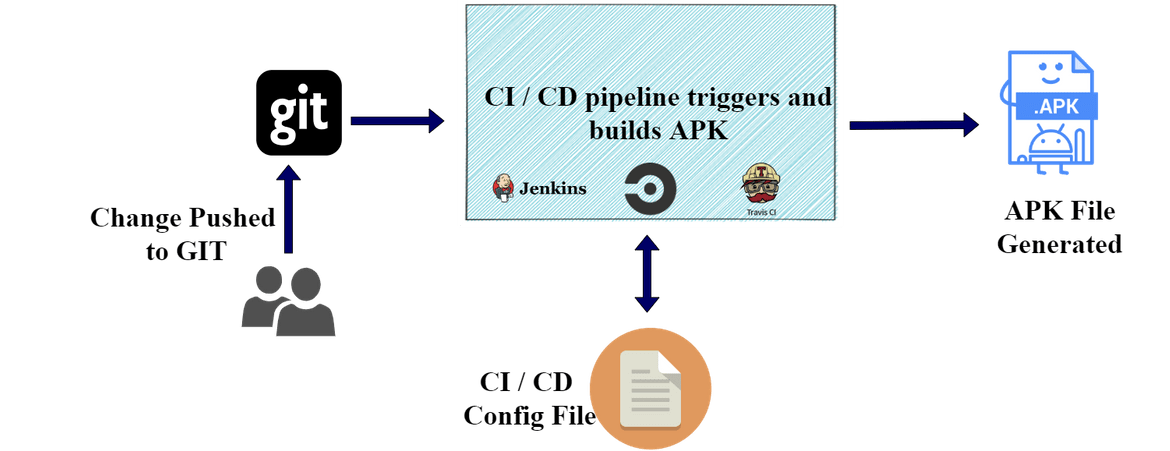
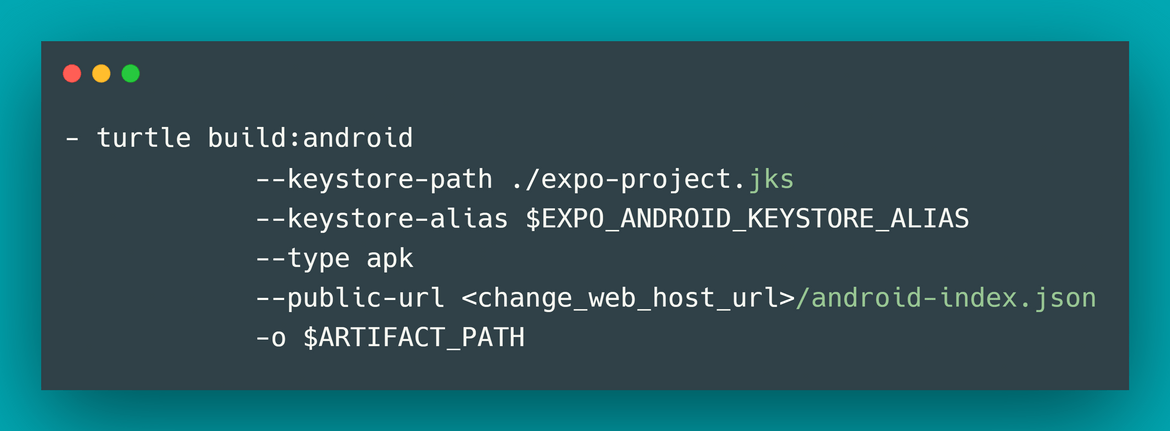
If you don’t want to use the expo server for build, an alternative way can be to use your own CI/CD server. In my repo I have included a Travis CI config file which can serve as an example to use Travis CI as the APK build server. There are few steps to follow before Travis CI can be used a your build server. I am listing high level steps for the same and not going into much details:
- Generate your own Keystore files for the Android React-native app
- You can use my sample Travis CI config file for setting up the build job. Just update the web host URL to your host URL where the android-index.json was hosted earlier.
- You will have to setup a Git repo for the mobile app folder and include the Travis CI yaml file in that
- Setup an S3 bucket on AWS where the APK file will be generated and stored. You will need an AWS account and credentials for the S3 bucket
- On the Travis CI project setup these environment variables according to your AWS account and your android keystore values:
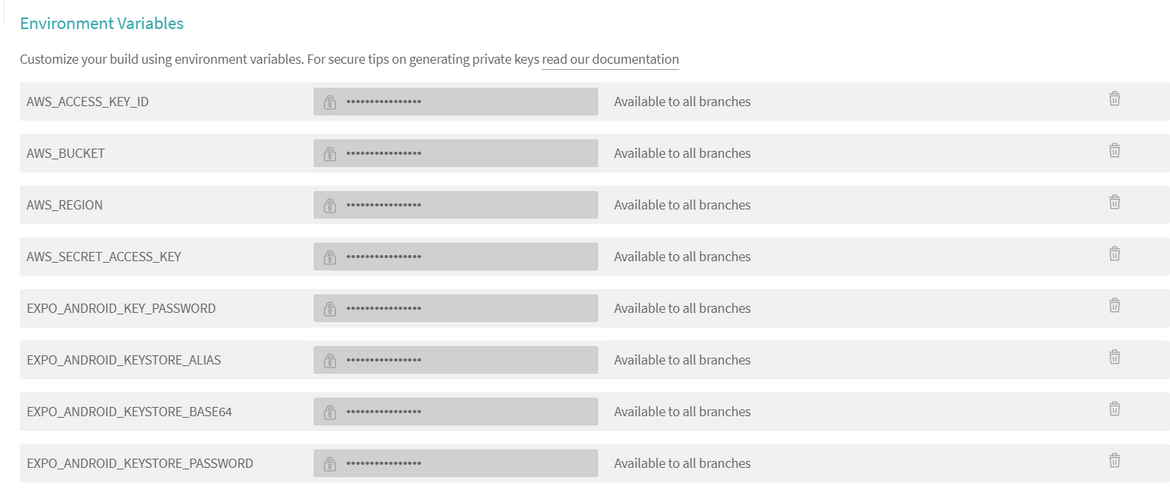
- Once these setups are done, every time a change is pushed to the Git repo, the Travis CI pipeline runs and builds the APK file. The APK will be available in the S3 bucket specified on the environment variables.
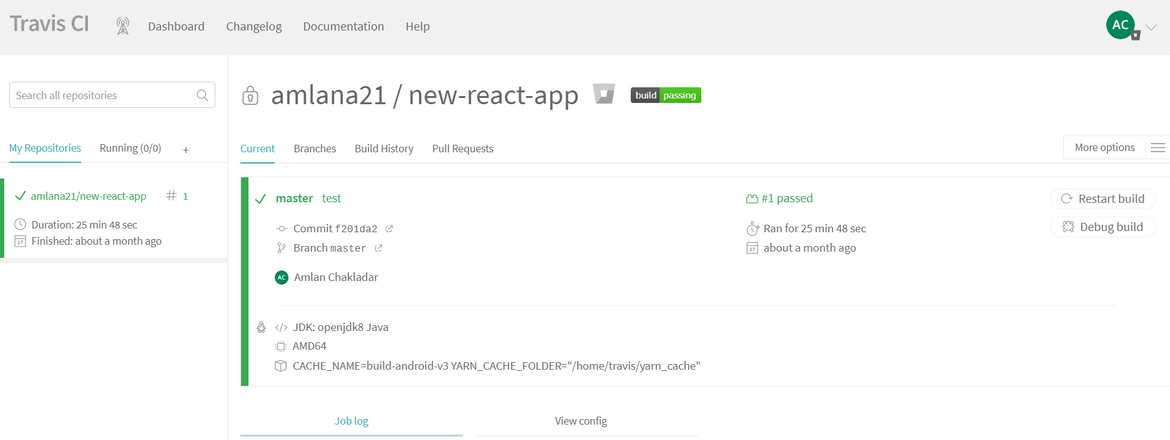
If you need more details about setting up a Travis CI pipeline, you can reach out to me and I can send you a documented walkthrough.
Testing and Considerations
Once we have the APK file from the last step, go ahead and download the APK file. Install the same on an Android phone. Once done open the app. On first time load, since there wont be any cookie stored, it will show the undefined alert:
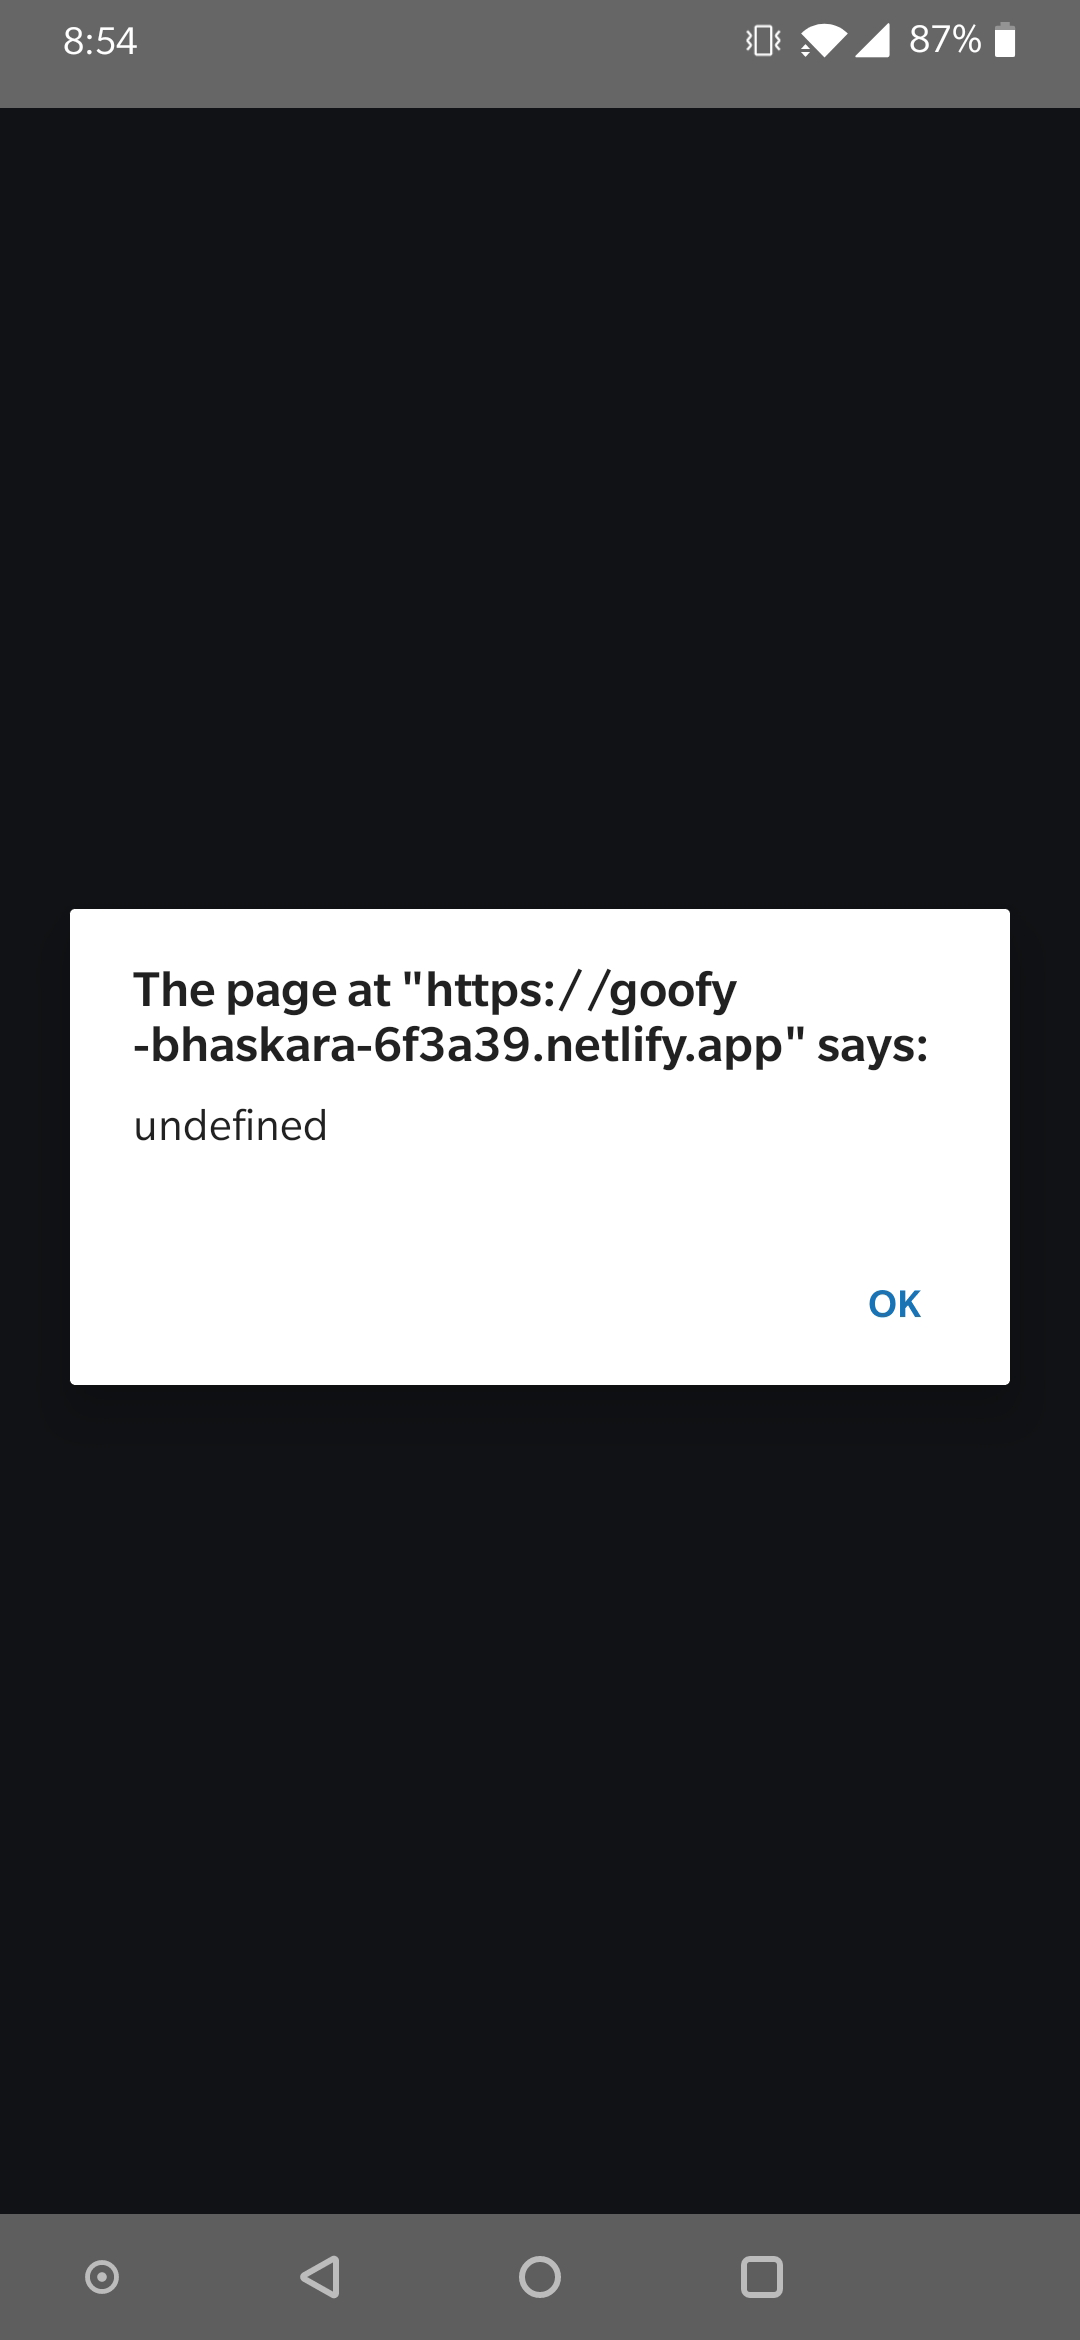
Close the app and reopen the app. Now you should see the alert with the stored cookie value
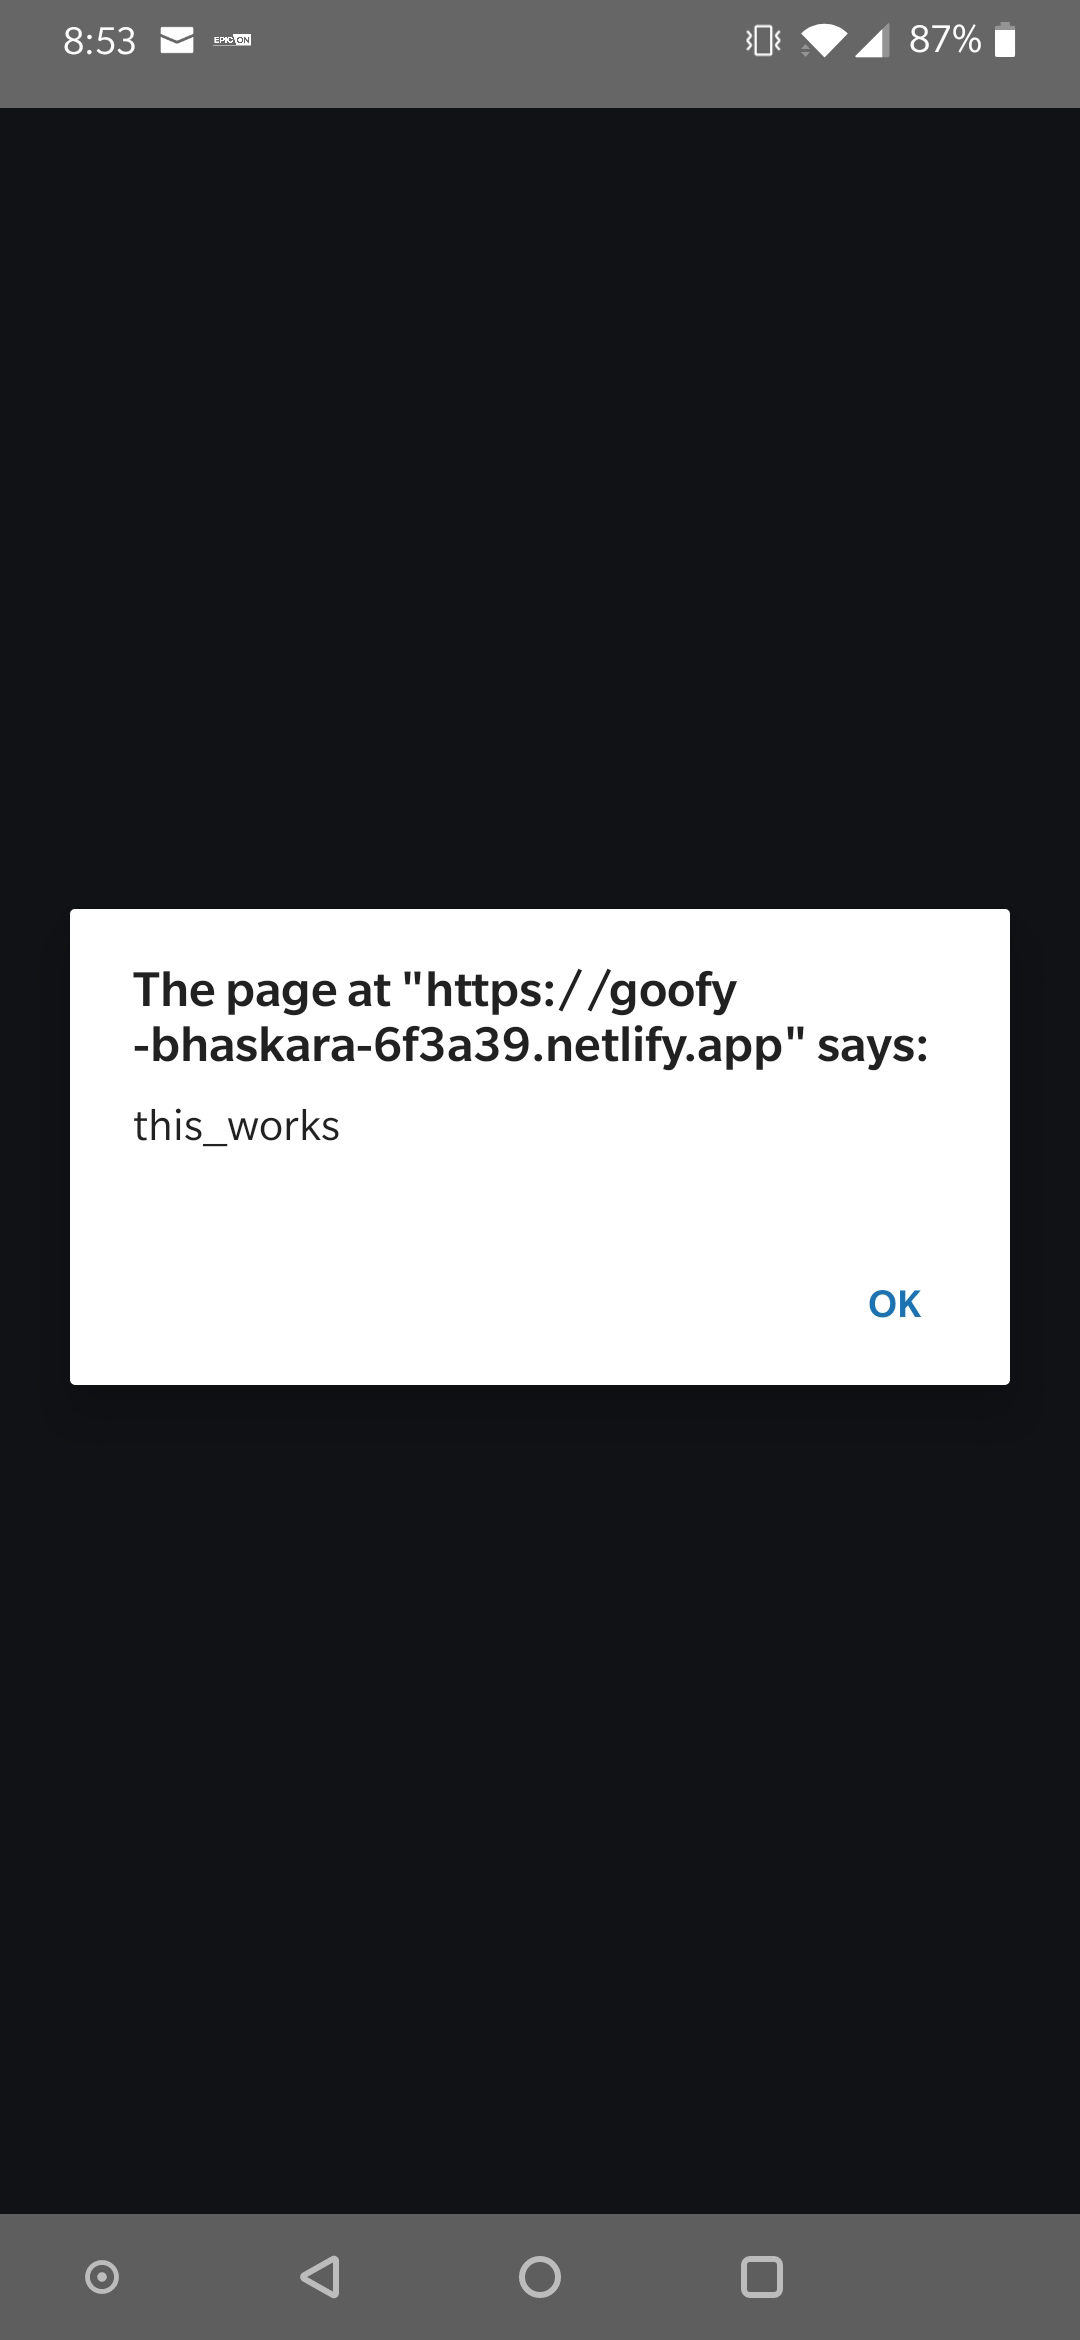
Now here’s the catch, you will notice that when you close and reopen the app you are still seeing the undefined value on the alert. This is because even though cookie storage is enabled for the Webview on the mobile app, it takes a bit of time for the mobile app to flush the cookie value from temp memory to mobile’s persistent storage. If you close the app before that the cookie value doesn’t persist. This is a behavior for Webview which is very unpredictable and I couldn’t get a work-around for it.
So if you consider the above point, you can still use the above method to convert a react app to a mobile app along with cookie persistence feature. That brings us to the next method which I think is a better way to convert the React app to a mobile app and have a better cookie storage feature.
Convert using PWA and TWA
In this method we will convert the React app to a PWA and then convert it to an installable mobile app using TWA. I know both of these terms are confusing so let me explain how this will work. Below is a high level flow about how we will convert the React web app to an installable mobile app using PWA.
- Add Serviceworker and manifest to the React App: In this step we will add the required components to the React web app to convert it to a Progressive Web app.
- Upload the changes with the new components to the web server: Next we will upload the changes back to to the web server where we hosted the React web app
- Test the PWA behavior of the React web app: In this step we confirm the PWA behavior of the React web app
- Use PWABuilder to build an Installable APK: Finally we will convert the PWA to an installable APK using PWABuilder and generating the TWA. Then we will test the cookie persistence feature
What is PWA and TWA
Before we go to the setup, lets understand what are we building here.
PWA: It is short for Progressive web app. These are web apps or websites which run seamlessly across platforms. On a mobile device these are web applications which can be installed as a normal app. These are next gen of web apps which help break the barrier of cross platform availability for the app. PWA also adds ability to have an offline capability to have a better experience with the app. In short these are websites/web apps which you can install on a mobile as an app without going through any app store.
TWA: It is short for Trusted Web activity. This is similar to the PWA where you convert a webapp or website to an installable mobile app. The difference is you can have an installable APK file using a TWA and publish it over an app store too. It is still accessing the same webapp but as a mobile installable app. This is another easier way to easily convert a webapp to a mobile app.
Process Walkthrough
Lets get on with the process and walk through each of the steps. There’s not much pre requisites needed for this process except your knowledge of React. Navigate to the React app folder which you generated earlier as we will be modifying that. You can also just take the React app which I have in my Github repo and modify that according to your changes.
Add Serviceworker and manifest to the React App:
Lets add the required files to the React app which will add the PWA behavior to it.
You should be able to find the files in my Github repo. There are two files which are needed here which are required to be added. Go ahead and copy the files from my repo. The two files are:
- manifest.json file in the public folder. Edit the file according to your app. This will control the app names, app logo when installed etc.
- serviceWorker.js in the src folder
You will also need to have a logo and the splash screen image. You can use your own image and replace the default ones which gets generated
You should be able to use the basic version of the Serviceworker.js to add a PWA behavior. For more advanced features in the PWA like offline availability, the Serviceworker file can be edited accordingly. We will use the basic version here. Edit the index.js file to add this line of code. This will register the Serviceworker to the app and add the PWA behavior.
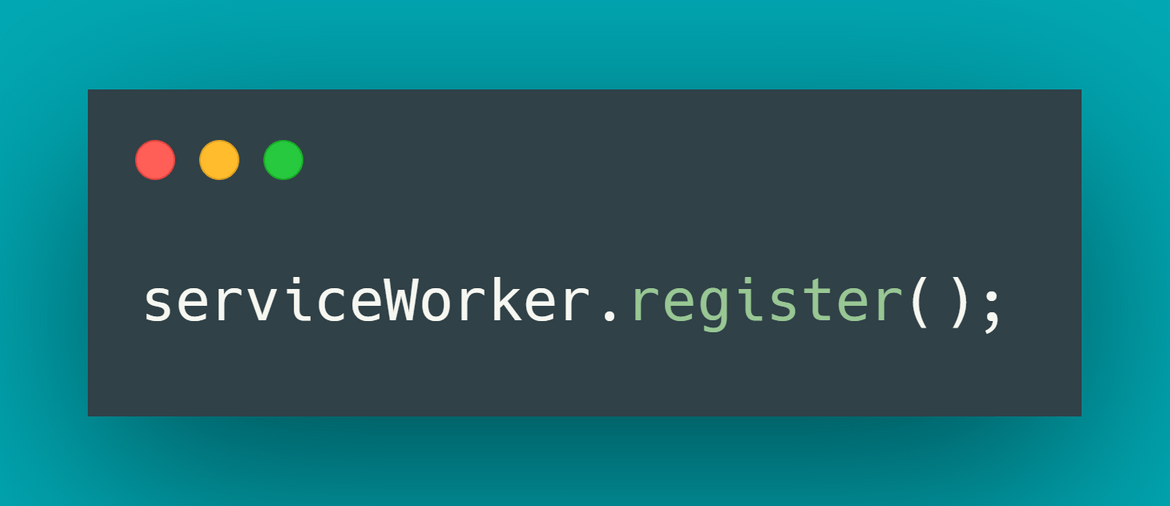
Once done with the changes, run the build command again to build the static files.npm run buildThis will generate the static files in the build folder. Upload the static files to the web server where earlier you uploaded the React app. This will update the app with the new changes.
Test the PWA:
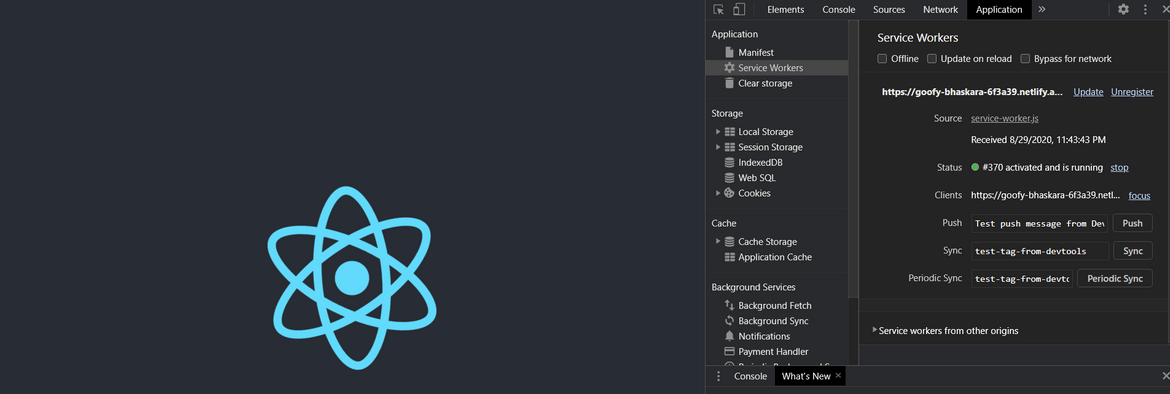
Once we have uploaded the files to the web host, lets test the PWA and verify if we have the Serviceworker registering for the app. I am using Netlify to host the React app static files. Open the web app URL from the web host. Once the app opens, open the browser dev tools and navigate to the Application tab. Verify that its showing a Serviceworker running for the app. This confirms that we have the PWA behavior enabled for the app.
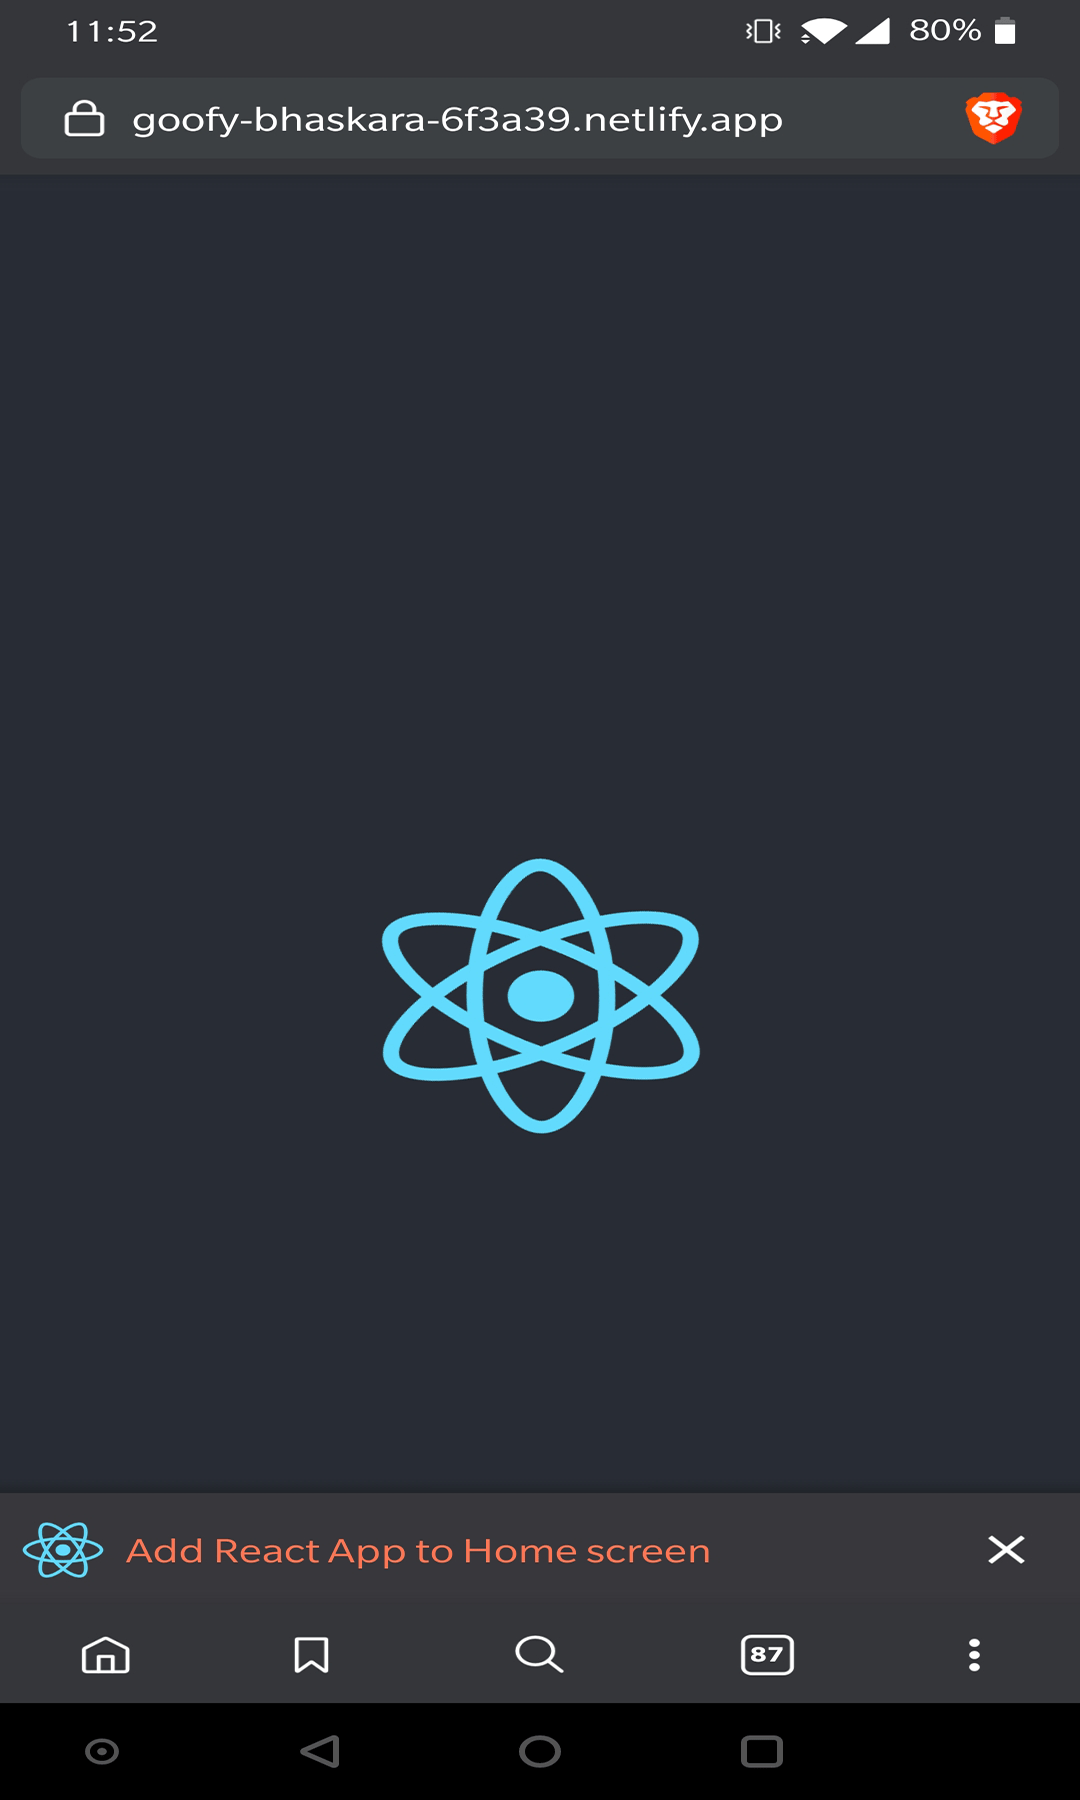
If you open the same web app on your mobile phone, you should be presented with an option to install the app on your phone. This will install the same on your app and provide you a way to access the web app via an app icon on your mobile.
Generate an installable APK file:
Next we generate the installable file which will allow us to install the React app just like any another Android app. We will be using TWA to get an APK from the React web app which we hosted earlier on the web host. I will be using PWABuilder to convert the React web app to an APK file.
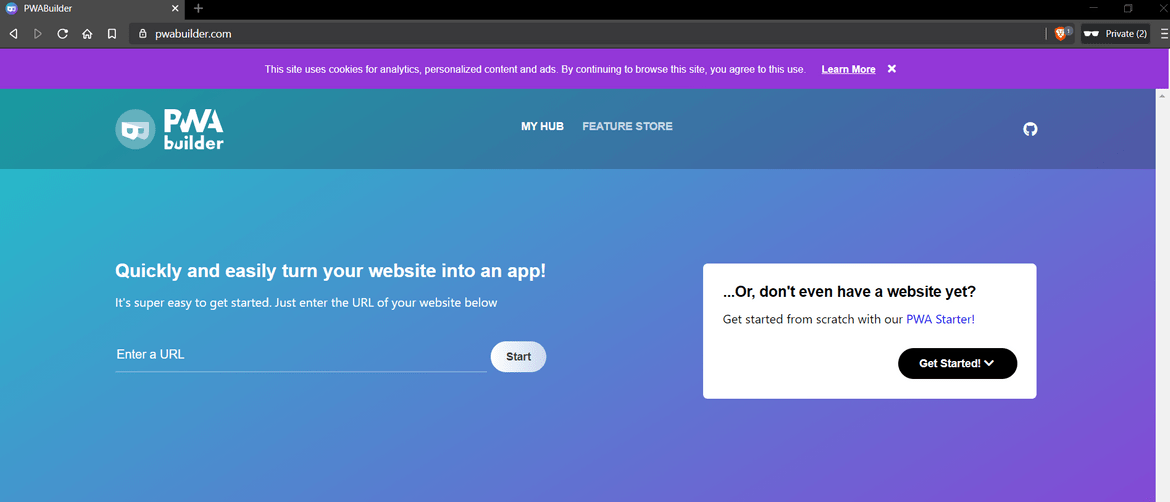
- Navigate to https://www.pwabuilder.com/ and enter the React web app URL on the URL field as shown above
- Click on start. This should start with a validation of the web app. It will validate whether the React app can be converted to a TWA.
- Once the validation is done and if everything looks fine, click on Build PWA. If there are any failures, modify accordingly
- In the next screen click on the Android section download button. It should provide you with option to get the APK file. You can tweak the options for the APK too if needed.
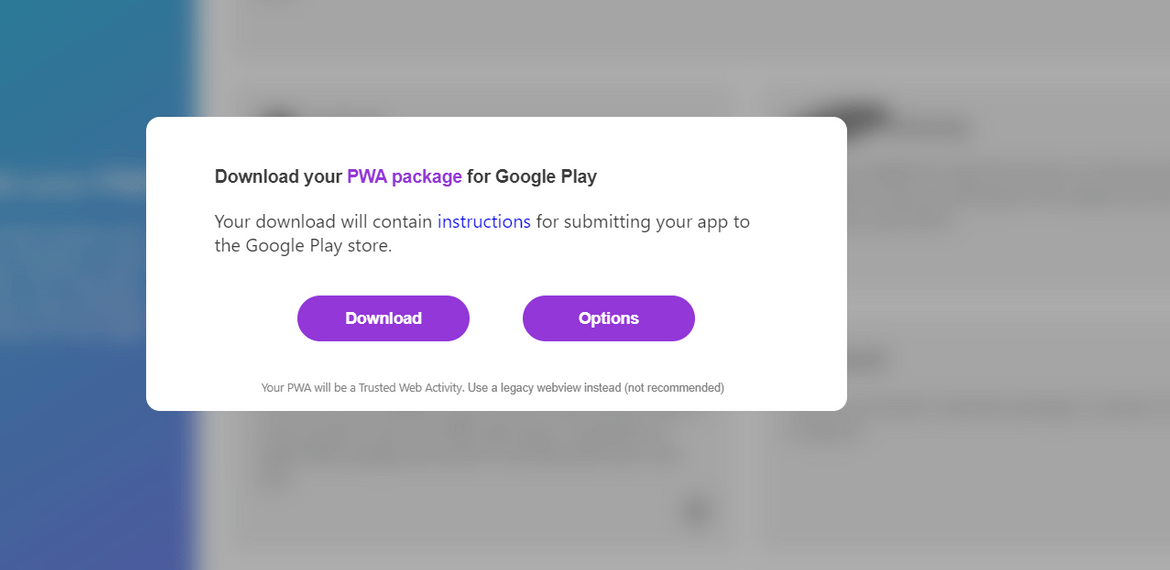
- Once you click Download, it will download a zip file containing the APK file and other verification related files
- We are still not ready yet. To have the app work as a full screen app on your mobile, you will have to upload the assetlinks.json from the downloaded folder to the React app hosted on the web host.
- In the React app public folder, create folder named .well-known. Copy the assetlinks.json file in this .well-known folder. Rebuild the app to rebuild the static files. Upload the files back to the web host to update the app. Make sure the json file is accessible at this URL: <webhosturl>/.well-known/assetlinks.json.
- Once these changes are done, go ahead and install the app on your android phone using the APK file. Once installed, open the app to confirm
Cookie Persistence Testing and Considerations
You can test the app which you installed from the APK. Once you open the app, first time you should see the alert showing the undefined value for the cookie. This app should get installed just as another android app and you can access it from the app icon.
![]()
One difference to notice here is that, the cookie value gets persisted correctly once the app is opened once. Even after closing and reopening, you should see the alert for the cookie value. This happens because even though it gets installed as an app, the PWA is running via Chrome browser. The cookie gets stored on the browser once the app is opened.
Conclusion
I hope these steps help you to give an easy way for converting a React app to an installable mobile app. These steps helped me resolve some of the issues which I was facing in one of my projects. If you have an React app and you want to easily get this app as an mobile installable app without building a whole new app for mobile, these steps will ease your process and quickly get you going. If you have any questions about the process, you can contact me from the Contact page. Also if you are looking to hire a React Native developer, you may find this article very helpful.
