Deploy a NLP Machine Learning model and app to an AWS EKS Cluster via AWS Codepipeline-Yelp Search App Part 2
This is the second part of the post series which you can find Here. In the last post I described about the app and how it is built. Just to refresh, this is what we have in each of the post:
- 1st Post( old post): Overview about the application and about its underlying logic. This will be more about how the app works and the overall architecture of the whole app ecosystem
- 2nd Post (This post): In this 2nd part I will be discussing how I deployed the app on AWS S3 and AWS EKS (Elastic Kubernetes Service) cluster using Codepipeline
The limited demo of the app can be found here: Here.It has a limited dataset included. Only demo zipcode of 61820 can be searched. For e.g: 61820 pasta.
Also the Github repo for the deployment scripts can be found Here
Pre-Requisites
Before I start, if you want to follow along and understand this, here are few pre-requisites you need to take care of in terms of installation and understanding:
- An AWS Account
- Basics of Python and NLP (Natural Language Processing)
-
Few installations:
- AWS CLI
- Python and pip on local system
- Basic understanding of AWS and Kubernetes
- Docker installed on your local system to build the images
- kubectl installed
- An IAM user to perform the deployment activities
Revise Architecture
Before I dive in to the deployment process for the app components, let me revise how the app architecture looks and what components we are looking at here.

-
Front End
Front end client for the app is a React SPA. The React app is accessed by the user and the app reaches out to the backend via API calls to get the required data. Below are the components which makes up the whole front end:
- Cloudfront
I am using a Cloudfront distribution as the CDN which speeds up the delivery of static front end assets (pages, images etc.) to end users. For this sample scenario, I havent used a custom domain so the end user will be accessing the application via the Cloudfront endpoint. - S3 Bucket
This is where the static files generated from the React App for frontend, are stored. The bucket serves as a storage for the front end files. Also for the busket, the static website hosting option has been enabled so the busket provides an endpoint on its own which can be used to access the app frontend. The cloudfront distribution is pointed to this S3 bucket as the origin and serves these static files to end users.
- Cloudfront
-
Back End API
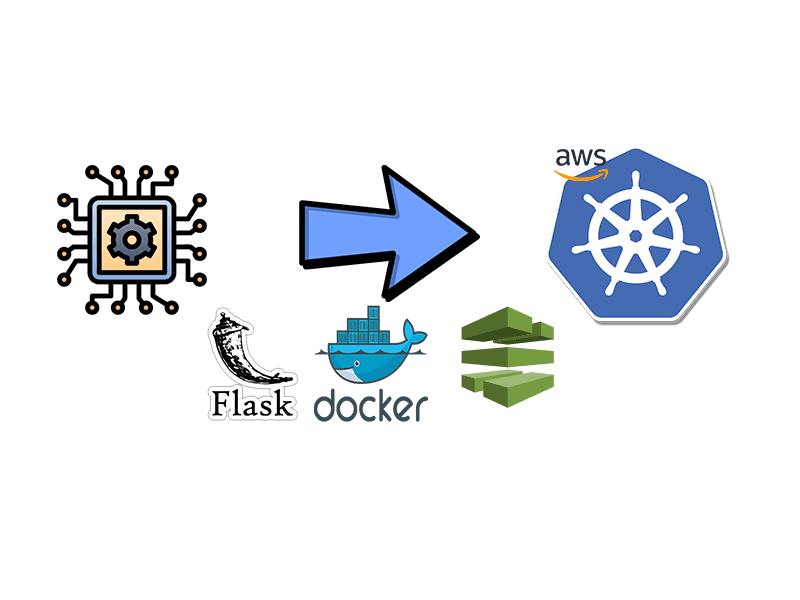
The front end connects to a back end API which is doing all of the data processing and providing the results back. The backend is a Flask API built with Python and deployed to a Kubernetes cluster. There are multiple components which build up to the whole backend architecture. I am using AWS EKS to launch a Kubernetes cluster where all of these components will be deployed.
- Docker Image and Registry
The Flask API is built to a Docker image and pushed to an imgae resgistry. Kubernetes pulls the image from this registry to deploy the respective components. Here I am using a Gitlab private registry where the Docker image being pushed. All the docker images used in the API, the scheduled jobs are pushed to this repository. - Secret for Image resgistry
A Kubernetes secret is created to store the credentials for the image registry. This is passed to the deployment for the API as an image pull secret. - Deployment
The Flask API is deployed as a Kubernetes deployment on the Kubernetes cluster. Based on needed scalability, the replicas can be adjusted. Various details are passed as environment variables to the pods within the deployment. For the data files needed for the search responses, separate Persistent volumes have been created( described below) which are mounted as volumes on the pods in this deployment. - Service to expose the API
To expose the public endpoints for the API, a Kubernetes service is created which exposes the Flask API running on the pods. For the example here I am using a Nodeport service which exposes the API on a higher port on the Node. But in actual Production deployment, we will need to launch a Load balancer service which will provide a higher scalability and availability for the application. - Pod Autoscaler
To add an autoscaling capability in the system for having a consistent performance under higher loads, I have also added a Pod autoscaler which will scale the number of pods in the deployment based on the CPU utilization.
- Docker Image and Registry
-
Scheduled Jobs for Data Sync/Updates
For the search to work flawlessly, proper data need to be provided by the backend. The data processing happens in the backend which converts the raw data files to processed data files that are understood by the API to provide response. The data file processing happen as batch processing and are split into two parts:
- Weekly Processing: This tunes the ML model based on the data gathered throughout the week. This increases the model accuracy
- Nightly Processing: This processes the data nightly to get new data for that day and process them through the ML model. This makes sure new data is being updated everyday to increase the search accuracy.
Both of these are deployed as Kubernetes Cron jobs and scheduled accordingly. Below are the components which are deployed as part of the Scheduled Jobs deployment:
- Persistent Volume for data files
A persistent volume is created to hold the processed data files. This volume is shared between the scheduled jobs and the API deployment so they have access to the data files. The claim for this volume is mounted on the pods for the each deployment to give access to these data files. - Cron jobs for the scheduled processes
Both of the scheduled jobs are deployed as cron jobs and scheduled to run weekly or nightly. The Perisstent volume defined above is mounted via a claim to the pods so the processed data can be written to it. The data file paths are passed as environment variables to the pod containers. Also for the jobs to get the initial un-processed data files, an initcontainer is invoked. This downloads the data files from an S3 bucket (details passed via environment variables) and places on the folder where the volume is mounted.
Code Folder Structure
Before I move to the deployments, let me explain my code folder structure if you are using my repo.

-
frontend_app:
Contains the source code for the front end react app
-
frontendinfrarepo:
All the Cloudformation templates for front end infrastructure and pipelines.
- 1-infradeploypipeline.yml: Template to deploy the infra pipelines
- 2-deployinfra.yml: Template to deploy the infrastructure for front end. This will be called by the infra pipeline
-
infracftemplates:
Cloudformation templates for backend infrastructure.
- deployinfrapipeline.yml: Template to deploy the pipeline for backend infrastructure deployment.
- deployinra.yml: Template to deploy the backend infrastructure. This is called by the infra pipeline
- ekscluster.yml: Template to deploy the EKS cluster and Nodegroups
-
weekly_job:
This folder contains the source code, Codebuild file and Kubernetes deployment file for the weekly data processing job deployment.
- buildspec.yml: Codebuild file to build and push the Docker image
- kubebatchjobs_deploy.yml: YAML file to deploy the Kubernetes components
- kubebuildspec.yml: Codebuild file to run the kubectl command and deploy the Kubernetes components
-
nightly_job:
This folder contains the source code and deploy files for the nightly data processing jobs.
- buildspec.yml: Codebuild file to build and push the Docker image
- kubebatchjobs_deploy.yml: YAML file to deploy the Kubernetes components
- kubebuildspec.yml: Codebuild file to run the kubectl command and deploy the Kubernetes components
-
app_api:
This folder contains the source code and deploy files for the main backend Flask API.
- buildspec.yml: Codebuild file to build and push the Docker image
- kubeapideploy.yml: YAML file to deploy the Kubernetes components
- kubebuildspec.yml: Codebuild file to run the kubectl command and deploy the Kubernetes components
Deploy Front End
Now that we have refreshed about the overall architecture, lets dive in to the process of deploying each component. All the relevant files can be found on my Github repo and can be used for any other similar deployments too.
When deploying for the first time, the front end deployment will consist of three parts:
- Deploying the Codepipeline for the infrastructure deployment
- Run the Codepipeline to deploy the infrastructure
- Run the app deploy Codepipeline to deploy the application

Let me go through each of these.
-
Deploy Infrastructure Pipeline
Before we can deploy the front end, we need to spin up the infrastructure needed for the frontend. Based on the architecture above, we need to deploy:- S3 bucket
- Cloudfront Distribution
To handle the deployment of the infrastructure, I have created a Codepipeline which will manage the Infrastructure components and manage any changes to the infrastructure after the deployment. As a first step lets deploy this Codepipeline which will handle our infrastructure. I have created a Cloudformation template using which we can deploy the needed components (1-infradeploypipeline.yml).
The Codepipeline to deploy the infrastructure consist of multiple stages.
About the Template
Below are the high level components which are deployed as part of this template:- Repo for the Cloudformation template which defines the actual infrastructure

- IAM role to provide access to Codepipeline to perform needed actions

- S3 Bucket to store artifacts from the pipeline

- The Codepipeline that will handle deploying the infrastructure resources.
Checkout Stage

Deploy Stage where it creates the Cloudformation stack with all the Infrastructure
Now that we know what we are deploy, lets deploy this Cloudformation template to create the stack for the Infrastructure pipeline.
Create the Stack
Before starting the deployment, since we will be dealing with multiple Codecommit repos here, lets generate the GIT credentials for the user which we will use to perform all deployments. Navigate to IAM and open up the user which was created as pre-requisite for the deployment. On the Security and Credentials tab, click on Generate credentials as shown below. This will generate the GIT credentials which you can go ahead and store for later use.

Now lets deploy the stack to create the pipeline.
-
Configure AWS CLI to use proper profile and access keys to perform the deployment. Run the below command on a console to configure the CLI:
aws configure --profile <profile_name>Follow on screen instructions to complete the config.

-
Once done, navigate to the folder where the CF template is stored for the pipeline. If you have cloned my Github repo, it will in the ‘frontendinfrarepo’ folder. Once in the folder, run below command to start creation of the stack.
aws cloudformation create-stack --stack-name FrontEndInfraPipelines --template-body file://infradeploypipeline.yml --capabilities CAPABILITY_IAM CAPABILITY_NAMED_IAM --profile <profile_name>This will trigger the creation and the status can be tracked on the console:

Once the creation shows Complete, it can be verified from the console if each component has been created:

At this point the pipeline will show failed because we dont have the source files yet to deploy the actual infrastructure. Now we have the Release pipeline in place to handle the infrastructure changes and deployments.
-
Deploy Infrastructure
Now that we have the pipeline built to deploy the Front end infrastructure, we need to build the actual infrastructure. The whole infrastructure is define on another Cloudformation template which creates another CF stack for the front end components. The template can be found on my Github repo for reference. Let me go through the important sections on the template which define the main components of the infrastructure. The pipeline can be understood by the below flow:

About the Template Below are some of the main components whihc build up the front end infrastructure:
- S3 bucket which stores the front end static files. The Static web hosting option is enabled for this bucket so the files can be served as website from this S3 bucket. Accordingly the permissions have been tweaked too.

- Cloudfront distribution to serve the front end static files from the S3 bucket. The S3 bucket is pointed as a source for this distribution. This will be the CDN to serve the website.

- The Codecommit repo to store the app source files.

- Code build project which will build the static files from the React source app. It reads the source files from the Codecommit repo defined above. Roles are also defined to provide proper permissions to the Codebuild project.

- Finally, the Codepileine which is the release pipeline to handle the deployment of the Front end application. I will get into details for this pipeline in next section
Deploy the Infrastructure
Now we have the template to deploy the infrastructure. We need to commit the template to the infra repo so the Infrastructure pipeline runs and deploys the infrastructure. Lets go through the steps:- Navigate to the folder where the Infra CF template is stored. In my repo its in ‘frontendinfrarepo’ folder. The file name is deployinfra.yml.
-
Since we need to commit this to the Infra codecommit repo which we created earlier lets point the Git origin to the Codecommit repo remote. Run the below commands to commit the Infra files to the repo.
git init
git remote add origin <Infra codecommit repo URL>
git add .
git commit -m "updated template files"
git push -u origin main
Once done, the Pipeline should start running at should create the Cloudformation stack for the Infrastructure components.

Wait for the pipeline to complete. Once it completes, all the infrastructure components should be in place and a new Cloudformation stack would have been created.

That completes the infrastructure deployment. We now have the infrastructure in place to deploy the front end application. Next let us deploy the application.
- S3 bucket which stores the front end static files. The Static web hosting option is enabled for this bucket so the files can be served as website from this S3 bucket. Accordingly the permissions have been tweaked too.
- Deploy App
The app is deployed by the Codepipeline created as part of the infrastructure. The Pipeline was defined on the CLoudformation template. Let me go through the pipeline details.


Below are the high level steps defined in the template for the pipeline:
1. Source Stage
In this stage the code is checked out from the Codecommit repo. This is the first step to start the build process.

2. Build Stage
In this stage the React source files is built and it produces the static files for the final front end web app. In this stage a Codebuild project is ran which runs the build command to build the React project and produce the static files. The files are copied to a temporary artifact S3 bucket for the next stage. Below shows the buildspec file which is included in the frontend app and this defines the Codebuild project steps:

3. Deploy Stage
This is the final stage where the static web files built on the earlier step, are copied to the S3 bucket that was created for the Frontend website. This Codepipeline stage uses S3 provider for the deployment to copy the files from the temporary S3 bucket to the final website S3 bucket.

Now lets deploy the app to the S3 bucket. The app will be deployed from the Code commit repo which was created on above step. Point the app source folder to the Codecommit repo as origin. In my Github repo the app code is in the ‘frontend_app’. Run below command to point this to the Codecommit repo and push the code.
  git init
  git remote add origin <App codecommit repo URL>
  git add .
  git commit -m "adding app files"
  git push -u origin main
Once the code is pushed, the release pipeline will start running and the deployment will start.

Once the deployment completes, navigate to the Cloudfront distribution which was launched as part of the Infra deployment. Open the Cloudfront domain name on a browser and it should open up the front end app.

The basic front end app should open up now. At this point it wont work since the backend is not defined yet.

With this we have completed deploying the frontend and its related infrastructure. The pipelines will handle automating the deployments:
- Infra pipeline: Any time there is any change to the infrastructure, the changes are pushed to the Codecommit repo which triggers the Codepipeline. The pipeline releases the changes to the infrastructure
- App Deploy pipeline: Any time there is change to the app, the changes are pushed to the Codecommit repo. This triggers the Codepipeline and deployes th changes.
We have the front end deployed now. Lets move on to deploying the backend and connect the two.
Deploy Back End
In this section we will be deploying the backend Flask API and the data processing jobs. The API and the jobs will be deployed to an EKS cluster. The deployment will follow the below steps:
- Deploy the Pipeline to manage the infrastructure
- Deploy and spin up the infrastructure components
- Deploy the backend API and Jobs
All of the deployments are done via Cloudformation templates. Let me go through each of the components.
-
Deploy the Infra Pipeline
As a first step, we will deploy the pipeline that will manage all the infrastructure components. Any updates, the pipeline will manage deploying the same.
Let me go through some details about few of the components on the pipeline. The pipeline is defined in a Cloudformation template which creates a stack for the pipeline.About the Template
Below components are part of the pipeline stack and get deployed to spin up the Codepipeline for Infrastructure deployment.- Codecommit repo for the Infrastructure templates: This defines the Git repo which will store the Cloudformation templates for the whole backend infrastructure. Any changes are pushed to this repo which triggers the pipeline.

- IAM Roles: Multiple IAM roles are created for Codepipeline and Cloudformation to provide permission for spinning up resources. I wont go into details but the sections can be found on the template (deployinfrapipeline.yml).
- Codepipeline to manage the Infra deployment: This defines the main Codepipeline which contains multiple stages to handle the infrastructure. I will go through the pipeline details in next section.
Deploy the Pipeline
Lets move to deploying the pipeline that will handle the infrastructure. The infrastructure consist of three main stages. Each stage deploys different parts of the backend infrastructure. Let me go through each stage:- Source Stage: In this stage the Cloudformation templates for the infrastructure are checked out from the Codecommit repo
- Deploy Supporting Infra: In this stage the supporting components of the infrastructure are deployed. ALl of the components are defined in the Cloudformation template. The components which get deployed are shown in the overall image above.

- Deploy the EKS CLuster: In this stage, it deployed the EKS cluster on which all the Kubernetes components for the backend will be deployed. The cluster is defined as a Cloudformation stack in a template. The template also defines the nodes which will be connected to the EKS Control plane and run the pods.

Now lets deploy the Cloudformation stack to create the Pipeline and related resources. Navigate to the folder where the pipeline CF template is stored. In my Github repo it is in the infracftemplates folder (deployinfrapipeline.yml). Follow the below steps to deploy the Pipeline stack:
- We are creating a separate user to handle the backend deployments. Follow the steps from above to create a new IAM user with necessary permissions and note down the ARN of the user.

- We need this user to be able to assume a role to perform the Kubernetes tasks. Update this user as principal in the Codepipeline trust role in the CF template file(deployinfrapipeline.yml)

-
Once done, run the below command in the same folder as the CF template to deploy the CF stack for pipeline:
aws cloudformation create-stack --stack-name BackEndInfraPipelines --template-body file://deployinfrapipeline.yml --capabilities CAPABILITY_IAM CAPABILITY_NAMED_IAM --profile <profile_name>This should start creation of the stack. Once done, the related resources can be verified on console. At this point the pipeline will be failing since there is no source file for Infra stack.

- Codecommit repo for the Infrastructure templates: This defines the Git repo which will store the Cloudformation templates for the whole backend infrastructure. Any changes are pushed to this repo which triggers the pipeline.


Now that we have deployed the pipeline lets move on to deploy the infrastructure via the pipeline.
-
Deploy the Infrastructure
As part of the backend Infrsatructure there will be multiple resources deployed. Let me go through some of the important ones below. This image should provide an overview of the infra deploy pipeline.

About the Template
The infrastructure is define as a Cloudformation stack. The template defining the stack is part of my repo (deployinra.yml). Below are some of the important parts defined in the template:- Code Repos: Multiple Codecommit repos are defined to hold the source for Main API code, Weekly Job code and Nightly job codes.

- Code Build Projects: Multiple Code build projects are specified. The projects perform below for each of the Backend API components:
- Build a Docker Image from the code
- Push the Docker Image to the private Gitlab repository
Here is an example of a buildspec file

Each component folder has its own buildspec file. - EKS Code Build Project: To deploy the Kubernetes components, multiple Codebuild projects are specified. These Codebuild projects:
- Installs kubectl as a dependency
- Logs in to the EKS cluster
- Use kubectl command to deploy the Kubernetes components from the file

- The deployment pipeline: Finally there are three different pipeline defined to deploy the main API and the two scheduled jobs. I will go to the details for the pipelines in coming sections.
- EKS CLuster: There is also another template which defines the EKS cluster to be deployed. This defines all the details for the Kubernetes cluster and the Nodes which are launched and attached to the Control plane.
Deploy Infra
Now lets deploy the infrastructure which was defined above. To deploy, we will need to run the Infra pipeline which we created earlier. Before that lets push the infrastructure cloudformation template to the Codecommit repo which is the source for the pipeline. Get the URL for the repo which was created as part of the pipeline stack. Run below commands to push the Infra CF template:git init git add . git commit -m "added template" git remote add origin <repo_url> git push -u origin mainOnce pushed the Infra pipeline should start running and deploying the infrastructure.

Once it completes below can be verified from the console:- All Code repos
- EKS Cluster
- Nodes to the cluster
- All release pipelines
- Code Repos: Multiple Codecommit repos are defined to hold the source for Main API code, Weekly Job code and Nightly job codes.


Lets recap what we have till now:
- Deployed the Infrastructure pipeline
- Ran the pipeline to deploy the infrastructure
-
As part of infrastructure we have ready:
- Code repos
- Release pipelines
- EKS cluster and nodes joined
So we have the whole supporting infrastructure ready. Now we can start deploying the backend components. There are three main components which we have to deploy via three pipelines:
- The Weekly Batch job for data processing
- The nightly batch job for data processing
- The Main Backend Flask API

Lets go through deploying each.
-
Deploy the Scheduled Jobs
I wont go through details for each of the jobs since both will follow a similar deployment pattern. Below shows the overall release pipeline which will deploy each of the Scheduled jobs to the EKS cluster.

The respective Kubernetes deployment YAMLs can be found in each of the job code folders. In my repo there are two folders which contain all necessary files for each of the Schdeuled jobs:- nightly_job
- weekly_job
The jobs get deployed through Codebuild stages within the release Codepipeline. Let me go through an overview of the Codepipeline template.
About the Template
The pipeline for each of the Job consist of multiple stages which are defined in the Cloudformation template:- Source Stage: First stage is where the code is checked out and made ready for the subsequent stages
- Build Stage: In this stage a Codebuild project runs which builds the Docker image from the code and pushes to the private Gitlab registry

- Deploy Stage: This is also a Codebuild stage where the Codebuild stage runs the kubectl commands and deploy the Kubernetes components from the YAML file in the codebase.

Deploy the Jobs
Now that we have the sources defined for the jobs, lets deploy each of the jobs. The overall steps remain same for both of the jobs and the difference is on the Kubernetes YAML files in each of the sources. Follow below steps to deploy the Kubernetes components for the Jobs to the EKS cluster:- Since the jobs pull data files from an S3 bucket we need to configure the Access keys within the Kubernetes Job spec. Update the access keys which was copied from the user which we created earlier:

- Push the source codes to each of the respective repo . Run below commands within each of the Job source folders:
git init git add . git commit -m "added codes" git remote add origin <repo_url> git push -u origin main- We wont run the pipeline yet. First we need the data files to be available on the S3 bucket before the job runs. Copy the initial data file from the code folder to the respective S3 bucket which was created as part of infrastructure
aws s3 cp <data_file> s3://<s3_bucket> --profile <profile_name>- Once the files are uploaded, lets run the pipeline to deploy the Job and deploy the Kubernetes components to the EKS cluster.

- It will take some time for the deployment to complete. Once complete we can verify the jobs by logging into the cluster.
- Configure your local kubectl to connect to the EKS cluster and get authenticated. Run the below command to verify that the jobs have been deployed:
kubectl get cj


That completes the deployment for the scheduled jobs. Same steps can be followed for each of the jobs. Once the pipeline runs once, subsequent changes can be pushed to the repo which triggers the pipeline to release the changes.
-
Deploy the Backend API
Next we will deploy the main Flask API which will be responding to the requests from frontend. The backend deployment is also defined in the Kubernetes YAML file which we will deploy to the EKS cluster. In my repo, the api code is on folder named ‘app_api’. The deployment is handled by the Codepipeline which was deployed earlier. Below is a high level flow of the pipeline

The pipeline is defined as Cloudformation stack which we deployed earlier. Let me go through some important components of the Pipeline in the Cloudformation template.About the Template
Below are some of the main components which is part of the CF template that deploys the release pipeline:- Source Stage: In this stage the code is checked out from the repo for subsequent stages
- Build Stage: In this stage the Docker image is built from the source code and pushed to the private Gitlab repo. This is handled by a Codebuild project

- Deploy Stage: In this stage the Kubernetes components are deployed to the EKS cluster. This is handled by one more Codebuild project which is configured by a separate buildspec file in the source code folder (kubebuildspec.yml)

Deploy the Backend Now we have the template defined. So lets deploy the backend API to complete the Backend deployment. If you are following my repo, the source folder is ‘app_api’. Navigate to the the folder and run the below commands to push the code to the Codecommit repo which was created earlier.
git init
git add .
git commit -m "added codes"
git remote add origin <repo_url>
git push -u origin main
Once this is pushed, the pipeline should start running and deploying the API to the EKS cluster.

Once the pipeline finishes, the deployment can be verified by running kubectl command locally. Since the kubect was already set previously, run the below command to verify the API deployment:kubectl get deploy


That finishes the deploymemnt for the backend. The API endpoint can be built as below:
https://<load_balancer_url> This needs to be updated on the frontend so frontend gets connected to the API backend. Update the endpoint on the .env file for the frontend app. Once updated, push the changes to the Codecommit repo and it should run the pipeline to deploy the changes to frontend.

Finally this completes the whole deployment. The app can now be accessed by navigating to the Cloudfront endpoint and it will return search results accordingly:


Improvements
This is an approach I took to develop and deploy this ML algorithm and front end. There are multiple improvements which can be done on this architecture to have more efficiency in the app. Some examples which I am working for improvements are:
- Expose the backend API via an API Gateway
- Add a standby EKS cluster to handle any downtimes
- More efficient handling of the data files in the Jobs
Conclusion
Finally, this long post has come to an end. I agree this post had become a bit complicated. The deployment for the ML model and the front end consist of so many components which increased the complexity of the architecture. But these are necessary to have a scalable and tolerant system architecture. Hope I was able to explain my whole architecture and was able to provide some learning to readers. Any questions, feel free to reach me from the Contact page. I will be happy to answer questions and help out.