Effectively analyze chat sentiment by Amazon Lex and OpenAI-GPT-3 API: Deploy using Terraform and Github Actions
ChatGPT is the most hot topic now in the tech community. Its growth in popularity in a short time has solidified its position among other similar solutions. I decided to have a go at learning the workings of the underlying API (not the exact ChatGPT API but the previous version of it). What best way to lean than use it in an usable use case.
The simplest use case I could think of using the AI to analyze the sentiment of a text. In this post I am using GPT-3 API to analyze the sentiment of a sentence. For an usable use case, the sentence is a chat typed on Amazon Lex, which can be a customer typing a feedback to an agent on the other side. Based on what the customer is typing on the chat via Lex, the GPT-3 API analyzes the sentiment and Lex responds according to the sentiment of the chat text. I am training a custom model using some sample data to tune the analysis based on my use case.
The GitHub repo for this post can be found Here.
A demo video of the bot at work can be found Here.
Pre Requisites
Before I start the walkthrough, there are some some pre-requisites which are good to have if you want to follow along or want to try this on your own:
- Basic Terraform, AWS, Github actions knowledge
- Github account and able to setup Github actions
- An AWS account.
- Terraform installed
- Basic Python knowledge
With that out of the way, lets dive into the solution.
What is GPT-3 and What is ChatGPT
First, what exactly is GPT and this thing called ChaGPT? This is a snippet from Wikipedia about GPT-3:
Generative Pre-trained Transformer 3 (GPT-3) is an autoregressive language model released in 2020 that uses deep learning to produce human-like text. Given an initial text as prompt, it will produce text that continues the prompt.In simple terms, its a program, which can produce human like responses if asked a question. It was created by OpenAI
So what is ChatGPT? This is a chatbot which was recently released by OpenAI. This Chatbot is a more advanced version of the AI. This chatbot interacts in a conversational way and can nearly answer any questions in a human like manner. If you have not tried ChatGPT I will suggest go ahead and try it out now Here!!
In this post I am not using ChatGPT but rather using the GPT-3 API to train a model for sentiment analysis. Lets see whats happening in this process.
Functional Details
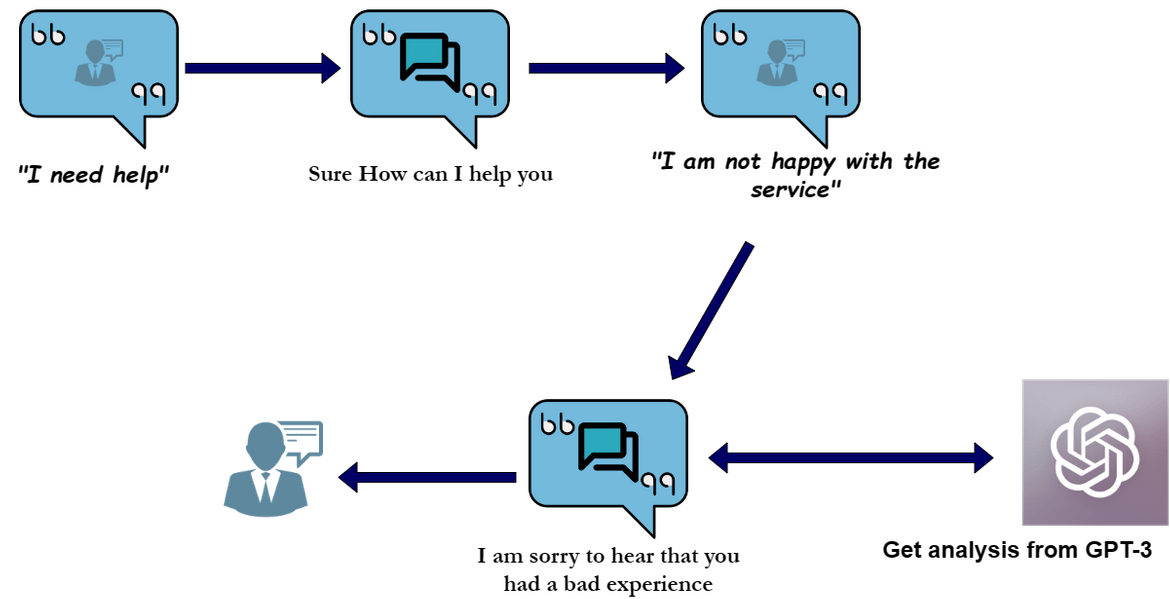
Lets first go through what will be happening in this process. Below image will describe the whole process flow.
- The process starts with an user (lets say a customer) sending a chat to the Chat bot asking for help
- The Bot will respond with a question to which the user can provide some kind of feedback about a service
- The Bot will read the input and send it to GPT-3 model for analysis
- The GPT-3 model will analyze and respond with the analysis output
- The bot will respond a reply to the customer based on the sentiment output from the GPT-3 model
For this post this is a very simple flow to demonstrate the capability. In real business scenarios his flow can be extended to complicated business flows.
That should explain the overall functional flow for this solution. Now lets move on to the technical part of it.
Tech Architecture and Details
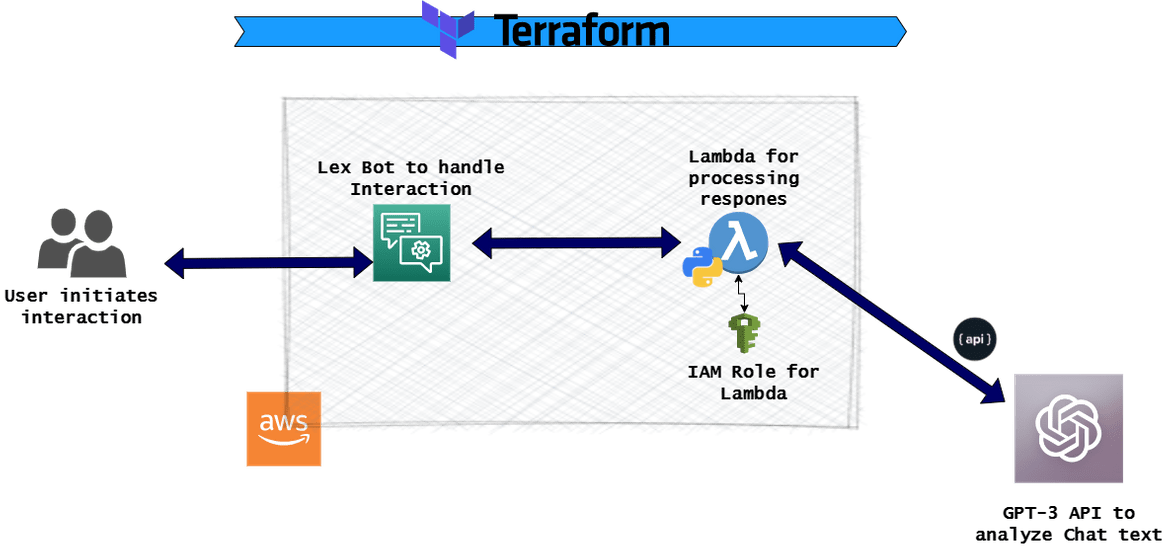
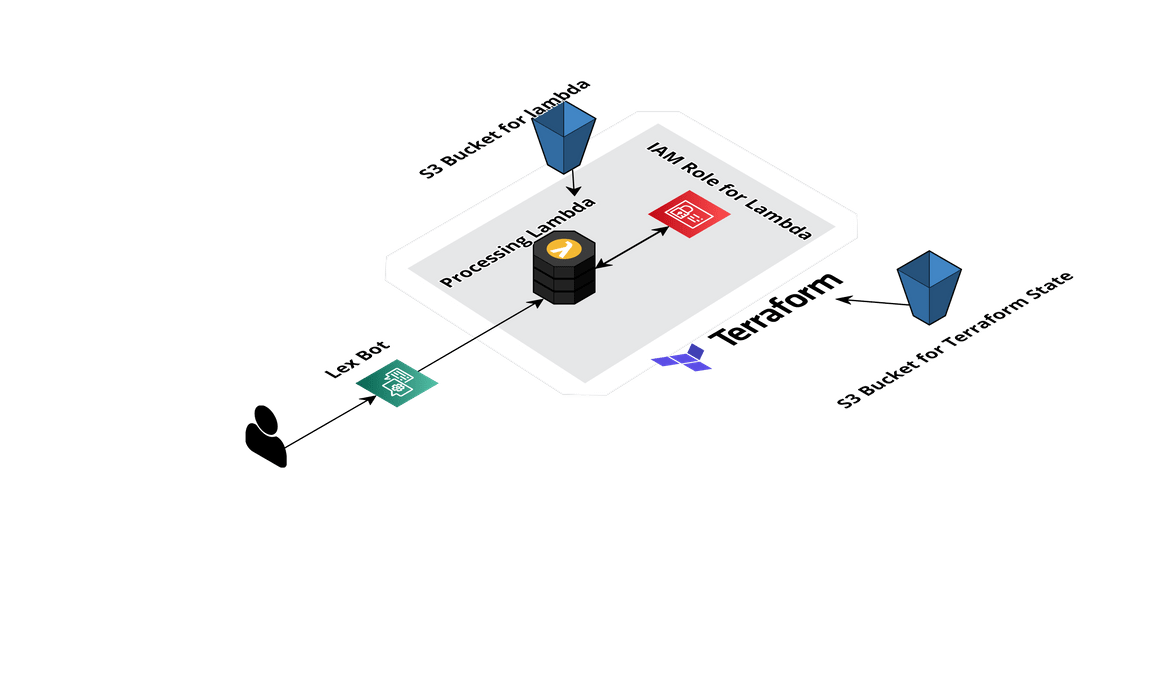
Lets go through the technical components involved in the whole solution. Below image will show all of the components which are involved in this.
Lets understand how each of the above are working. The flow starts with the user/customer initiating a chat asking for help. The chat is handled on an Amazon Lex Bot which handles the whole interaction.
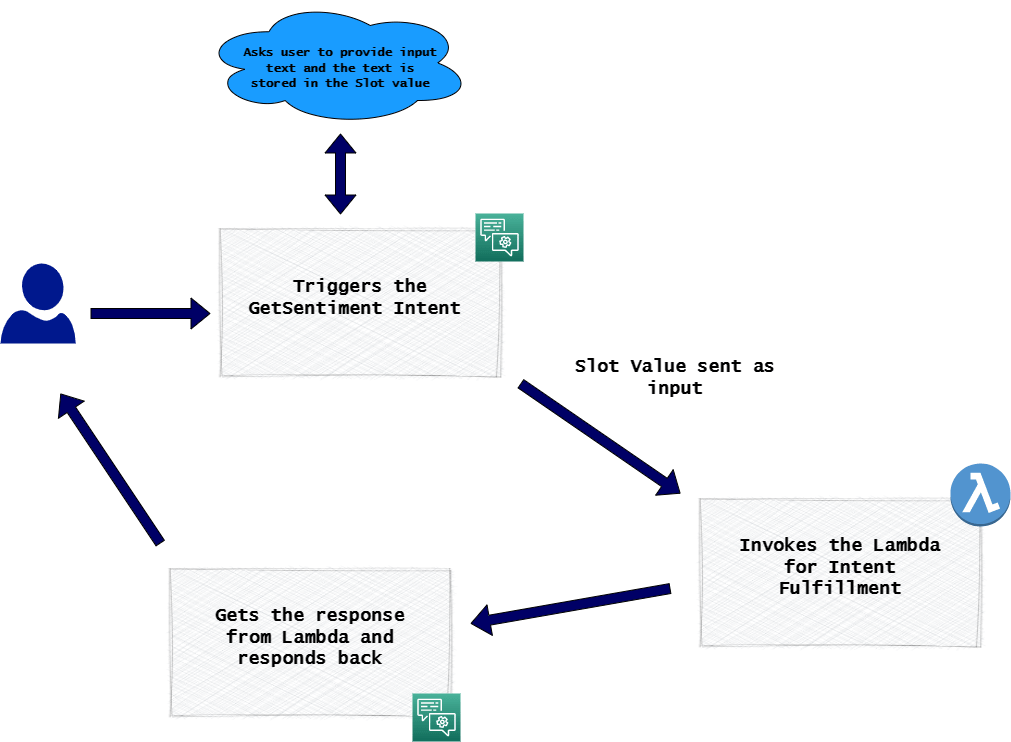
- Amazon Lex Bot: The Lex bot is configured to handle all the interactions. There are intents configured which triggers based on the typed chat. Below is a high level flow which gets handled within the bot during the conversation.
These are the two intents which are configured:
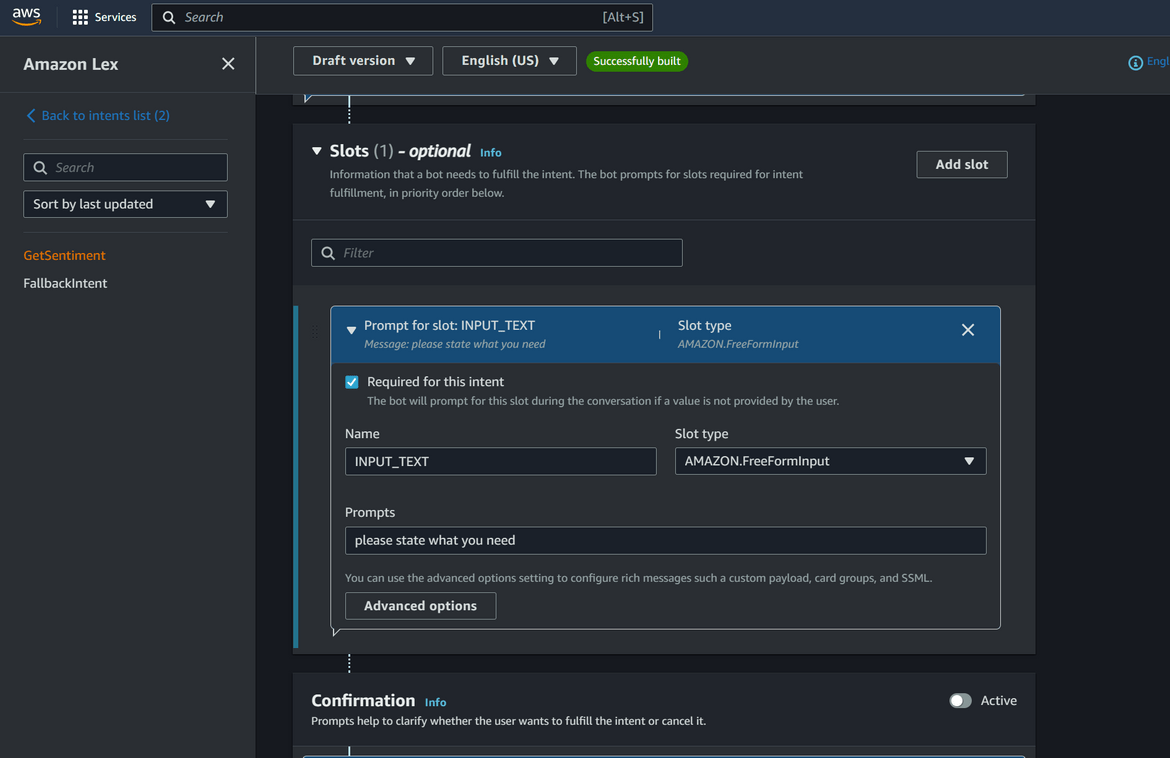
- GetSentiment: This intent is triggered when user asks for help. The utterances are provided to trigger this intent.
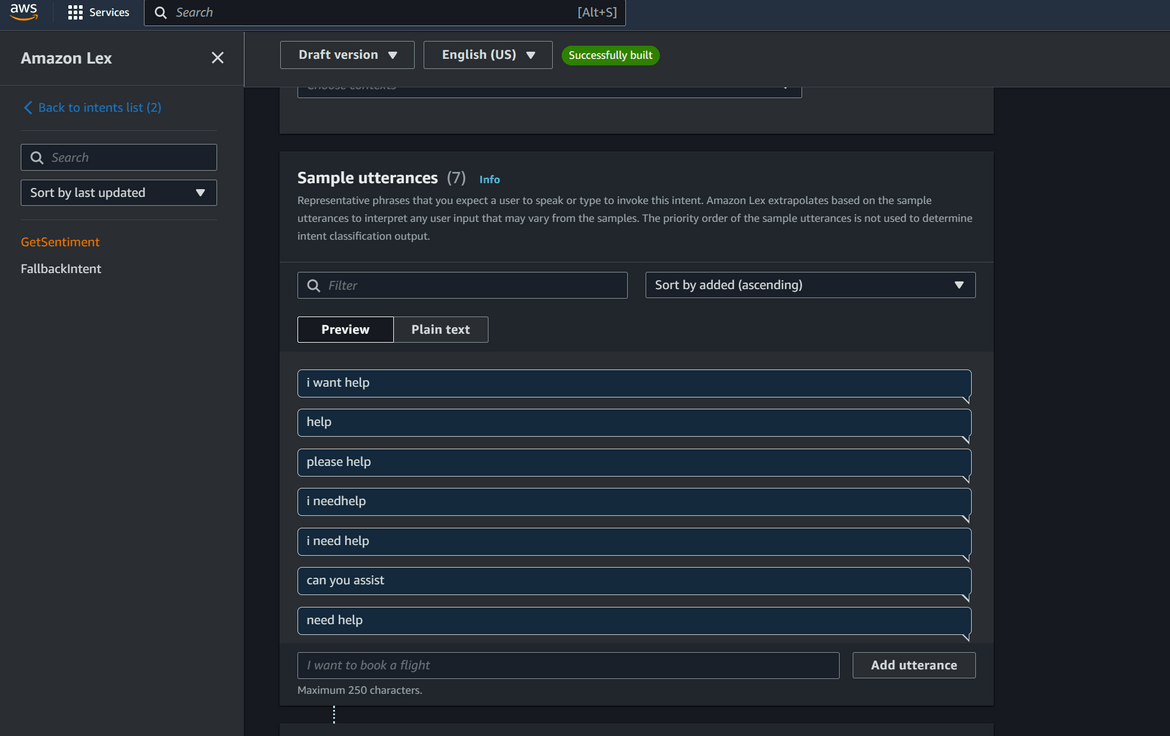
Once the intent is triggered, a slot is configured in the intent which asks the user to type their need. Then the bot invokes a Lambda function to fulfill the intent. The slot value entered by the user is sent as input to the Lambda function. Output of the Lambda function is received back and the Bot shows the response which is received from the Lambda.
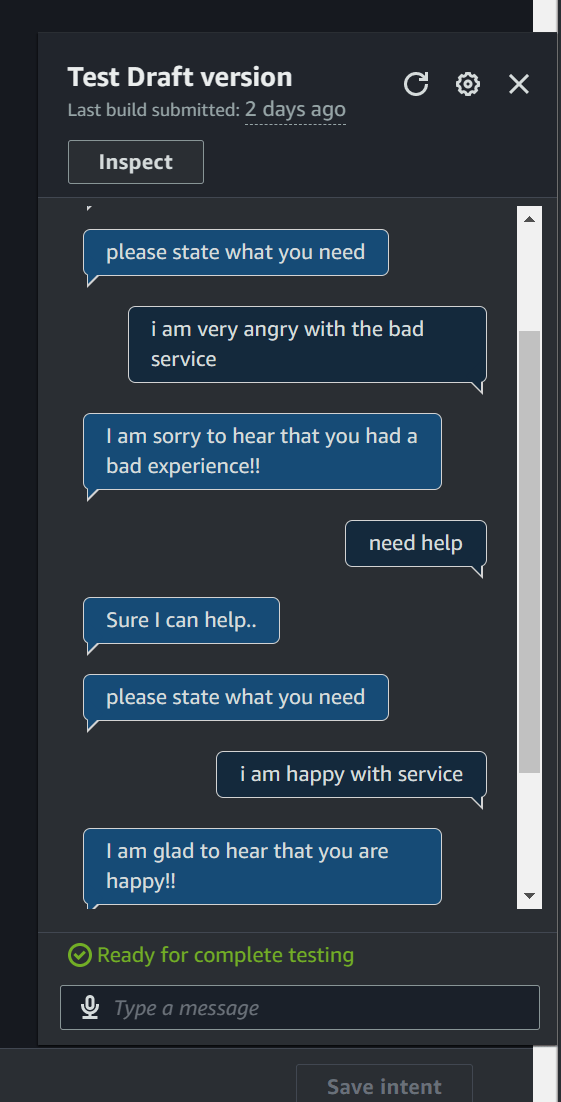
- FallbackIntent: This is a default intent which is added to the bot like a catch all for scenarios where none of the intents match the utterances. This provides a default response to the user.
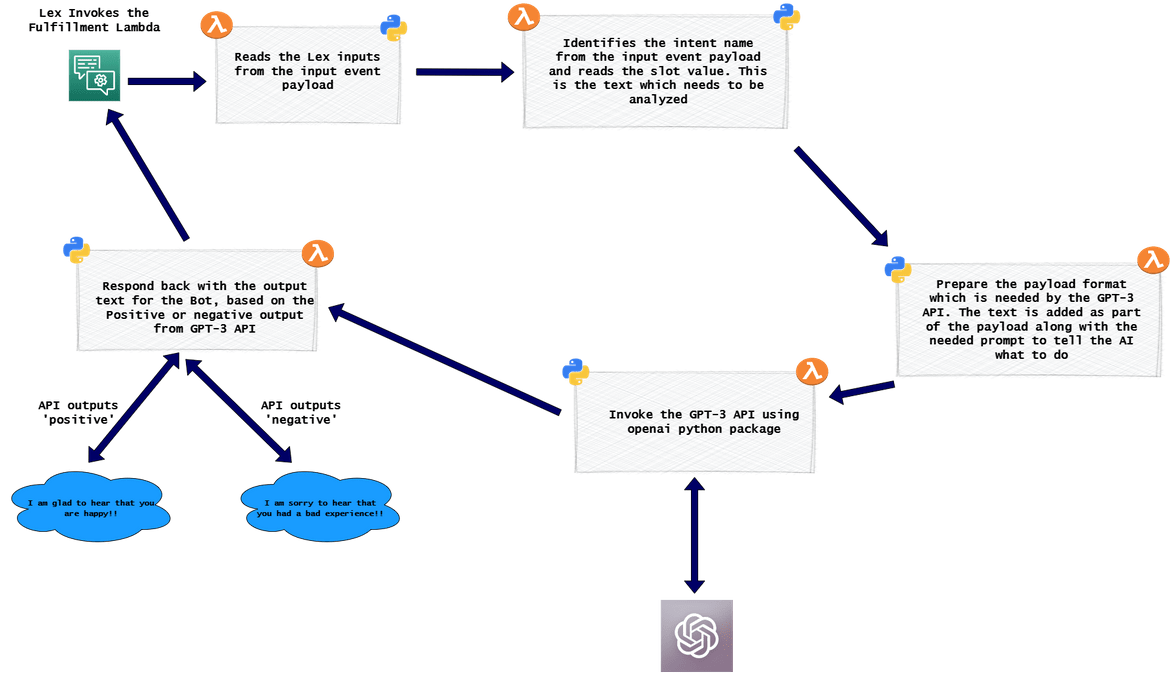
- Lambda for processing responses: To fulfill the intent triggered on the Lex bot, this Lambda is invoked. This Lambda is responsible for processing and responding with the analysis output. Below flow shows what the Lambda performs after it is invoked.
IAM role is attached to the Lambda to provide necessary permissions to the lambda. The API key details, which are needed to invoke the GPT-3 API, is passed as environment variable to the Lambda.
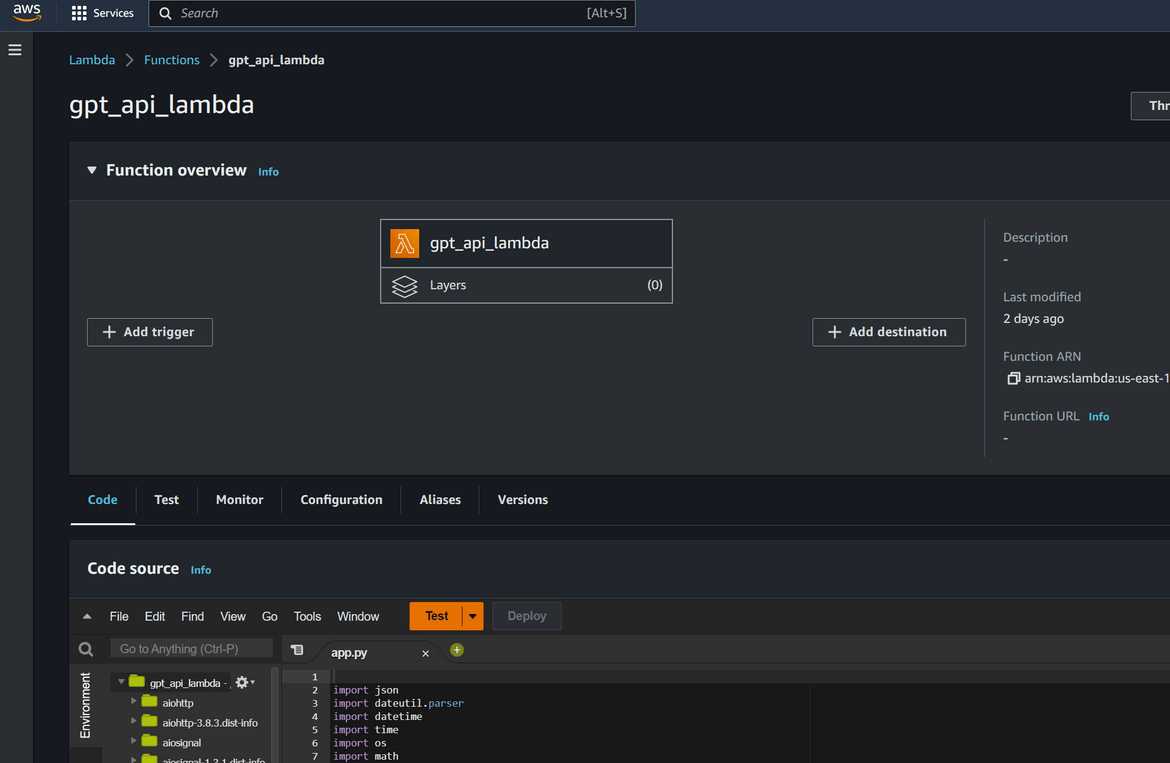
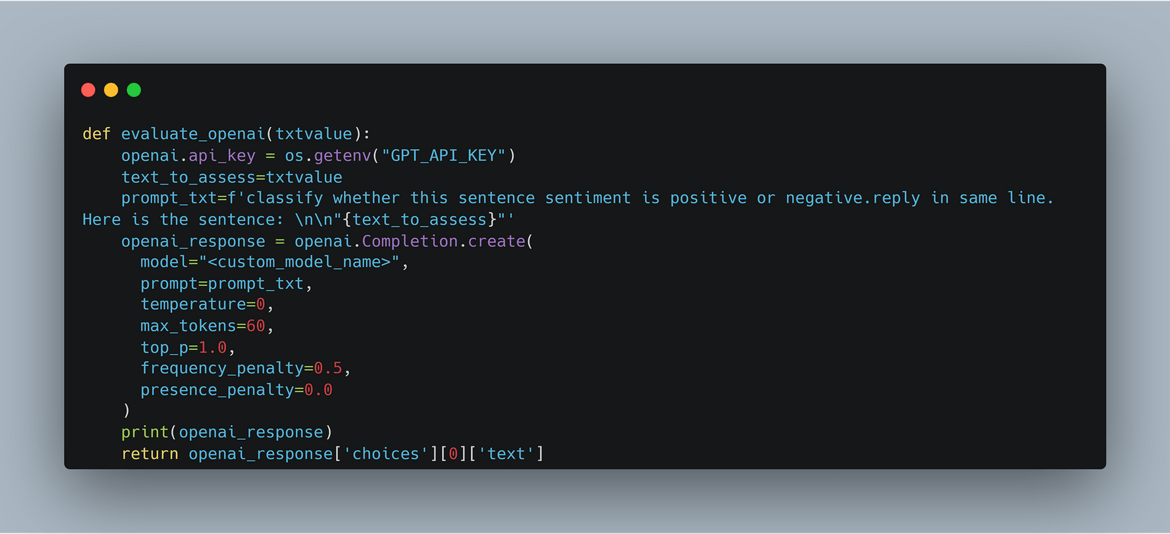
For the API to properly analyze the text, a prompt has to be sent as part of the APi payload. Here I am using a prompt to tell the API what to do along with the input text.
prompt_txt=f'classify whether this sentence sentiment is positive or negative.reply in same line. Here is the sentence: \n\n"{text_to_assess}"'Here is the snippet of the Lambda which is calling the GPT-3 API
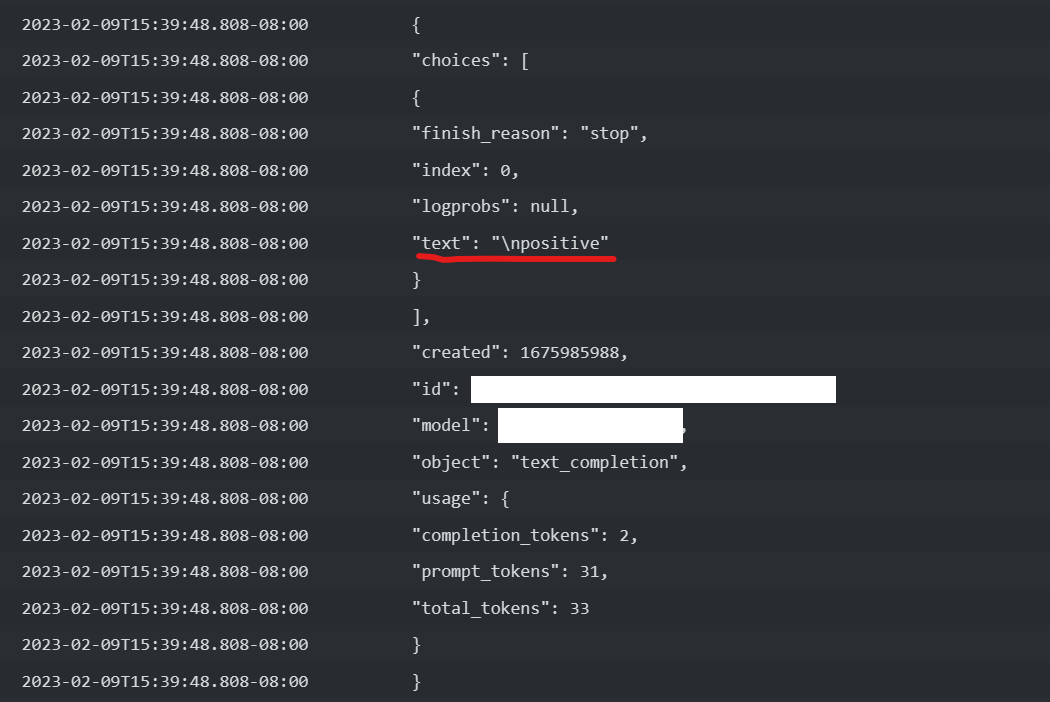
- GPT-3 API for actual Sentiment Analysis: This is not something we are actually deploying. I am using the API provided by OpenAI. Anyone can register to get API keys for some basic usage of the API. I registered for API key to use the API from Here. In my use case, I am training a custom model using OpenAI’s model as a base model. This is to customize the sentiment analysis based on my use case. This is a very useful capability which can let you train the model for specific use cases and not just use their default model. Based on the input text, the API responds with the sentiment of the text which gets parsed by the Lambda. Output of the API specifies either ‘positive’ or ‘negative’ based on the sentiment of the sentence.
That covers all of the components needed to achieve this. Now time to deploy the stack.
Deploy the Setup
The whole tech stack for this solution is deployed on AWS. Here I will cover a way to deploy the same. You can follow your own way of deploying as comfortable. I am using Terraform and Github actions to deploy each component. Below shows the AWS components which are deployed.
These are the components which are deployed using Github Actions and Terraform:
- Processing Lambda
- IAM Role for Lambda
I am deploying the Lex Bot manually. I have included my bot export in the repo which can be imported to create the bot.
Folder Structure
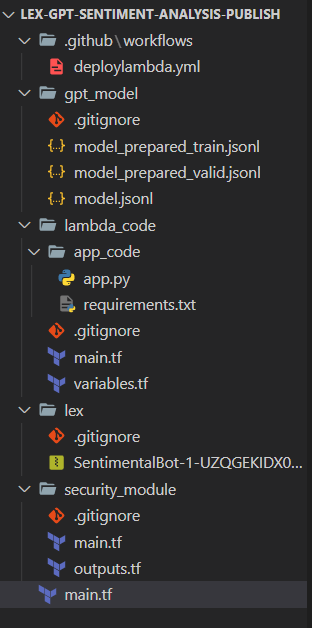
Let me explain my repo folder structure if you are following using my repo.
- .github: This folder contains the workflow file for Github actions. Github triggers the actions workflow based on this
- gpt_model: This holds a sample of the custom model data which I used to train the custom GPT-3 model
- lambda_code: This folder contains the Python code for the Lambda and the Terraform files to deploy the Lambda
- lex: This folder contains the export of the Lex bot which I configured. This can be imported to create the Bot
- security_module: This folder contains the Terraform files to deploy the IAM role and policies needed for the Lambda
- main.tf: This is the main Terraform file which deploys the above modules
You can clone the repo to spin up your setup using this.
GPT-3 Setup
Before we start the deployment, we will have to get access to the API and train a custom model. For getting access to the API, register for an account Here.Once account is created, login and create a new API key. Keep the API key safe as its specific to your account.
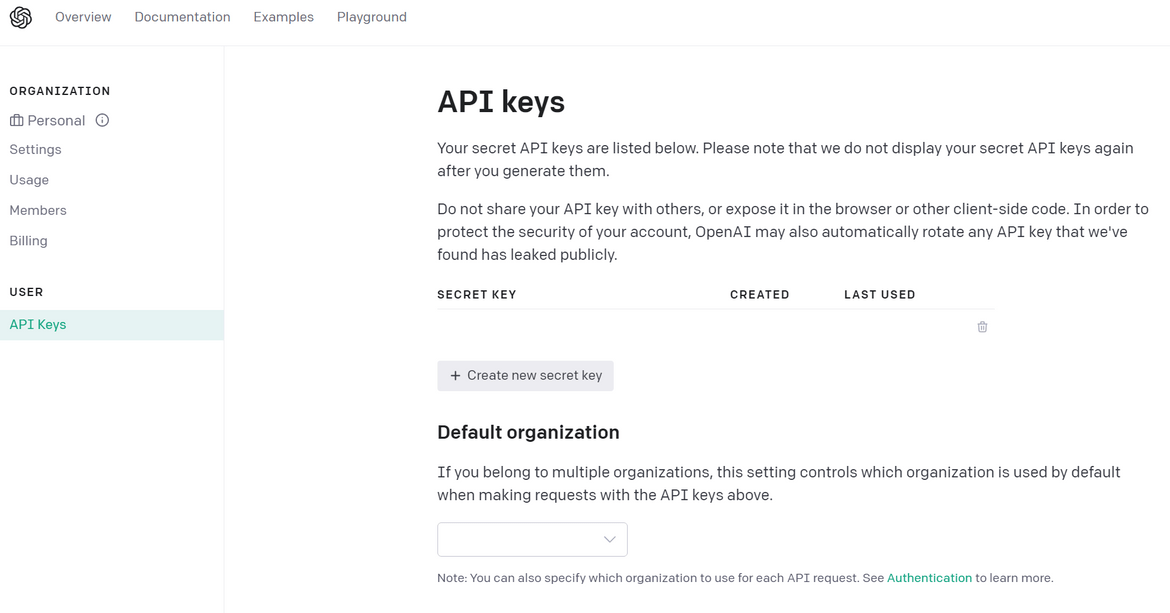
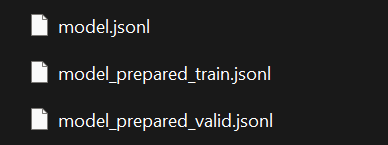
Once you have the key, note it down as we will need it later. This will also be passed as environment variable to the Lambda. So it can be copied to the Terraform variable for the Lambda. Now its time to train the custom model. I have included a sample training data file in my repo (model.jsonl), you can use that or come up with your own data based on use case. The data format will have to be JSONL format.
{"prompt":"I am so happy with your service!", "completion":" positive"}
{"prompt":"I am very disappointed with your service", "completion":" negative"}
{"prompt":"I am happy", "completion":" positive"}
You can add as many variations as you like to have more training data. For best results, its best to have around 1000 records at minimum. Once the file is prepared, follow these steps to train th GPT-3 model. Make sure you are in the same folder as the training data file when you run these commands. Also make sure Python is installed where these are executed.
-
Install OpenAI Package
pip install --upgrade openai -
The OpenAI API key which was created earlier, need to be set as environment variable so the CLI can connect to the API
export OPENAI_API_KEY="<API-KEY>"If you are using Windows, you can set environment variable from the Control Panel.
-
Next run the CLI tool to prepare the data for training. This validates the data file and splits the file into training and validation datasets.
openai tools fine_tunes.prepare_data -f <file_name> - Now we are ready to start the training of the custom model. When the last step completed, it would have shown the next command to run to start the training job. Copy that command and execute to create the training job on OpenAI servers.
openai api fine_tunes.create -t "model_prepared_train.jsonl" -v "model_prepared_valid.jsonl" --compute_classification_metrics --classification_positive_class " positive" -m "davinci"Here I am using davinci as the base model. You can use any of the other models (ada, babbage, curie, or davinci) as your base model. This command uploads the data file and creates a training Job. The command shows status of the job live until its interrupted. But interruption doesn’t cancel the job at server
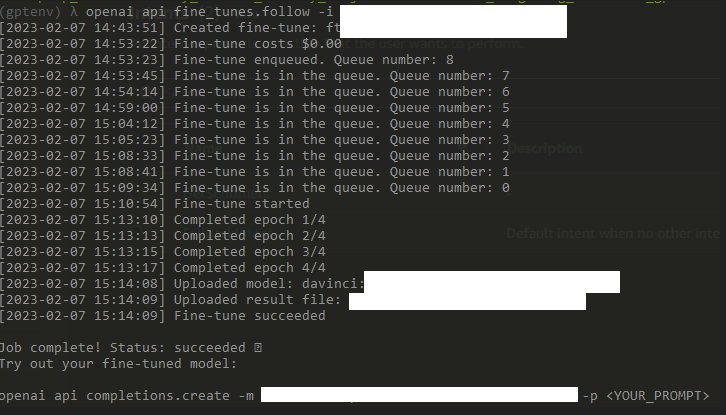
You can also keep track of the job and position in the queue by this command
openai api fine_tunes.follow -i <job_id>It will take sometime for the job to get scheduled and finish based on the load on servers. Th status will be shown on the CLI. Once complete it will also show an example command to try the model. You can go ahead try the model at this point.
The output will also show the name of the custom trained model. Note the name down. This name will be used in the Lambda (as explained above) during the GPT-3 API call. Replace the custom model ame in the Lambda code where OpenAI package is being called. Now you have a custom trained model which can used to analyze sentence sentiment based on your use case.
Github Actions Setup
Now lets setup the pipeline which will deploy the components. I am using Github actins to orchestrate the deployment and Terraform to handle creation of the components. These are the components which get deployed using Actions and Terraform:
- Processing Lambda
- IAM Role for Lambda
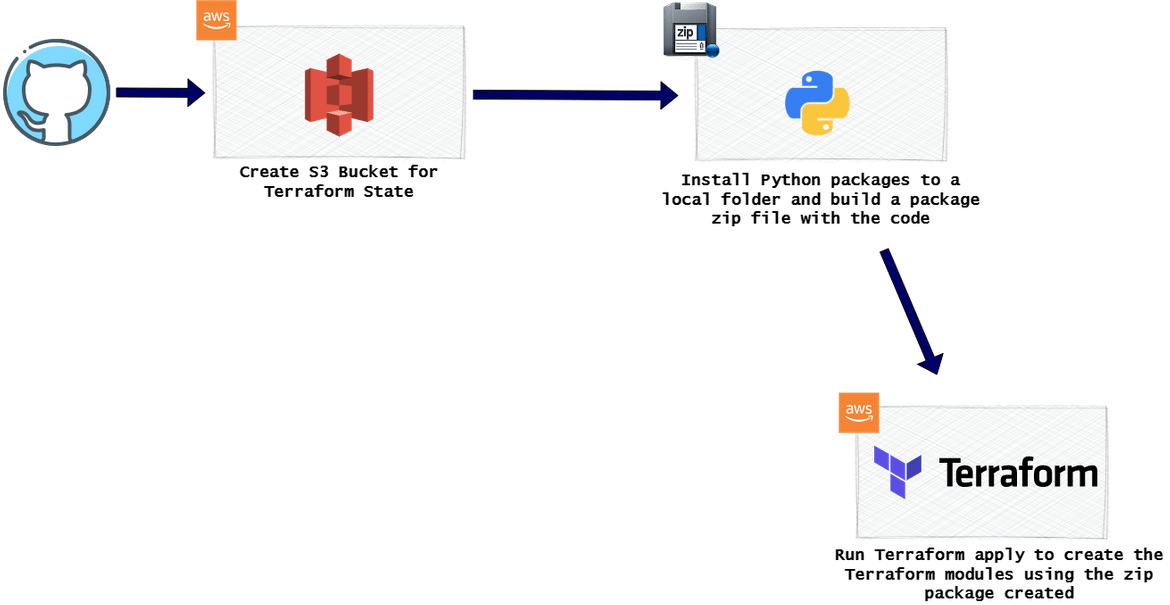
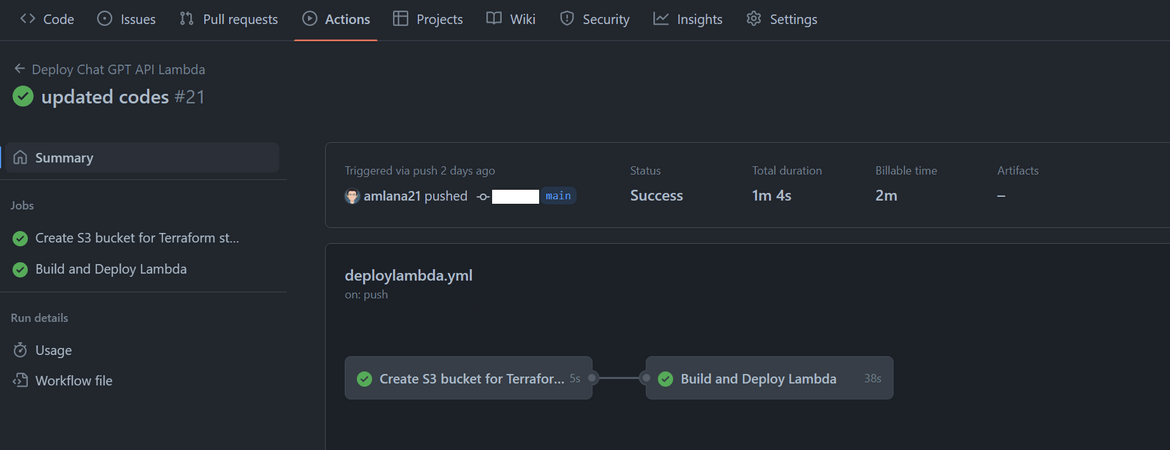
Below image will show overall flow of the deployment process in Github actions
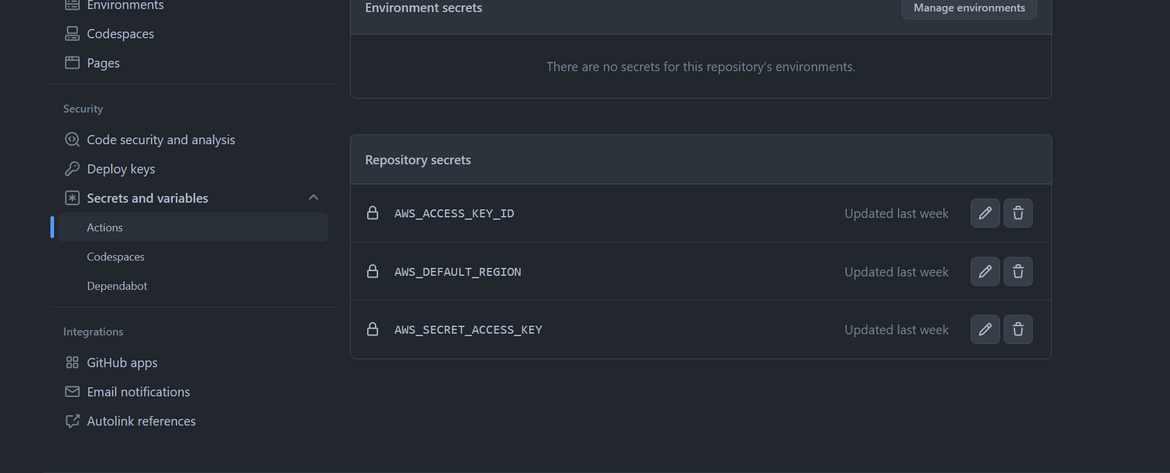
- First we are creating the S3 bucket that will be used to store the Terraform state. I am using AWS CLI to create the bucket. For AWS credentials there are 3 secrets added to the Github repository to store the access keys.
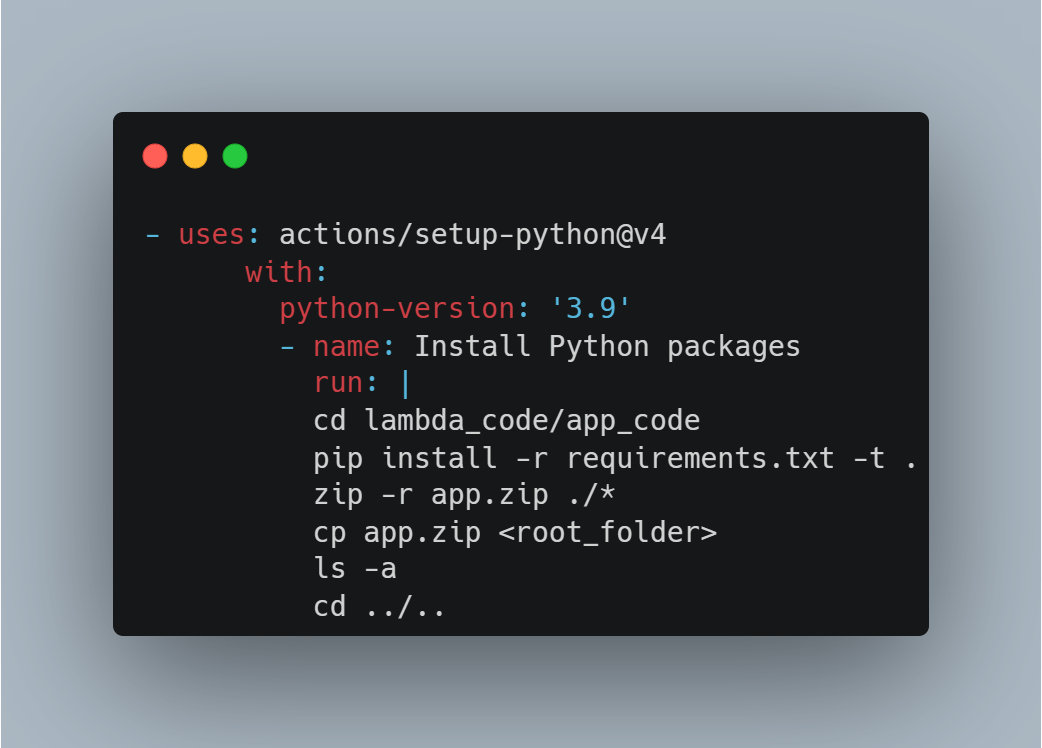
- Next we will need to create the Lambda package that will be deployed. As part of the package, all of the Python requirements need to be installed in the same folder as the code file. In this stage, I am installing the Python requirements in a local folder alongside the code file and the creating a zip file to be used by Terraform.
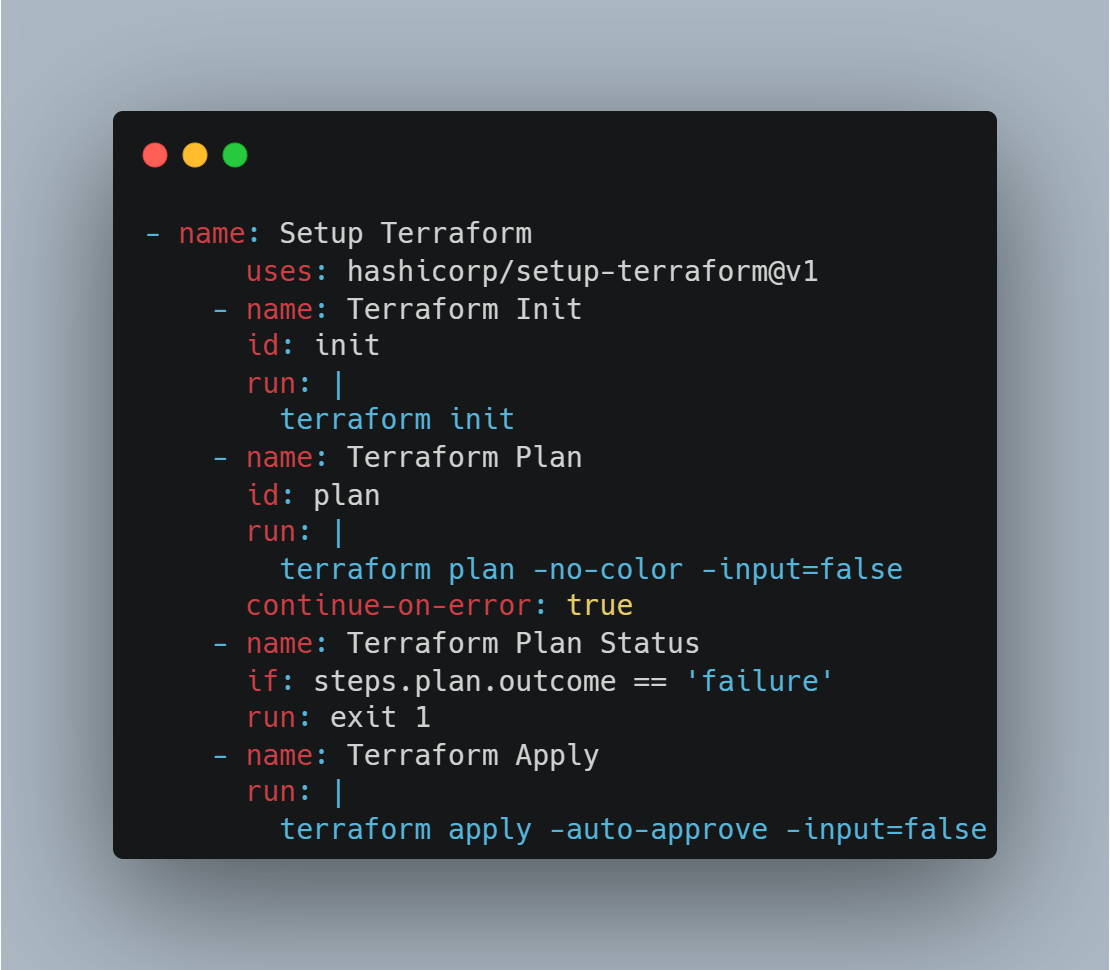
- Now we have the Python package ready to be deployed. In this stage we first setup the Terraform and the AWS credentials needed. Then I am running Terraform apply to start creating the modules. This will deploy the Zip file as Lambda to AWS and also create the necessary IAM role.
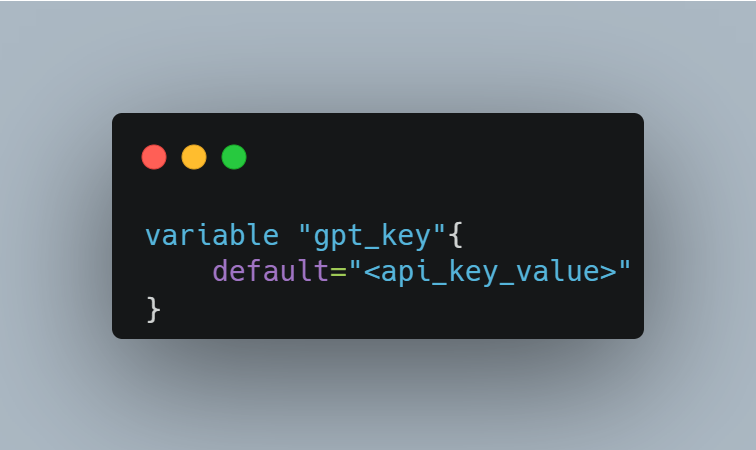
Make sure to update the environment variable on the Lambda with your GPT API key. Update the var file in the Python Terraform module with the needed key value.
The Actions workflow file is placed in .github—>workflows folder of the repo. The pipeline can be triggered by pushing a commit to Github. On pushing to Github, the pipeline will start running and perform the deployment.
The Lambda gets created on AWS which can be verified by logging in to AWS console and navigating to the Lambda function
Lex Bot Setup
Only component left to setup is the Amazon Lex bot. I have included my bot export in the repo which can be used to just import and be ready with the sample bot. Follow these steps to import and configure the Bot:
- Login to AWS console and navigate to Amazon Lex screen
- On the Lex screen, click on Actions and Import. This will bring up the import screen
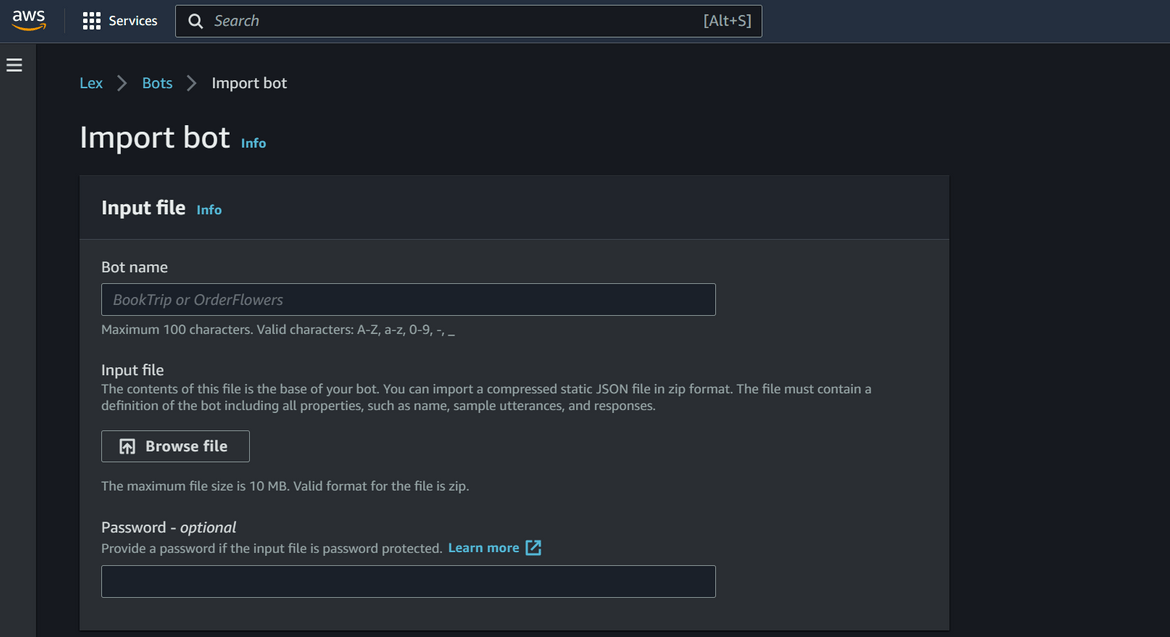
- On the import screen, browse and select the bot export file, as input file here

- For rest of the settings, select as needed or can be kept default
- On clicking Import it will start importing and create the bot

- Even though bot is imported, there is a manual step to associate the Lambda for fulfillment. Navigate to the bot detail. First make sure to build the bot once. Then click on Bot versions on show all of the versions for the Bot. Right now it will show only one version
- Click on Create Version button to create a new version. All options can be kept default. This will create a new version
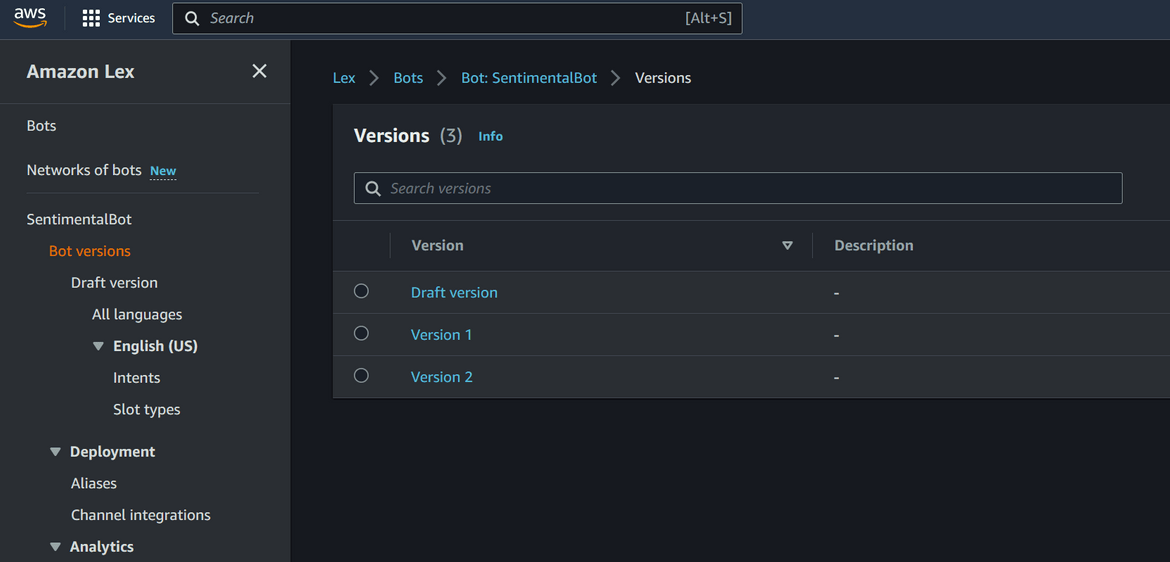
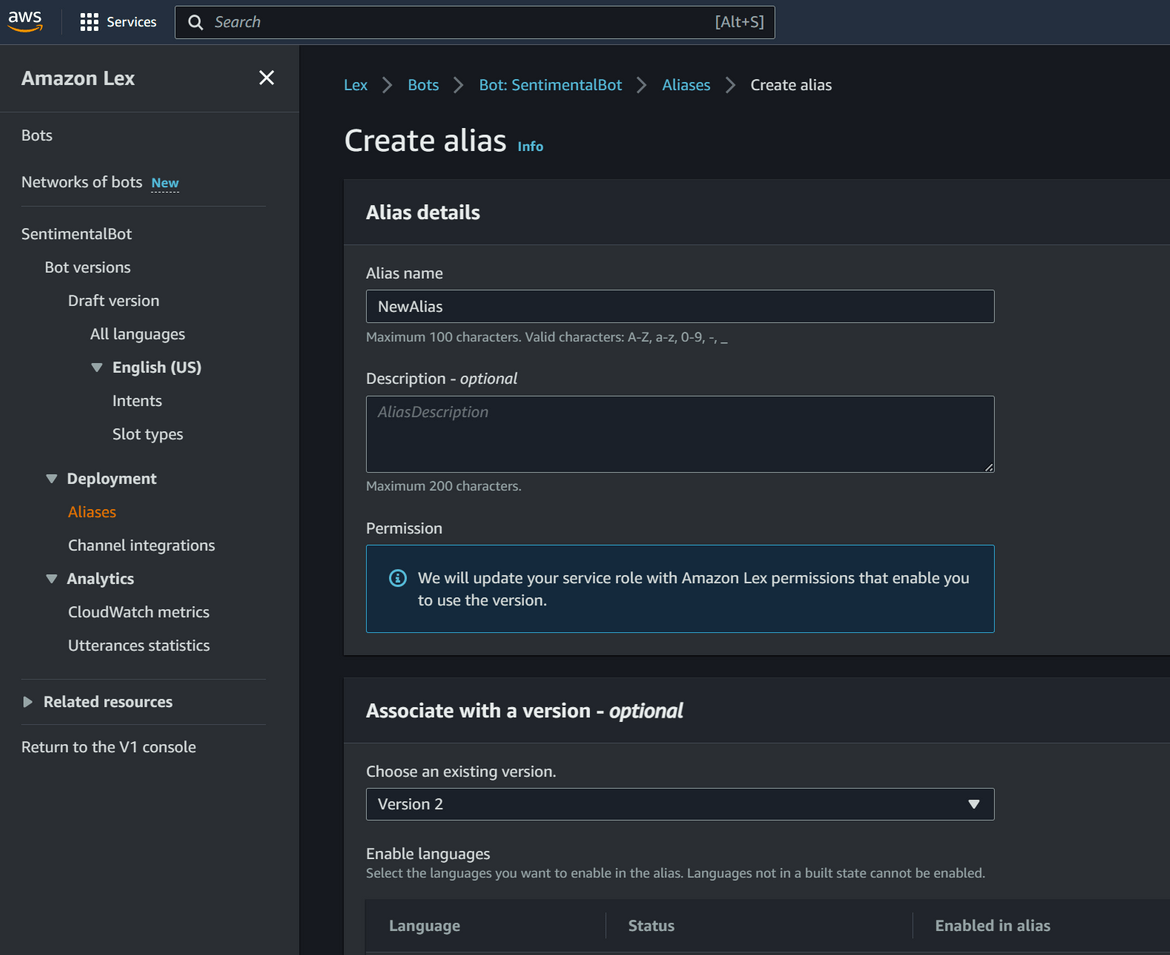
- Click on Aliases and Ceate a new Alias from this page. Associate the version which was created earlier
- Once the alias is created, navigate to the alias and click on the Language name which you want to configure. In this page select the lambda which was created by the pipeline. This will associate the Lambda with the bot
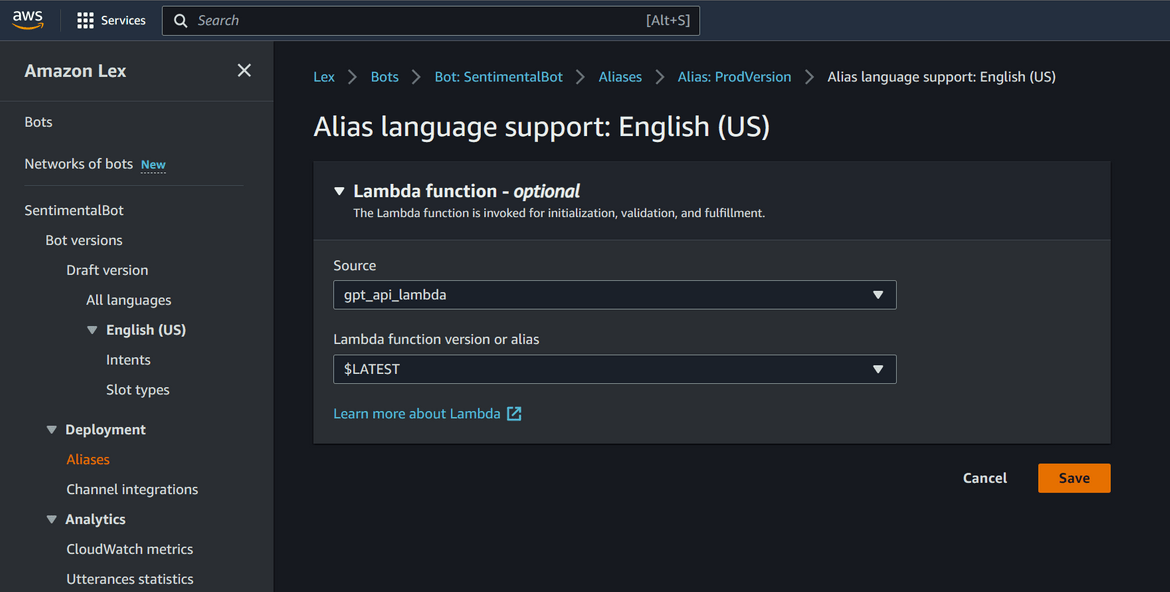
That will complete configuration of the bot and make it ready to use. You can check the bot configuration by navigating to the specific intents
Demo how it works
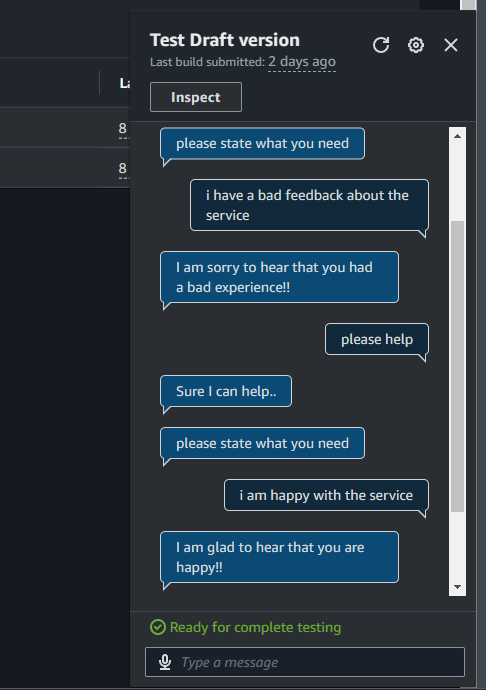
Now lets see how it all works. To test the Bot, click on Intents and then click on the Test button. This will bring up the test chat window. Here is a sample conversation which can be used to test the bot
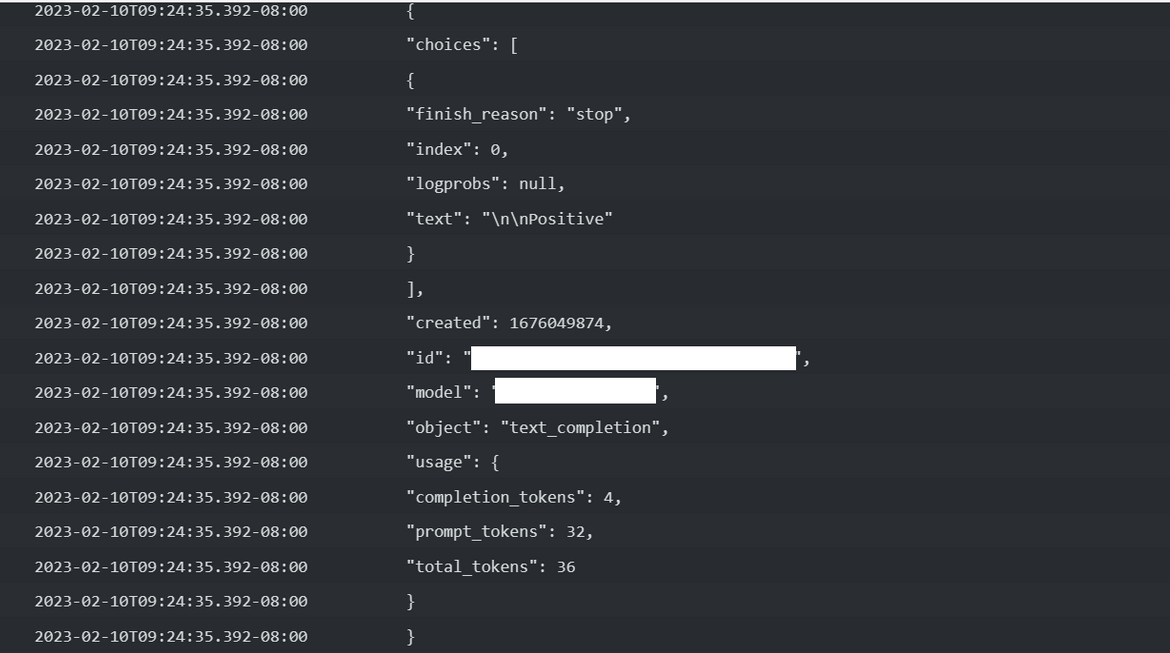
The Lambda logs can be checked to confirm OpenAI response
A demo video of the bot in action can be found Here.
Conclusion
In this post I explained an use case of integration Amazon Lex with GPT-3 API. This is just one of the use cases and potentially there are unlimited possibilities to use the GPT API. With ChatGPT gaining more popularity, it will be very useful to include it in different solutions where AI can be leveraged. Hope I was able to explain my solution well. Please let me know if any issues or any questions, by contacting me from Contact page.
