A fun experiment: Create Azure resources using AWS Cloudformation (Built using GoLang)
Azure has quickly become one of the leading cloud providers in the market now. So I started having deep dives in learning about Azure resources. One of the useful aspect of Azure is the usage of Azure API to interact with the resources. Similar to AWS, the Azure API also has methods to access various resources. Best way to learn this is to implement a project using the API. Thats where I started having this fun experiment to learn use of the Azure API. In this post I am describing a process which I used to spin up Azure resources using AWS cloudformation. Normally we use AWS cloudformation to interact with AWS resources. But to extend its usage using Azure API, I am using Cloudformation to create a Storage account on Azure (similar to S3 bucket on AWS). I am describing below the whole process how I achieved this. This may not be a proper Production scenario but who know if such scenario may arise in our projects. Will be a good learning. Please do not try this in Production scenarios unless you know exactly what you are doing :)
The GitHub repo for this post can be found Here
Pre Requisites
Before I start the walkthrough, there are some some pre-requisites which are good to have if you want to follow along or want to try this on your own:
- Basic Terraform, AWS, Azure knowledge
- Github account and able to setup Github actions
- An AWS account.
- An Azure account. Initial free duration should be enough
- Terraform installed
- Basic Go knowledge
With that out of the way, lets dive into the solution.
Functional Details
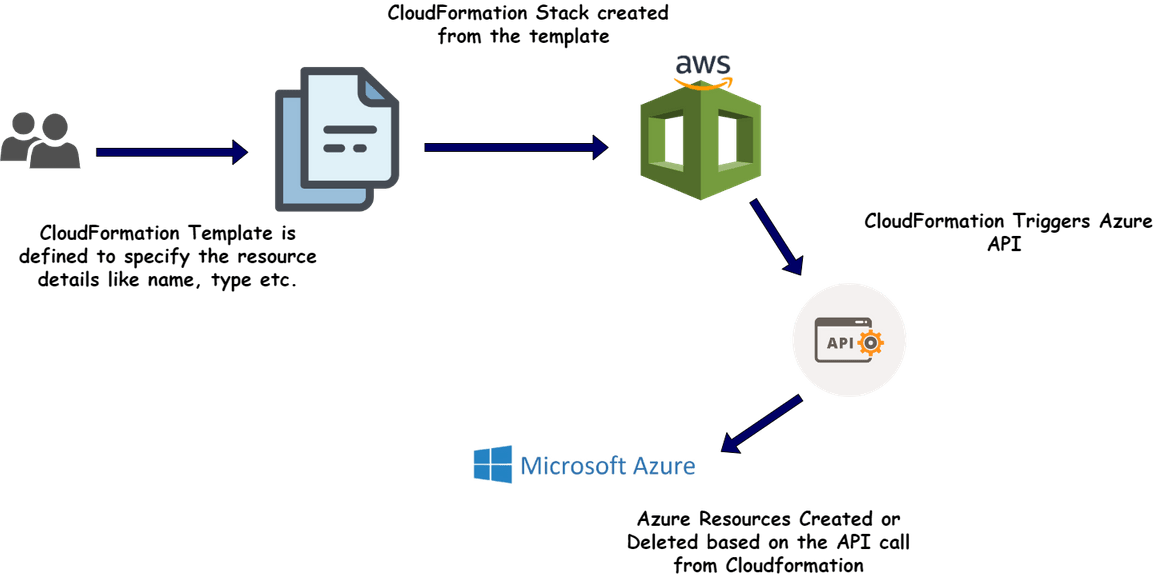
Let me first explain the overall method of how this will work from Cloudformation to Azure. Below image will explain what is being built here
In this example, I am creating a storage account on Azure and defining the details on the Cloudformation template. Let me explain whats happening here:
- Create and upload the Cloudformation template: To create/update any resource, we will need to define the Cloudformation template first. In the template we pass the Azure Storage account name to be created. This template is uploaded to Cloudformation
- Create the Stack: Using the template from above step, a Cloudformation stack is created and Cloudformation triggers stack creation process
- Interact with Azure: In the stack creation process, Cloudformation triggers API calls to the specific Azure APIs using specified credentials. The API calls create the resource on Azure and responds back status to Cloudformation. The creation status gets shown on the Cloudformaton console.
- Deletion of resource: When the stack is deleted on Cloudformation, it triggers a deletion APi call to Azure API. This deletes the specified resource on Azure and shows back the status on Cloudformation console.
Thats a high level overview of the whole process. Now lets see how its implemented.
Tech Architecture and Details
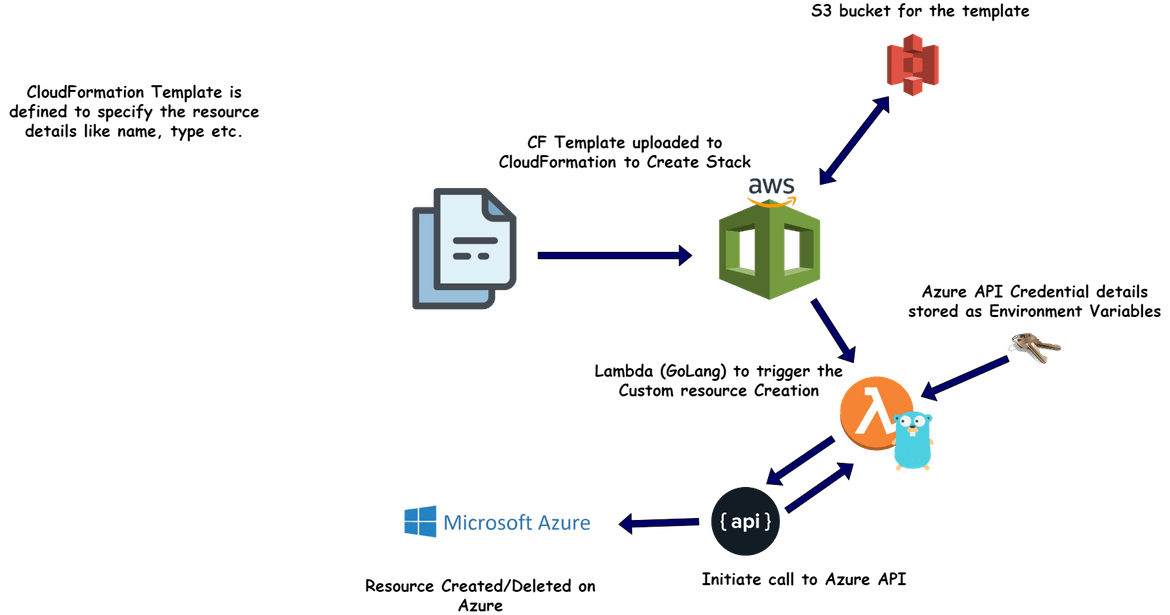
Let me describe what are the components involved in achieving the whole process. Below image will show all of the components involved in building the solution.
- Cloudformation and Template:This is not really a component which I am deploying but it is a service provided by AWS. I am defining the template that describes what resource I am deploying. This template is uploaded to Cloudformation to trigger the resource creation process. The resource details like for this example, the storage account name, is passed as parameter to the template
-
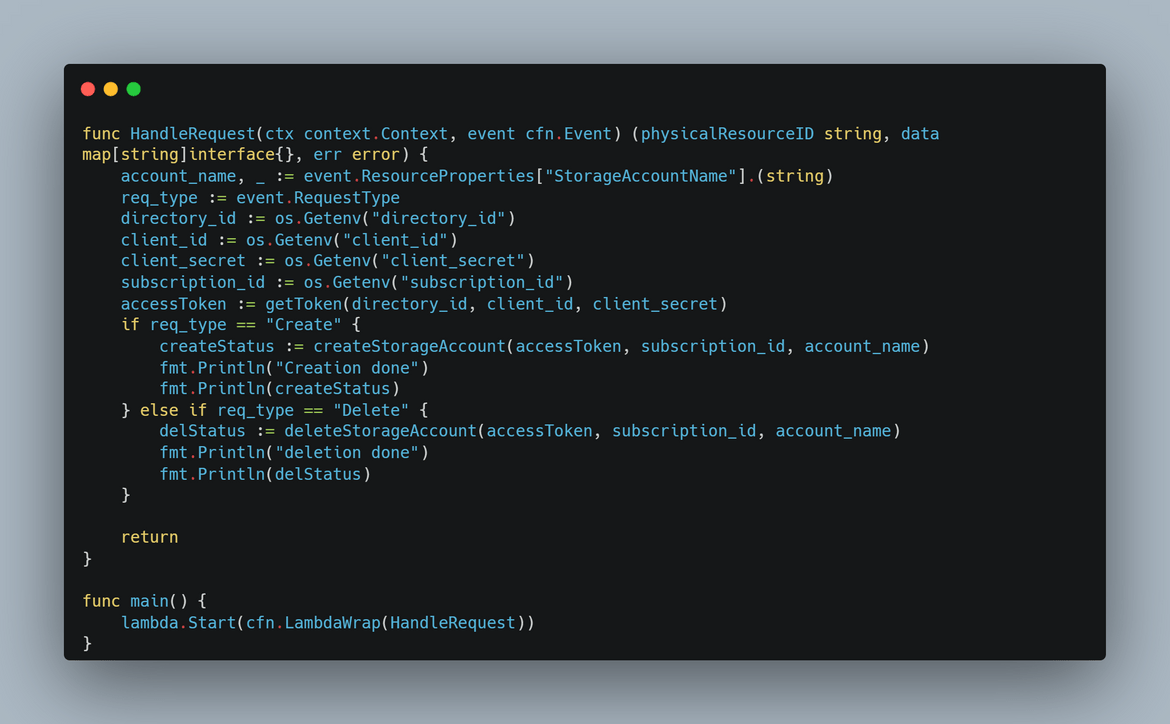
Custom Resource Lambda:I am using the custom resource feature of Cloudformation here. Once the stack creation process is triggered by Cloudformation, it triggers a Lambda which handles the creation of the resource. This Lambda handles all of the functions to create the resource and return the status to Cloudformation. This is the process which happens:
- After stack creation process is triggered by Cloudformation, it triggers the custom resource lambda
- The lambda gets the Cloudformation parameters as input, like the Azure storage account name
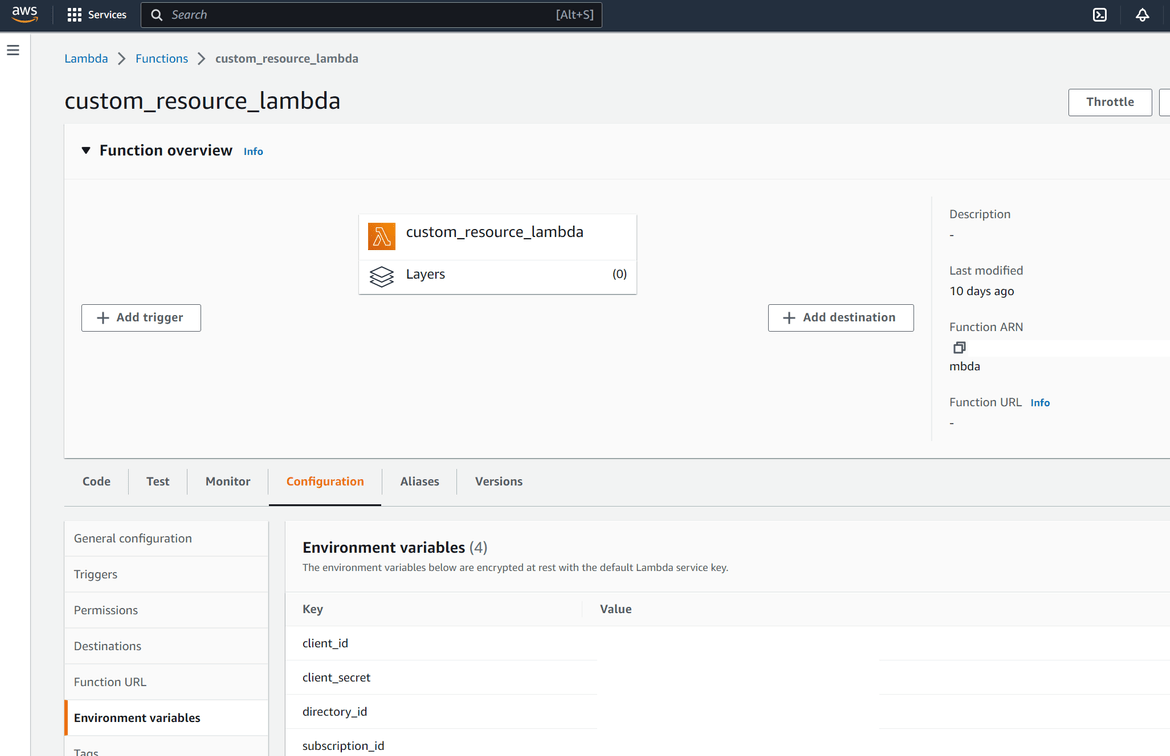
- Once triggered, the Lambda starts an API connection to Azure API. The API auth details are passed to the lambda as environment variables
- Lambda gets an oAuth token from Azure API to be able to interact with Azure resources
- Using the oAuth token, it sends a create storage account API call to Azure and gets the API response from Azure
- Based on success or error response, the Lambda returns the response to Cloudformation in a specific format
- Cloudformation parses the response and shows the status on console
The Lambda is built using Go language and using AWS provided Go packages to interact with Cloudformation. Deployment of the Lambda has been automated using Terraform which I will be covering in coming sections.
- Azure API:This is also a resource which I am not deploying but provided as part of Azure service. To use the API, an App password need to be created on Azure Active directory service, with proper permissions on the resources need to be managed. The Lambda function connects to the Azure API using the app password and completes an oAuth process for authentication. The app password details are passed as environment variables to the Lambda and are need to be created once before the process.
Those are all the components which handle the whole process. Since this is just for a simple experiment, it consist of just these parts. For actual Production grade scenario, the process can become moe complicated based on the use case. Now lets move on to deploy this process.
Setup and Deploy
To complete setting up this process, there are few steps which need to be completed. Below image will show in order of the steps that need to be completed.
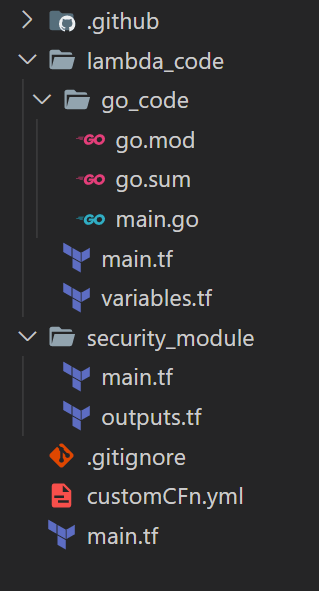
Let me first go through the folder structure of the code folder in my repo. You can have your own structure based on your use.
Folder Structure
- .github:This folder contains the Github actions workflow file. I am using one workflow to deploy the Lambda. Multiple workflows can be included based on use case
- lambda_code:This folder contains the Go code for the custom resource creation Lambda function. The Github actions flow reads the code file from this folder and builds and deploys the function to AWS.This folder also contains the Terraform scripts to deploy the Lambda function and its supporting elements to AWS.
- security_module:This folder contains the Terraform scripts to deploy the IAM role and policy needed by the Lambda to perform the functions successfully.
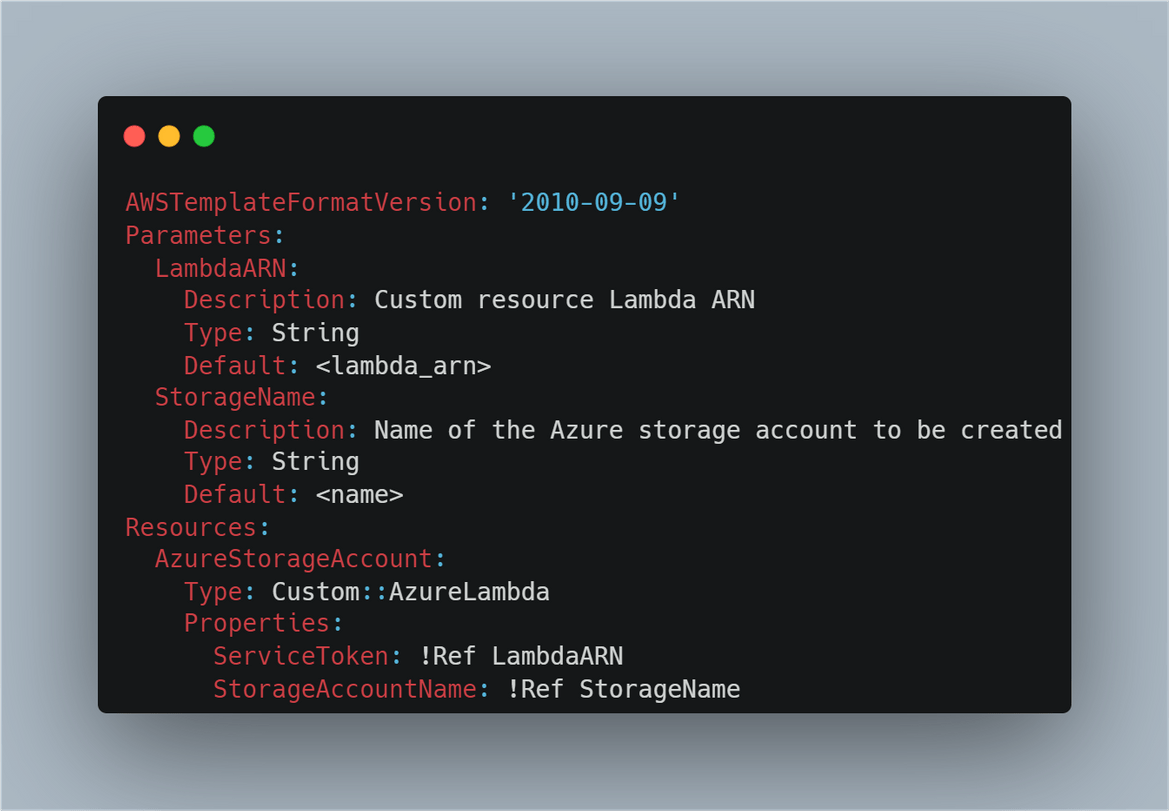
- customCFn.ymlThis is the Cloudformation template which defines the Azure custom resource details
- main.tf:This is the main Terraform script to deploy all of the Lambda components to AWS. This reads the different modules defined in the above folders and deploys to AWS
If you are following my steps this folder structure can be followed. Now lets move on to setting up rest of the process.
Azure Setup
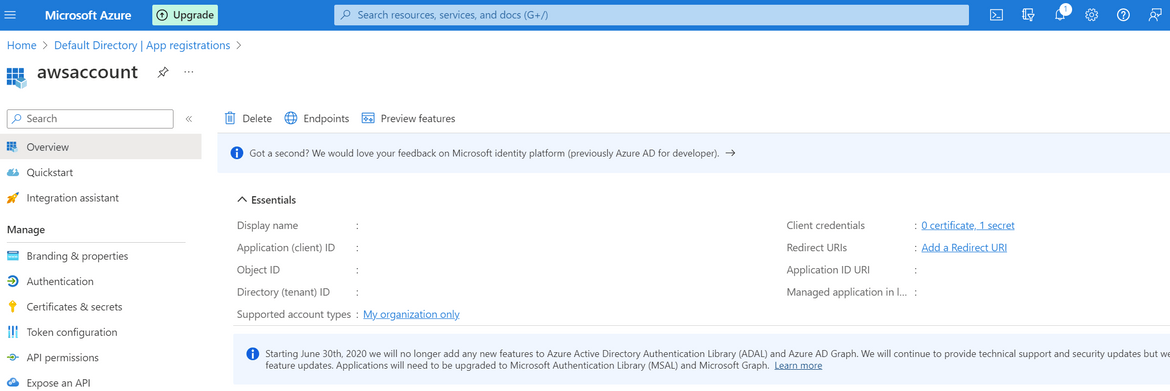
To be able to connect to Azure API we will need the credentials. For that we will need to setup an App registration. Follow the below process to setup and app registration and get the details:
- Login to Azure account and navigate to Azure Active Directory service
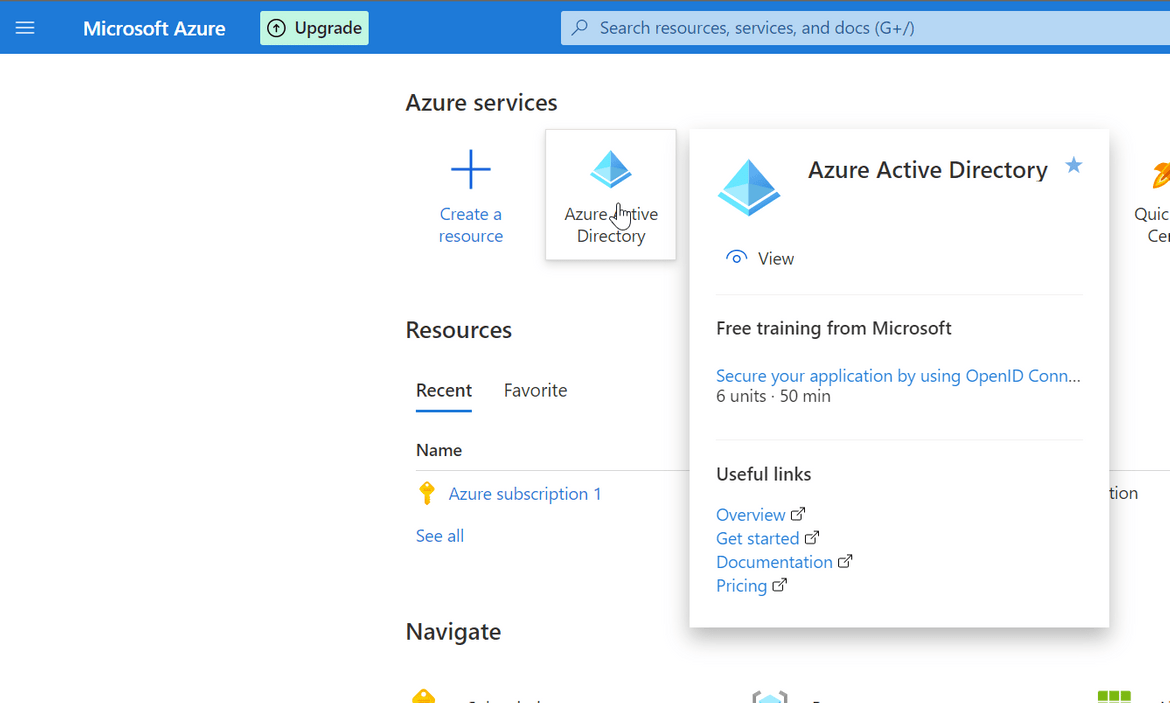
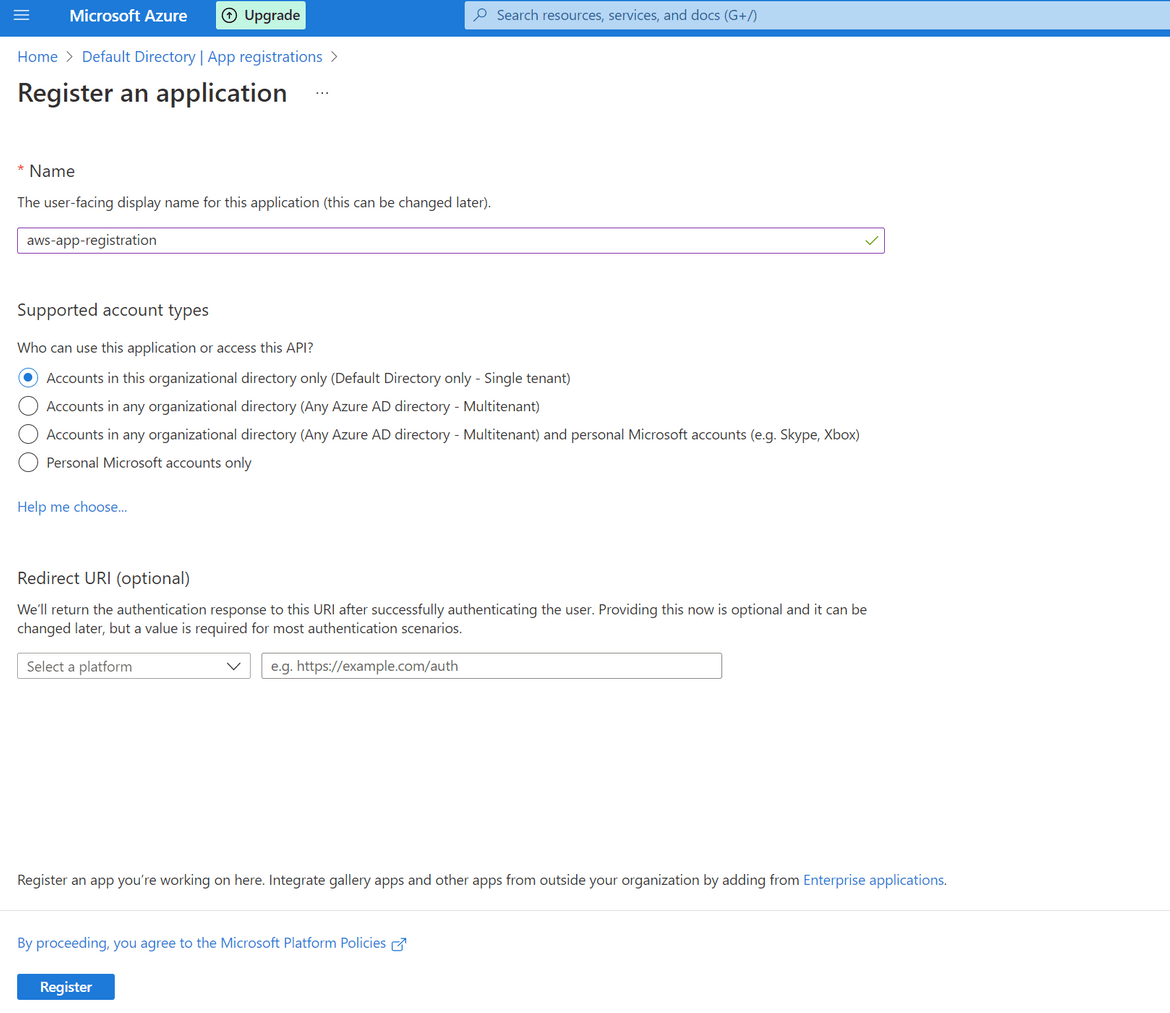
- Navigate to App Registrations from the left sidebar and Click on new Registration button to create a new one. On the next page the default options can be kept as is and provide a name
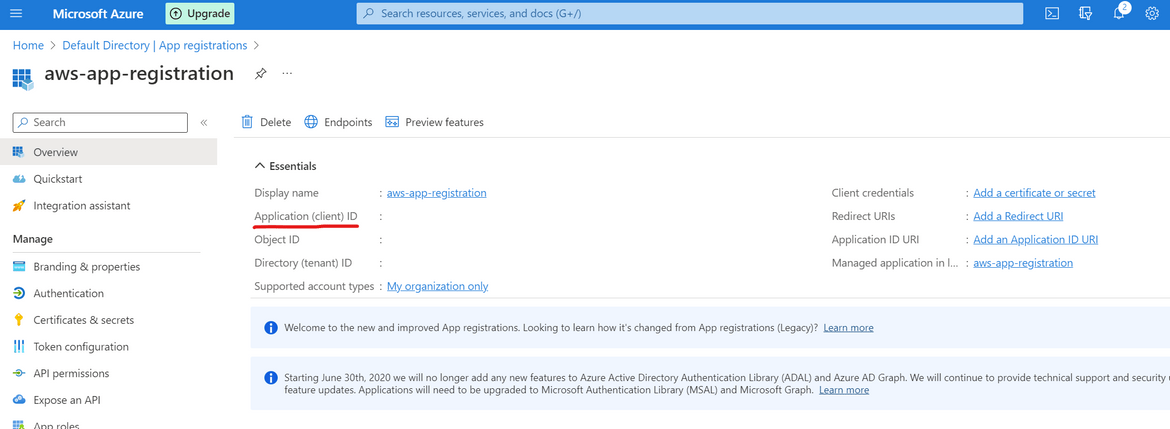
- Once created, on the next page it will show the client ID. Note this down as it will be needed later
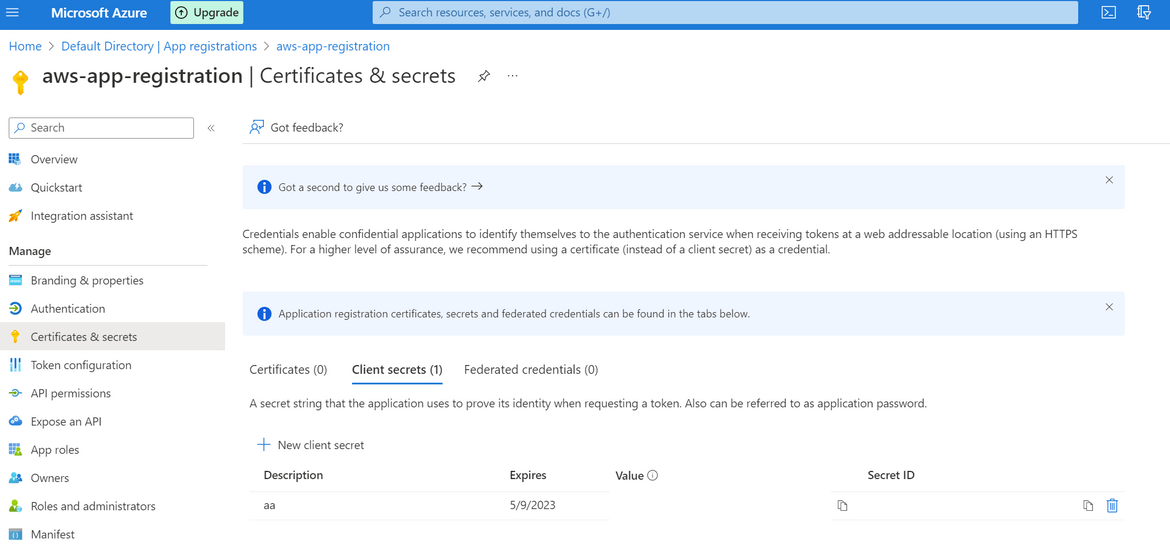
- On the left sidebar, click on Certificates and Secrets and add a new client secret. You can keep the default values on the opened option. It will create a new secret and show on screen. Copy the Secret Value on this screen and note that down. It will be needed for API connection.
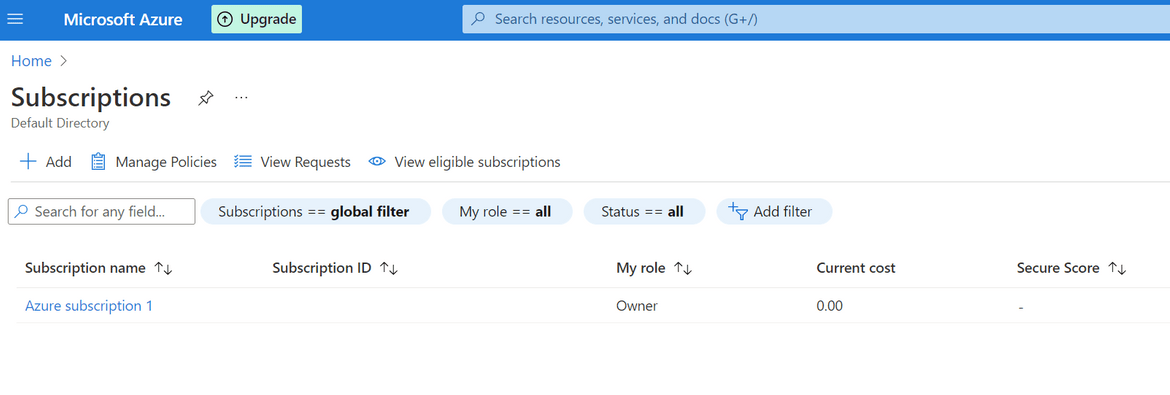
- Next we will need the Subscription ID for the Azure subscription. Navigate to Subscriptions from Azure homepage. Based on your Azure account you can have one or multiple subscriptions. Copy the Subscription ID and note it down.
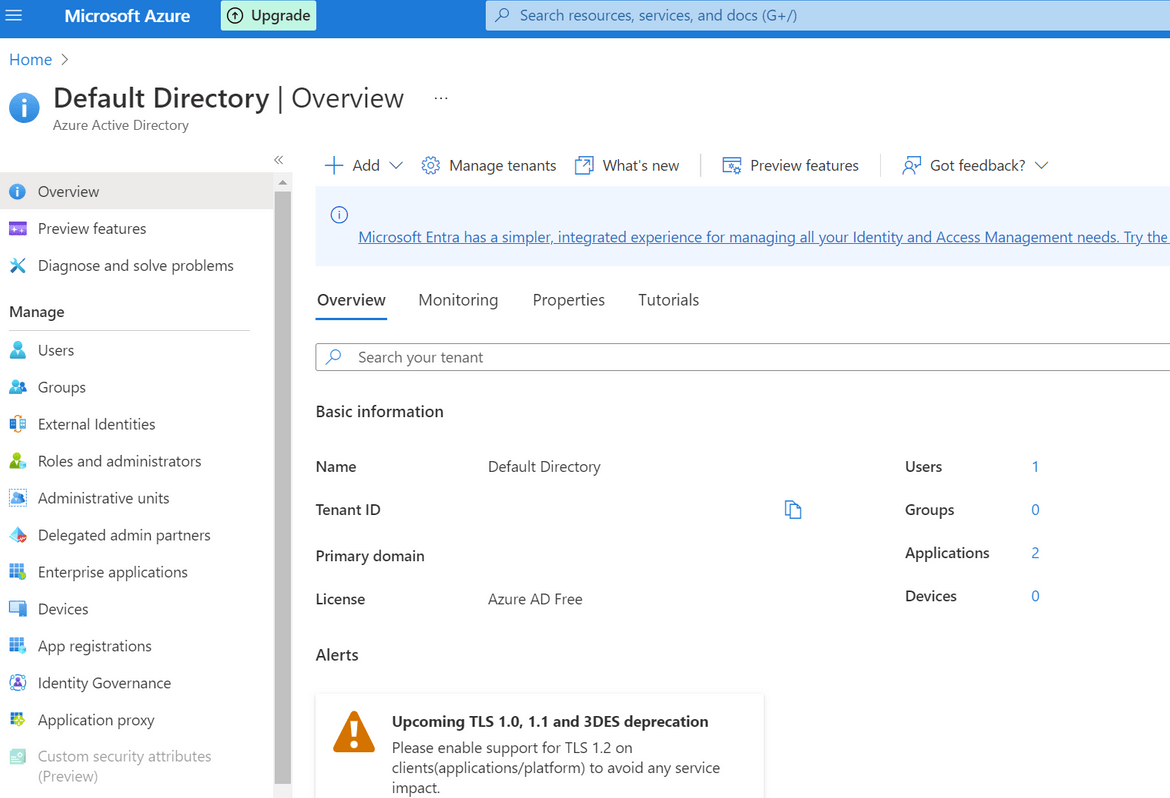
- We will also need the Tenant ID for the Azure account. Navigate to the Active Directory service and from the Overview page, copy the Tenant ID value. We will need it later
- Next we will need to add proper access levels to the app registration so we can use it to interact with Azure API. Click on the Subscription name and navigate to Access Control sidebar option. Start adding a new role. Add the contributor role to the app registration/Service Principal which we created above
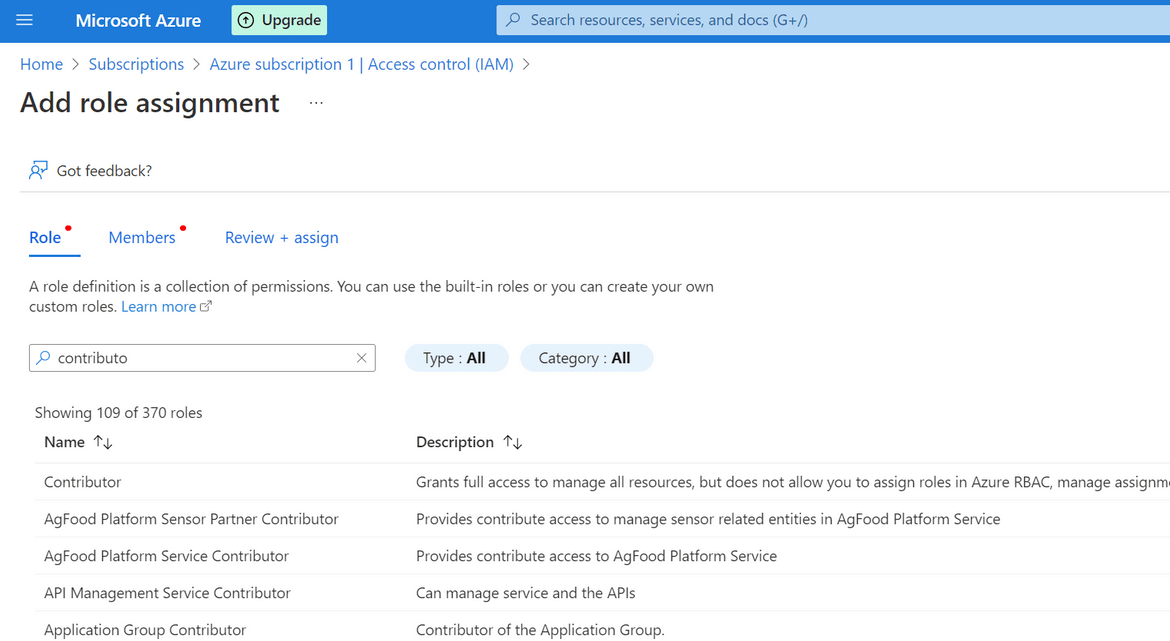
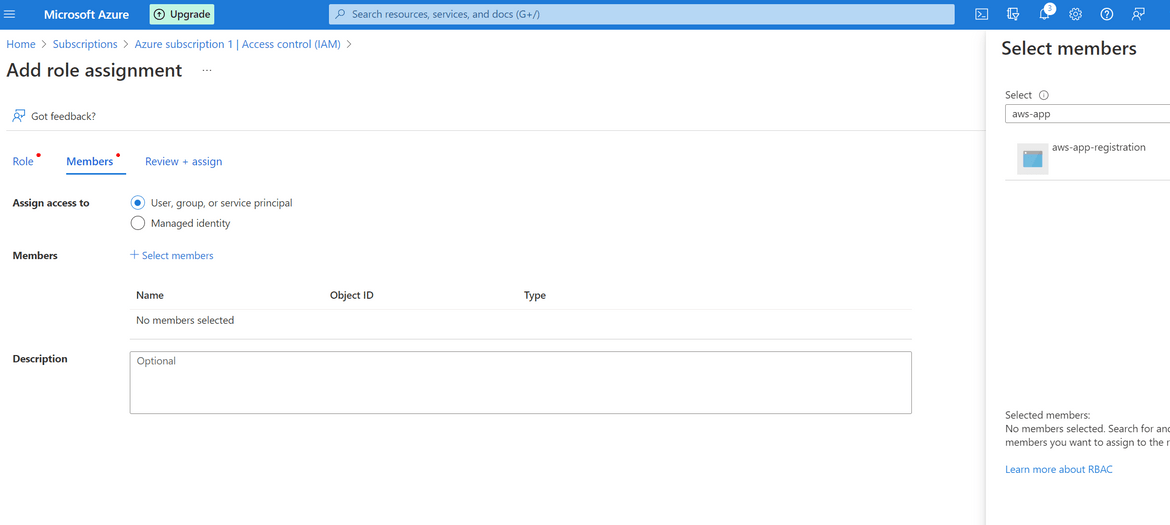
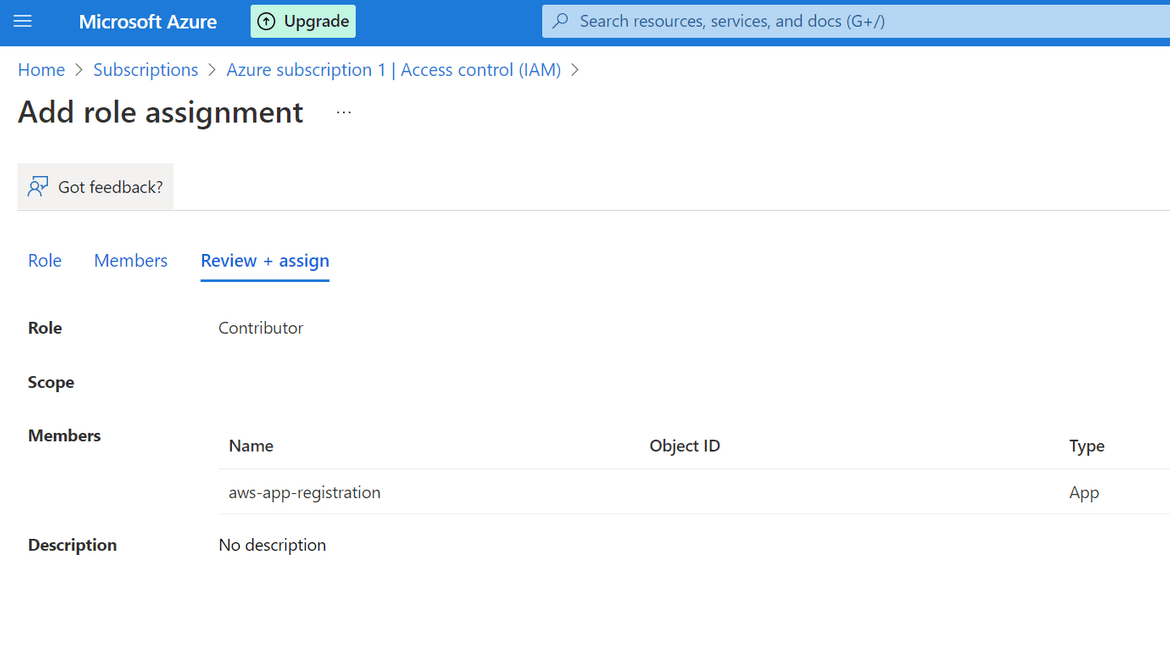
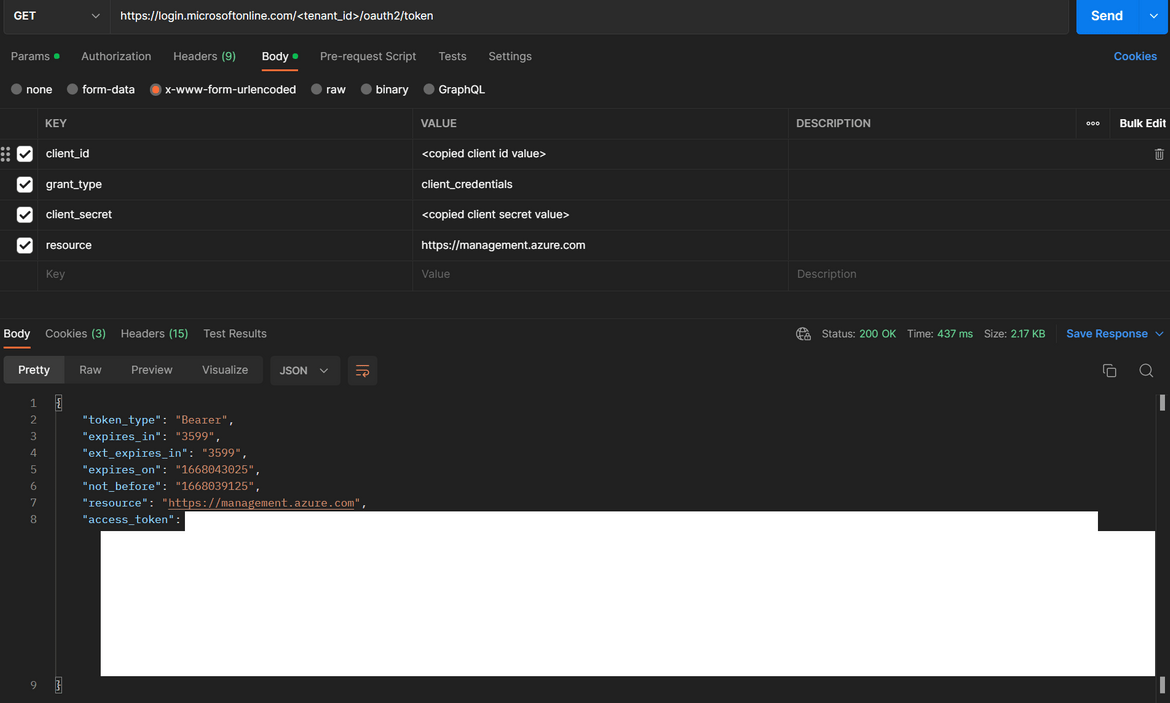
That completes all of the steps for setting up the Service Principal and the app registration on Azure. Lets test the setup with a test Auth call to the Azure API. Below is a GET API call which can be sent to test the successful auth call. Replace the specified values with the noted down values which where copied above.
The oAuth call should return an access token in the response as shown above. This shows successful setup of the Service principal. This Access token is a temporary token which can be used to interact with Azure resources. These steps have been coded in the Go code Lambda to be able to connect to Azure API.
Now that Azure setup is done, lets deploy the other parts of the process.
Github actions and Terraform Steps
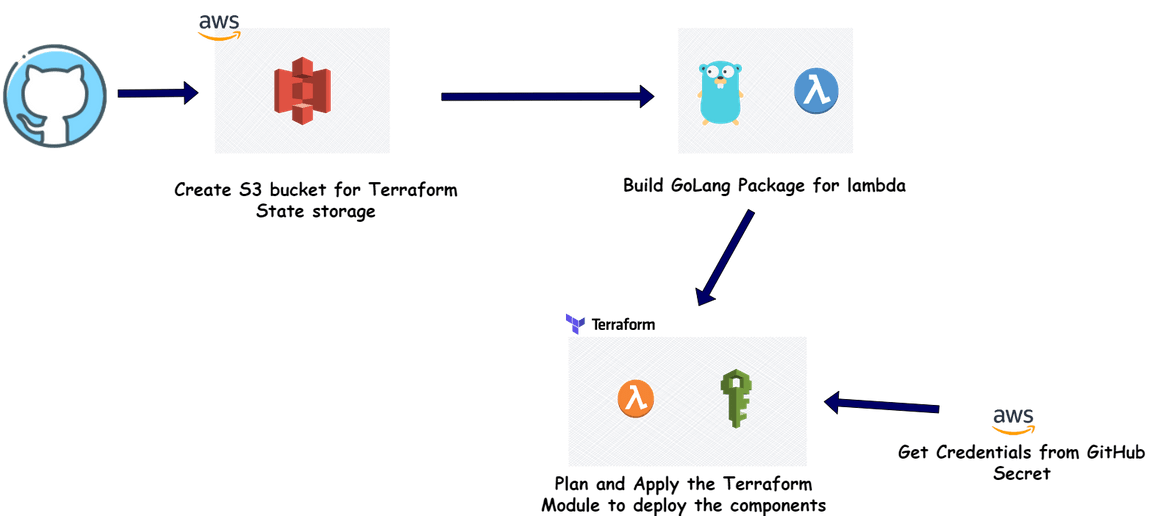
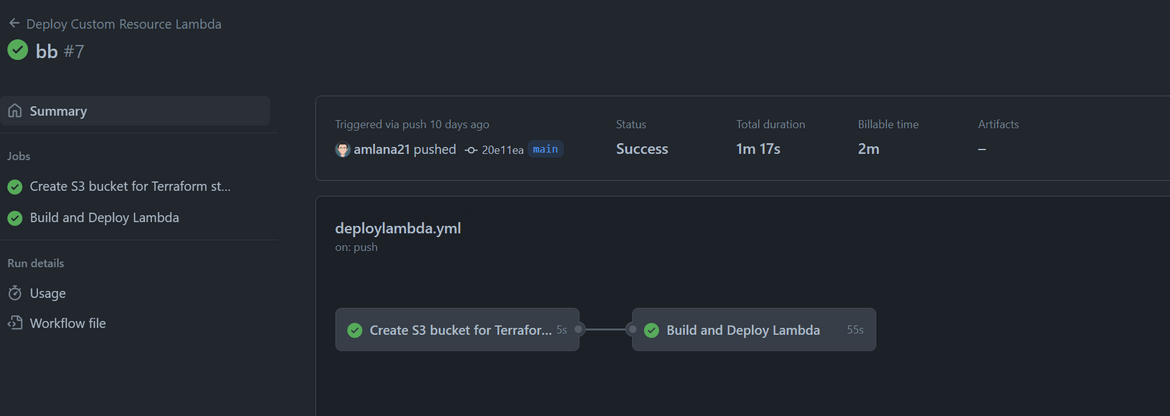
Next we will setup the process to deploy the AWS Lambda. This the Lambda to deploy the Custom resource. I am using Github Actions to automate the deployment. Below is the whole flow which is handled by the Github actions workflow.
Let me go through the steps:
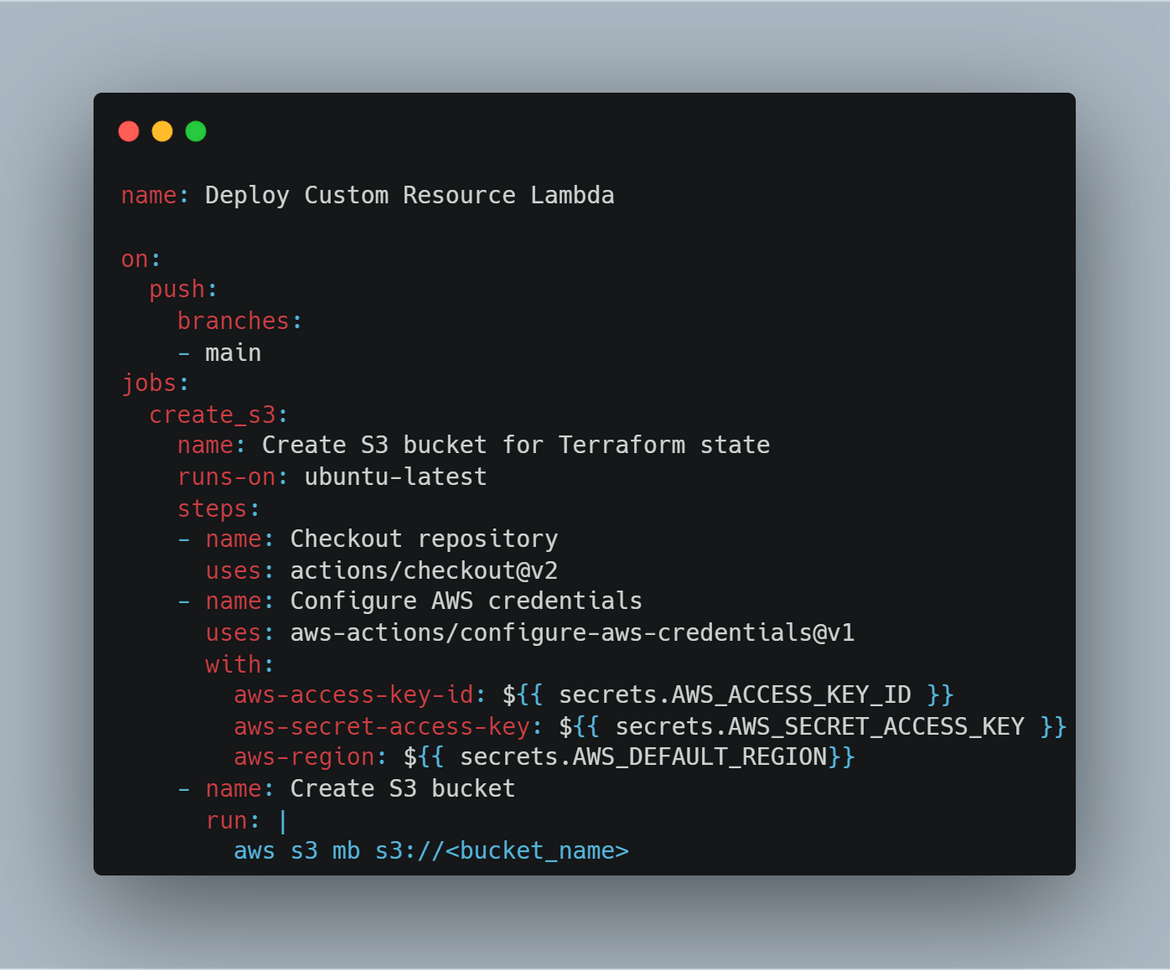
- Create S3 Bucket for State: First we will be creating an S3 bucket to store the Terraform state. In this step the S3 bucket is created using AWS CLI. The credentials for AWS are passed in as Secrets which were configured on the Github repository. This bucket name is passed as variable to the Terraform module for Terraform o store the resource state.
-
Build the Go Lambda Package: Before we can deploy the Go code as Lambda, we will need to build the Lambda package. In this step, the package is being built and stored locally. To build the lambda package on a Linux environment, these are the commands to run:
go get github.com/aws/aws-lambda-go/lambda   //import the aws go package for lambda
go get github.com/aws/aws-lambda-go/cfn      //import the aws go package for cloudformation
GOOS=linux CG_ENABLED=0 go build main.go     //build the package with specific environment variables
zip main.zip main                            //zip the package o create a deployable package
This zipped file will be used by Terraform and deployed to AWS to create the Lambda.
-
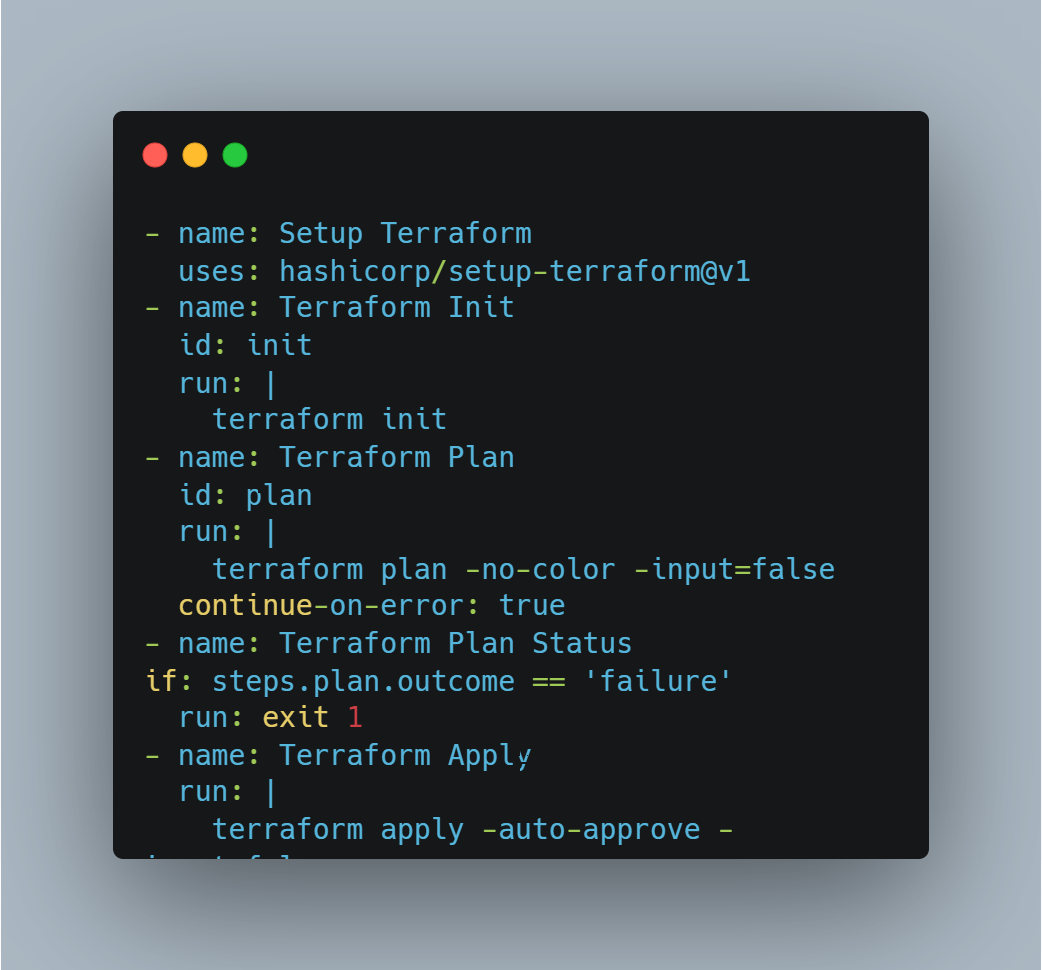
Setup and Apply Terraform Modules: Now that we have the Go package, next we deploy the package to AWS. In this step Terraform deploys the Lambda and related components to AWS. There are few steps happening here:
- Terraform is installed in the runner instance
- Run Terraform init to initialize Terraform
- Run Terraform Plan to verify what will be applied by Terraform. Any errors are caught in this step and the workflow aborts if any error
-
Finally Terraform Apply is executed to deploy the modules to AWS. The modules which get deployed are:
To be able to run the Github actions workflow, some settings need to be configured on the Github repo.
- Add the AWS credentials as Secret to the repository
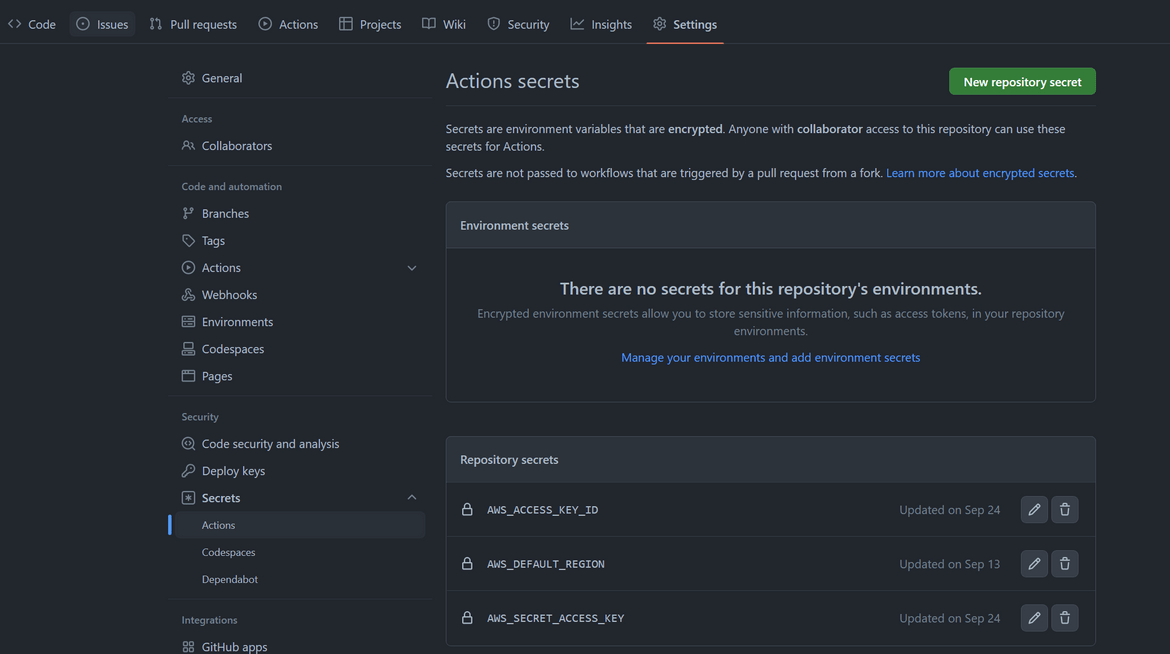
- The workflow script for Github actions is placed in the code folder. For Actions to trigger the flow, the workflow yaml file is placed in the .github folder
Once changes are pushed to Github repo, the workflow is triggered. The workflow deploys the Lambda to AWS
Now we have all the setups done to deploy the Azure Storage account using Cloudformation. Lets Create a Storage account on Azure from Cloudformation.
Demo and Outputs
I have included a sample Cloudformation template in my repo. Here is the template which I am using to create the storage account on Azure
Lets start creating the Cloudformation stack from this template.
- Login to AWS console and navigate to Cloudformation Service
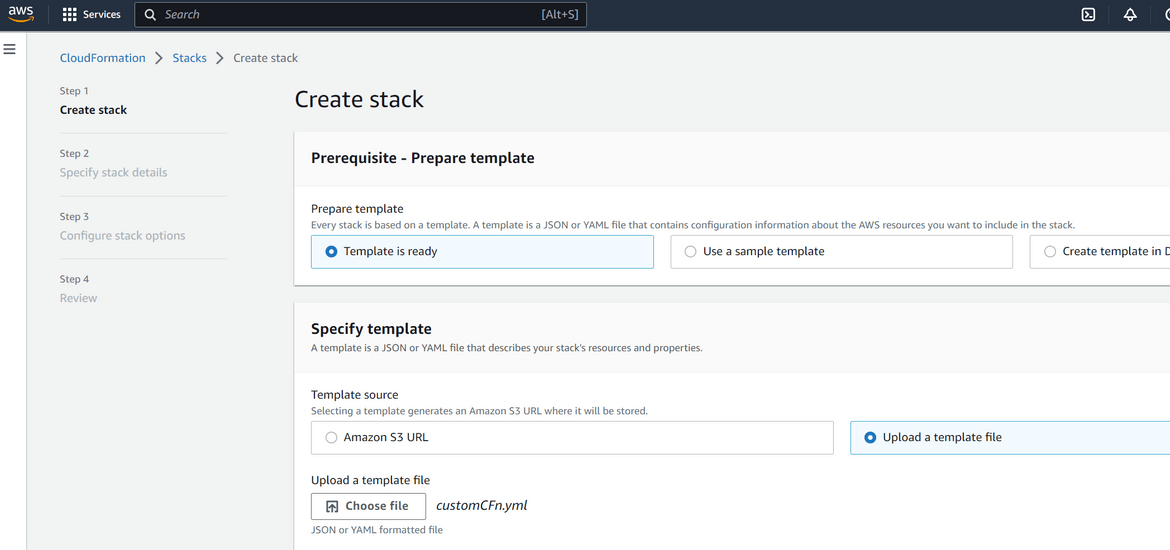
- Click on Create Stack with new resources. On the page which opens, upload the template which you created as shown above
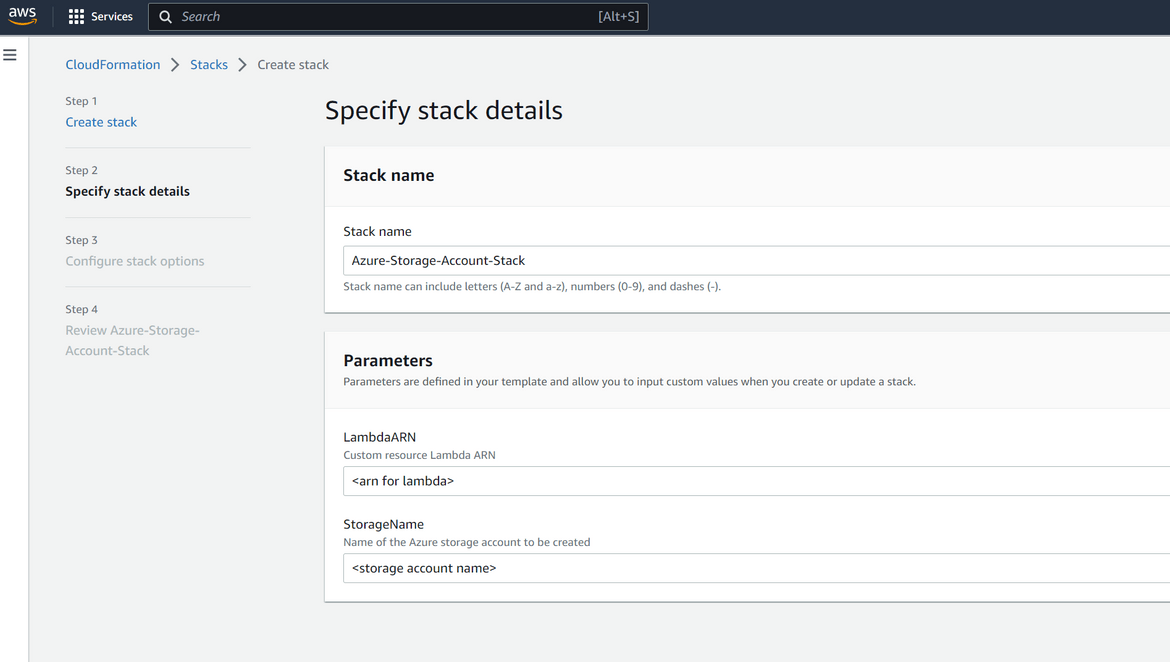
- Provide the Custom Resource Lambda ARN and the Storage account name (to be created on Azure) in the next screen
- For next steps the default options can be kept or customized as needed. On the final confirmation page, click on submit to start the stack creation
- The status of creation can be tracked on the Cloudformation page

- Once the creation completes, the status will be shown on the stack console

- Lets confirm that it actually triggered the lambda and the resource creation to Azure. Navigate to the Cloudwatch log group for the custom resource Lambda. Check the recent logs and check that the Lambda was triggered and look for any logs to identify the status of API call
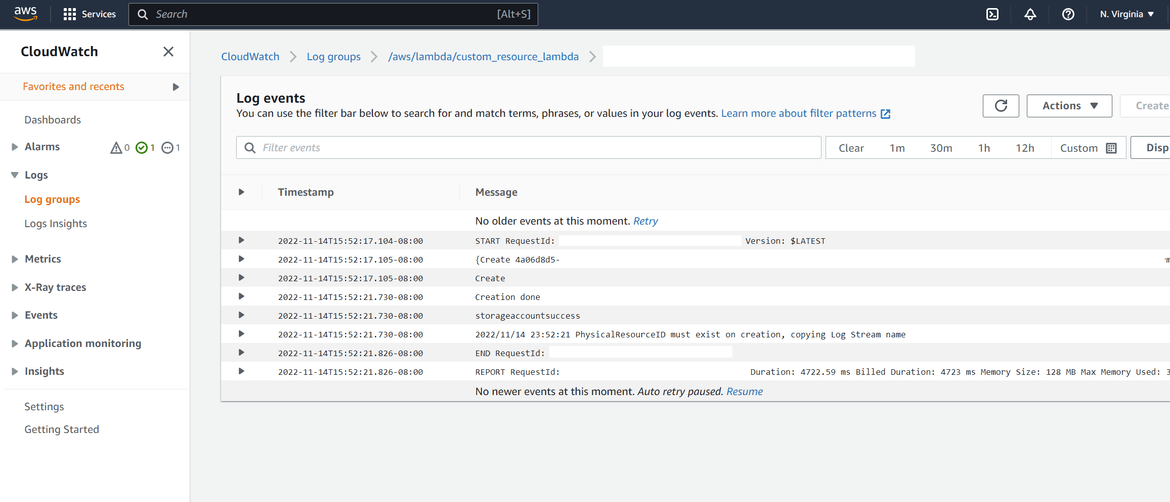
- Now lets verify on Azure whether the Storage account was created or not. Login to Azure and navigate to Storage Accounts. The new Storage account should be shown on the list. You have to wait for a bit before the storage account show up on Azure.

- Lets now delete the resource which was created. Delete the Stack on AWS cloudformation console. The console will show the status of the deletion
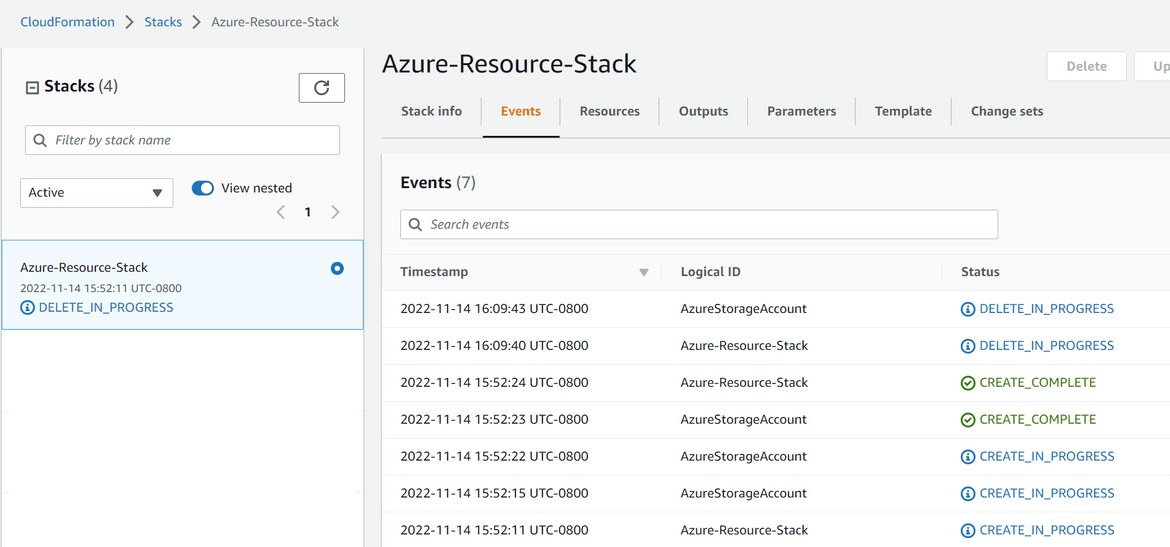
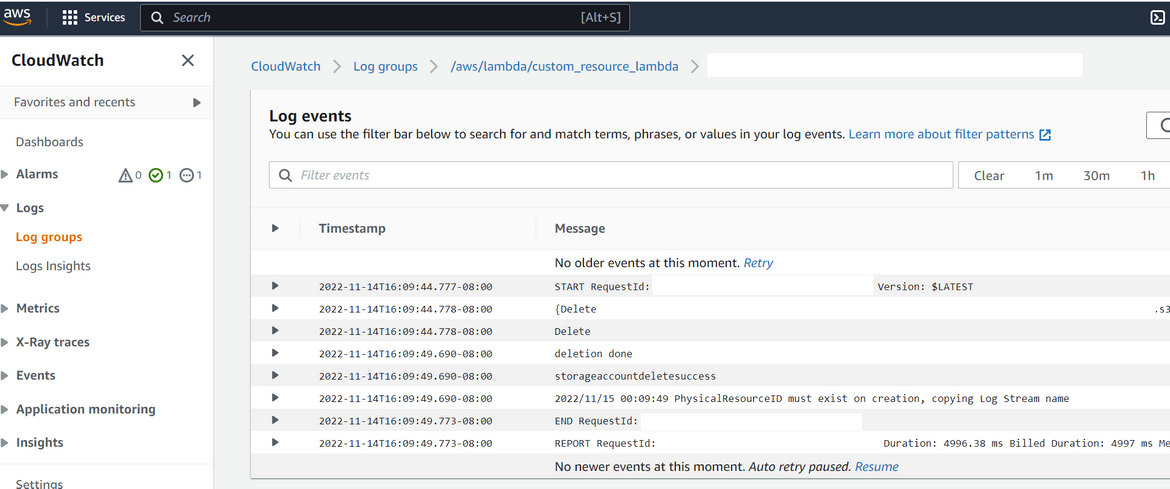
- The Lambda logs can be verified to confirm that delete API was called
- Azure should also show the Storage account being deleted
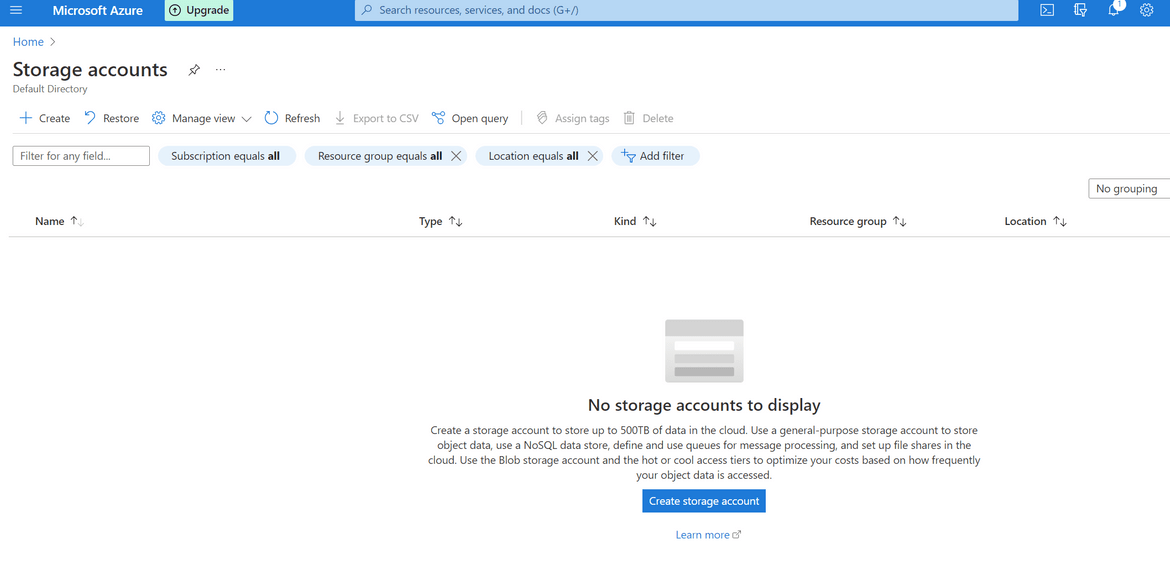
We successfully created a Storage account on Azure using AWS Cloudformation.
Improvements
The example I covered in this post is a very basic use case of this process. There can be many changes done to this process to handle more complex production ready scenarios. Some of the ideas I can think of are:
- Add ability to update Azure resources from the Cloudformation stack
- Add support for more resources from Azure
- Improve the Azure credential storage on the Lambda using Secret Manager
There are endless possibilities to customize and use this process.
Conclusion
In this post I explained about my experiment around using Cloudformation to deploy Azure resource. Hope I was able to explain how the process worked for me. I can’t think of any significant Production use for this method. But I am sure someone somewhere will find use for this. Please let me know if you find any issues or have questions. You can contact me from the contact page.
