AWS CLI Series - How to use CloudFormation
AWS CLI Series : How to use CloudFormation
We all love to work with command line right? At least I love the ease of just opening a console and write a command to accomplish a task. I agree it may seem overwhelming at first but once we get used to it, a command line is our friend. To extend on that I am coming up with multiple posts to walk through some basic frequently used commands using which various AWS services can be controlled or managed. Yes AWS provides a whole command line only experience through which all of the AWS services can be managed. When I started learning AWS and wanted to run the CLI commands I struggled to understand the commands from the documentation and had to do lot of trial and errors to finally make them work. So I am planning to write these series of posts for such beginners who are trying to learn the CLI way of doing things on AWS.
This post is first of many more posts where I will describe how to perform some basic management functions on various AWS services. In each post I will pick up an AWS service and provide a step by step guide to show how the service can be managed from command line.
The whole Code base is available on my Github Repo: Here
What is CLI
A CLI(Command Line Interface) is a way to access a service using just some commands on a command line. You can execute different commands on the console to perform a specific task. AWS provides a similar interface which is an alternative way to access and manage the services directly from the command line console. It provides a level of ease to just open the command line and execute the command to manage an AWS service.
AWS CLI is an open source tool which you can install on a machine and using that run various commands on the console. Using the CLI and through a minimal configuration you can have a simplistic interface and have the same functionality as the web console. CLI proves very useful for CI/CD pipelines where the pipeline can run the CLI commands to achieve various tasks on AWS. It is available on different terminal programs and can be used accordingly based on what OS you are using:
- Linux Terminal
- Windows Command line
Pre-Requisites
To follow along the commands, there are a few Pre requisites which you will have to make sure to have:
- An AWS Account
- A command line terminal. Based on which OS you are using the corresponding command line terminal will do
- An editor for the Cloudformation Template
In This Post
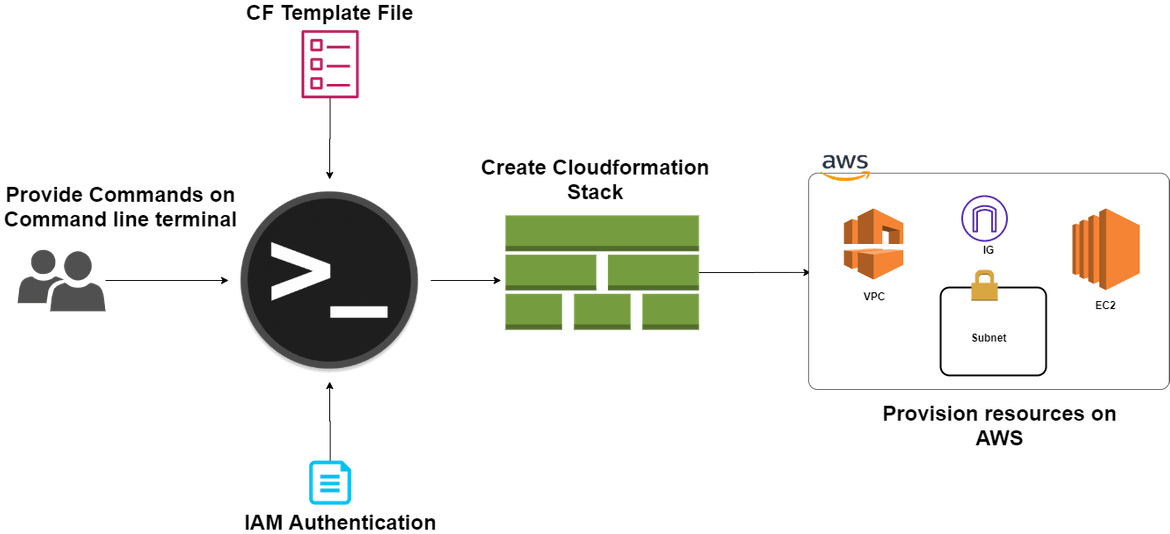
In this post I will be explaining some basic commands to control some Cloudformation functionalities. There are times where we need to quickly spin up some resources in AWS to test something. Cloudformation gives the ease to have pre-defined templates for different resources which we can use to quickly launch those services on AWS. CLI gives one more level of simplicity to control all of Cloudformation functionalities right from the command line on our local system. Cloudformation is based on the concept of Infrastructure as a code where we can convert our whole AWS ecosystem to a template file which can be used to launch the same set of resources repeatedly. With CLI and Cloudformation the steps to launch a service looks like:
- Prepare the Cloudformation templates as needed
- When needed to launch a new Service or modify a service, open the command line and navigate to the CF template folder
- Run the respective CLI command to communicate with AWS and perform the respective Cloudformation task
In this post I will be going through the last two steps with a pre-defined CF template which I have created. This post is to help with some basic beginner steps to start using CLI for Cloudformation. I didn’t go into much detail of all Cloudformation commands as that will become a very long post.
What will we build
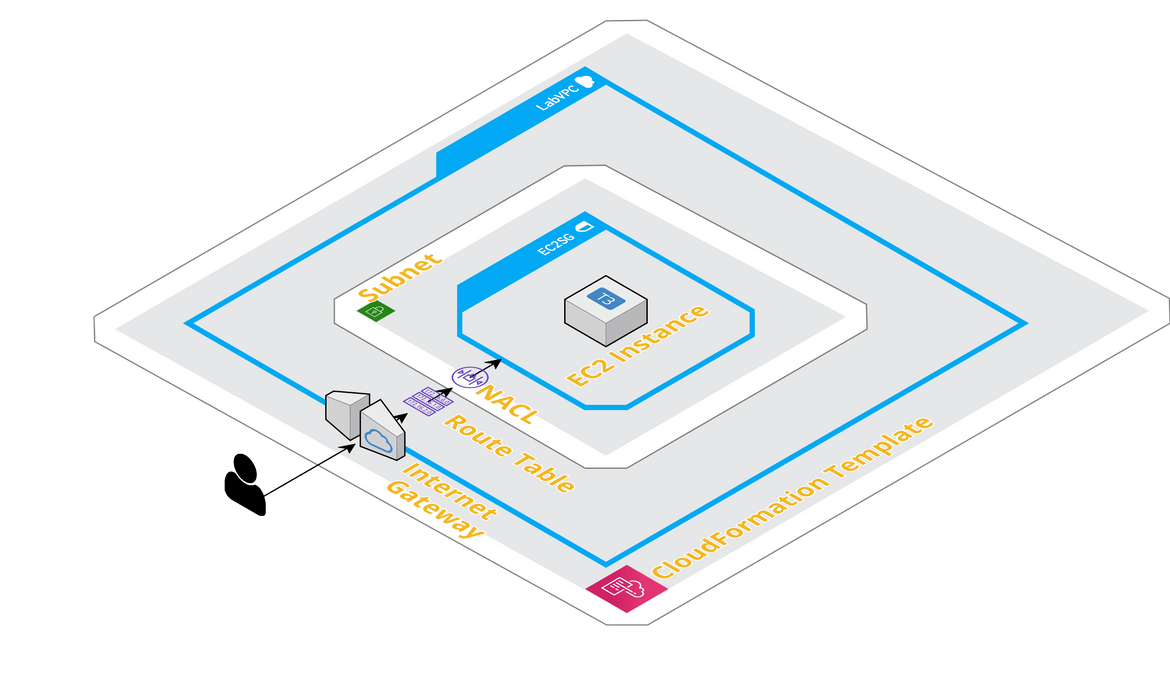
To explain the method of controlling Cloudformation functions using CLI, I will be building a simple architecture in AWS. Below image shows what architecture we will be launching on AWS using Cloudformation and CLI.
Below components will be launched as part of the architecture:
- VPC: A new virtual network will be created to house all the other components and isolate the architecture in its own network.
- Public Subnet: A public subnet will be used inside the VPC. This subnet will be accessible from the internet and instances within it will have access to the internet.
- Internet Gateway: This will be created to enable internet accessibility for the VPC
- Route Table: A route table to route network requests within the VPC and external requests
- Security Group: To control the traffic to EC2 instances, a Security group will be created and some basic ports will be opened to allow traffic
All of these will be launched as a new Cloudformation stack. A Cloudformation stack is a set of resources which get launched together from a Cloudformation template. Those resources can be controlled by changing the template.
Preparation Step
Before we can use the CLI, we need to install and configure the CLI on our system or on any system where you are planning to use the CLI. It needs to be configured so that it can connect to the proper AWS environment to perform the tasks. Follow the below steps to prepare the CLI for further use:
Create IAM User: We will need a specific user which will be used by the CLI to connect to AWS. This can be created separately from the Web console. To create the user:
- Login to console and navigate to the IAM service
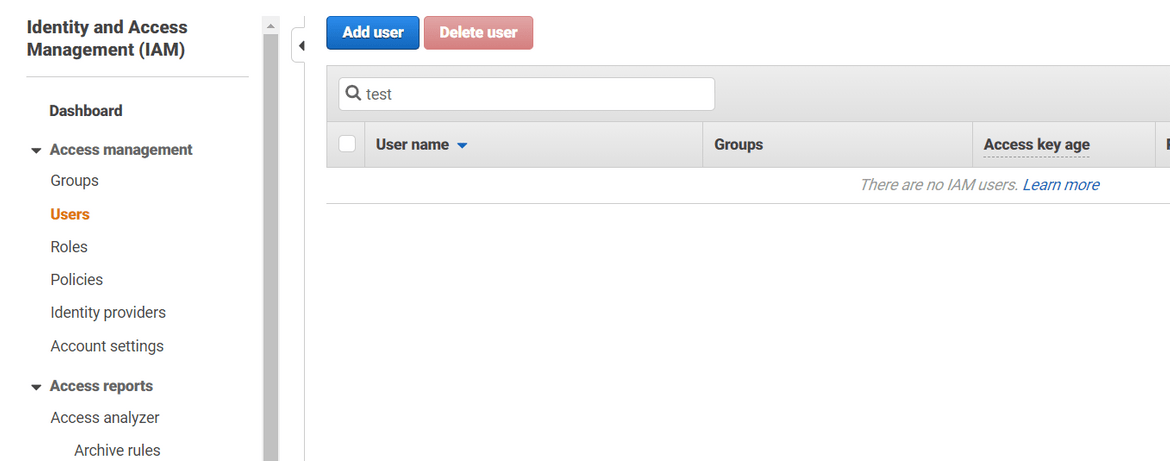
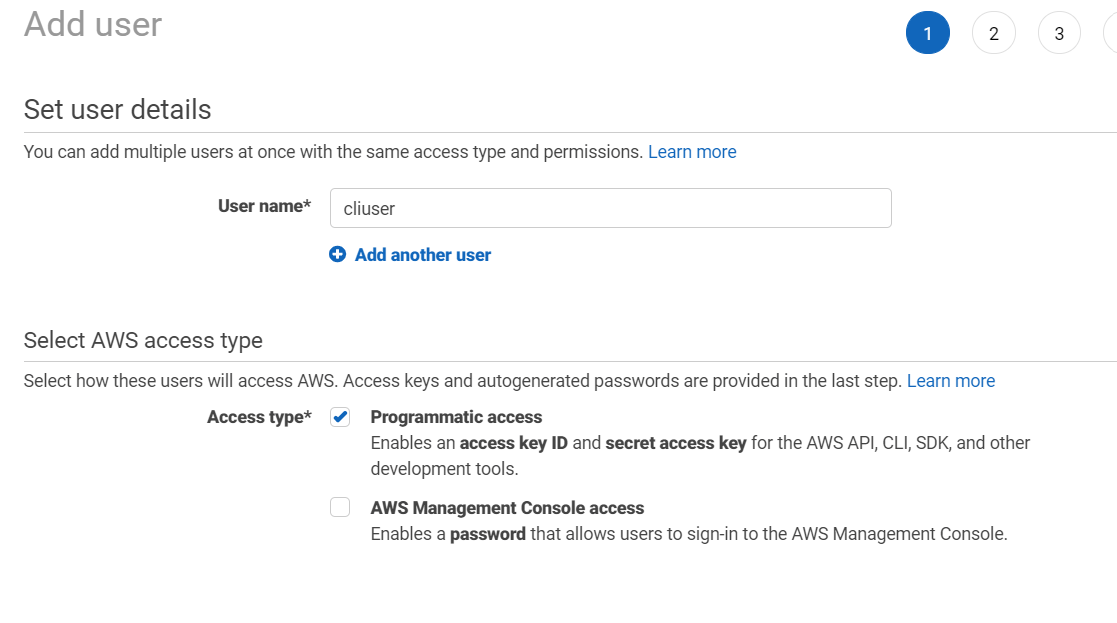
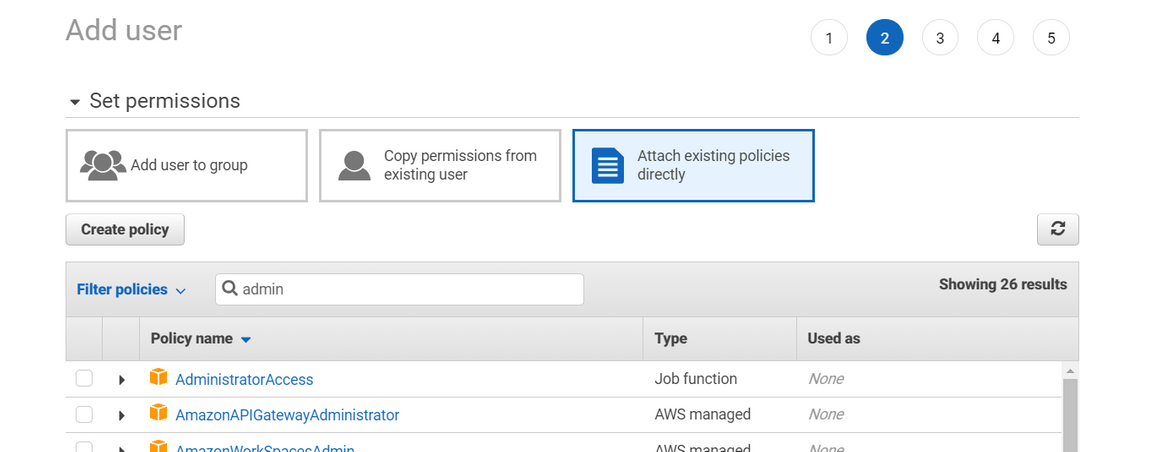
- Create a new user and add required permissions to the user. The permissions will depend what you are trying to perform using the CLI. For this post I will add admin access to the user.
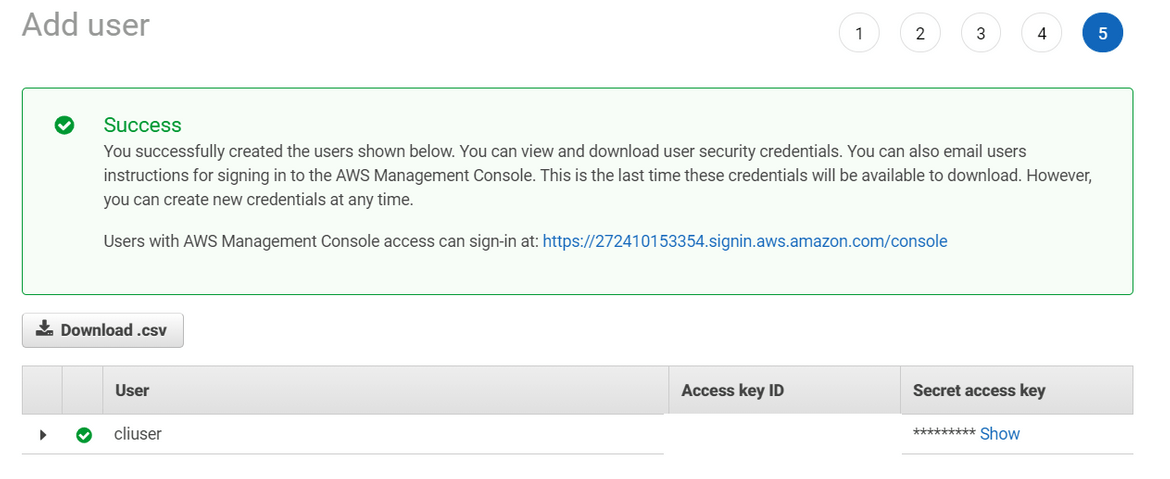
- Note down the Access keys from the Save confirmation page. This will be needed to configure the CLI
Create a SSH Key: Create a new SSH Key from the EC2 page on web console. Download and store the key to be used later.
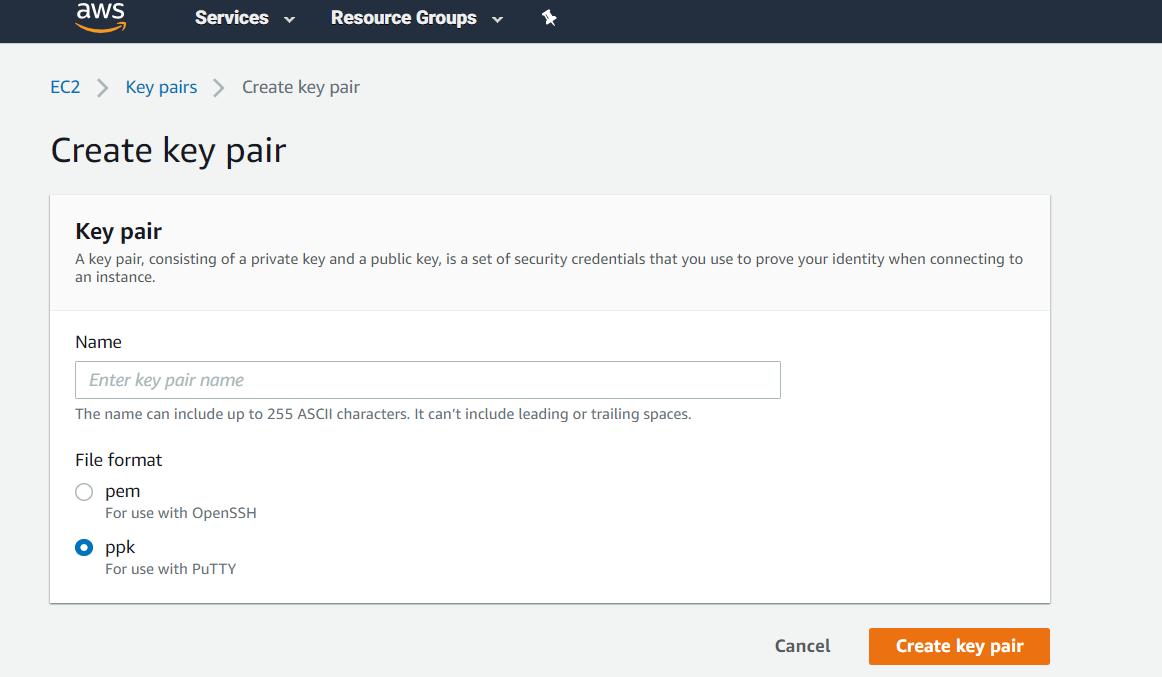
Install CLI:
Once we have the user we move on to install the CLI on our system. Based on whether you are using on local machine or on a VM, login to the system to configure the CLI. The steps to install will differ based on which OS you are using. Different OS options are available on AWS official Docs Here.
Since I am using Windows I will go through the Install option for Windows:
- Download the installer Download the installer from Here
- Run the MSI to install the CLI. By default it gets installed here: C:\Program Files\Amazon\AWSCLIV2
To confirm the installation open a command line and run the below command. It should output the version
aws --version
Configure CLI: Next step is to configure the CLI to be able to use it with an AWS environment. I will be configuring a custom profile for the CLI. You can have multiple profiles for the CLI to connect to different environments or users from the same system. Run the below commands to configure the CLI. When prompted enter the respective access keys which were noted on earlier step from the IAM user.
aws configure --profile blogprofile
That completes the config of the CLI on your system. Now the CLI is ready to connect to the AWS instance to manage resources.
CloudFormation Steps
We will be performing few steps through CLI to perform various Cloudformation functions:
- Launch a new Cloudformation Stack to create the resources in AWS
- Check the status and read outputs from the Stack
- Update the Stack to update one of the resources
- Check Drift status for the stack
- Delete the Stack to bring down the whole architecture
Before you start, clone my Github repo on your local machine and navigate to the folder. That should contain the sample Cloudformation template.
Launch the Stack
Run the below command to launch the stack:
aws cloudformation create-stack --stack-name myteststack --template-body file://deploy_ec2_network_v1.json --parameters ParameterKey=KeyP,ParameterValue=key1 ParameterKey=InstanceType,ParameterValue=t2.micro --profile blogprofileThis will start the creation of the stack and output the Stack ID. Note the Stack ID for the next commands:


These are the parameters which get passed with the command:
- Stack Name: The name of the stack which is to be created
- Template Body: The CF template file name is passed. If it is in some other folder than the current one then provide the absolute file path of that file
- Parameters: Here we are passing two parameters: SSH key name and the Instance type. These are the parameters configured in the Cloudformation template and serve as input parameters to the stack. The parameters passed here will depend on what id defined in the CF template and change accordingly.
- Profile: The custom AWS profile we created above
These are the most basic parameters to pass with the command for creation of the stack. There are some other parameters too which can be passed to control other aspects of the stack creation like what to do on error, timeout config etc. But for this example I will go with these basic options.
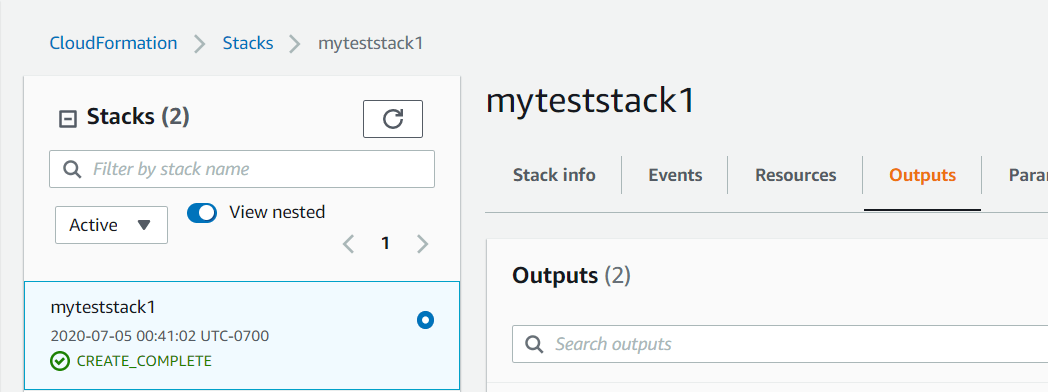
Check the Status of the Stack
Run the below command to check the status of the creation. Pass the Stack ID we copied earlier as input:
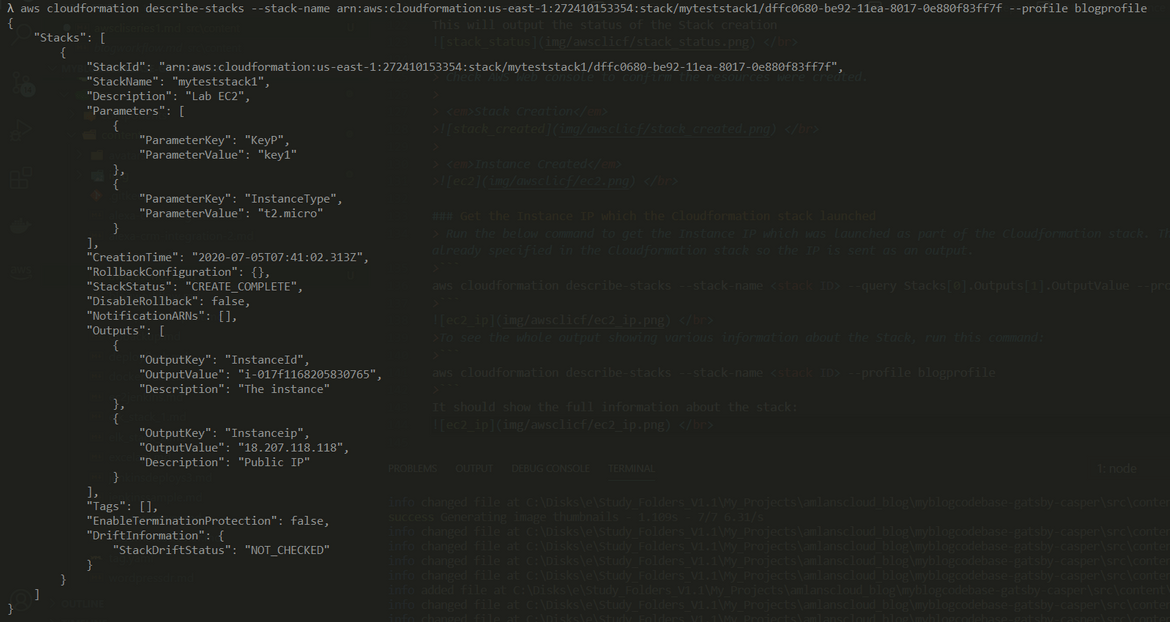
aws cloudformation describe-stacks --stack-name <stack_id> --profile blogprofile
Check AWS Web console to confirm the resources were created.
Get the Instance IP which the CloudFormation stack launched
Run the below command to get the Instance IP which was launched as part of the Cloudformation stack. Pass the Stack ID we copied earlier as input. The output step was already specified in the Cloudformation stack template so the IP is sent as an output.
aws cloudformation describe-stacks --stack-name <stack ID> --query Stacks[0].Outputs[1].OutputValue --profile blogprofile

In the CF template the Output step was specified to return the IP after Stack creation:
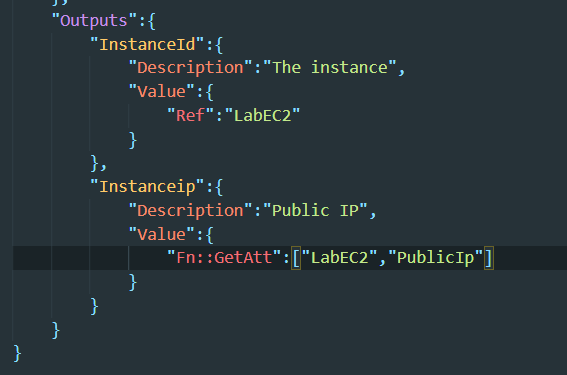
To see the whole output showing various information about the Stack, run this command:aws cloudformation describe-stacks --stack-name <stack ID> --profile blogprofile
Check the drift Status of the Stack
There are instances when someone may change the stack resources from the AWS web console or outside of Cloudformation. These changes make it hard to track when and how the resources changed since they were not done via the Cloudformation stack. For such scenarios Cloudformation provides a feature called Drift Status. When checked it shows if the resources are in a state which differs than the state defined in the stack. To check the drift status lets first update a resource from the web console. Update the Security group which is part of the stack, and add a new port rule to it(open port 5000).
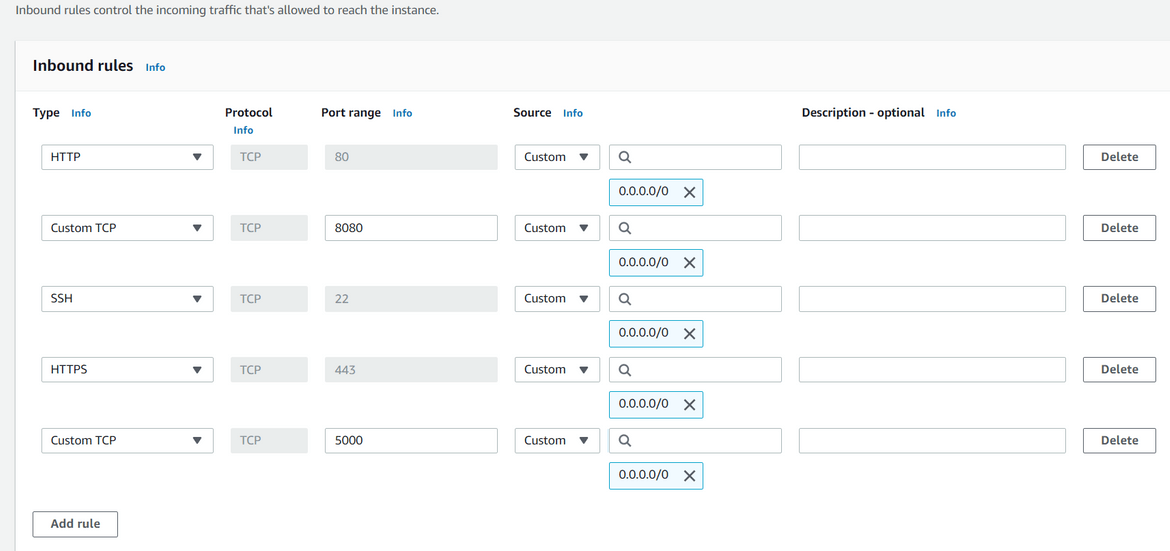
To check the drift status, run the below command:
aws cloudformation detect-stack-drift --stack-name <stack ID> --profile blogprofileThis initiates the Drift detection process. To check the status output, run the below command:
aws cloudformation describe-stack-resource-drifts --stack-name <stack ID> --profile blogprofileThis will output the drift status of all the stack resources. The ‘StackResourceDriftStatus’ field will show the status. For any drifted resource it will show accordingly. In this case it will show the Security group as drifted.
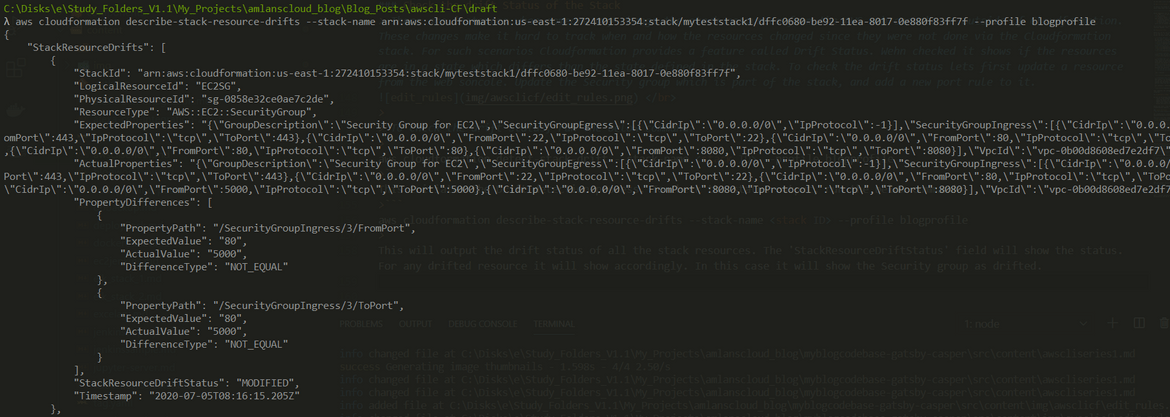
Delete the Stack
Run the below command to delete the stack and remove all resources from AWS:
aws cloudformation delete-stack --stack-name <stack ID> --profile blogprofileThis initiates the deletion of the stack and the resources are deleted:


This concludes all the steps which I wanted to cover to describe the process of using Cloudformation using CLI.
Conclusion
In this post I have just scratched the surface about the Cloudformation CLI commands. There are whole lot of other commands through which every aspect of Cloudformation can be controlled using CLI. The commands I explained are some basic useful commands which will help build the knowledge of CLI usage of Cloudformation. Hope this post helps someone start their journey with AWS CLI. I will be coming up with a new AWS service and its CLI usage next. Till then if you have any questions reach out to me directly from the Contact page.
