Deploying an AWS ECS Cluster with AWS CDK (in GoLang) and Deploying a Streamlit-OpenAI App to the cluster
Nowadays everything is getting an AI flavor to them. So it is becoming more important to be able to properly deploy AI apps and be able to define the infrastructure for such apps. I found that AWS CDK is a very useful infrastructure-as-code (IaC) tool provided by AWS, which makes it very easy to deploy the infrastructure to AWS. So I created this blog post to help someone start learning AWS CDK and how to use it to deploy infrastructure to AWS.
In this blog post, we’ll follow step by step, using AWS CDK and create an ECS cluster tailored to hosting our Streamlit-OpenAI app. We will see how we can use CDK to not only deploy ECS but the whole infrastructure to support the Streamlit app which uses OpenAI API. The Streamlit framework provides an intuitive way to build interactive web applications for data science and machine learning, while the OpenAI API empowers our app with state-of-the-art natural language processing capabilities.
The GitHub repo for this post can be found Here. If you want to follow along, the repo can be cloned and the code files can be used to stand up your own infrastructure.
Pre Requisites
Before I start the walkthrough, there are some some pre-requisites which are good to have if you want to follow along or want to try this on your own:
- Basic AWS knowledge
- Github account to follow along with Github actions
- An AWS account.
- Some knowledge of Golang as the CDK scripts are in Golang
- If you are following along for Golang, the GoLang need to be installed
- Understand what is OpenAI and how the API works for inferences
- Latest npm version installed
With that out of the way, lets dive into the details.
What is CDK
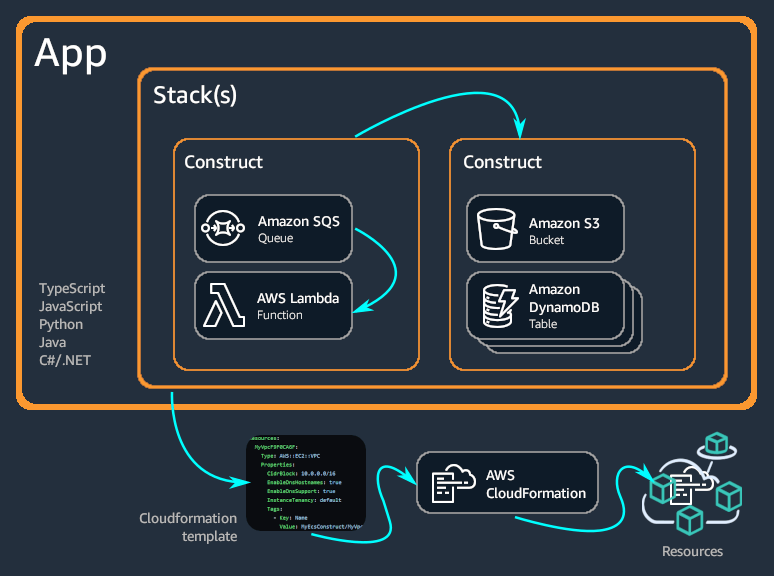
AWS CDK, short for Cloud Development Kit, is an open-source software development framework provided by Amazon Web Services (AWS). It allows developers to define and provision cloud infrastructure in a familiar programming language using object-oriented constructs. CDK supports multiple programming languages, including TypeScript, Python, Java, C#, and JavaScript, making it accessible to a wide range of developers. AWS CDK enables developers to use the full power of their preferred programming language to define infrastructure as code.
Under the hood, CDK generates AWS CloudFormation templates based on the defined infrastructure constructs. CloudFormation then deploys the resources to AWS, ensuring the desired state is achieved. To learn more about CDK navigate Here. Below is an image showing conceptual structure for CDK. This is an image from the AWS CDK documentation
What is StreamLit and how it works with OpenAI
Streamlit is an open-source Python library that empowers data scientists and developers to create interactive web applications for data visualization and machine learning quickly. It simplifies the process of turning data scripts into shareable and interactive web apps, enabling users to interact with data, models, and visualizations seamlessly. Streamlit is commonly used to deploy machine learning models and showcase their predictions or results interactively. Users can integrate their trained models directly into the app. Streamlit is designed with simplicity in mind. It follows a straightforward and intuitive API, allowing users to transform Python scripts into web apps with just a few lines of code.
It can be easily used to build apps which use OpenAI API. The apps can be built using OpenAI API and provide an intuitive app UI to interact with the API. Some use cases for this combination are:
- Chatbots and Virtual Assistants: Building interactive chatbots or virtual assistants powered by OpenAI’s language models allows users to have natural and dynamic conversations with the app.
- Question-Answering Systems: Users can create question-answering systems where they can ask questions, and the app utilizes OpenAI’s language model to provide answers.
- Language Translation Apps: By leveraging OpenAI’s language model, users can build language translation applications that can translate text from one language to another in real-time.
About the sample application which we will deploy
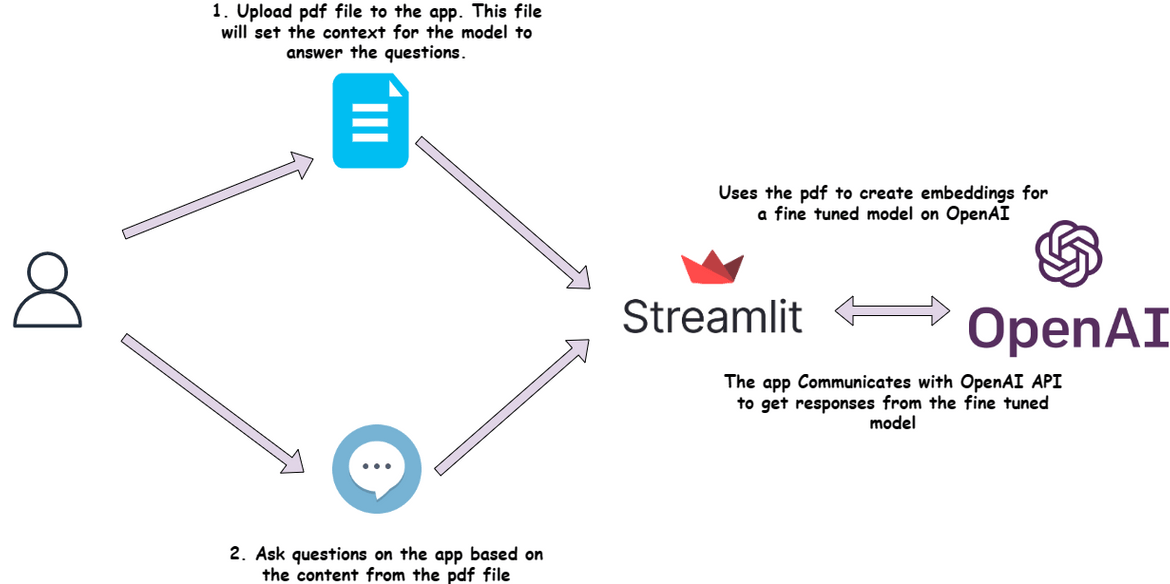
Before we dive into the CDK steps, let me first explain the app which I am using as example here. Below diagram shows the app functional flow.
Lets go through each of the steps.
- Upload the pdf: First step is to upload a pdf document to the app. This document will act as a context for the further questions to the app. The uploaded document trains a fine tuned model on OpenAI based on the content of the pdf file. Once the file is uploaded, the app calls the OpenAI API to send the pdf content and get a fine tuned model ready with the embeddings created from the pdf file content.
- Ask a question: Once the uploading and the fine tuned model gets ready, the app opens up a text field to ask questions based on the document. The app responds back with answers based on the context of the uploaded pdf file.
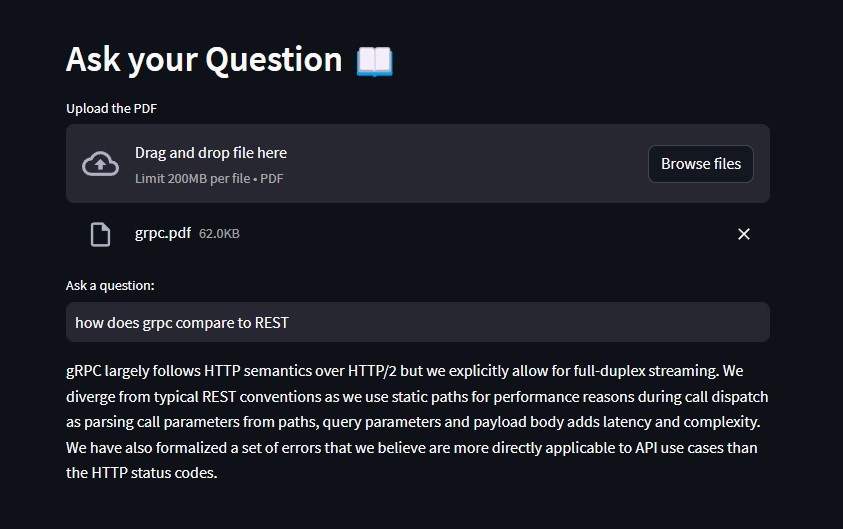
Below is a sample screenshot of the app in action
Overall Tech infrastructure
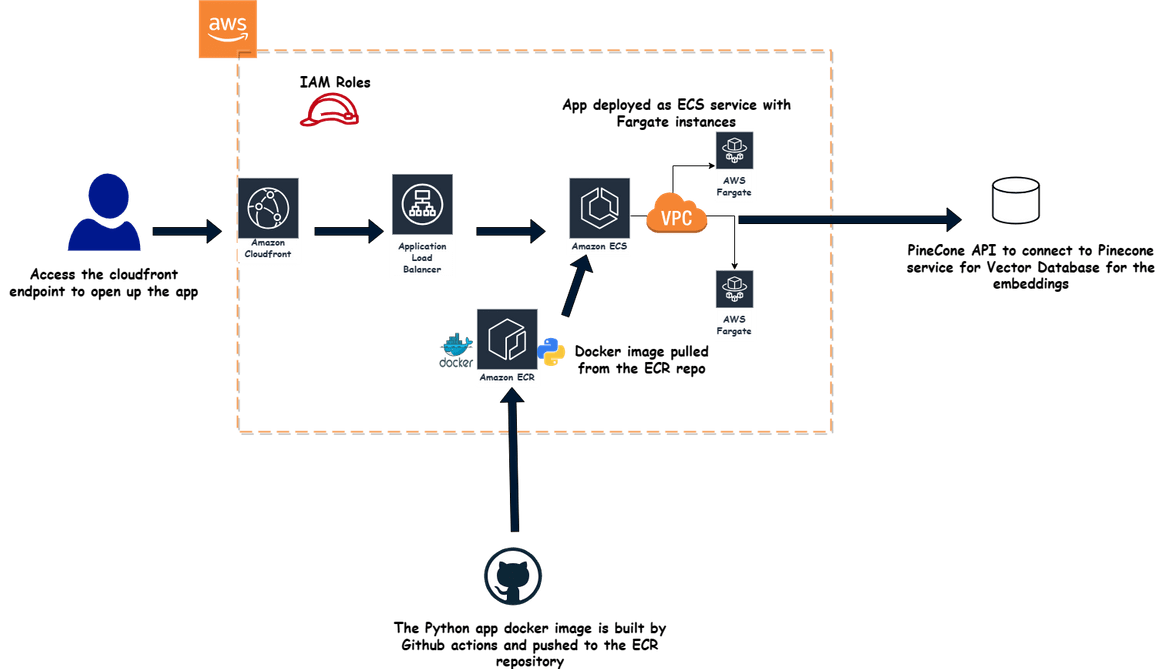
Let me first explain all of the components which we will deploy via CDK and which will build the whole stack for this application. Below image shows all of the components involved and how they connext to each other.
-
Networking:Though I don’t show this on the diagram but its inherent that networking components are also deployed along with the ECS cluster components. The networking components which we deploy here are:
- VPC
- Subnets
- Internet Gateway
- Security groups for various parts of the app
- IAM Roles: IAM roles are created for the ECS task to assume and get access to AWS services. This role provides the needed access to the ECS task (the app) to access other services like Cloudwatch for logs or S3 for storage.
- Amazon Cloudfront: Cloudfront is deployed to serve the app from edge locations to the user. This improves the performance of the application when accessed from global locations. To open the app, user accesses the Cloudfront URL which is pointed to the load balancer.
- Load Balancer: The load balancer is deployed to expose the ECS service to public internet. The ECS service for the app is behind a private subnet and cant be accessed directly. The load balancer exposes the app and also performs load balancing between the Task pods to make sure traffic always gets routed to the healthy pod and not an unhealthy pod.
- ECS cluster: The ECS cluster is deployed for the app to run. I am using the declarative config of CDK to declare very minimal info for the cluster and rest gets deployed and handled by CDK. The cluster runs in the VPC created as part of this stack.
- ECR Repository: The repository is deployed to hold the container images for the app. The Docker container images for the Streamlit app is built and pushed to the repository using a Github actions workflow
- ECS Service and Task: The app is deployed to the ECS cluster as ECS service. The service spins up few replicas of Task running the pods for the app. The docker im age for the pods is pulled from the ECR repo. I am using Fargate instance for the tasks which run on the ECS cluster. Fargate instances are good way to run those tasks serverless on ECS cluster.
- Pinecone API for Vector DB: For the app to be able to fine tune the OpenAI models from the pdf, there is a need for a vector database to store those embeddings. Here I am using a service called pinecone which provides a vector db service, that is enough for this example. You can find more about pine cone Here. I am accessing the service through the APi provided and store/retrieve the embeddings as needed.
That should explain all of the components involved in the stack. Now lets dive into using CDK to deploy this.
Deploy the infrastructure
For the deployment we will be handling in two parts:
- Deploy the infrastructure (like the ECS cluster, load balancer etc)
- Build and deploy the app to the cluster
In this section we will deploy the infra first.
Folder Structure
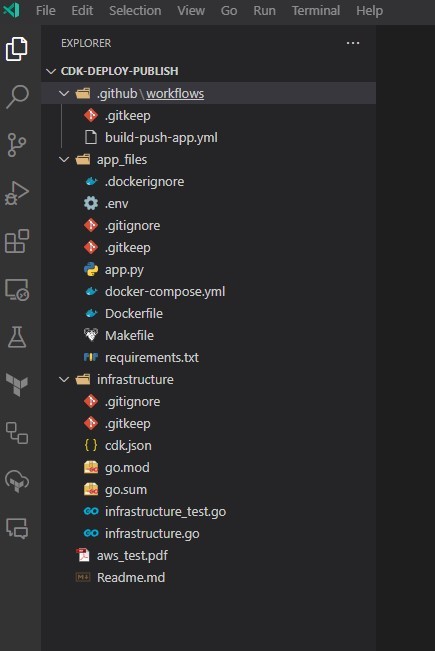
If you are following along from my Github repo then this sections will help understand the folder structure.
- .githubThis folder contains the workflow file for Github actions, which builds the docker image for the app and pushes to the ECR repo.
- app_filesThis folder contains the files for the app. The app python files and the Dockerfile to build the app is placed in this folder
- infrastructureThis folder contains the CDK related files. The Go module and the go code file for the CDK deployment is in this folder
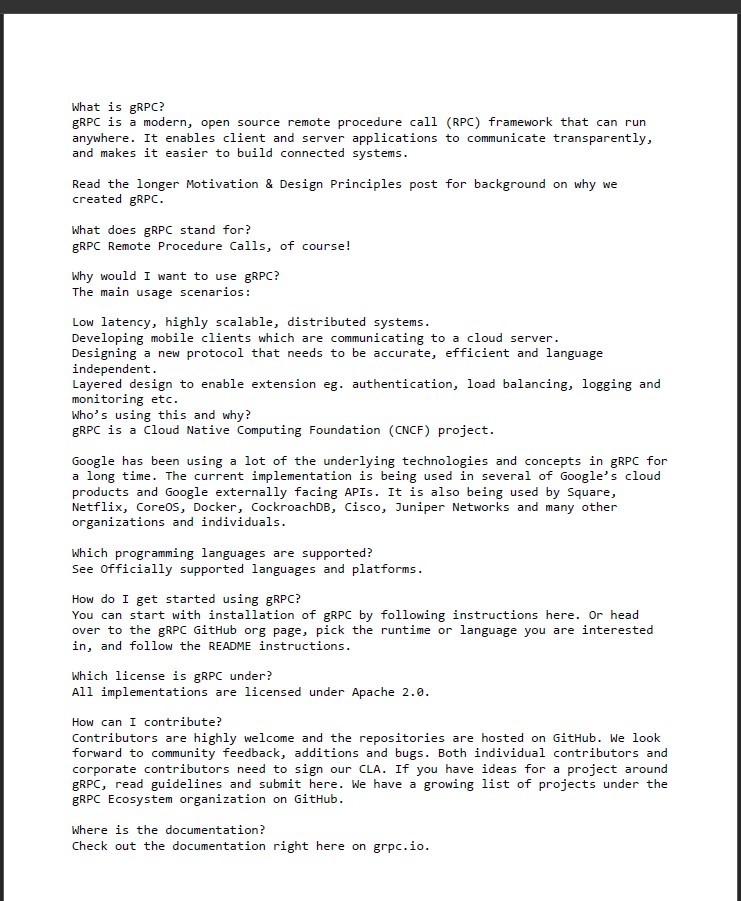
- grpc.pdfThis is just a sample file to test the app
Setup AWS CLI
Before using CDK, AWS credentials need to be configured on the system. Install AWS CLI from the instructions Here. You also need to create an IAM user on AWS and note down the keys for the same. Then run the command to configure the credentials on your system
aws configureWhen prompted enter the respective keys. This configures the AWS credentials on your system.
Install and Setup CDK
Now we are ready to setup CDK. First install CDK on your system. To install CDK, you need to have the latest npm also installed on the system. If you don’t have npm installed, get it along with nodejs from Here. Once it is installed, CDK can be installed with this command
npm install -g aws-cdkTo verify its installed correctly
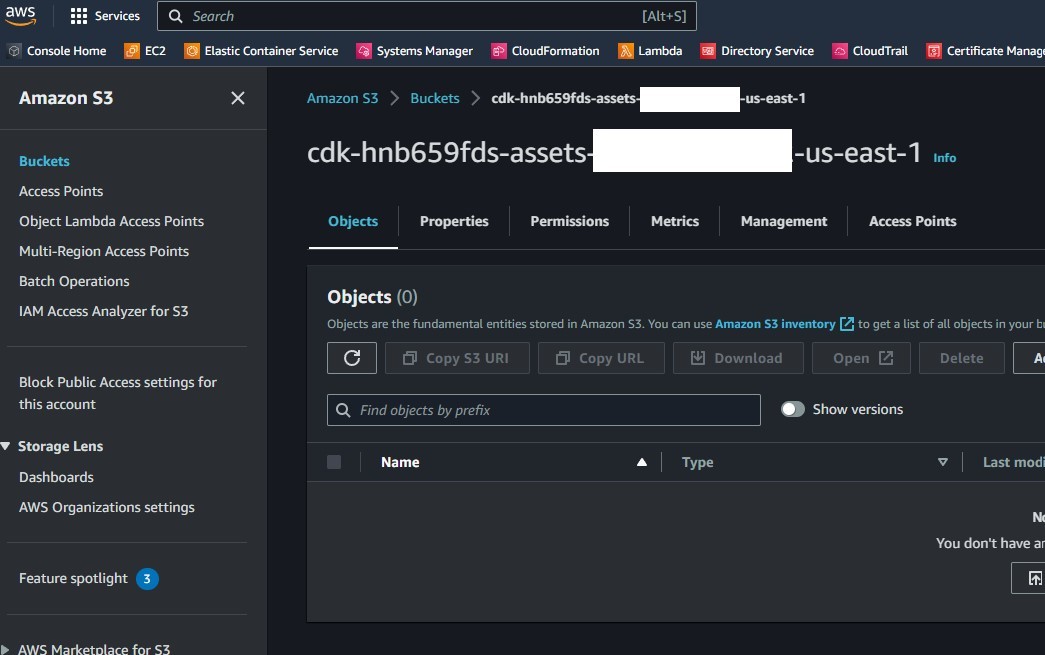
cdk --versionTo be able to init and deploy using CDK, first step is to bootstrap. Since deploying with CDK requires S3 buckets for the cloudformation templates that get generated, this bootstrap step makes sure those buckets are created properly and the local project is pointed to use those buckets. Since the AWS credential is already configured, run this command to perform the bootstrapping
cdk bootstrap aws://<account_number>/<aws_region>Replace the account number and the region based on your values. Once you run the command, it performs the bootstrap and creates the needed buckets

Now we are ready to init a new CDK project. Create a new folder for the CDK app and navigate to that folder
mkdir new-app
cd new-app
In the folder, run this command to init a new CDK app. Since I am using Go Lang, here I specify Go as the language. But as suitable other language can be specified too:
- typescript
- javascript
- python
- java
- csharp
cdk init --language goYou should have a few Go files created in the folder now.
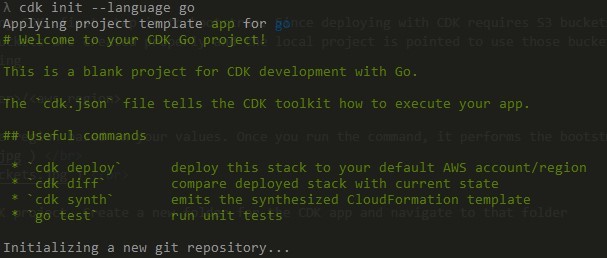
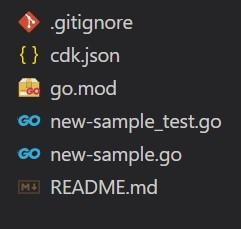
This is the CDK app starter which got created. Now we have the module created but we still to install AWS construct libraries needed for CDK to work. Run this command to install all the libraries
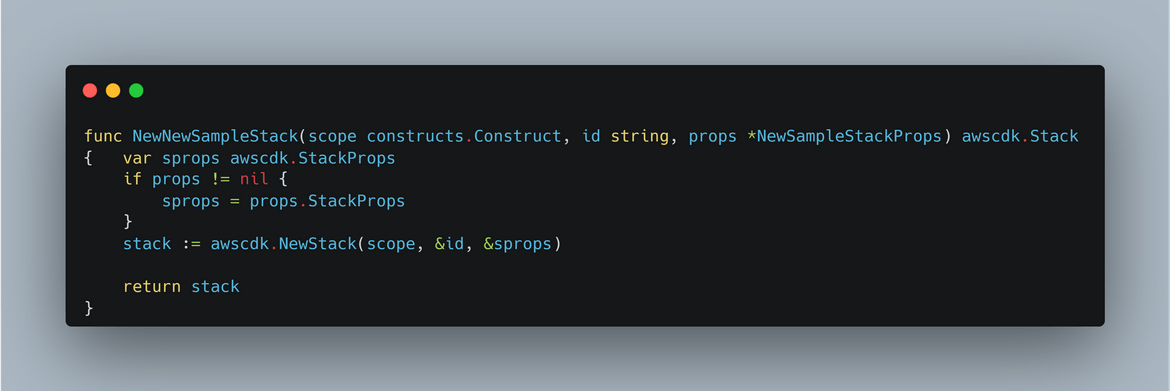
go getLets check the file. Open the go file which is the main code file for the stack. In the file you will have the basic template starter code defined. To add new resources, this is the function which needs to be modified
The resources which need to be deployed, need to be added one by one to this function. For this example I am simplifying it to keep all in one file itself. But in real scenarios, for better modularity, the resources can be split into multiple files and then imported.
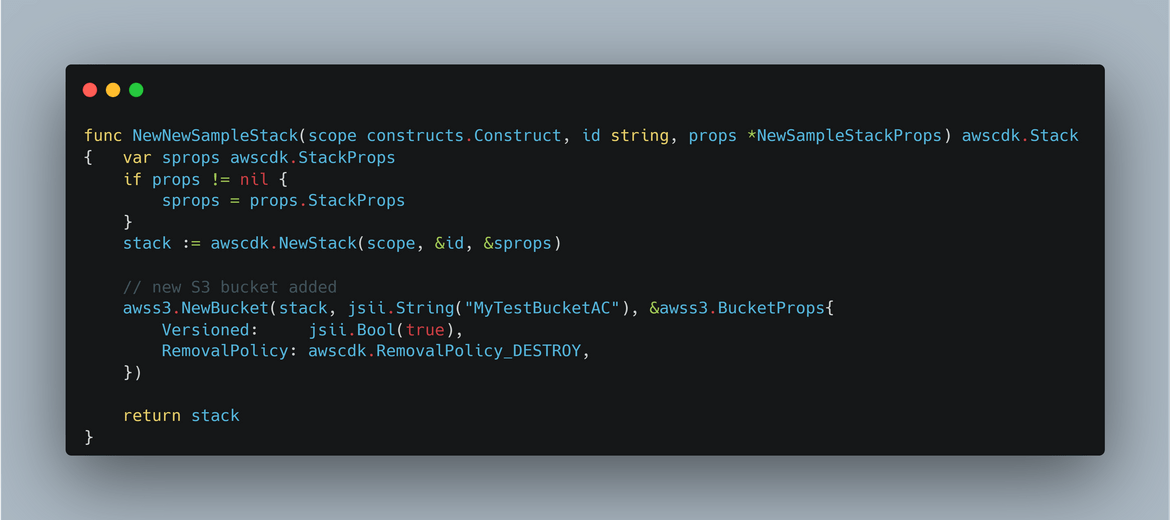
Lets see if our setup works. Lets add a S3 bucket resource to the code. The modified function now looks like this
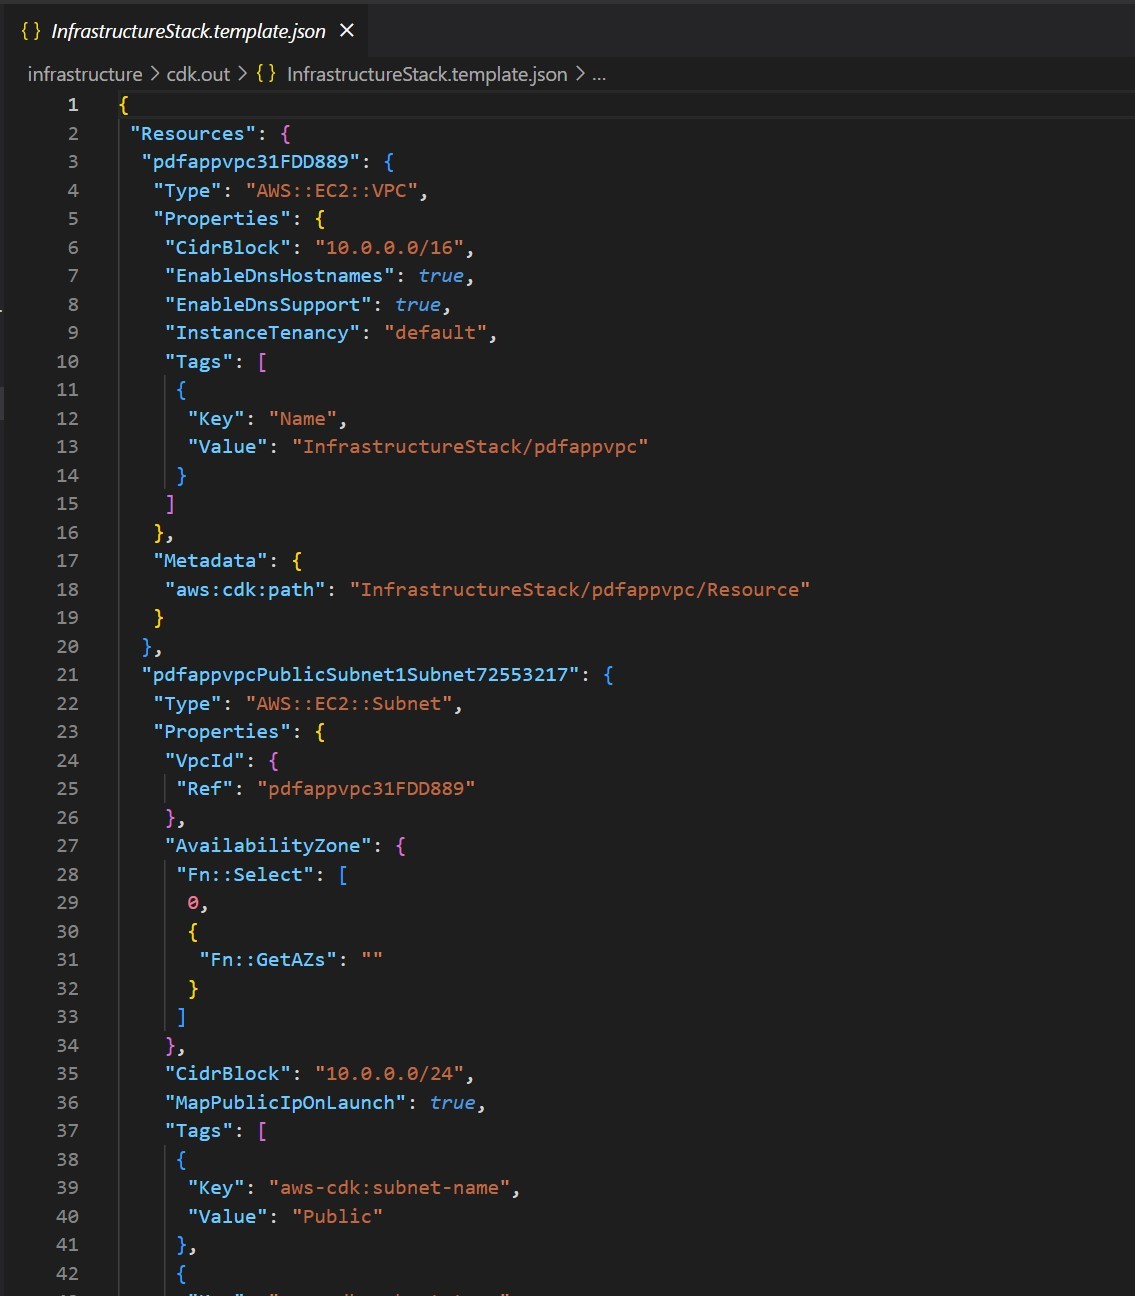
Once its added, lets generate the cloudformation templates. Now when you are working with CDK, you generally dont have to deal with the templates directly, but for example and understanding lets see how it gets generated. Run this command to generate the Cloudformation template
cdk synthOnce the command completes, you will see a new folder called cdk.out. The cloudformation template can be found in this folder

As you can see the Cloudformation template is creating an S3 bucket just as we specified in the Go code. Now lets deploy this CDK stack.
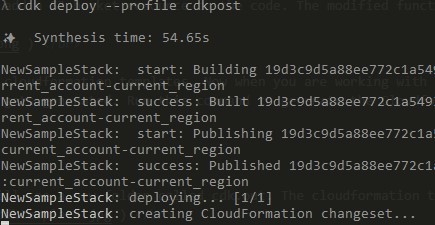
cdk deployThis will start the deployment of the stack to AWS. Since the credential is already configured, it will get deployed to the AWS account for which the credential was configured.

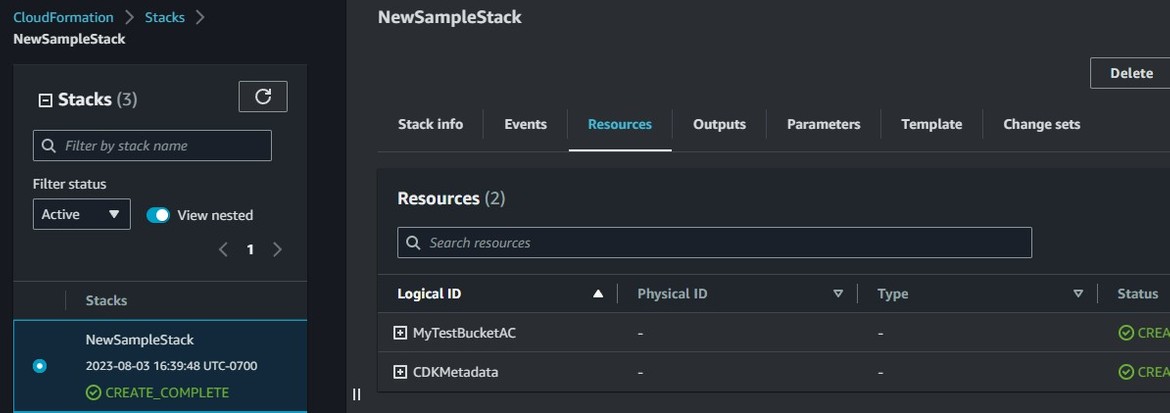
Lets check the stack on AWS. The stack ARN and name is the final output of the deploy command. Navigate to AWS console and open up that Cloudformation stack. It shows the S3 bucket is deployed
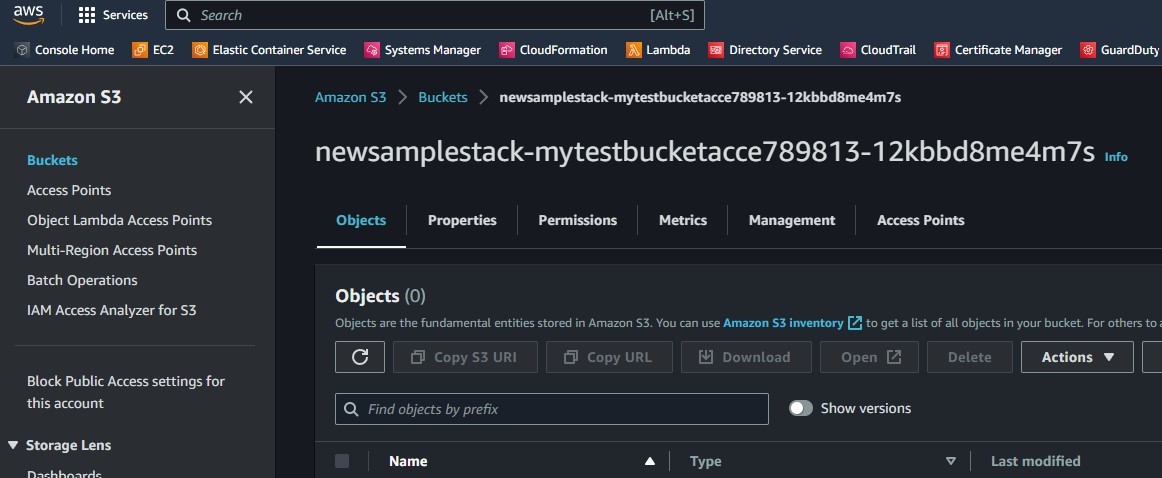
Lets verify the S3 bucket. Navigate to S3 service page and verify that the S3 bucket was created
With that we have successfully deployed an S3 bucket using CDK. This should give you good idea on how to start using CDK. If you want to follow along with the stack from my repo, this sample S3 bucket wont be needed anymore. So lets destroy the bucket.
cdk destroyIt will ask to approve the step. Just specify y. Once approved it will go ahead and delete the S3 bucket along with the Cloudformation stack.

Now lets understand the CDK stack which we will be creating to deploy the Streamlit app.
CDK Components in the infrastructure
For the app which I am deploying in this post, the infrastructure has been defined in CDK. The files can be found in the Github repo. Let me explain the Go code for each of the infrastructure components
-
VPC and Subnets
The vpc and subnets are defined in the code using the awsec2 construct.
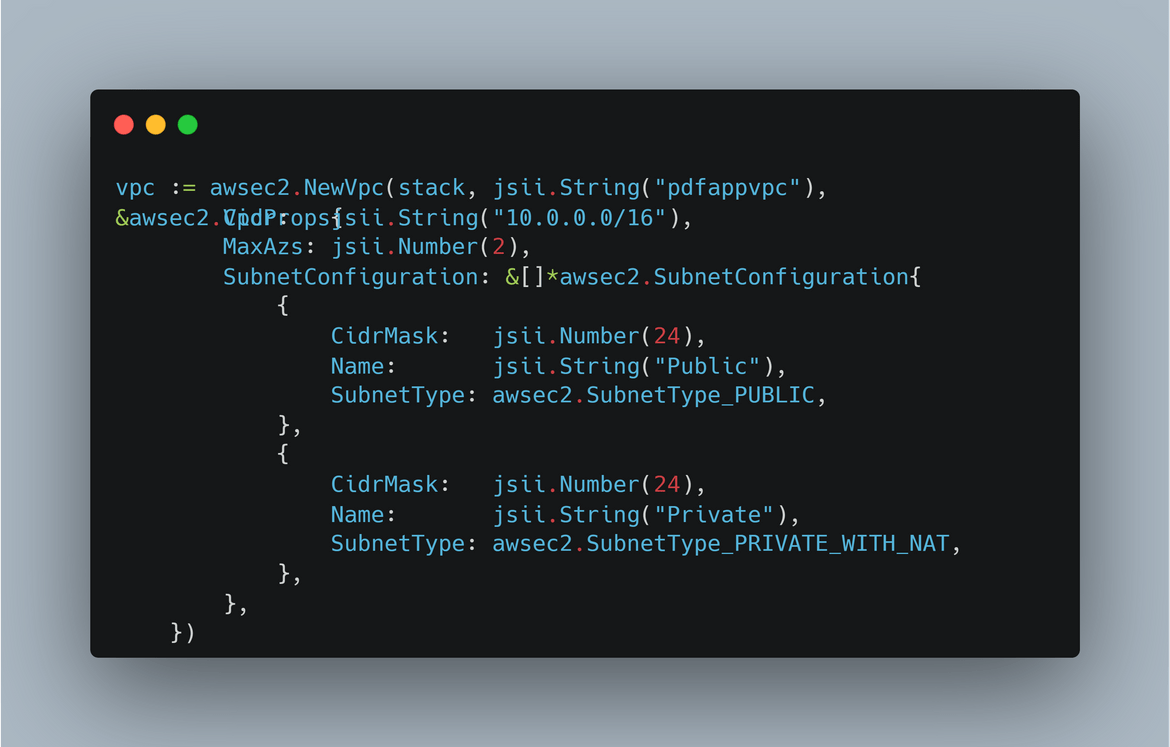
Here the vpc is getting created with cidr range of 10.0.0.0/16. Using the declarative way of CDK, in the same code I am also creating public and private subnets. For the private subnet,‘SubnetTypePRIVATEWITH_NAT’ also creates a NAT for the instances in private subnet to reach out to internet. -
Security Group
A security is needed for the load balancer. In this code I am creating the security group and adding ingress rules to the group allowing the needed ports.
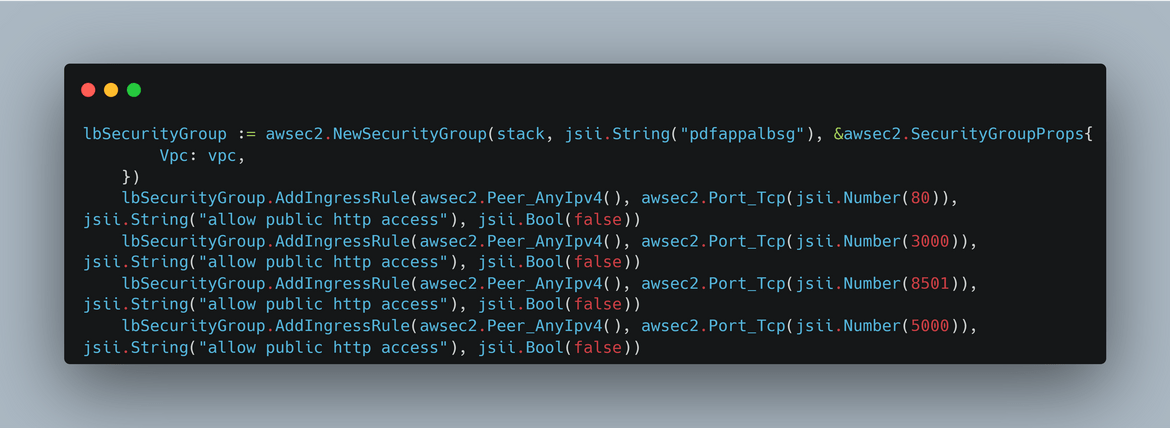
-
ECR Repository
Here I am creating the ECR repo needed for the Docker container images of the app

-
ECS Cluster
Here I am creating the ECS cluster. I am not providing any specific settings and just creating the cluster with some basic defaults. The cluster is getting created in the vpc created above. So we pass the vpc variable.

-
ECS Task Execution Role
We need an execution role for the tasks or pods which will be running on the ECS cluster. This provides the needed access to the task. Here I am creating the role and associating an AWS managed policy to provide the needed permissions.

-
Task Definition
The app which will be running as a task on the ECS, will need a task definition defined. Here I am creating the task definition. This basically defines some parameters for pods like cpu, memory etc. I am just using some defaults and not setting much custom options.

-
Task Container details
Here I am defining the container details for the task. This defines different options for the container which will run in the pods. The image name will be the image name from the ecr repo. Since we already created the ecr above, I am getting the name from the ecr repo variable. I am also exposing the 8501 port for the container for the app to be accessible. This container def is added as part of the task definition created above.
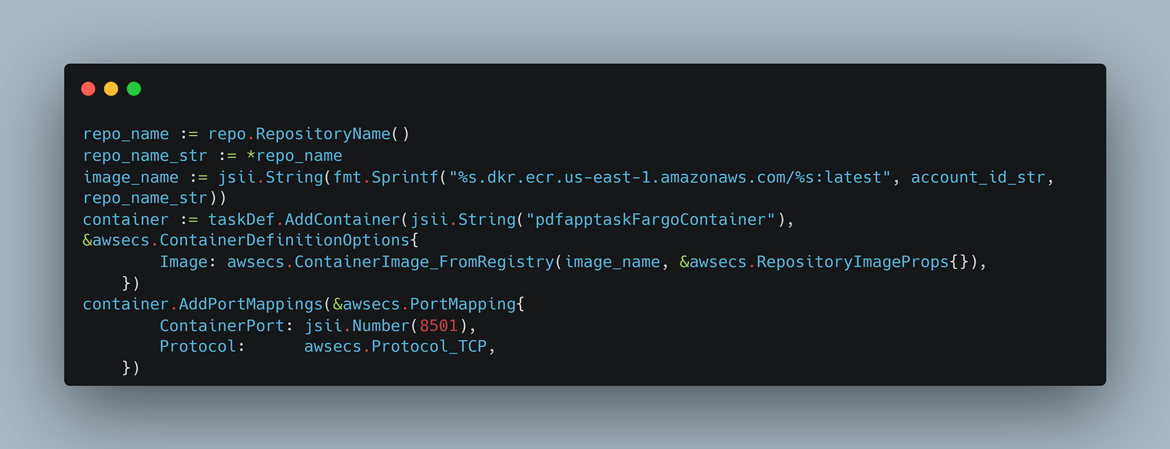
-
ECS Service
Using all above task related definitions finally an ECS service is being created here. This service maintains the Task replicas and exposes the app endpoints for the load balancer. Here I am passing the task definitions and the vpc details as options for the service
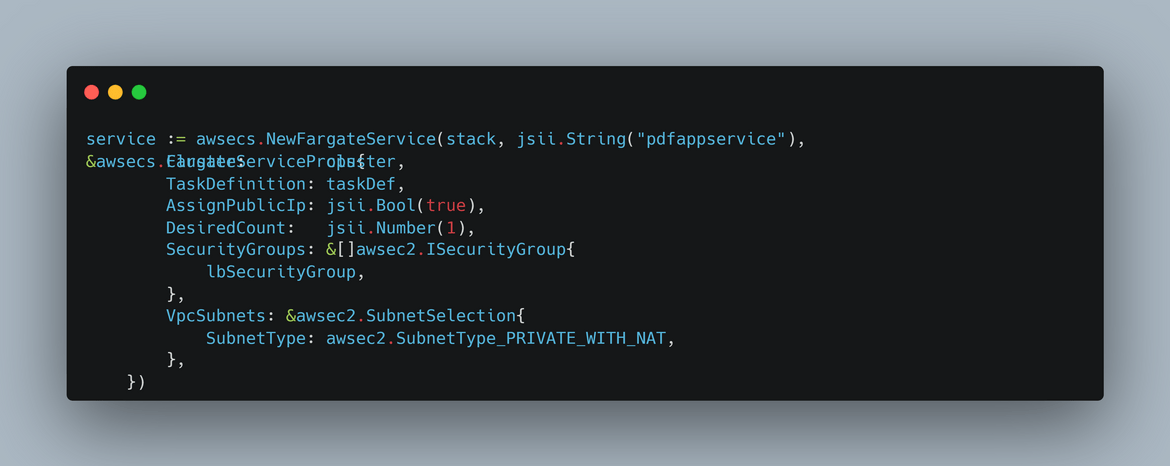
-
Load Balancer and the listener
To expose the app to public a load balancer is being created. The load balancer is defined with the vpc details above. The listener for the load balancer is created and the ECS service created above, is passed as the target for the listener. I am also adding a healthcheck to make sure load balancer only routes traffic to healthy pods.
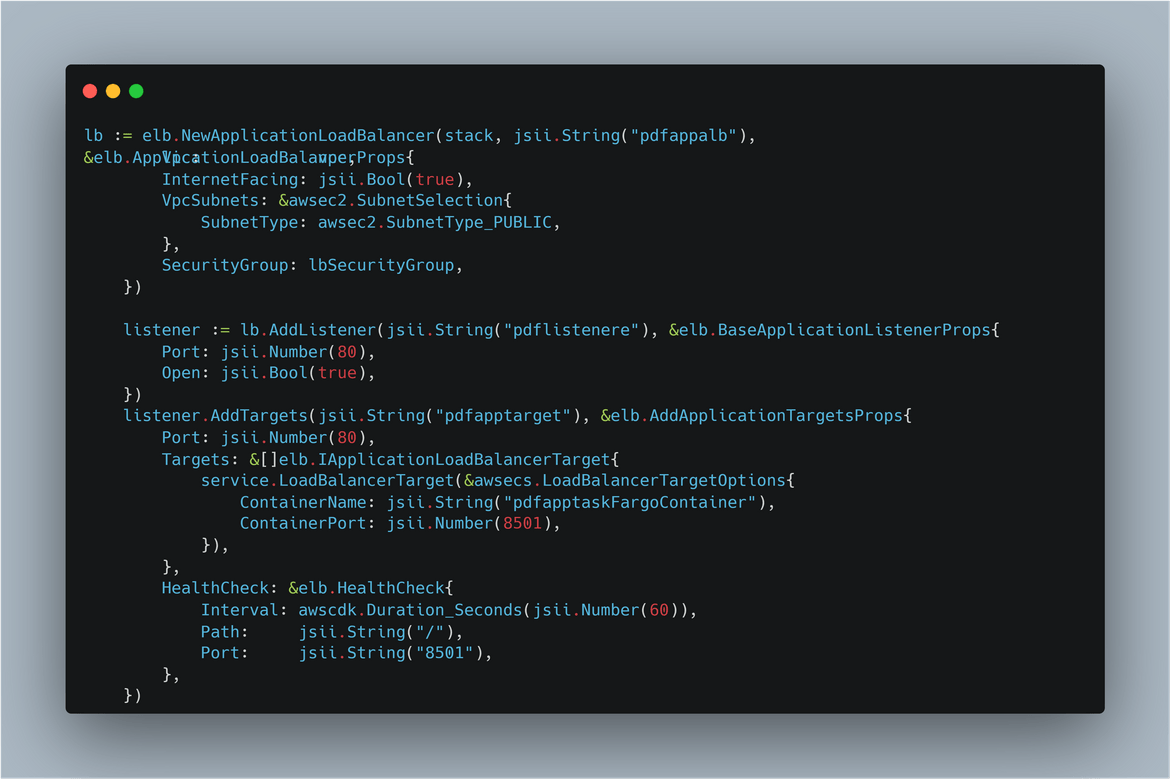
-
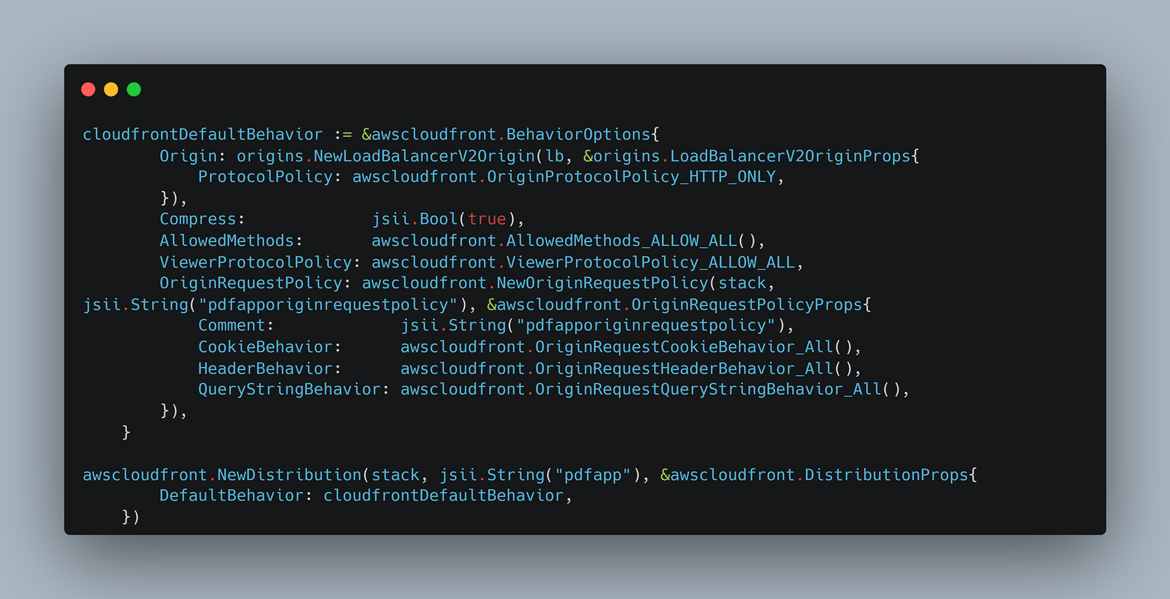
Cloudfront Distribution
Finally I am deploying the Cloudfront distribution. The origin for this distribution is the load balancer. Since we already created the load balancer above, we are passing the load balancer variable to the cloudfront construct for the origin parameter. I am using some other defaults and not customizing much here.
That covers all of the components which are being specified in the Go file. All of these are defined using pure Go code. This is where CDK makes it easy to define IAAC code files using multiple preferred coding languages. Now we have the stack defined in the code, time to deploy the stack.
Deploy components using CDK
If you have cloned my repo then you can use the code files in my repo to directly deploy this stack. Before you deploy, make sure you have followed the steps from the setup section. You don’t need to run the init step now because you are getting the code files from my repository. To start the deployment, navigate to the infrastructure folder of my repo. The AWS constructs need to be installed first. Run this command to install everything
go getAfter completing the install, ensure these steps have been completed before going forward
- Configuring AWS credentials
- Completing the cdk bootstrap process
Run this command to first generate the Cloudformation templates. Its not a mandatory step but just for learning running this command.
cdk synthThis will start creating the templates. After sometime the templates will be created in the cdk.out folder. The templates can be checked in the cdk.out folder to see how the templates are structured.
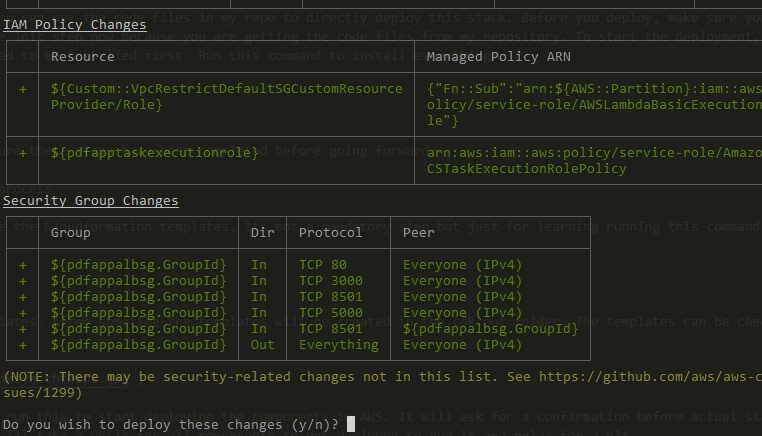
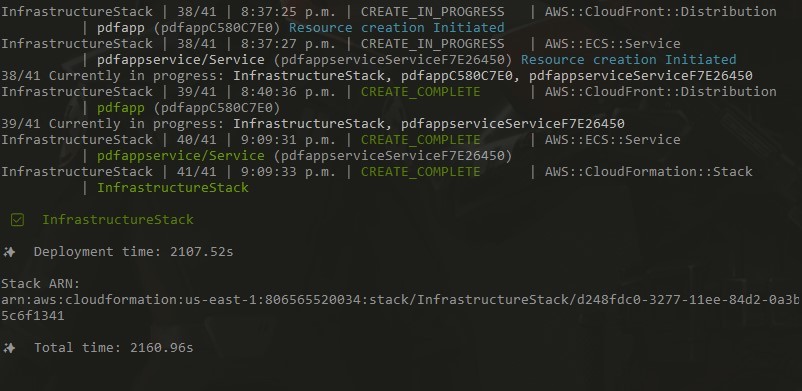
Once satisfied with the template, run this to start deploying the components to AWS. It will ask for a confirmation before actual start of the deploy. Select y for that and it will trigger deployment. It will take a while for all components to get deployed so run it and relax for a bit.
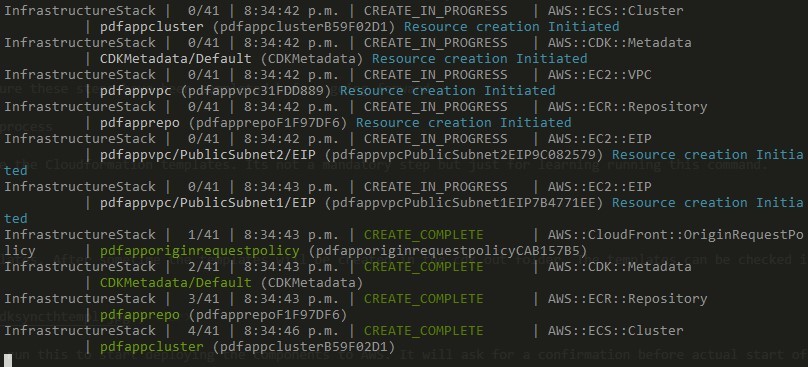
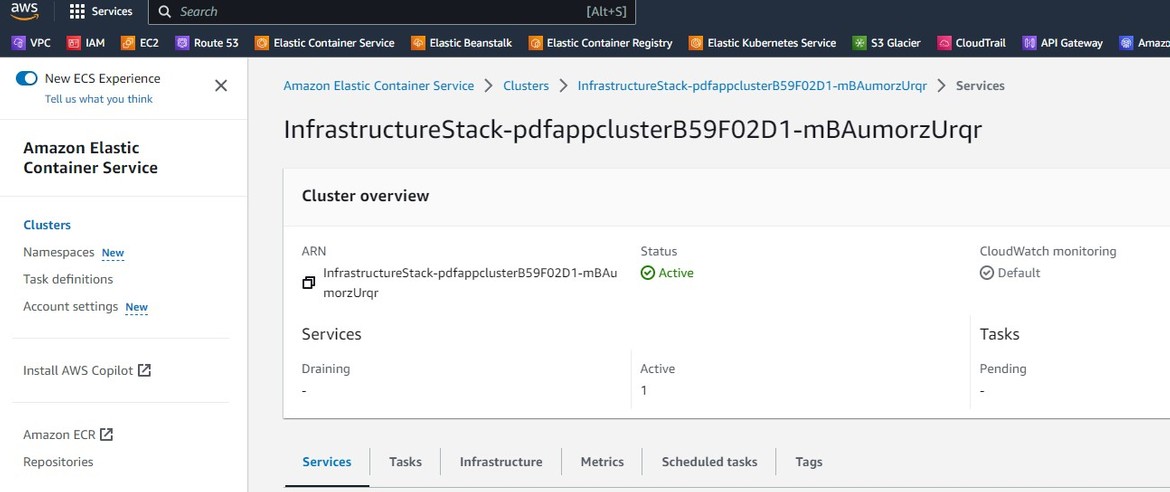
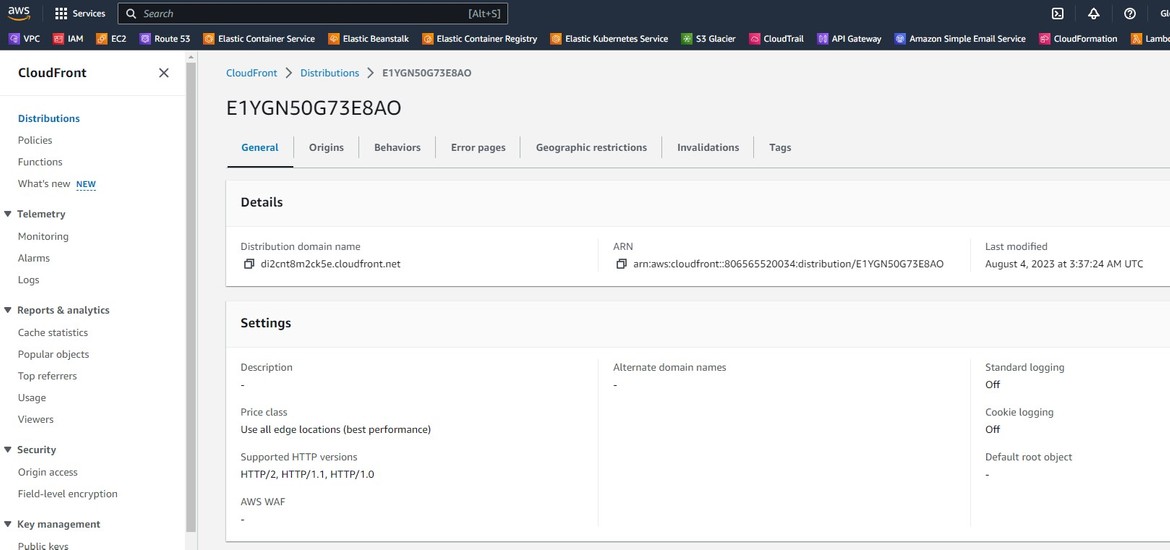
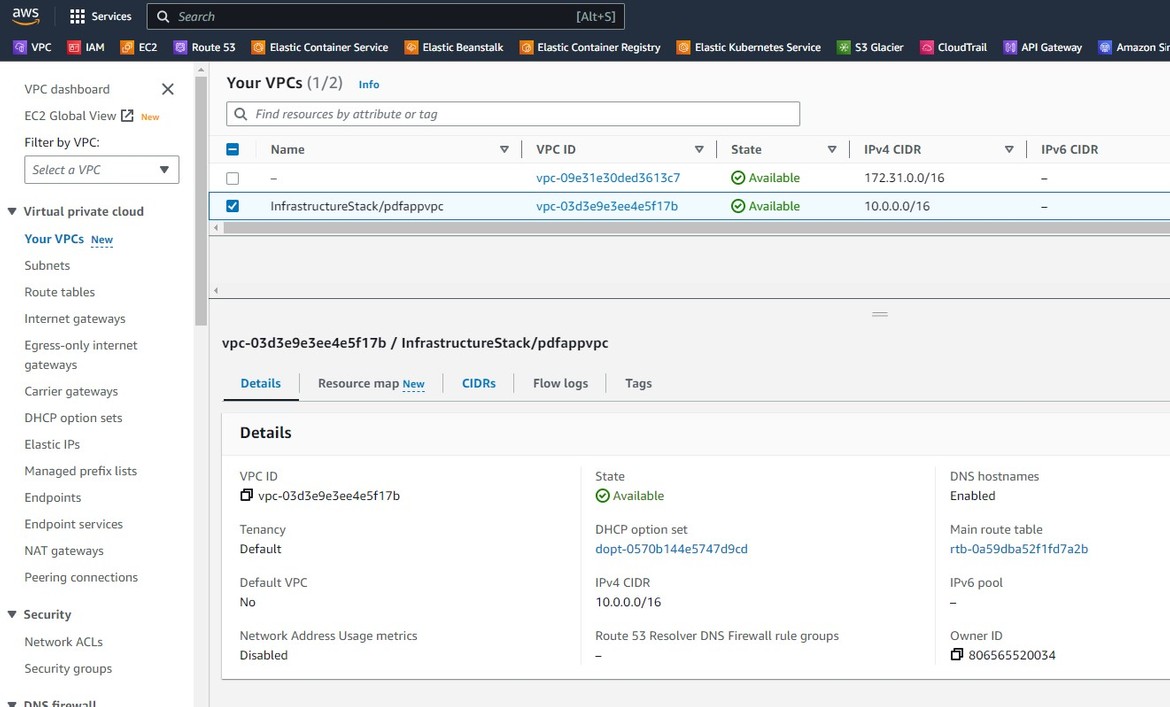
cdk deployAfter the process completes, lets check some of the resources on AWS console
ECS Cluster
Cloudfront
VPC
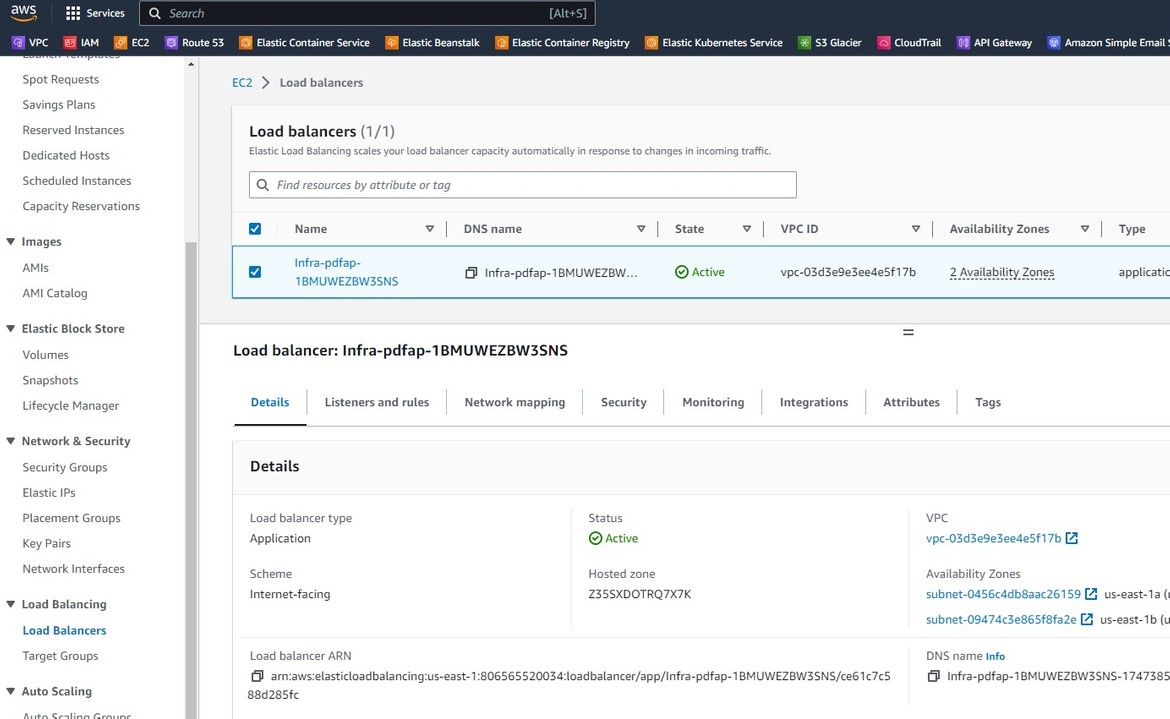
Load Balancer
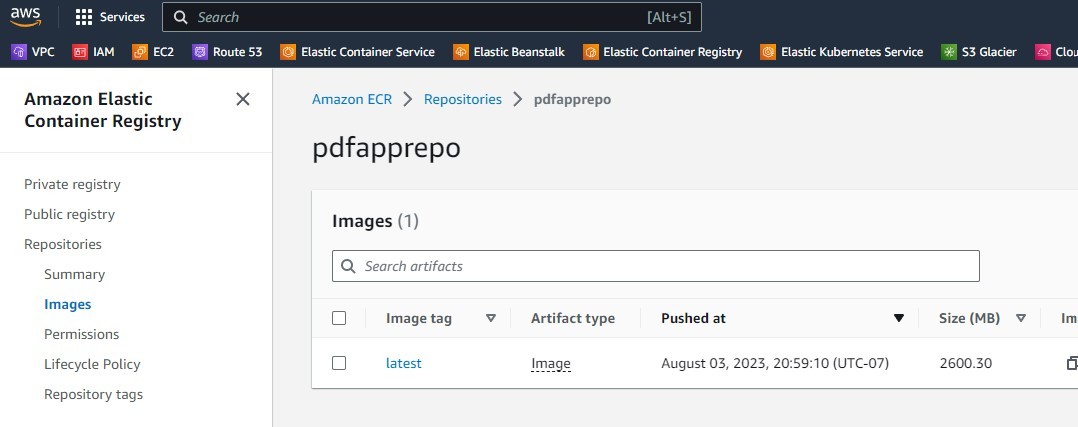
ECR Repo
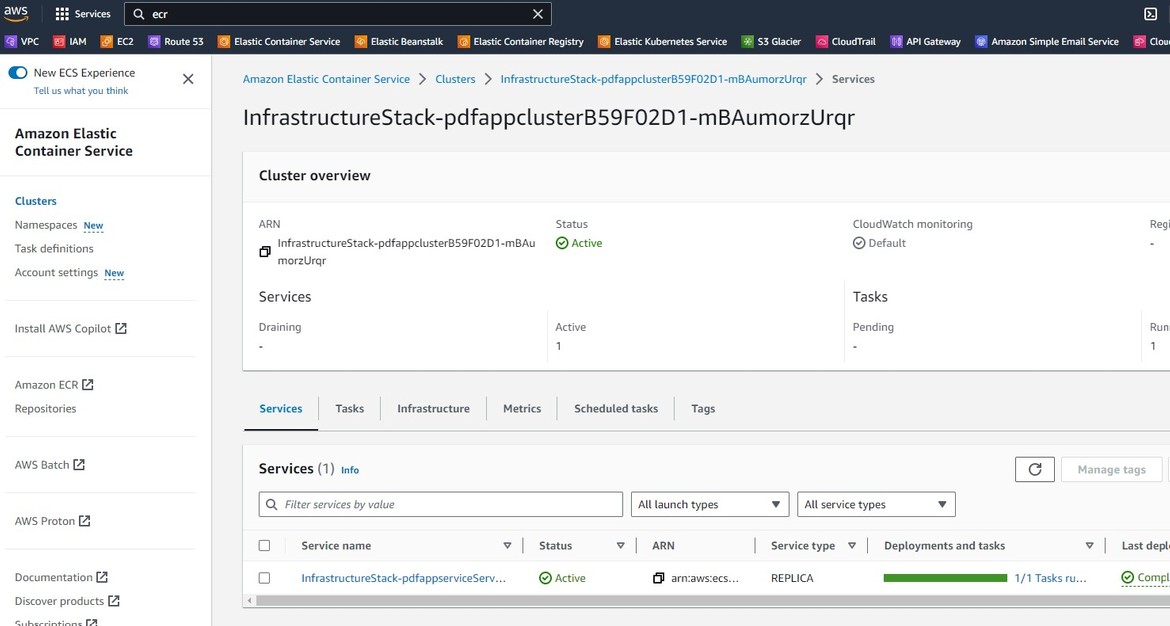
ECS Service
Now we have all of the infrastructure components deployed via CDK. Now we are ready to deploy the app.
Deploy the app and test the app
We have our infrastructure ready and deployed using CDK. Now we will deploy our app to the ECS cluster and then see how it works. Before you deploy, we will need to perform some pre-requisite steps:
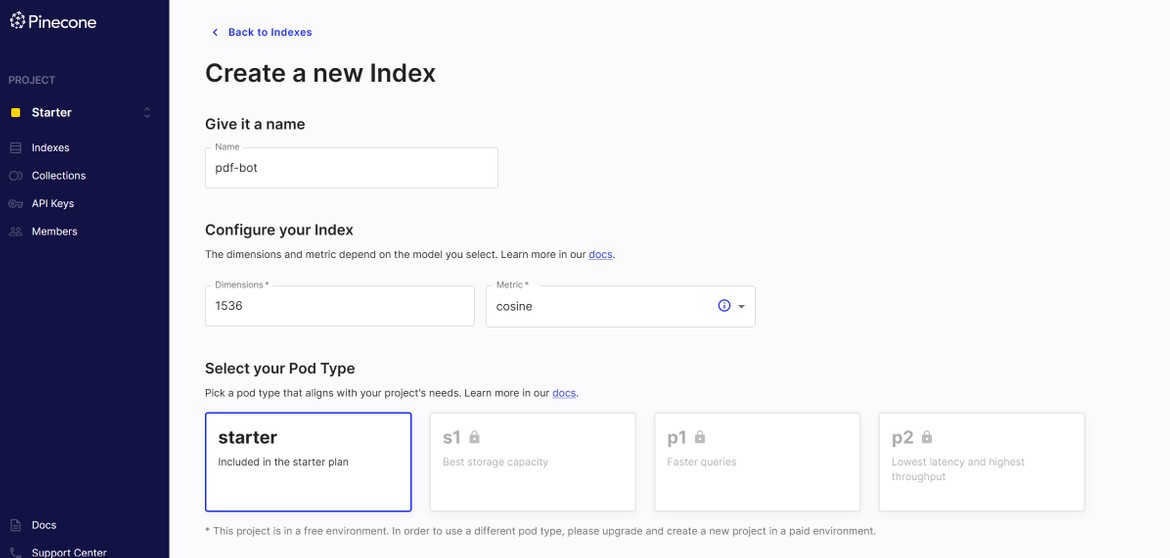
- Pinecone api keys:First we need to get an API key for the Pinecone db. You can get a free tier account on pinecone and launch the db. Navigate Here to create an account. Once created create a new index in the service and keep the index name. We will need that later. Also from the API keys page create a new api key and copy the value

To create the index make sure to enter the dimension as 1536 as thats something specific to OpenAI.
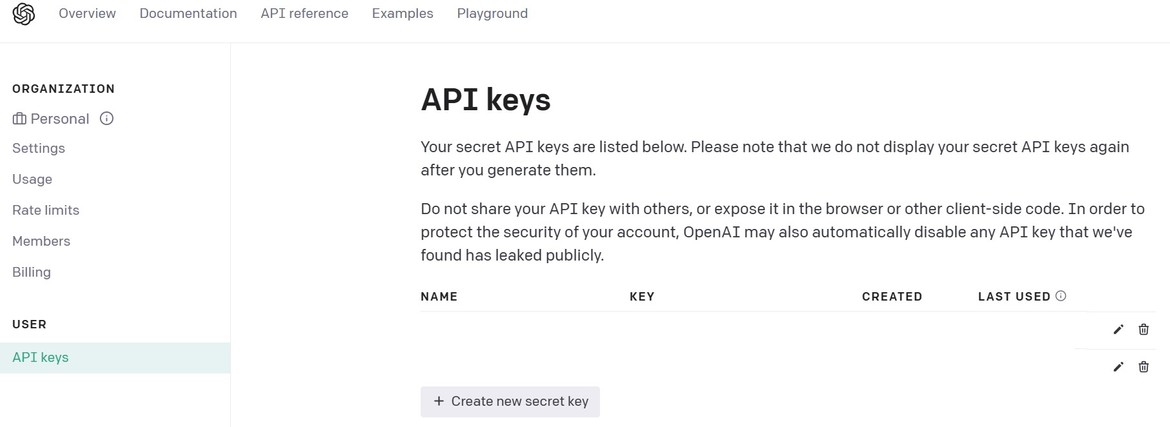
- OpenAI API Key:For the inference to work, we will also need an OpenAI api key since the app will be fine tuning an OpenAI model. Create an account Here. The free credits provided should be enough for this example. Create a new API key from the OpenAI console and copy the value.
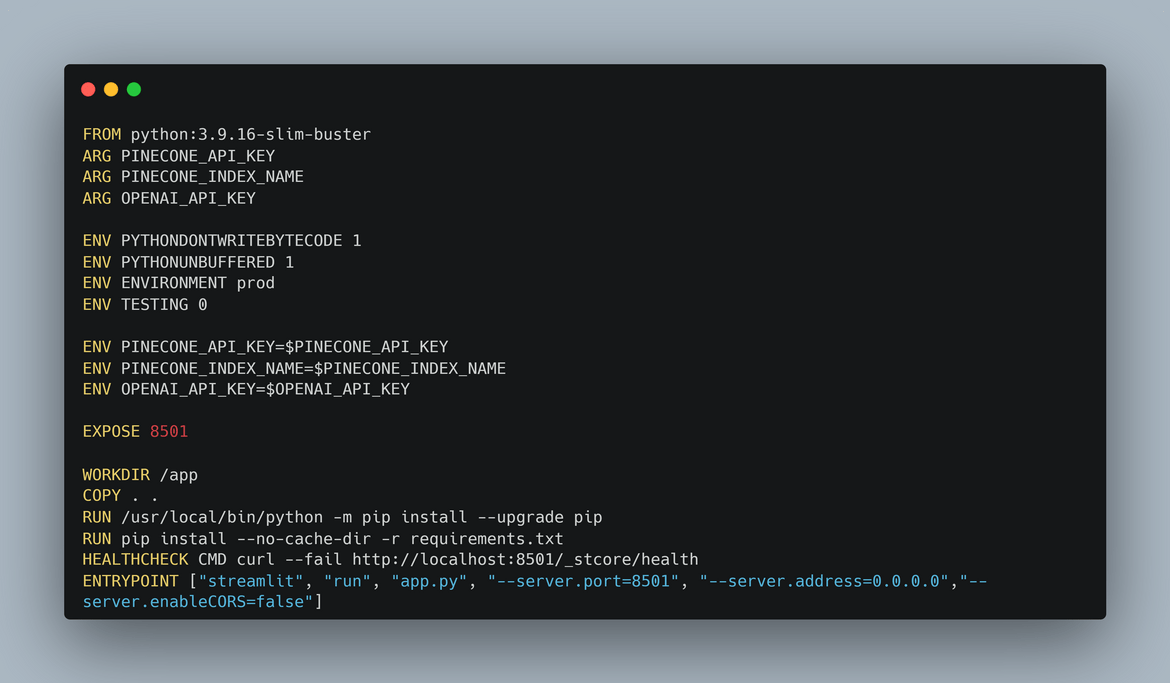
Once those steps are done, lets see the Dockerfile. The app image is being built into a Docker image using the Dockerfile in the app files folder. The Docker file performs these steps:
- Sets the environment variables from the build args. The env variables are needed for the OpenAI and Pinecone API connections
- Installs all dependencies
- Exposes the port for the app
- Starts the streamlit app
If you want to run it locally, I have included a docker-compose file in the folder. First edit the .env and update the respective values as copied in the pre-requisite step.
PINECONE_API_KEY=""
PINECONE_INDEX_NAME=""
OPENAI_API_KEY=""
Then run this command to spin up the docker container locally
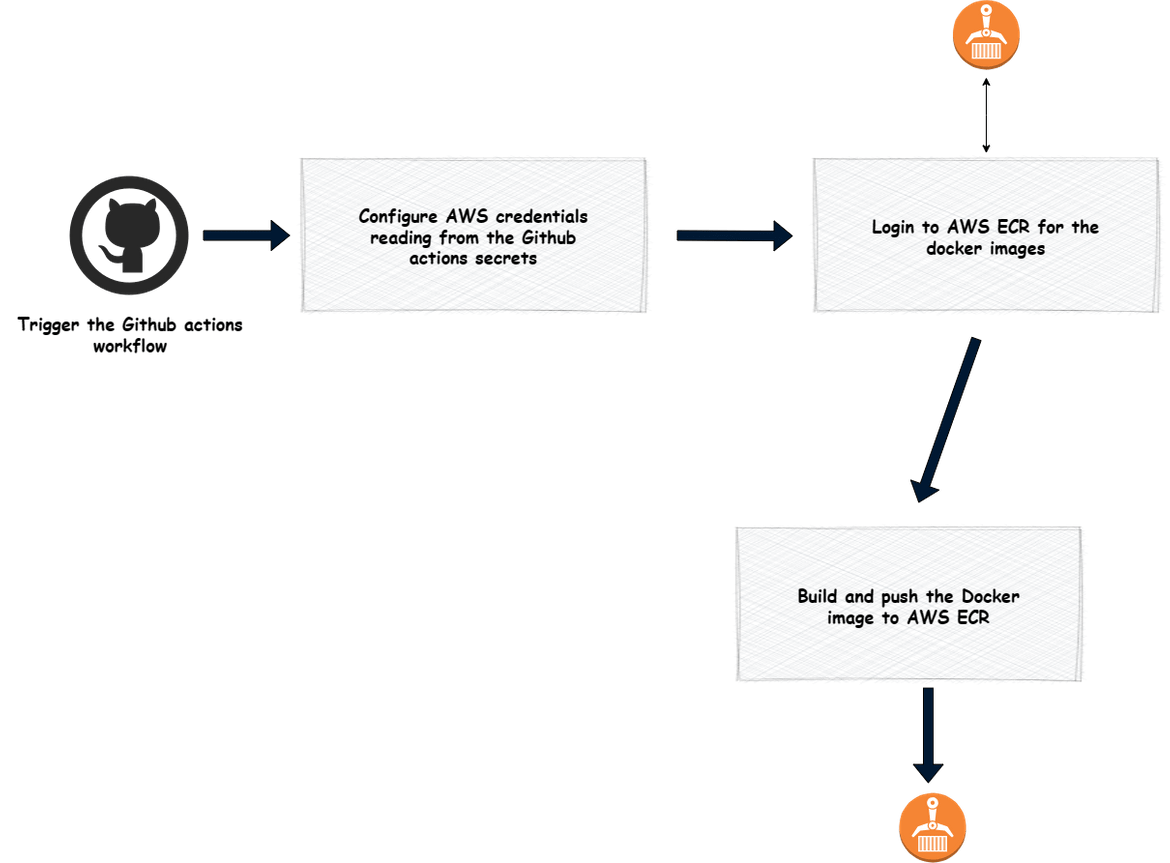
docker-compose up --buildTo build and deploy the app, I am using Github actions. An actions workflow builds the Docker image and pushes it to the ECR repository. This image should explain what the workflow is doing.
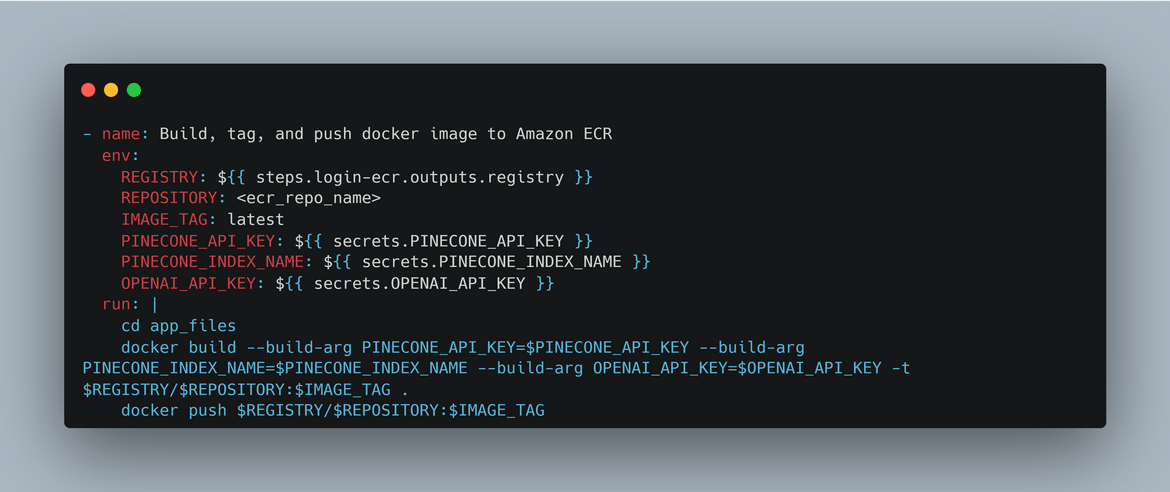
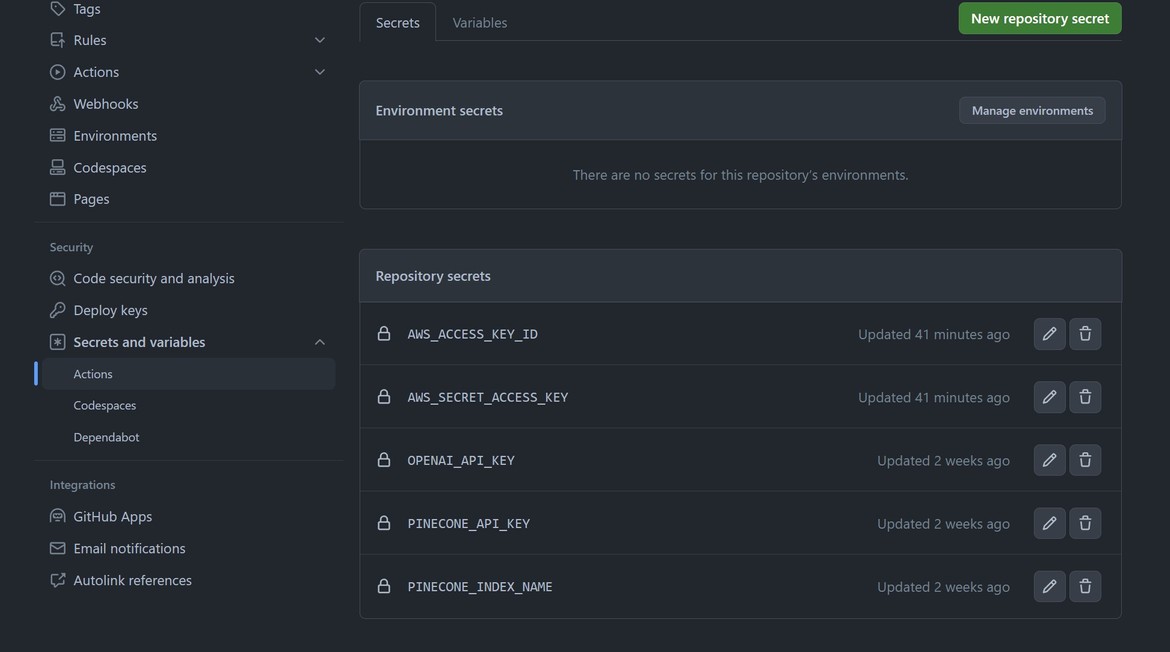
For the Docker build args, I am passing the API keys as environment variables to the build step in the workflow. The API keys are being set as secrets in the Github repo. The workflow is reading from those secrets and setting the environment variables.
So before we start the build, set the secrets on your Github repository. Provide the values which were copied earlier. It will also need the AWS keys to be able to push to the ECR repo. Set these env variables with their values on Github secrets.
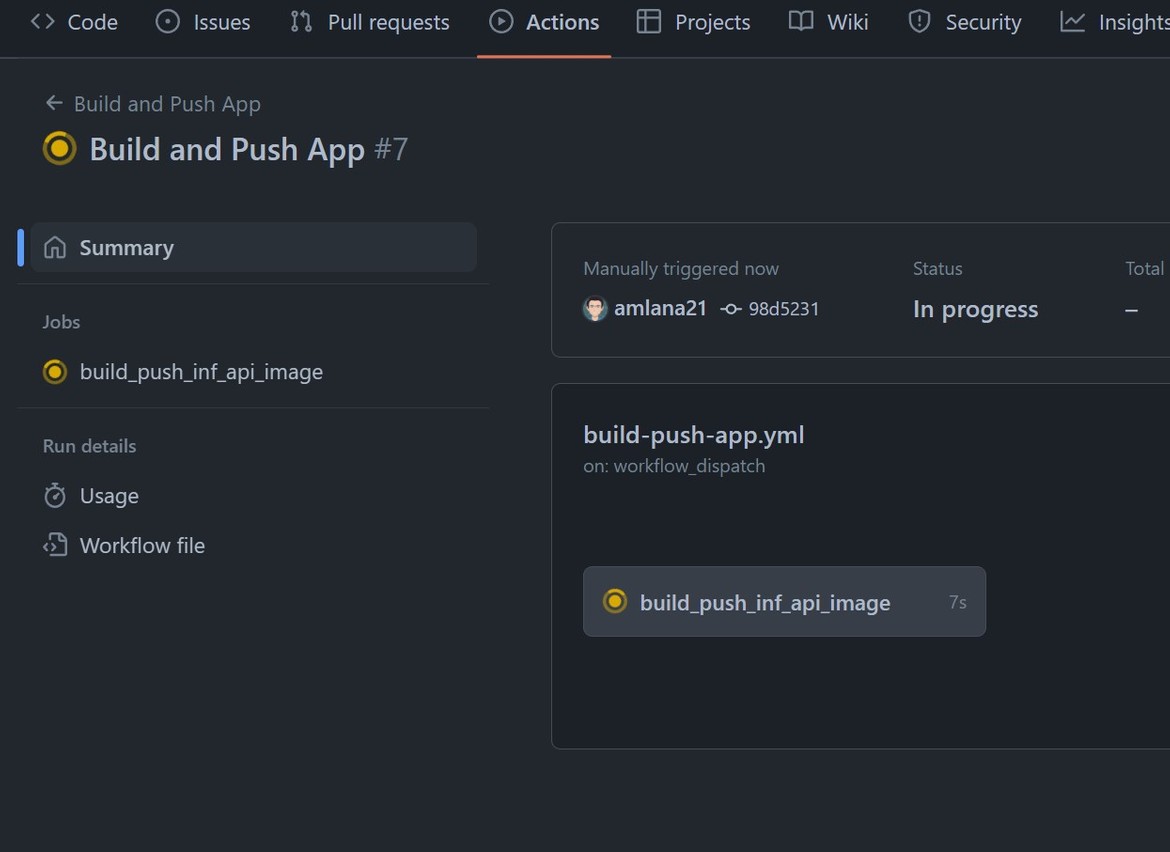
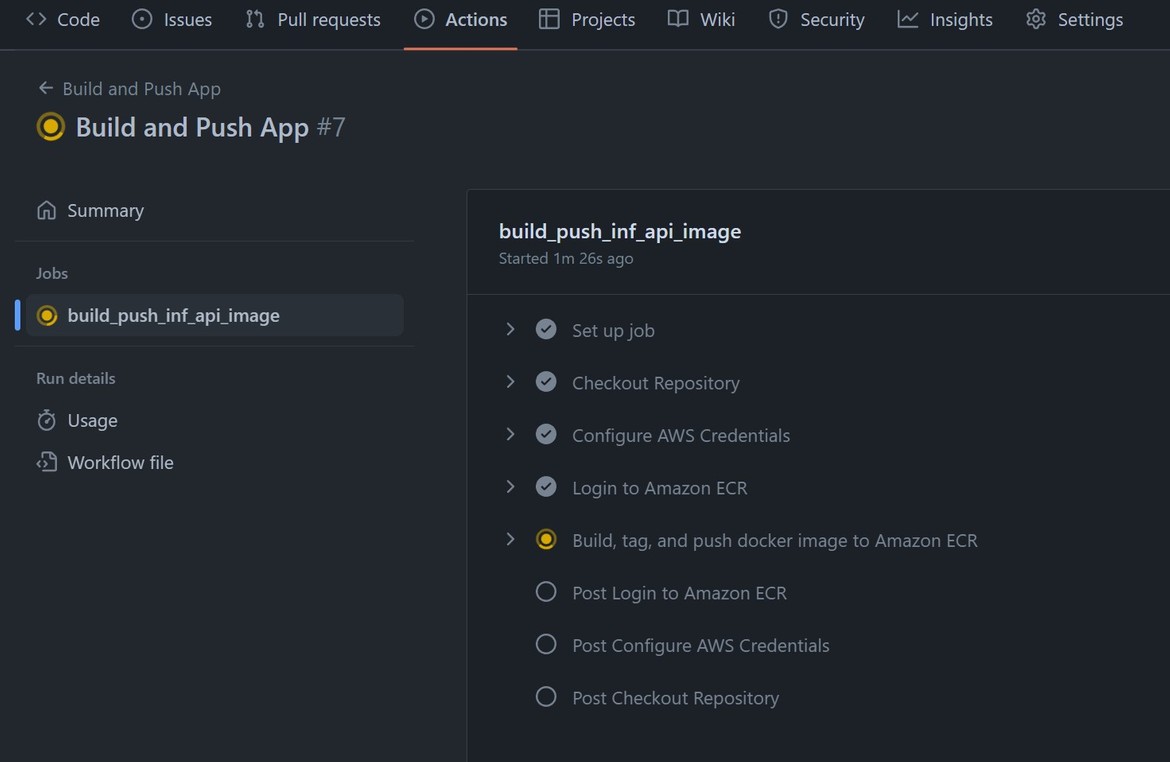
After the secret is updated, to start the app deployment, trigger the Github actions workflow from Github Actions tab. It will take while to build and complete. Track the progress on Actions tab.
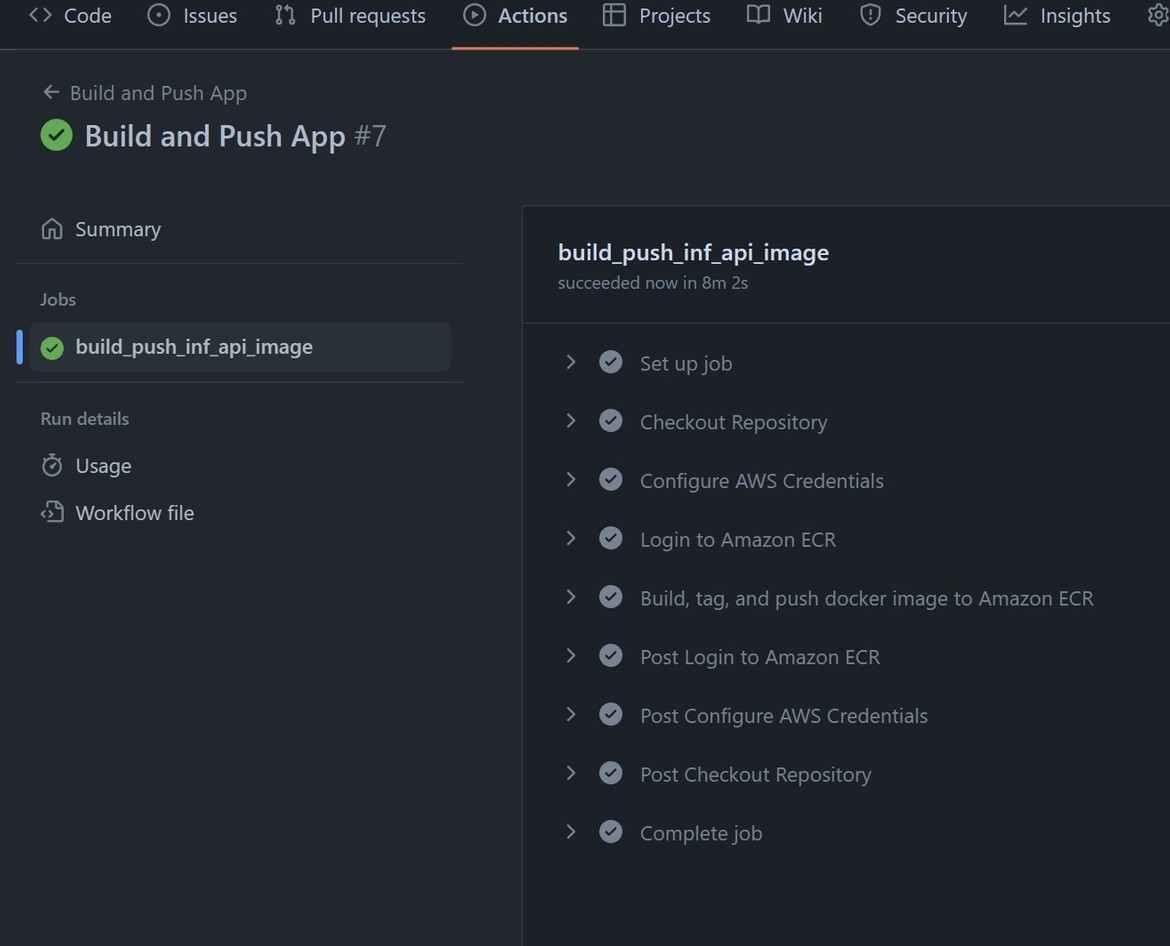
The workflow completes successfully and the image is pushed to ECR.
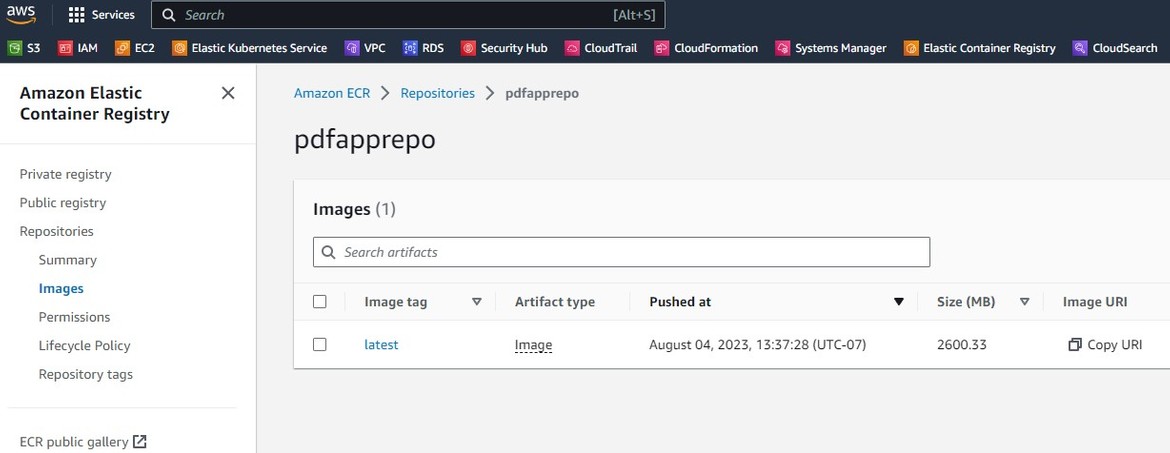
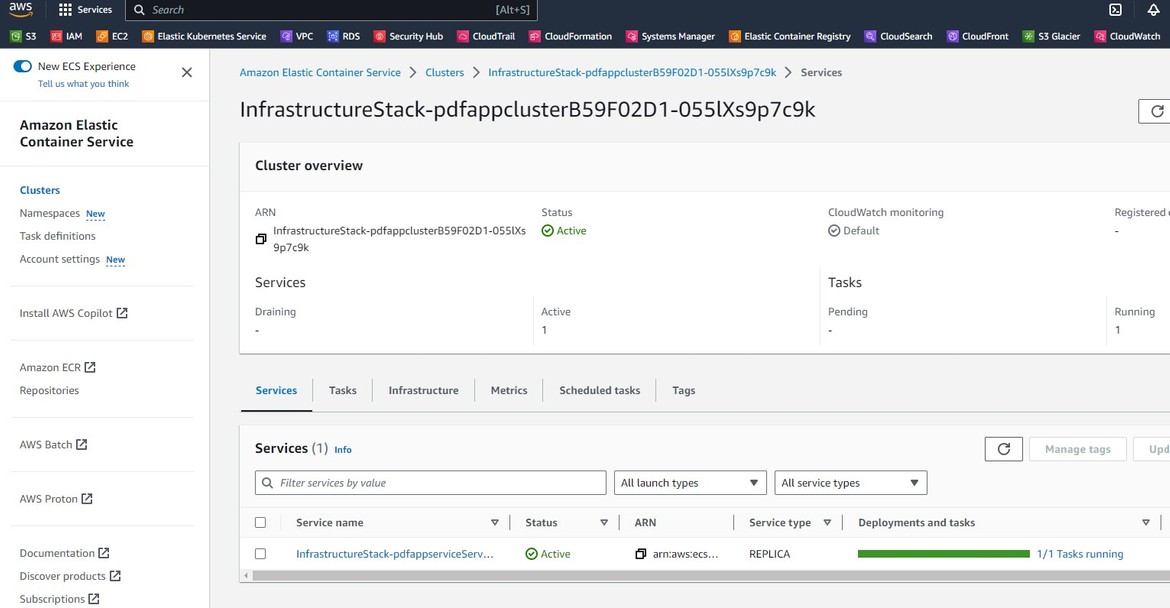
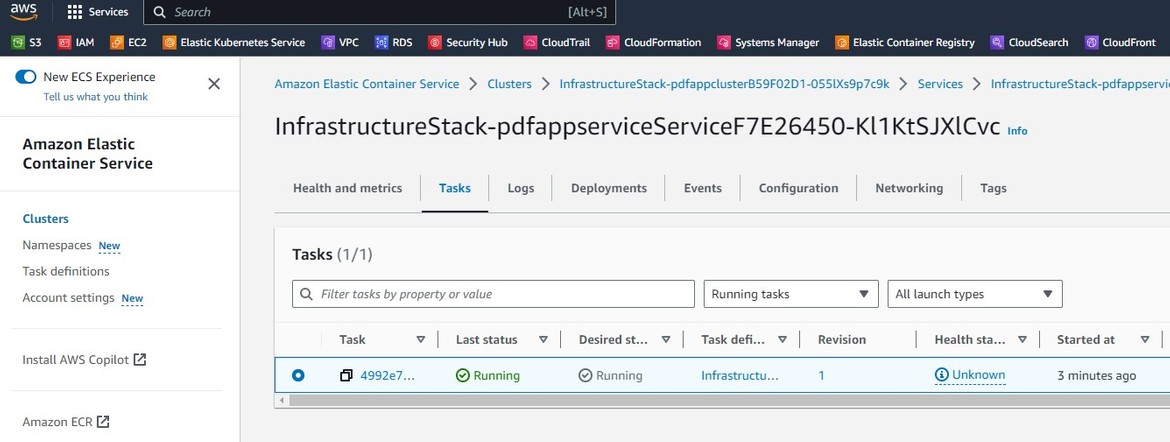
Since we already had the ECS service deployed via CDK, pushing the image triggers a reload of the ECS service (until the image was pushed the service would have been in error state). Check the service status on the ECS cluster page. It should show running status now.
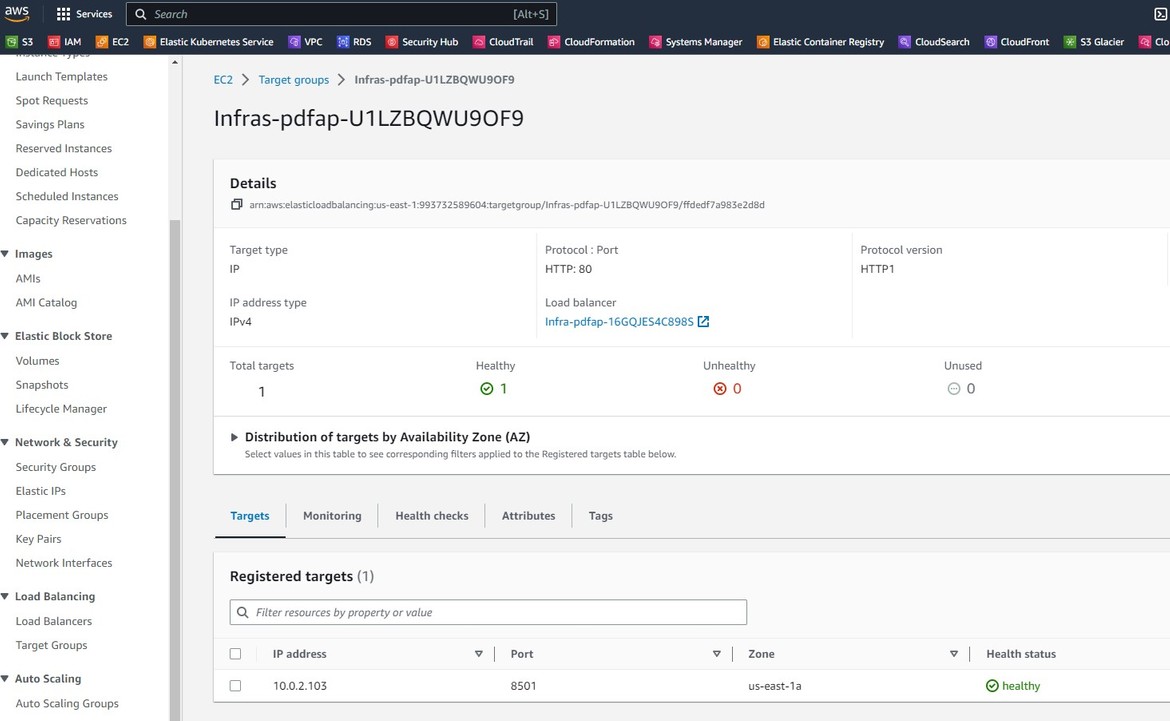
We can also check the app is running healthy, from the load balancer target group page. Navigate to the load balancer target group which was created by the CDK. It will show healthy target, which is the app pod that is running.
Now that the task is up and running, we can go ahead and test the app. To test the app, I have kept a sample small doc in the repo. The doc is short so that we can test quickly how the test works for this example. The test doc is just some basic info about grpc API framework. We will use this as context and ask questions based on the doc content.
Lets open up the app and upload the sample pdf doc. To open the app, get the app url from the cloudfront distribution.
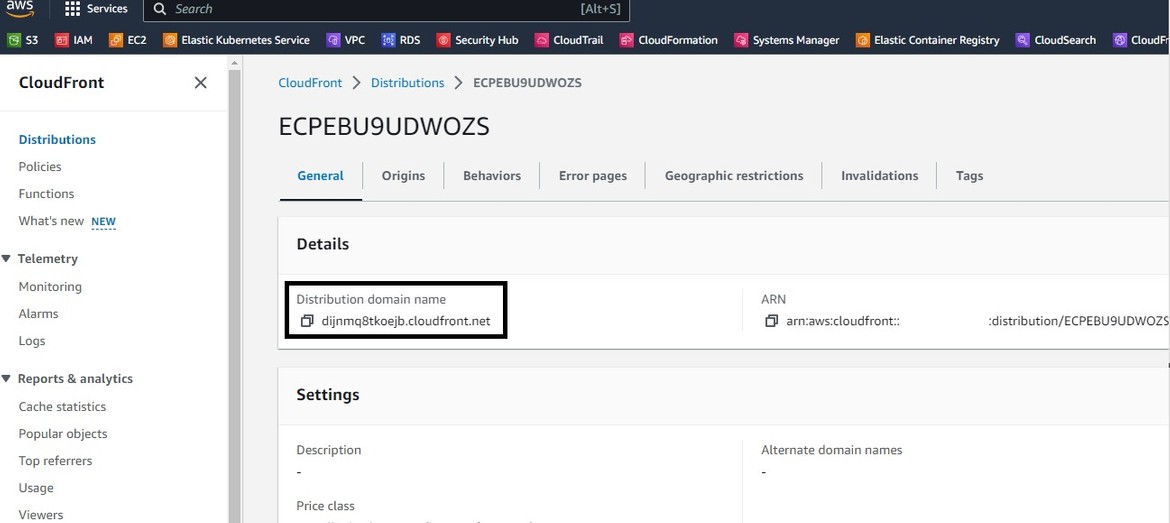
Hit that url from a browser. It will open up the app.
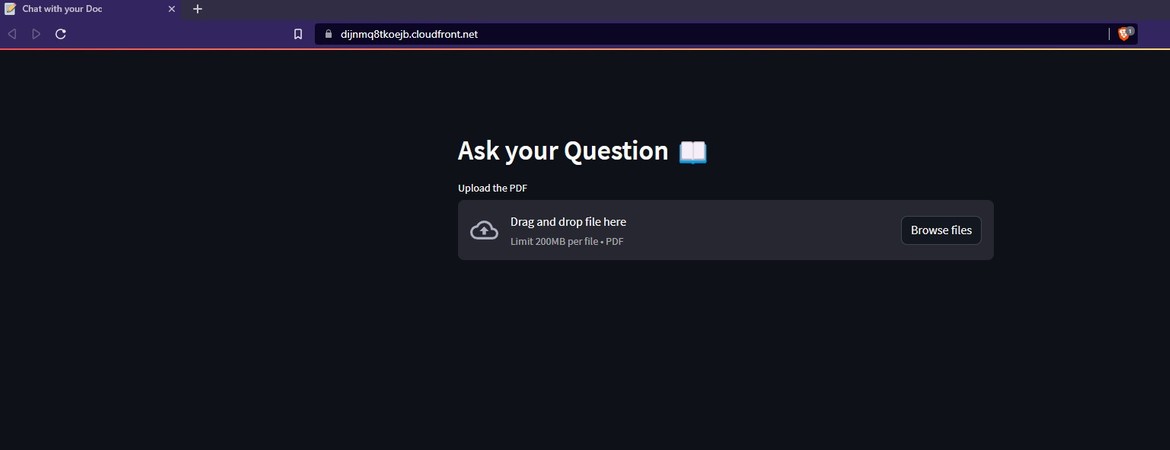
Click on the button to browse for the pdf file and upload the same. Once its uploaded, the doc embeddings gets stored in the Pinecone DB and after complete load the text field opens up for question
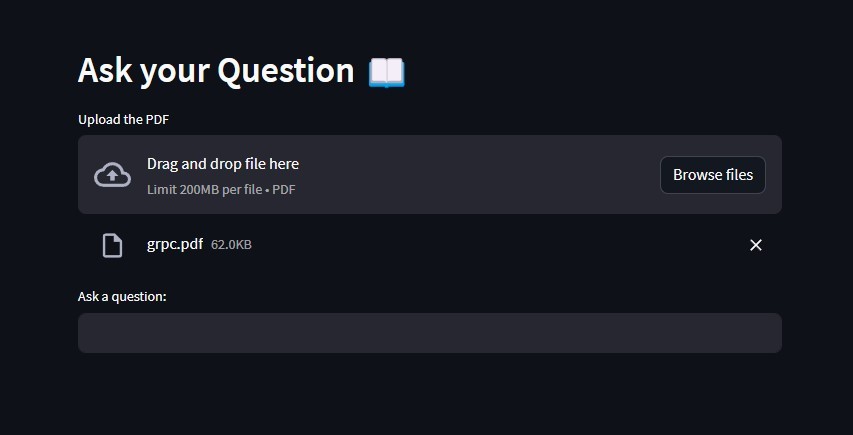
Check the Pinecone console to check if the embedding count is now showing.
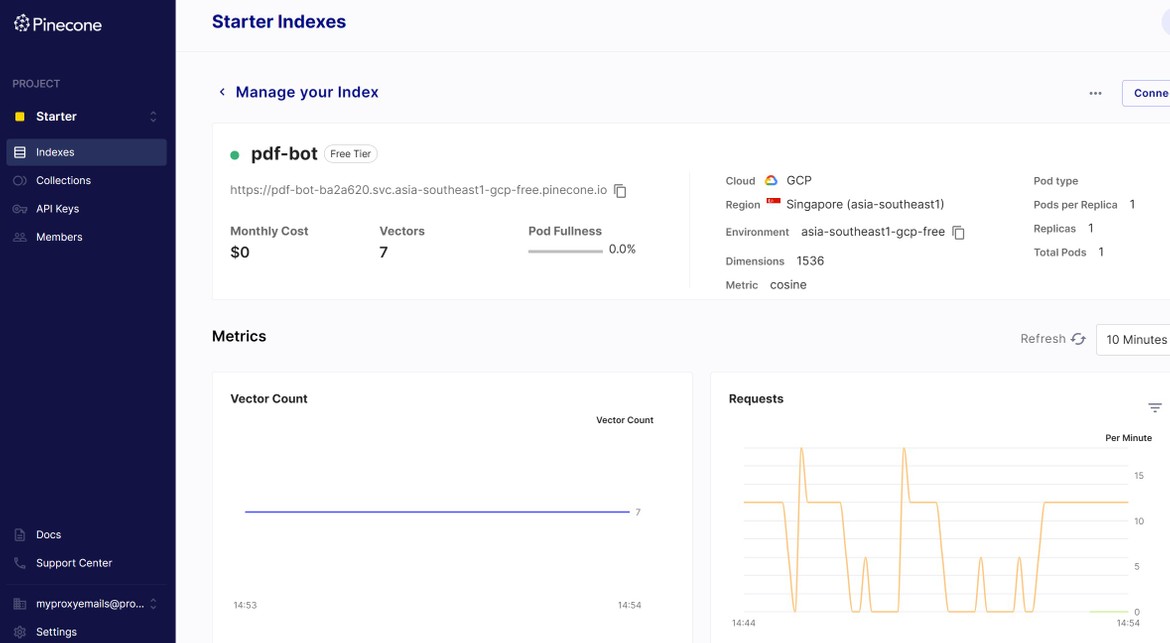
Lets ask a question based on the doc. After entering the question, hit enter. It takes few seconds and responds with an answer based on the doc.
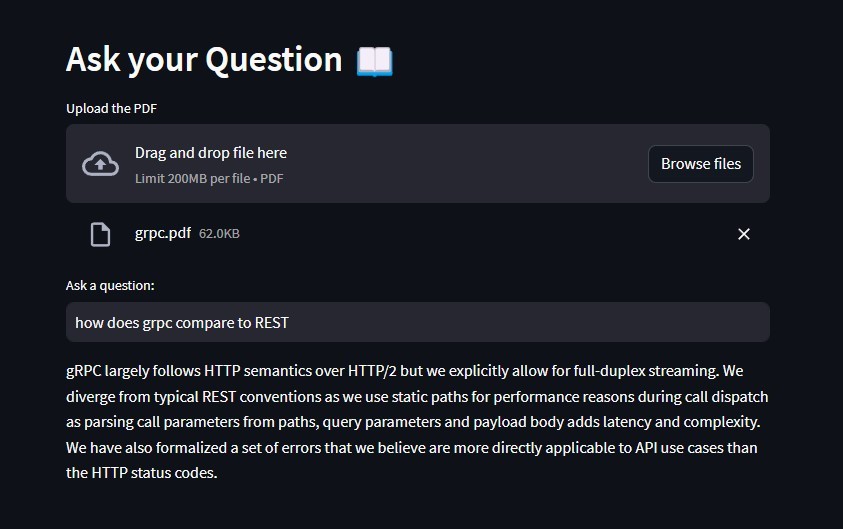
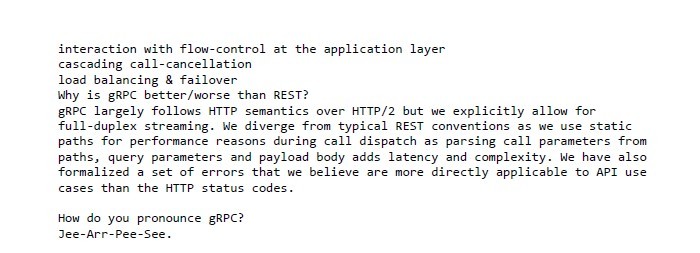
The answer returned is from the fine tuned model of OpenAI. The app uses OpenAI api key to get response from OpenAI. Lets see how the answer compares to the relevant section from the doc
Pretty amazing. So we now have a fully functional app, which uses OpenAI, running on AWS. The infrastructure is now managed using CDK. Any changes need to the infrastructure, just make changes to the Go code and redeploy. This will easily deploy changes to AWS.
Note: The resources deployed as part of this post incurs charges. So, if you are following along for learning make sure to destroy the resources
cdk destroy Conclusion
As AI continues to transform the landscape, the infrastructure management for such apps are also becoming more critical. CDK gives an useful framework to create the IAAC code and define infra components, using your preferred language. So it becomes easier with the learning curve because you can now write IAAC code in a language you are comfortable in. Hope I was able to explain steps to use CDK through which AWS infrastructure can be managed easily, not just for AI apps, for any apps. If you have any questions or face any issues, please reach out to me from the Contact page.
