How to run a Neural Network(RNN) training pipeline on Airflow and deploy the AI model to AWS ECS for Inference
In today’s fast-paced world, artificial intelligence (AI) has become an indispensable tool for solving complex problems and making informed decisions. As businesses strive to harness the power of AI, it’s crucial to have a robust and efficient pipeline for training AI models. Also its all the more important now for developers to learn about AI and AI models. So I started delving into different AI topics and tried training and deploying my own AI models to AWS.
In this blog post, we will explore the step-by-step process of setting up an AI training pipeline using Airflow and deploying the trained model on AWS ECS for efficient and cost-effective inference.
The GitHub repo for this post can be found Here. The sample model files and a sample Jupyter notebook for training the model can be found in the Huggingface model repo Here. You can use the scripts in the repo to setup your own process.
Pre Requisites
Before I start the walkthrough, there are some some pre-requisites which are good to have if you want to follow along or want to try this on your own:
- Basic Terraform, AWS knowledge
- Github account to follow along with Github actions
- An AWS account.
- Terraform installed
- Terraform Cloud free account (Follow this Link)
- Some Basic AI/Machine learning knowledge
With that out of the way, lets dive into the solution.
What is Airflow
Airflow, is an open-source platform designed to orchestrate and manage complex workflows. It provides a highly flexible and scalable solution for automating tasks, data pipelines, and workflows. Airflow’s core strength lies in its ability to define, schedule, and monitor workflows as Directed Acyclic Graphs (DAGs). Each DAG represents a collection of tasks that need to be executed in a specific order, enabling the seamless coordination of various components in a data pipeline. Going forward in this post I will be referring to this as DAG.
Since model training pipelines involve multiple tasks and dependencies, such as data preprocessing, feature engineering, model training, and evaluation, Airflow’s DAG-based workflow orchestration allows users to define these tasks and their dependencies, ensuring that each task is executed in the correct order. This capability simplifies the management of complex training workflows, providing a clear and structured approach to organizing the pipeline. In the following sections, we will explore how Airflow can be leveraged to build an AI training pipeline and witness its power in action.
What is AWS ECS
AWS ECS, which stands for Elastic Container Service, is a fully managed container orchestration service provided by Amazon Web Services (AWS). It simplifies the process of deploying, managing, and scaling containerized applications. With ECS, users can easily run and scale containers without worrying about the underlying infrastructure.
ECS offers two modes for running containers: ECS-EC2 and ECS-Fargate. With ECS EC2, users can launch and manage a cluster of EC2 instances to host their containers. This mode provides more control over the underlying infrastructure, allowing users to fine-tune the instances for specific requirements. On the other hand, ECS Fargate abstracts the underlying compute infrastructure, enabling users to focus solely on running and scaling their containers without the need to manage the EC2 instances. This serverless approach simplifies the deployment process and optimizes resource utilization.
In following sections we will go through the steps to deploy the model as an API container on ECS and expose it as an inference API to perform inferences from the model.
Overview of the model and the Training process
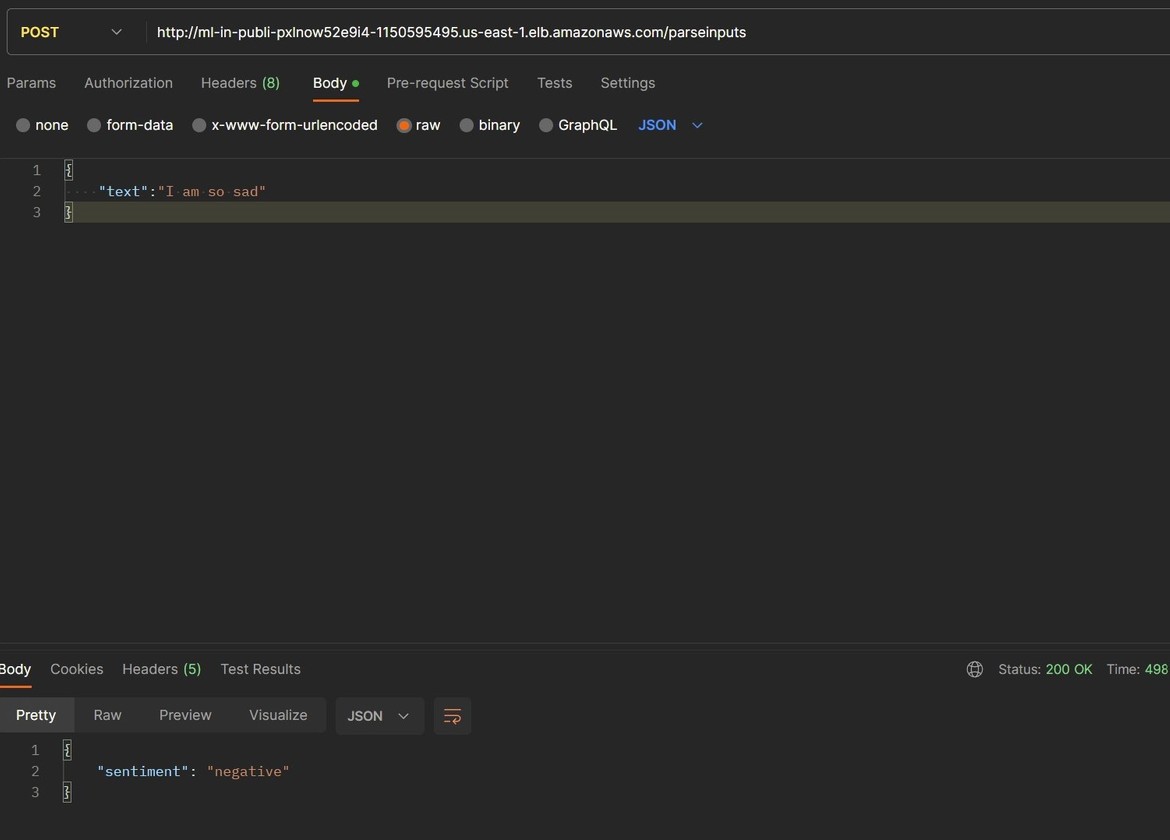
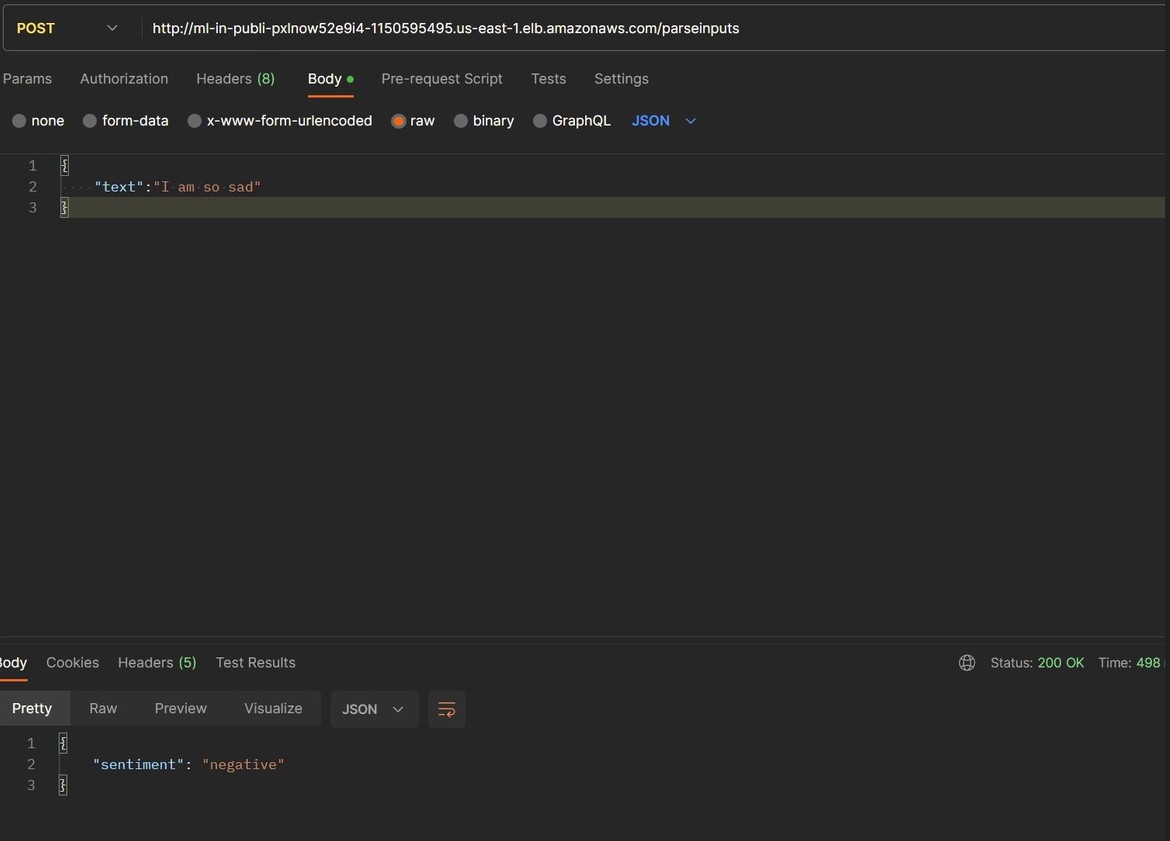
Let me first explain about the AI model I am building as an example for this post. Here I created a Sentiment analysis model which detects the sentiment of a text which is passed to it as input. Here is an example inference from the model, deployed as a REST API. Here I am passing a text as input. The API response shows the sentiment of the text.
The model which I trained here is a Recurrent Neural Network, to predict the sentiment of the text. I am using a specialized type of RNN called LSTM. I wont get into theory of these models as those are big topics in themselves. You can learn more about them Here
For the pre-processing and training, I am using Tensorflow framework. Its a Python framework very useful to build and train AI models. Read more Here
Training Process
First let me walk through how I am building and training the model. The whole notebook can be found here in this huggingface model repo. Click Here to open Huggingface.
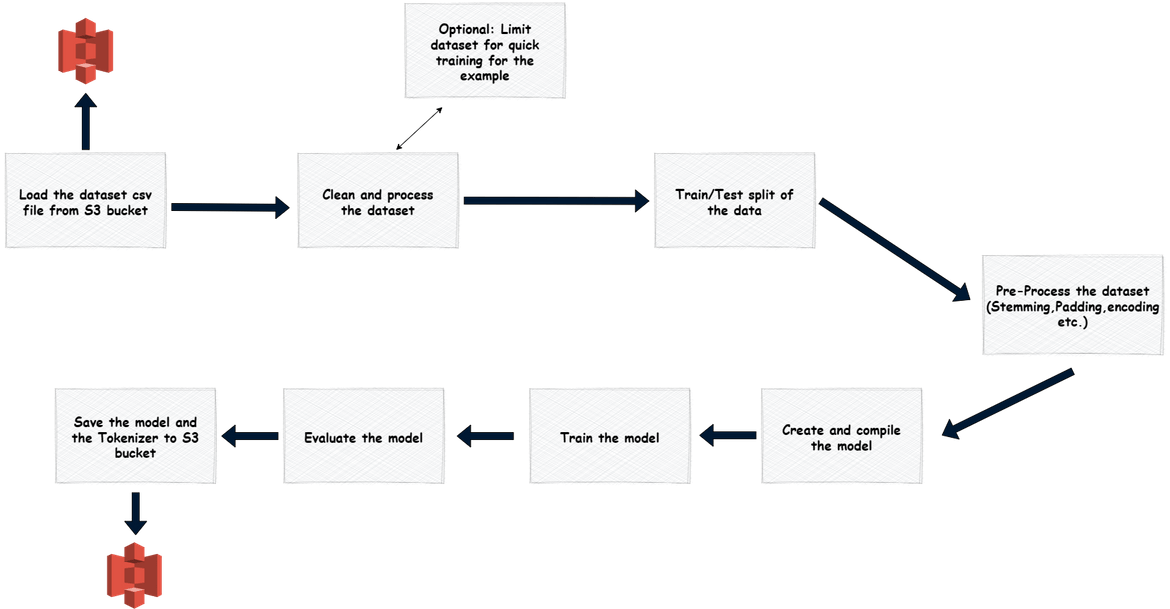
The whole process can be described by this image
Lets go through each of the steps in the code.
Load the dataset from csv file & drop unused columns
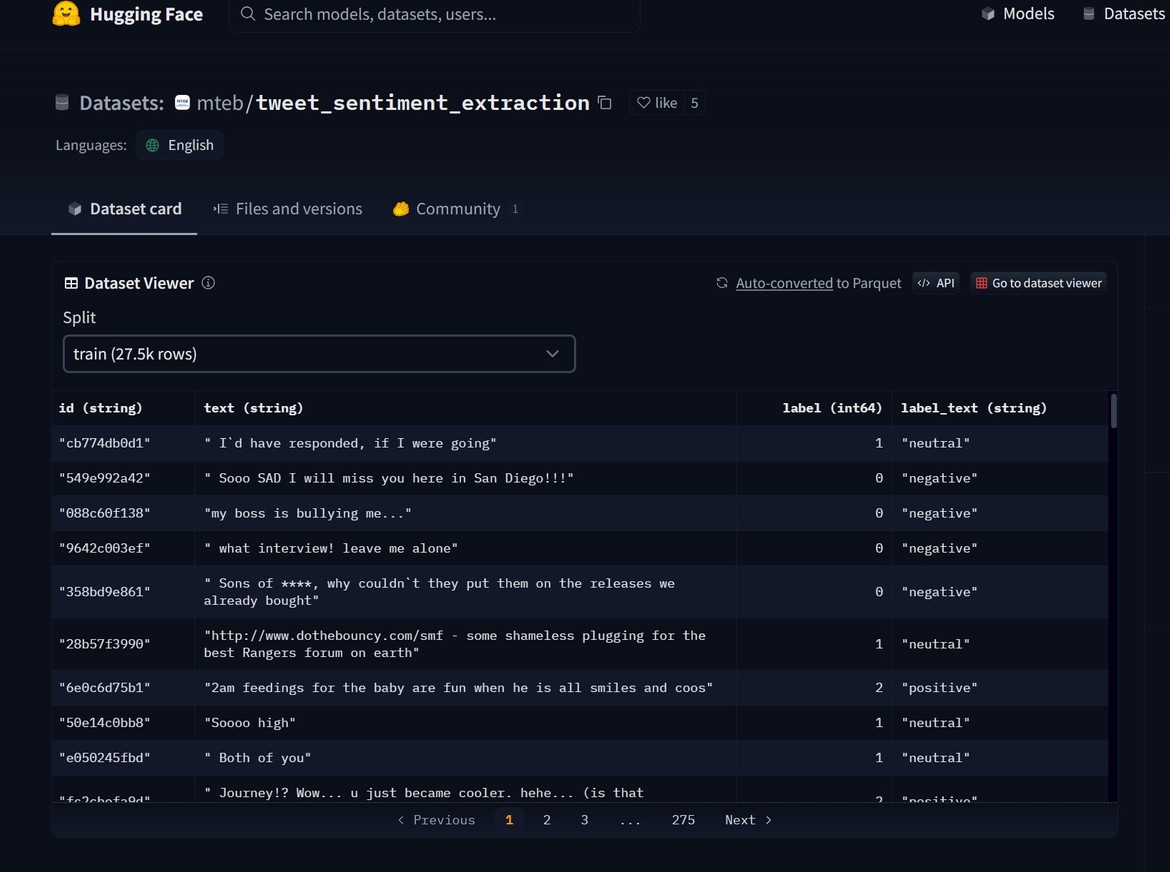
I am using a dataset from HuggingFace. This dataset provides tweet texts and they are labelled with their sentiments. The dataset can be found Here
df=pd.read_csv('data.csv')
df.drop(['id','label'],axis=1,inplace=True)
# This step is optional and just added to quickly run training for this example
df=df.head(500)
Train/Test Split of the dataset
This step is performed to split the dataset into Training and Validation groups. We will use the Train split to train the model.
TEST_SPLIT = 0.2
RANDOM_STATE = 10
np.random.seed(RANDOM_STATE)
tf.random.set_seed(RANDOM_STATE)
X_train, X_test, y_train, y_test = train_test_split(df["text"], df["label_text"],test_size = TEST_SPLIT, random_state = RANDOM_STATE)
texts_train=list(X_train)
labels_train=list(y_train)
Pre-Process the dataset
To make the dataset ready for the model, I am performing few steps here. I wont go into details why these are being done as thats for another post.
Stemming and Lemmatization
lemmatizer = WordNetLemmatizer()
stemmer = PorterStemmer()
stop_words = set(stopwords.words("english"))
patterns = []
tags = []
for i in range(len(texts_train)):
    # Convert all text to lowercase
    pattern = texts_train[i].lower()

    # Remove non-alphanumeric characters and replace them with space
    pattern = re.sub(r"[^a-z0-9]", " ", pattern)

    # Tokenize text
    tokens = nltk.word_tokenize(pattern)

    # Remove stop words
    tokens = [token for token in tokens if token not in stop_words]

    # Apply lemmatization and stemming
    tokens = [lemmatizer.lemmatize(token) for token in tokens]
    tokens = [stemmer.stem(token) for token in tokens]

    # Join the tokens back into a string
    pattern = " ".join(tokens)

    # Append the pattern and tag to respective lists
    patterns.append(pattern)
    tags.append(labels_train[i])
Tokenize texts
unique_words = set()
for text in texts_train:
    words = nltk.word_tokenize(text.lower())
    unique_words.update(words)
unique_word_len=len(unique_words)
num_words=unique_word_len+100
tokenizer = Tokenizer(num_words=num_words, oov_token="<OOV>")
tokenizer.fit_on_texts(patterns)
Convert text to sequences and pad them
max_sequence_len = max([len(tokenizer.texts_to_sequences(patterns)[i]) for i in range(len(patterns))])
sequences = tokenizer.texts_to_sequences(patterns)
max_sequence_len=max_sequence_len+100
padded_sequences = pad_sequences(sequences, maxlen=max_sequence_len, padding='post')
One hot encoding for the output labels
training = np.array(padded_sequences)
output = np.array(tags)
output_labels = np.unique(output)
encoder = LabelEncoder()
encoder.fit(output)
encoded_y = encoder.transform(output)
output_encoded = tf.keras.utils.to_categorical(encoded_y)
output_encoded
Create and Compile Model
VAL_SPLIT = 0.1
BATCH_SIZE = 10
EPOCHS = 20
EMBEDDING_DIM = 32
NUM_UNITS = 32
NUM_CLASSES=len(set(labels_train))
VOCAB_SIZE = len(tokenizer.word_index) + 1
model = Sequential([
    Embedding(input_dim = VOCAB_SIZE, output_dim = EMBEDDING_DIM, input_length = max_sequence_len, mask_zero = True),
    Dropout(0.2),
    LSTM(NUM_UNITS,activation='relu'),
    Dense(len(output_labels), activation='softmax')
])
model.compile(loss='categorical_crossentropy', optimizer='adam', metrics=[Precision(), Recall(),'accuracy'])
print(model.summary())
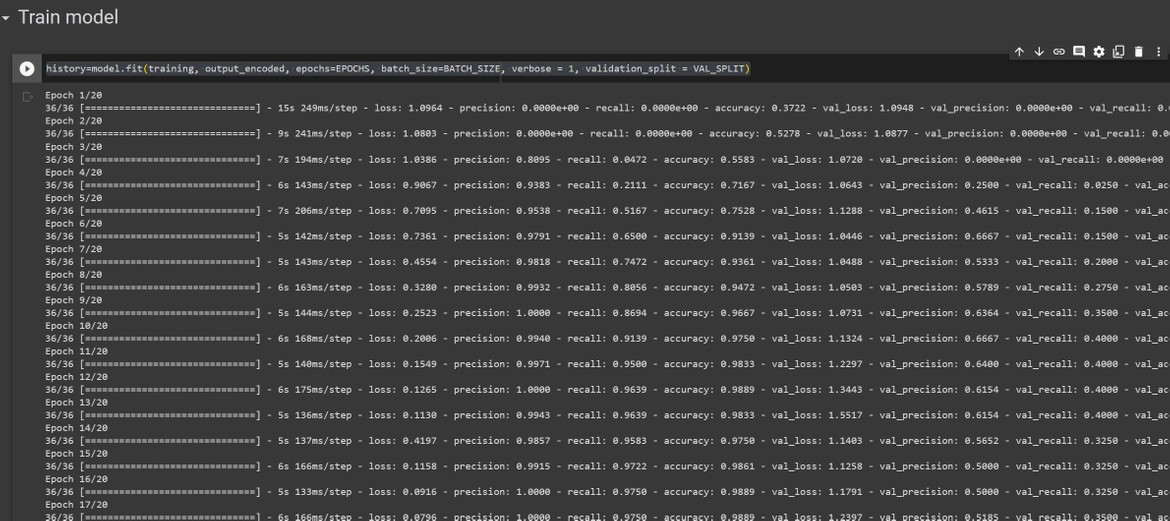
Train the Model
history=model.fit(training, output_encoded, epochs=EPOCHS, batch_size=BATCH_SIZE, verbose = 1, validation_split = VAL_SPLIT)Evaluate the Model
In this step I am evaluating the performance of the model. The graph shows the accuracy over epochs.
def plot_graphs(history, metric):
  plt.plot(history.history[metric])
  plt.plot(history.history['val_'+metric], '')
  plt.xlabel("Epochs")
  plt.ylabel(metric)
  plt.legend([metric, 'val_'+metric])
plt.figure(figsize=(16, 8))
plt.subplot(1, 2, 1)
plot_graphs(history, 'accuracy')
plt.ylim(None, 1)
plt.subplot(1, 2, 2)
plot_graphs(history, 'loss')
plt.ylim(0, None)
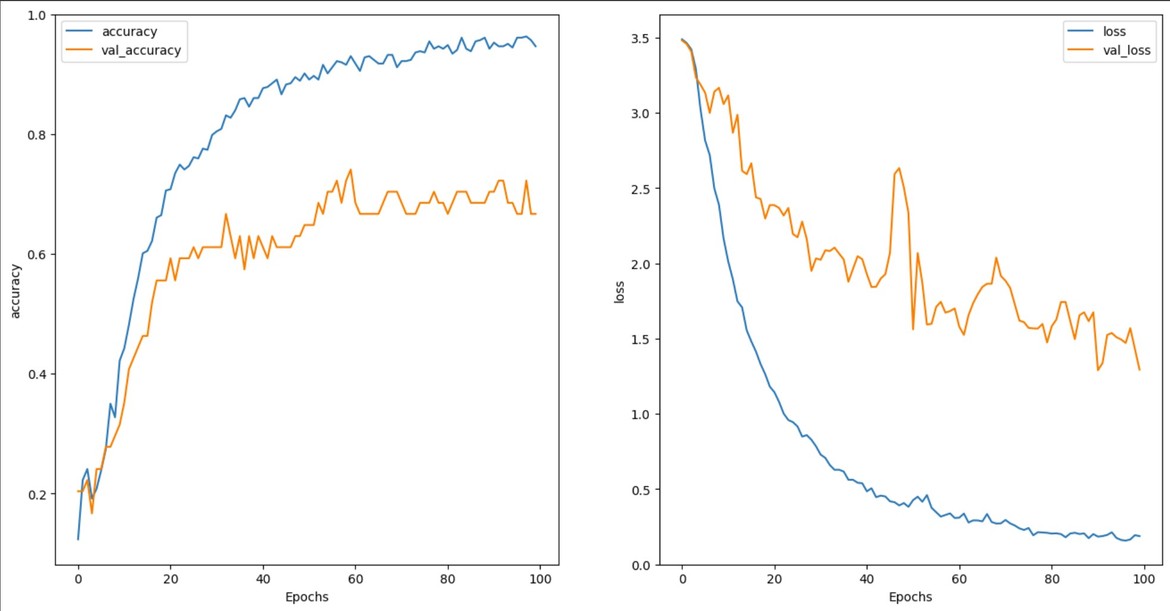
We can see that the accuracy increases over epochs and the loss decreases over epochs.
Save the Tokenizer file and the model file
Once the model is trained, to deploy it as an API we will need to export the model file and the Tokenizer. This step saves both of these.
import pickle
from mlem.api import save,load
with open('tokenizer.pickle', 'wb') as handle:
    pickle.dump(tokenizer, handle, protocol=pickle.HIGHEST_PROTOCOL)
save(model, "models/tf")
save(encoder,"encoder/tf")
Once the model and encoder is saved, these files are uploaded to an S3 bucket. The API which gets deployed, reads the model and Tokenizer files from this S3 bucket for Inference. Now lets understand the whole process.
Process Overview
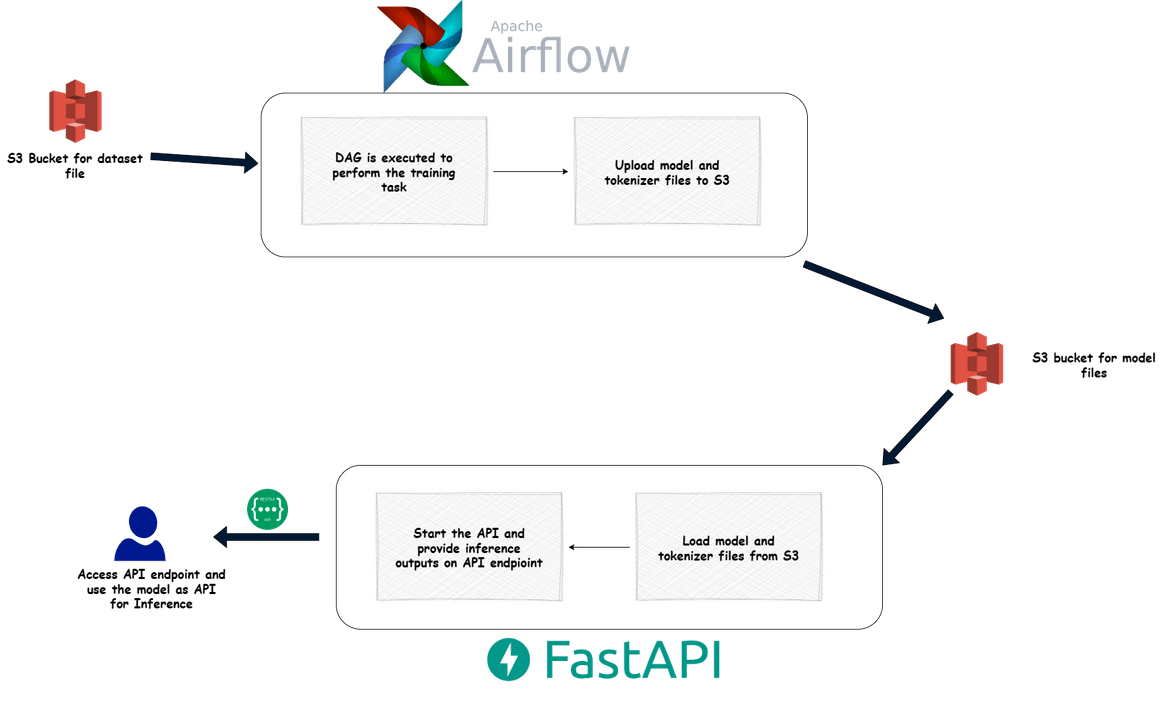
We saw the training process above. This training process runs as a DAG on airflow. DAG allows running step by step tasks on airflow. The whole training process runs as step by step task on airflow. Below diagram shows the whole process which is executed for training and then deployment.
DAG Executed on Airflow
The training process gets executed as a DAG task on Airflow. The DAG runs the above training steps in a Docker container. The whole process is defined in a Python function which gets executed by the DAG task.

Once the task is executed, after training and saving the model, it uploads the model file to the model S3 bucket.
Model deployed as API
To perform inference, the model is deployed as an API. Here a REST API using FastAPI gets deployed. The API loads the model from the above S3 bucket and makes the model inference available on an API endpoint. When a text is sent to the APi endpoint, it uses the loaded model to detect the sentiment of the text and responds back with the sentiment (positive or negative).
Now lets understand the whole architecture.
Components & Architecture
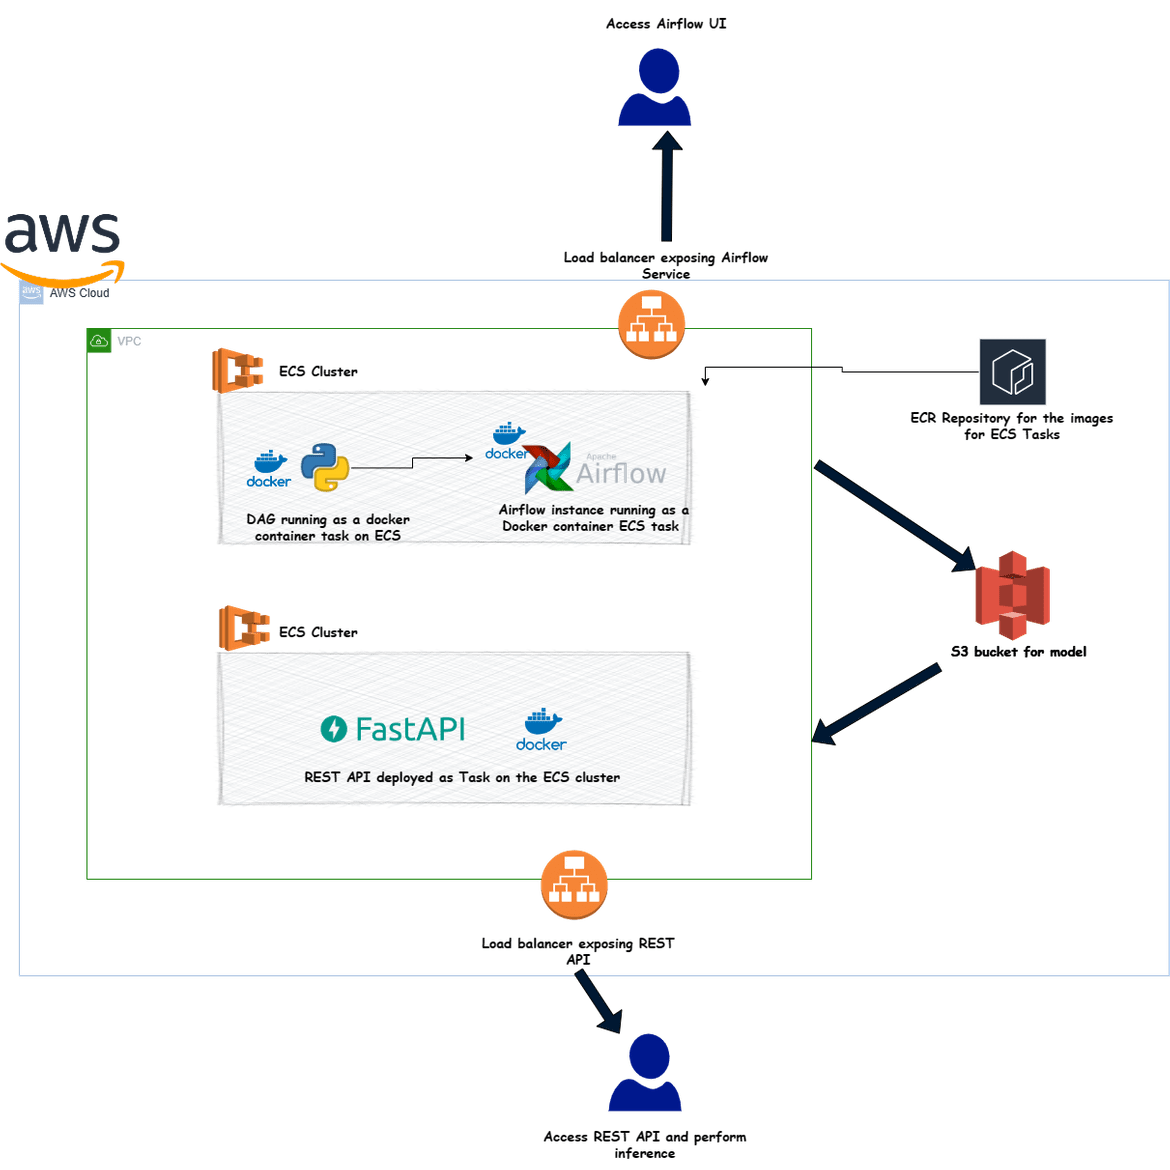
The whole process gets executed by various components which are deployed to AWS. Below diagram shows the technical view of all of those components and how they are deployed.
ECS Cluster
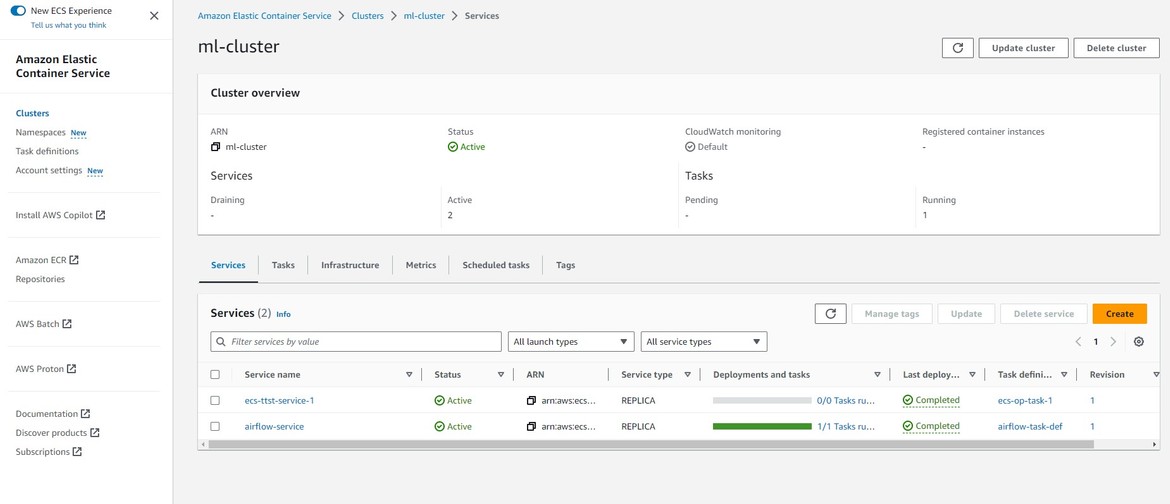
The ECS cluster houses all of the component deployments for the whole process. The ECS cluster is deployed on AWS inside a VPC. The cluster is the basic infrastructure for this whole setup. The cluster gets deployed using Terraform.
resource "aws_ecs_cluster" "ml_cluster" {
  name = "ml-cluster"
}
Networking and IAM Roles
Though not in the diagram, this is an important part of the whole architecture. Networking components are also deployed suing Terraform. Below are the networking components which get deployed.
- VPC
- Private and Public subnets
- Internet Gateway for internet access
- NAT gateway for internet access from private subnets
- Security groups for the load balancer and the Tasks on ECS
- Load balancers to expose Airflow and the Inference API endpoints
The networking components get deployed as a separate Terraform module.
resource "aws_vpc" "mlvpc" {
  cidr_block = "10.1.0.0/16"
  enable_dns_hostnames = true

  tags = {
    Name = "mlvpc"
  }
}

resource "aws_internet_gateway" "ml_gw" {
  vpc_id = resource.aws_vpc.mlvpc.id

  tags = {
    Name = "ml_gw"
  }

}


resource "aws_route_table" "ml_rt_public" {
  vpc_id = resource.aws_vpc.mlvpc.id

  route {
    cidr_block = "0.0.0.0/0"
    gateway_id = resource.aws_internet_gateway.ml_gw.id
  }

  tags = {
    Name = "ml_rt_public"
  }
}

resource "aws_subnet" "ml_public" {
  count                   = 2
  cidr_block              = cidrsubnet(aws_vpc.mlvpc.cidr_block, 8, 2 + count.index)
  availability_zone       = data.aws_availability_zones.available_zones.names[count.index]
  vpc_id                  = aws_vpc.mlvpc.id
  map_public_ip_on_launch = true
  tags = {
    Name = "ml_public_subnet"
  }
}

resource "aws_subnet" "ml_private" {
  count             = 2
  cidr_block        = cidrsubnet(aws_vpc.mlvpc.cidr_block, 8, count.index)
  availability_zone = data.aws_availability_zones.available_zones.names[count.index]
  vpc_id            = aws_vpc.mlvpc.id
  tags = {
    Name = "ml_private_subnet"
  }
}
ECR Repository
All of the tasks which run on the ECS cluster, run from the respective Docker images. Here I am building separate Docker images for the Airflow instance, DAG task running the training process and the REST API performing the inference. All of these images are pudhes to this ECR repository. There are different ECR repositories which gets deployed:
- For Airflow instance
- For DAG training task
- For the REST API
These are also deployed using Terraform.
resource "aws_ecr_repository" "ml_model_deploy" {
  name = "ml-model-deploy-repo"
}
resource "aws_ecr_repository" "ml_inference_api" {
  name = "ml_inference_api"
}
resource "aws_ecr_repository" "ml_training_task_repo" {
  name = "ml-training-1"
}
S3 Buckets
There are 2 S3 buckets which get deployed for the process. These two S3 buckets are:
- To store the dataset csv file for the training process
- To save the model and tokenizer files produced from the model training process
These S3 buckets gets deployed by the Terraform module.
resource "aws_s3_bucket" "model_bucket" {
  bucket = var.model_bucket
  acl    = "private"

  tags = {
    Name        = "model_bucket"
  }
}
resource "aws_s3_bucket" "dataset_bucket" {
  bucket = var.dataset_bucket
  acl    = "private"

  tags = {
    Name        = "dataset_bucket"
  }
}
Airflow Service
The Airflow instance itself is also deployed as a Service on the ECS cluster. The service spins up tasks as containers on the ECS cluster. The instance gets exposed via the load balancer, using which it can be accessed. For the Airflow docker image, I am using a custom Dockerfile, which builds the custom Airflow image and copies the DAG files in the image so they can run as tasks on Airflow. here is the high level flow of how the Airflow instance image is built and deployed:
-
The Docker image for the Airflow instance gets built based on the custom Dockerfile
- The build copies the DAG files from the local folder and copies it to the DAG folder in the image
- It also installs boto3 since we will be running AWS functions in the DAG task
- The image gets pushed to the ECR repository
- The Airflow service on ECS spins up task containers pulling the image from this ECS repository
FROM puckel/docker-airflow
WORKDIR /airflow
COPY dags/* /usr/local/airflow/dags/
COPY requirements.txt /airflow
RUN ls -l /usr/local/airflow/dags/
RUN pip3 install boto3
Task for the DAG
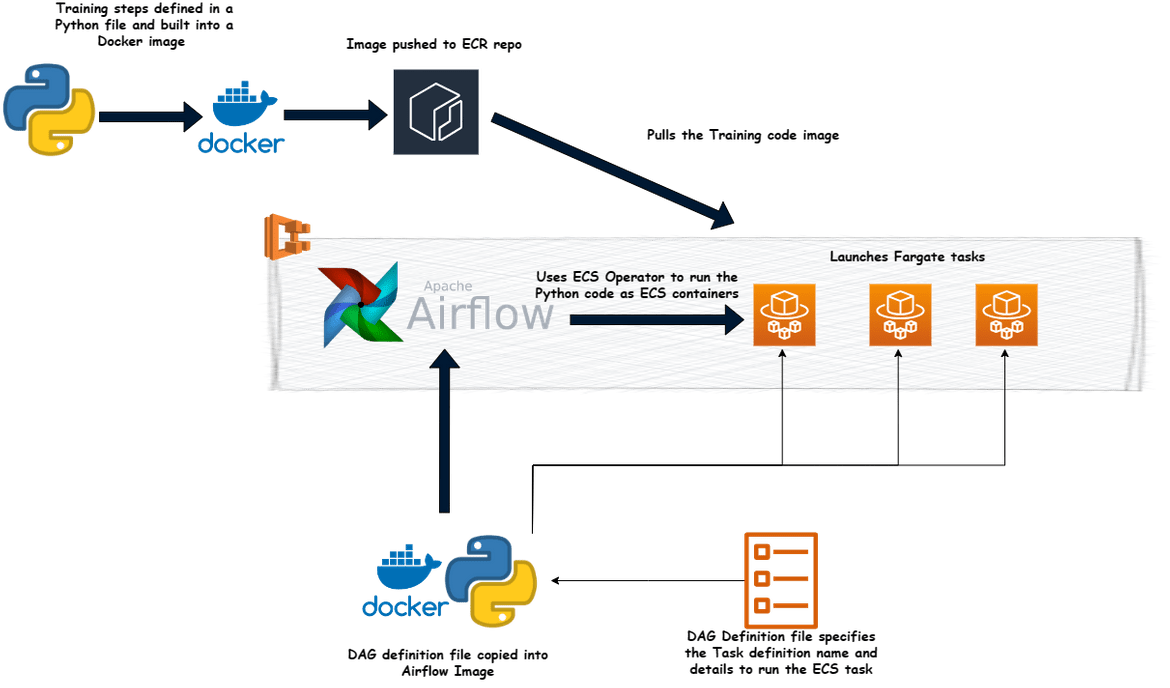
The model training process is defined as a DAG which runs as a task on the Airflow instance which we deployed above. The DAG specification is defined in the DAG file which gets copied while building the Airflow docker image. Airflow spins up DAG task instances which in turn launch ECS task containers from the docker image of the training process python code. This image will clarify how this process works.
The training steps are built into a Docker image which run as ECS task to execute the training and create the trained model files.
FROM python:3.9.17-slim
ENV APP_DIR /ml-pipeline
RUN mkdir -p ${APP_DIR}
WORKDIR ${APP_DIR}
COPY . .
RUN apt-get update
RUN apt-get install libgomp1
RUN pip install -r requirements.txt
ENV MODEL_S3_BUCKET_NAME=modelbucketnew1
ENV DATA_S3_BUCKET_NAME=datasetbucketnew1
CMD ["python", "main.py"]
Whenever an ECS task container is started with the above image, it runs the main.py file which contains the steps for the whole training process. I am launching Fargate tasks for my example to have a serverless flavor to the process and its easy to spin up. You can use EC2 tasks too, for the training task containers.
The DAG is also a Python code file. This provides the details of the Task definition name and details, which are used by Airflow to spin up the training process tasks. I am using ECS Operator in the DAG to run the DAG task instances as an ECS task container. Here I provide the Task definition details and other container specific details to enable Airflow to spin up those tasks on ECS via the ECS operator.
from http import client
from airflow import DAG
from airflow.contrib.operators.ecs_operator import ECSOperator
from airflow.utils.dates import days_ago
import boto3
import datetime as dt

CLUSTER_NAME="" #Replace value for CLUSTER_NAME
CONTAINER_NAME="" #Replace value for CONTAINER_NAME
LAUNCH_TYPE="FARGATE"
SERVICE_NAME="" #Replace value for SERVICE_NAME

with DAG(
    dag_id = "ecs_fargate_dag_1",
    schedule_interval=None,
    catchup=False,
    start_date=days_ago(1)
) as dag:
    client=boto3.client('ecs')
    services=client.list_services(cluster=CLUSTER_NAME,launchType=LAUNCH_TYPE)
    service=client.describe_services(cluster=CLUSTER_NAME,services=services['serviceArns'])
    taskdef=""
    netconfig={}
    for v in service['services']:
        if v['serviceName'] == SERVICE_NAME:
            taskdef=v['taskDefinition']
            netconfig=v['networkConfiguration']
            break

    ecs_operator_task = ECSOperator(
        task_id = "ecs_operator_task",
        dag=dag,
        cluster=CLUSTER_NAME,
        task_definition=taskdef,
        launch_type=LAUNCH_TYPE,
        overrides={
            "containerOverrides":[
                {
                    "name":CONTAINER_NAME,
                    'memoryReservation': 500
                },
            ],
        },
        network_configuration=netconfig,
        awslogs_group="/train-task-logs",
        awslogs_stream_prefix="ecs",
    )
That covers all of the components of the process. Now lets move on to deploying the whole stack.
Deploy the components
I am handling all of the deployment steps using Github actions. The infrastructure is deployed via Terraform modules. All of the scripts can be found on the Github repo. First let me explain the folder structure in my repo. You can use your own structure as suitable.
Folder Structure
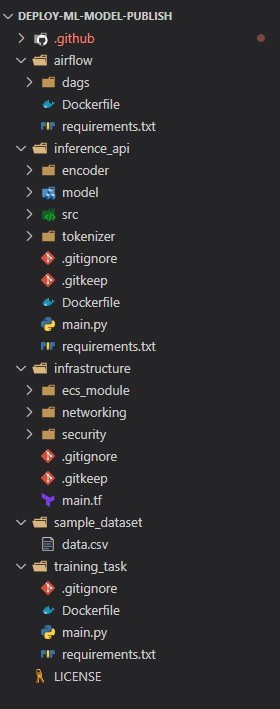
Below shows the folder structure for files in my repo.
- .github: This is the folder where the Github actions workflow files are kept
- airflow: Contains the Dockerfile to build the Airflow Docker image. This folder also contains the DAG file for the Training task
- inference_api: Contains all of the files for the inference REST API. It also contains the Dockerfile to build the Fast API Docker image
- infrastructure: Contains all of the Terraform modules for the whole infrastructure
- sample_dataset: I kept a sample data file in this folder
- training_task: Contains the Python code and the Dockerfile for the Training task
Some Pre-requisites
Now before we start deploying the components, we need to perform some steps which will be required by the deployment. I wont go through these in detail but here are the pre-requisites which have to be completed before we can start the deployment:
- IAM User for AWS:All the deployments on AWS will be done using this IAM user. Create an IAM user on AWS and note down the access keys. For guidance you can follow along my video Here
- Setup Terraform Cloud:I am using Terraform cloud as backend for Terraform. You can use anything else too. If you are using Terraform cloud, follow along the video Here to setup an account and the variables for AWS deployment

- Github actions Secret:Since I am using Github actions to deploy to AWS, I am setting the AWS keys as secret on Github Actions. Go ahead and set the AWS keys as secret on the Git repository
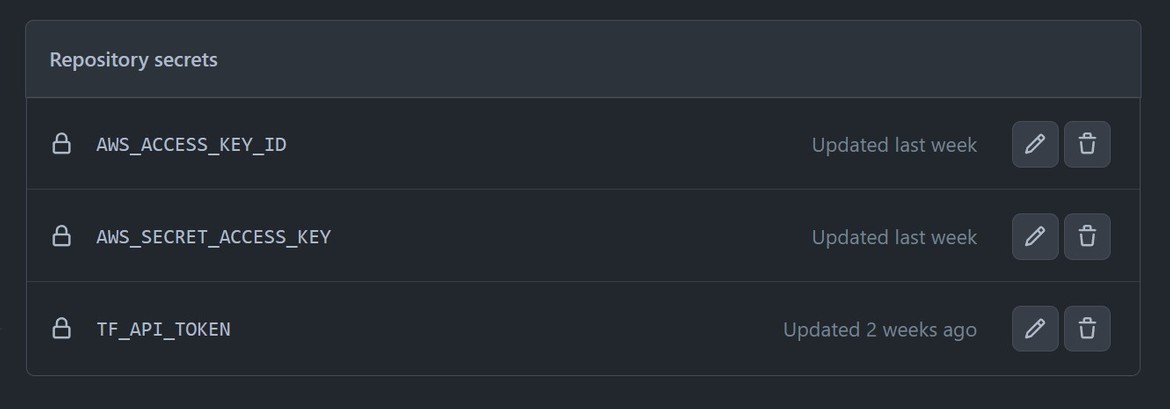
As you can see above, I am also setting a secret called TFAPITOKEN. Since I am using Terraform cloud to deploy from Github actions, this token is needed to trigger the Terraform cloud run. The token can be generated from Terraform cloud. Its also covered in the video above.
With these out of the way, now we are ready to deploy.
Deployment Pipeline
The whole deployment is being handled by a Github actions workflow. This diagram shows whats happening in the workflow.
When the Deployment workflow is triggered, it starts the flow to deploy the infrastructure and the task related components. The flow is defined as an actions workflow in the .github folder (deploy-infra.yml).
name: Deploy Infra for ML Pipeline

on:
  workflow_dispatch:

jobs:
  run_terraform_plan_apply:
    name: Run Terraform Plan & Apply
    runs-on: ubuntu-latest
    steps:
    - name: Checkout repository
      uses: actions/checkout@v2
    - name: Setup Terraform
      uses: hashicorp/setup-terraform@v1
      with:
        cli_config_credentials_token: ${{ secrets.TF_API_TOKEN }}sss
    - name: Terraform Init
      id: init
      run: |
        cd infrastructure
        terraform init -input=false
    - name: Terraform Plan
      id: plan
      run: |
        cd infrastructure
        terraform plan -no-color -input=false
      continue-on-error: true
    - name: Terraform Plan Status
      if: steps.plan.outcome == 'failure'
      run: exit 1
    - name: Terraform Apply
      run: |
        cd infrastructure
        terraform apply --auto-approve -input=false
  build_push_airflow:
    uses: ./.github/workflows/build-push-airflow.yml
    secrets: inherit
    needs: run_terraform_plan_apply
  build_push_task_1_image:
    uses: ./.github/workflows/build-push-training-task.yml
    secrets: inherit
    needs: build_push_airflow
Now lets run this pipeline to deploy the infrastructure and Airflow instance. If you are following along, you will already have the Actions workflow on Github. Lets run this workflow on Github.
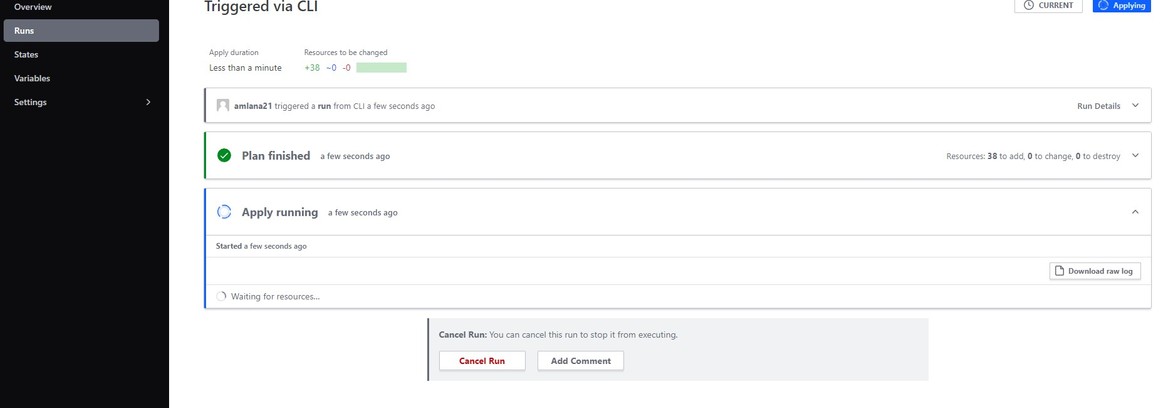
Once it starts running it will create a new run on Terraform cloud and start deploying the components. It will take a while to go through all the steps.
Once the whole workflow finishes, we can verify the components on AWS console. Login to AWS console to check the proper resources deployed.
Now lets see on AWS how the components have been deployed.
ECR Repositories
ECS Cluster
Task Definitions
Airflow Service and Task running on ECS
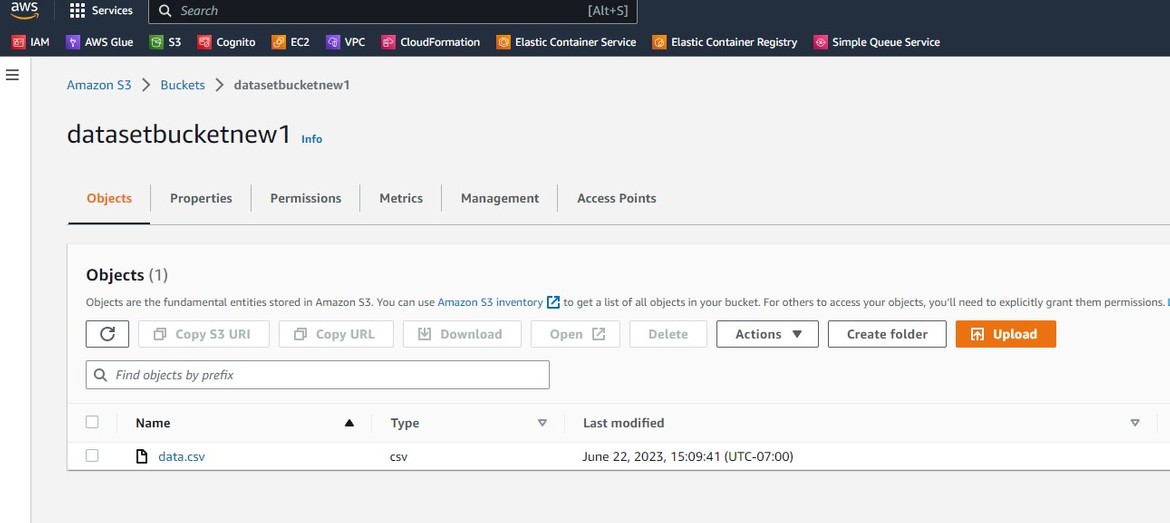
Now we have all the infrastructure components in place. We can start training the model. To start the training, we need to place the dataset file in the S3 bucket. Here I am uploading the data csv file to the S3 bucket. The training task will read the dataset from this bucket.
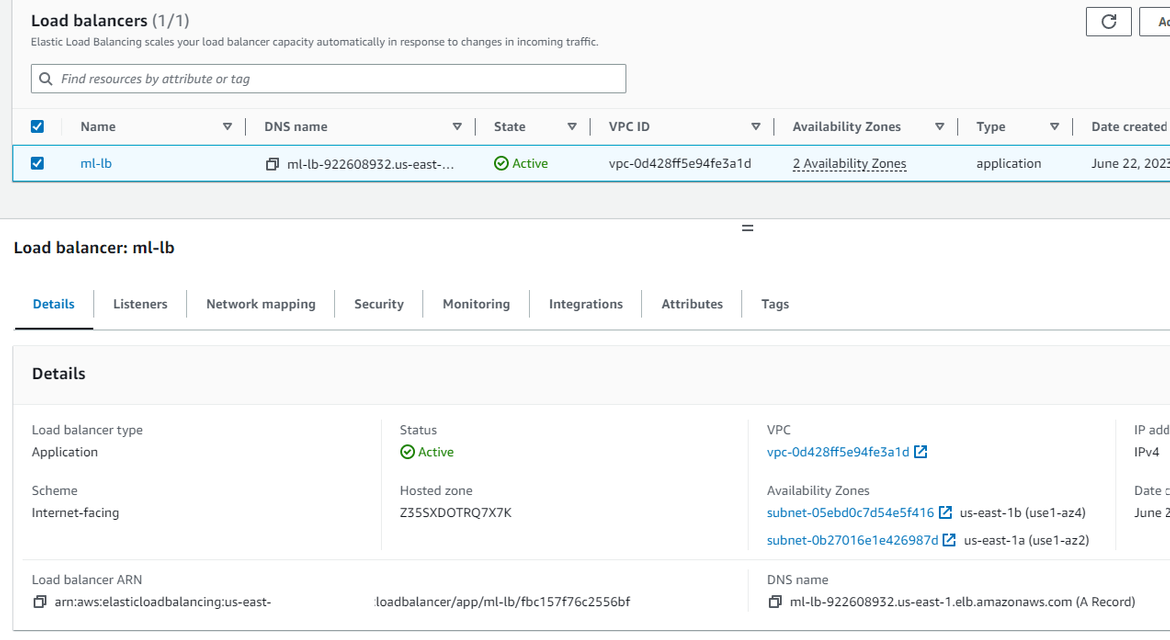
Lets open the Airflow web console. As part of the infrastructure, I have also deployed a load balancer, which is exposing the endpoint to access the Airflow console.
Copy the DNS name from the load balancer and open up on a browser. It will open up the airflow console.
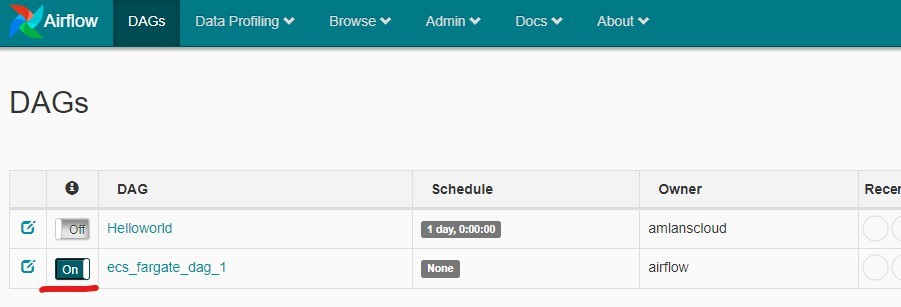
The console can be explored for various settings. Here I have the training task DAG ready to go. This DAG definition was built into the Airflow image. Currently the DAG is in a pause state and to run the task lets activate it. Click on button beside the DAG to activate it.
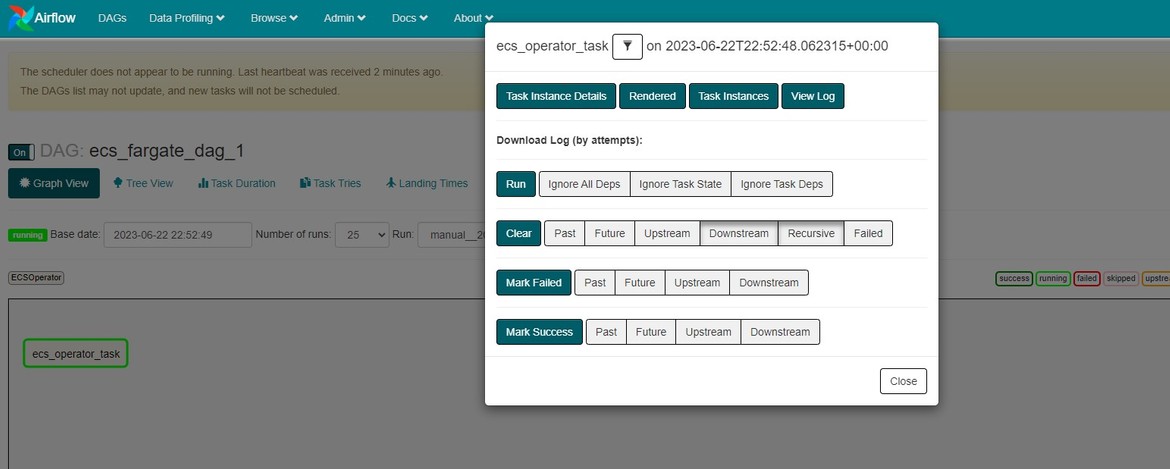
To start the training, click on the execute for the DAG. This will start a DAG task instance and start the training.
To check details of the running task, click on the DAG name. From the details page, logs can be checked for the task run
Since the task is running as a container on ECS, the actual execution logs will be delivered to the Cloudwatch log group configured for the ECS task.
  container_definitions = <<DEFINITION
[
  {
    "image": "${data.aws_caller_identity.current.account_id}.dkr.ecr.us-east-1.amazonaws.com/<image_name>:latest",
    "cpu": 2048,
    "memory": 4096,
    "name": "ecs-ttst-container-1",
    "networkMode": "awsvpc",
    "portMappings": [
      {
        "containerPort": 8080,
        "hostPort": 8080
      }
    ],
    "logConfiguration": {
      "logDriver": "awslogs",
      "options": {
        "awslogs-group": "/train-task-container-logs",
        "awslogs-region": "us-east-1",
        "awslogs-stream-prefix": "ecs"
      }
    }
  }
]
DEFINITION
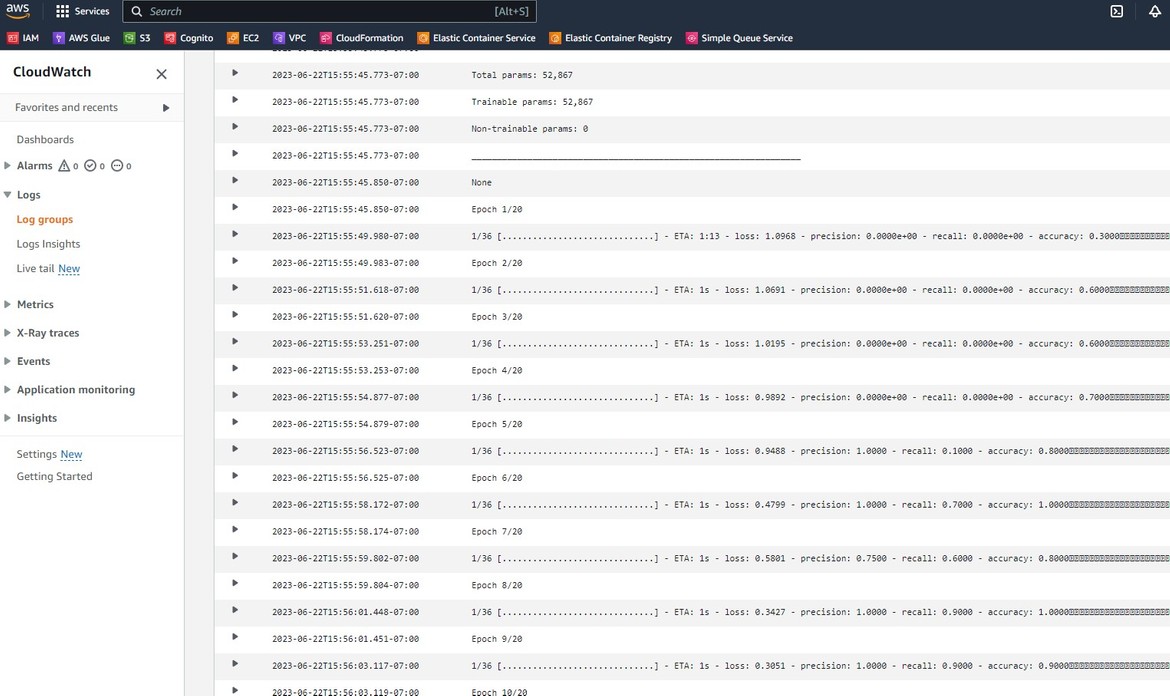
The log group is defined on the above code in Terraform. Lets check the logs on this Log group.
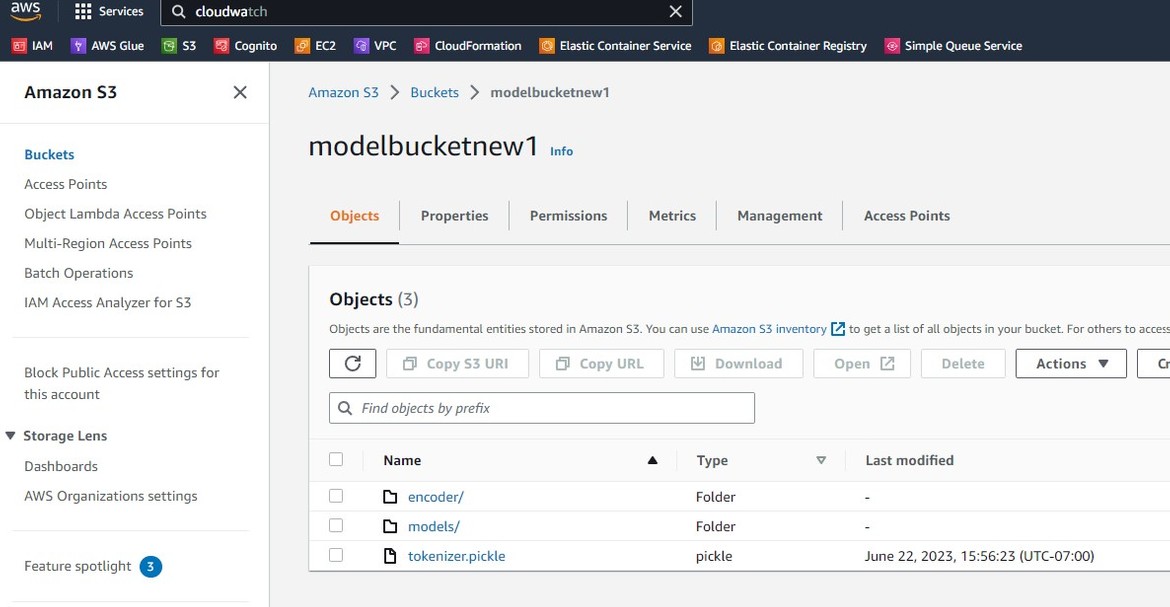
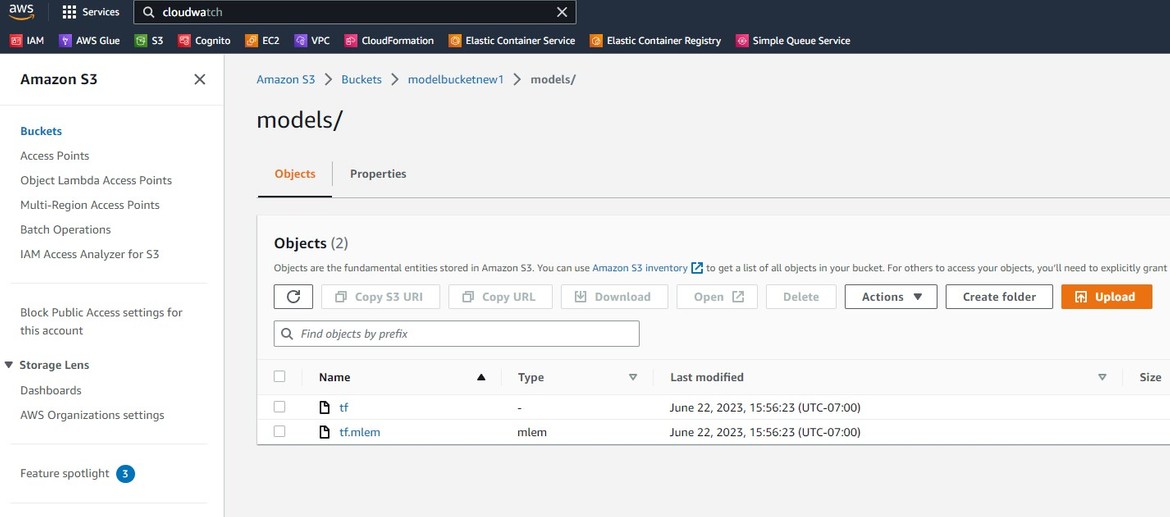
We can see the model training debug logs from the training steps. So the training task has run on Airflow and has completed. Now since the training has completed, we should have the model files save in the model S3 buckets. Lets check the S3 bucket for the files
So now our training task has completed and we have the trained model files. Next we need to expose these models in the inference API. Lets deploy the API next.
Deploy the Inference API
Now lets deploy the inference API. The API is a REST API build using Fast API. The API code and the Dockerfile is in the inference api folder. Now I am using AWS Copilot CLI to deploy the API to ECS. Dont confuse this copilot with the Github copilot. This Copilot is a developer tools provided my AWS which assists deploying to ECS. Learn more about Copilot Here.
To start using Copilot first it has to be installed and the AWS credentials need to be configured. Let me follow step by step
Install Copilot
Run this command to install the Copilot CLI
sudo curl -Lo /usr/local/bin/copilot https://github.com/aws/copilot-cli/releases/latest/download/copilot-linux \
  && sudo chmod +x /usr/local/bin/copilot
Install AWS CLI
Follow steps Here to install AWS CLI

Configure AWS Credentials
Run this command to configure the AWS credentials. Provide the access keys when it asks.
aws configure
Now we have all the pre-requisites configured. We are ready to deploy the Inference API. Navigate to the inference api code folder and start running these commands.
Setup a new app
Run this command to init the app
copilot initFollow on screen instructions to complete the setup
Setting a Load balancer based app
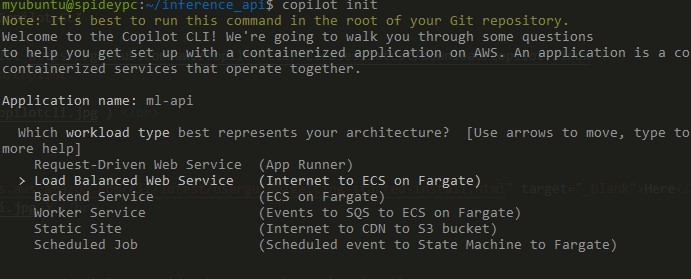
Select the Dockerfile to build the Docker image. Copilot will also build the Docker image and push to the ECR repository which it creates

That completes the initiation of the app. There are few local files which will get created. These are the cloudformation templates created to deploy the app. The app is not deployed yet.
Initiate the Environment
Now lets initiate an environment. You can initiate environments as needed, like dev, test etc. I am creating a PROD env.
copilot env init

Since I already have the VPC and subnets created by Terraform, I am selecting the existing option. Copilot is capable of creating VPC and subnets. So as needed the option can be selected.

Select the existing resources which were created. Here I am selecting the VPC and the subnets.

It starts creating the resources

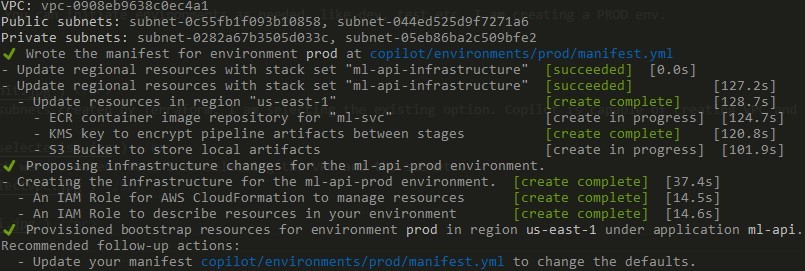
Now we have the resources ready. Lets deploy the API
Deploy the API
Deploy the API environment by running this command
copilot env deploy --name prodThis will start the deployment.
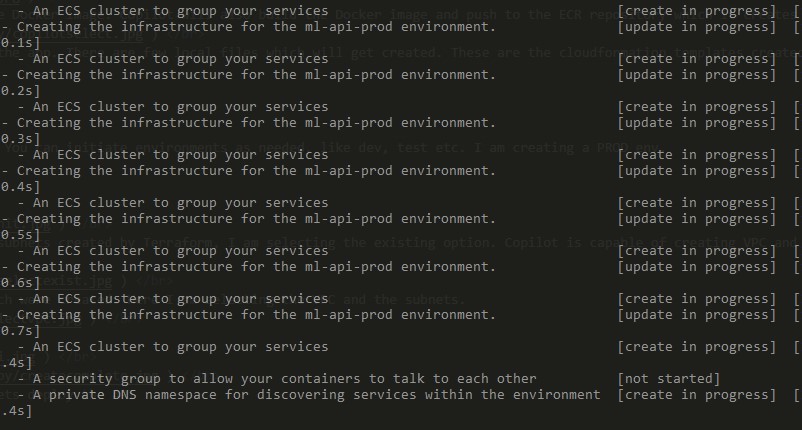
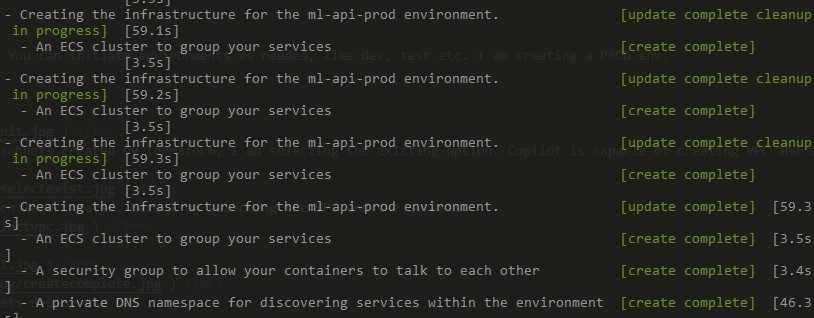
If you check AWS you will see a new ECS cluster deployed. This is the cluster the API will be deployed.

For this new cluster, Copilot also deploys a namespace and Service connect. This Service connect provides service discovery and service mesh on AWS ECS. Learn more about this Here Now run this command to build and deploy the APi service on ECScopilot svc deploy
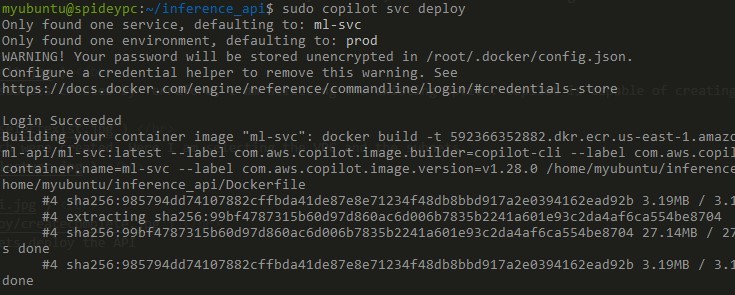
This will start the docker build and then deploy. On the console it will show that the task is deploying

Wait for the API task to change to Running state on ECS
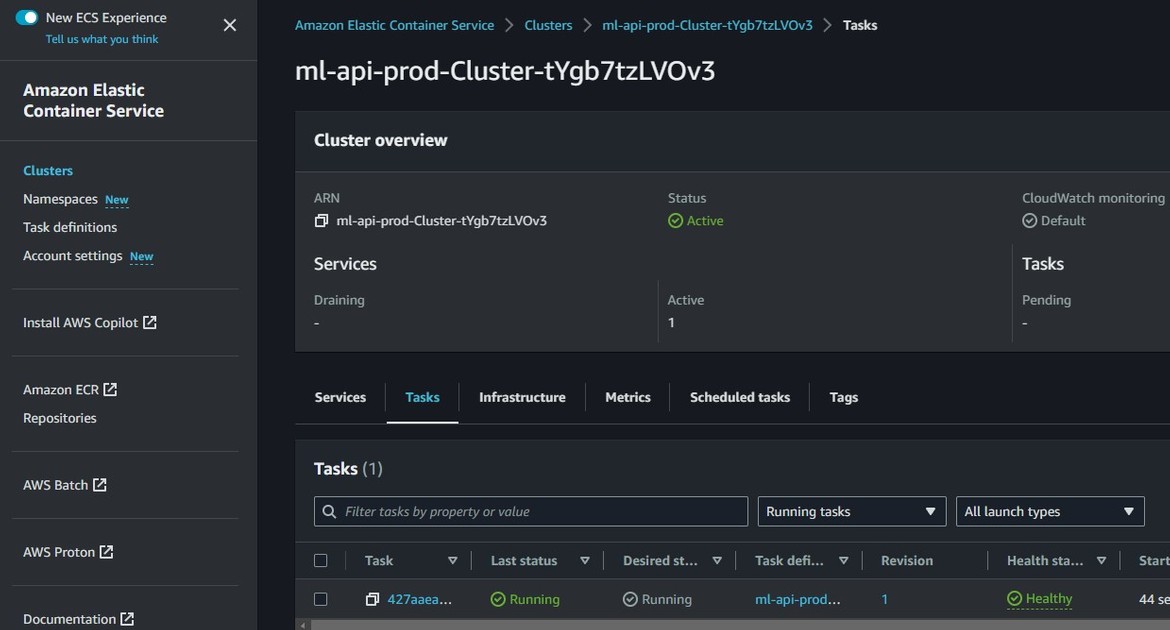
Now the API is up and running. It has already loaded the model files from the S3 bucket. The S3 bucket was passed as environment variable to the API Docker image
ENV MODEL_S3_BUCKET_NAME=modelbucketnew1We can verify the API by the ping endpoint of the API
Now that our API is successfully running lets perform an inference and detect the sentiment for a text.
Demo
The Copilot also created a load balancer for the API. Copy the DNS for the load balancer as this will be the API host. If you are following along, the inference endpoint will be
<load_balancer_dns>/parseinputsSend a POST request to above endpoint. The body will contain the text for which the sentiment need to be detected.
{
    "text":"I am so sad"
}
The API should respoind back with the sentiment of the text
That looks great. We now have a full fledged model training process and the model deployed as an API. This API can be used with any frontend to build an app for sentiment analysis. That concludes thiis whole process of deploying the end to end process.
Improvements
The steps I covered in this post are very simple and just as an example for the post. There are many changes which can be done or rather need to be done to make this process Production ready. Some changes I am working on next:
- Use Sagemaker pipelines for model training
- Deploy the API to EKS
The list can keep on increasing and you can add your own improvements to the process too. But this should give a good base to start learning the process.
Conclusion
As AI continues to transform industries across the globe, the ability to efficiently train and deploy models becomes paramount. With the guidance provided in this blog post, you are equipped with the knowledge to run an AI training pipeline on Airflow and deploy the AI model on AWS ECS for inference. Hope I was able to explain this process in detail and it can help in your implementation or learning. If you have any questions or face any issues, please reach out to me from the Contact page.
