How to deploy a multi Task AI agent via CDK on AWS using Bedrock and Bedrock Knowledgebase
Artificial Intelligence (AI) agents are transforming the way we interact with software, enabling intelligent automation, natural language understanding, and real-time decision-making. AWS Bedrock and Bedrock Knowledge Base provide powerful tools to build and enhance AI-driven applications without managing infrastructure or complex model training. By leveraging the AWS Cloud Development Kit (CDK), developers can deploy AI agents in a scalable, repeatable, and infrastructure-as-code (IaC) manner.
In this blog, we will walk through deploying a multi-function AI agent on AWS using CDK and using services like Bedrock, and Bedrock Knowledge Base. This agent will be capable of handling multiple tasks, such as answering questions based on a documentation and perform some other task as needed. We will cover the architecture, CDK setup, and key components necessary to build and integrate the AI agent into your AWS environment.
The whole code for this solution is available on Github Here. If you want to follow along, this can be used to stand up your own infrastructure.
By the end of this guide, you will have a fully functional AI agent running on AWS, leveraging the power of Bedrock’s foundation models and Knowledge Base to enhance its responses with domain-specific data. Let’s get started! 🚀
Pre Requisites
Before I start the walkthrough, there are some some pre-requisites which are good to have if you want to follow along or want to try this on your own:
- Basic AWS knowledge
- An AWS account
- AWS CLI installed and configured
- Coding knowledge in TypeScript.
- CDK concepts
- Basic LLM concepts
- A free Pinecone account for the vector storage. You can register at Pinecone
With that out of the way, lets dive into the details.
What are AI agents?
AI agents are intelligent systems designed to perform tasks autonomously, using machine learning and natural language processing (NLP) to understand and respond to user inputs. These agents can analyze data, retrieve relevant information, generate human-like responses, and even make decisions based on context.
AI agents come in various forms, including chatbots, virtual assistants, automation tools, and decision-making systems. They can be classified into different categories based on their capabilities:
Reactive Agents – These agents respond to inputs based on predefined rules or real-time data without maintaining historical context.
Goal-Oriented Agents – These agents follow a defined objective, using reasoning and planning to achieve a goal.
Learning Agents – These agents improve over time by learning from interactions and feedback, often using machine learning models.
Multi-Function Agents – These agents handle multiple tasks, integrating various AI models and external knowledge sources to enhance their responses.
In the context of AWS, AI agents powered by Bedrock and Bedrock Knowledge Base can leverage pre-trained foundation models while retrieving relevant information from structured or unstructured data sources. This makes them highly effective for tasks like customer support, document summarization, code generation, and more.
What is Bedrock and Bedrock Knowledge Base?
AWS Bedrock is a fully managed service that provides access to foundation models (FMs) from various AI providers, allowing developers to build and deploy generative AI applications without managing infrastructure. With Bedrock, you can integrate powerful models for text generation, image creation, summarization, and other AI-driven capabilities into your applications using simple API calls.
Key Features of AWS Bedrock:
- Access to Multiple Foundation Models – Choose from a variety of pre-trained AI models from providers like Anthropic, AI21 Labs, Stability AI, and Amazon Titan.
- Serverless Architecture – No need to provision or manage GPUs or infrastructure; Bedrock handles the scaling and deployment.
- Customizability – Fine-tune models with your data using techniques like retrieval-augmented generation (RAG) to improve responses.
- Seamless AWS Integration – Easily connect Bedrock with other AWS services like Lambda, S3, and DynamoDB to build intelligent applications
Bedrock Knowledge Base is an extension of AWS Bedrock that enhances AI models by allowing them to retrieve and use external information stored in databases, document repositories, and other sources. This enables AI agents to provide more accurate, context-aware responses beyond their pre-trained knowledge.
Key Features of Bedrock Knowledge Base:
- Retrieval-Augmented Generation (RAG) – Combines AI-generated responses with real-time retrieval of relevant data from structured and unstructured sources.
- Data Source Connectivity – Supports integration with Amazon S3, Amazon OpenSearch, and other databases to fetch domain-specific information.
- Automatic Indexing and Search – Organizes and retrieves relevant data efficiently to improve the quality of responses.
- Scalability and Security – Ensures secure access to enterprise data while scaling with AWS infrastructure.
By combining AWS Bedrock and Bedrock Knowledge Base, developers can build AI agents that are not only powerful but also capable of providing responses enriched with real-time, domain-specific knowledge.
Solution Overview
Lets first see what we will deploy for this blog post. Below image shows all the components which will be deployed.
- Bedrock Agent Using Claude3 Sonnet Foundation model – This is the core AI agent that will handle multiple tasks, such as answering questions, performing tasks etc. It uses the Claude3 Sonnet foundation model to generate human-like responses.
This is main core brain of the flow which performs all the orchestrations needed. - Bedrock Knowledge Base – This component will store domain-specific data, such as documentation, FAQs etc. For this example I am using the AWS Well architected documentation snippet as an example. So the agent
will be able to answer questions based on the AWS Well architected documentation. Here is a snippet of the content
AWS Well-Architected Framework Publication date: June 27, 2024 (Document revisions)
The AWS Well-Architected Framework helps you understand the pros and cons of decisions you make while building systems on AWS. By using the Framework you will learn architectural best practices for designing and operating reliable, secure, efficient, cost-effective, and sustainable systems in the cloud.
Introduction
The AWS Well-Architected Framework helps you understand the pros and cons of decisions you make while building systems on AWS. Using the Framework helps you learn architectural best practices for designing and operating secure, reliable, efficient, cost-effective, and sustainable workloads in the AWS Cloud. It provides a way for you to consistently measure your architectures against best practices and identify areas for improvement. The process for reviewing an architecture is a constructive conversation about architectural decisions, and is not an audit mechanism. We believe that having well-architected systems greatly increases the likelihood of business success.- S3 bucket for Knowledge files This bucket acts as the source storage for the documentation files needed to build the knowledgebase. For this example I am storing a text file containing the AWS well architected
documentation content, in the S3 bucket. - Vector Storage – This component stores the embeddings of the knowledgebase documents, allowing the AI agent to retrieve relevant information based on user queries. AWS supports various kinds of databases for this storage, but for this example I am using Pinecone service for the vector storage.
- Action Group for the agent – This component will store the actions which the agent can perform. The action group can contain a collection of different tasks in form of APIs or functions. The agent
can perform these tasks based on the input from the user. For this example, I am using a simple action group which contains a single ask which calls a free weather API to return current temperature of
a city. - Lambda function for the action group – This component is the actual function which will be called when the agent performs the action. This Lambda contains all the function definitions which will be used by the agent
to perform the tasks. For this example, I am using a Lambda function which calls a free weather API to return the current temperature of a city. - IAM Roles and Policies – These components define the permissions and access controls for the AI agent, knowledge base, and other AWS services. They ensure that the agent can securely interact with other AWS services.
All of these components are deployed to AWS using CDK framework. I am using TypeScript for the CDK code. Lets see some details for the CDK stack.
CDK Setup
Lets see the CDK scripts for each of the components. All of the below codes are in Typescript but you can write your own using the supported languages.
Initialize the CDK project
To start a new CDK project, run the following commands in your terminal:
cdk init --language typescriptIt will install the needed packages and start a blank CDK project. Below are the components which are added to the CDK code.
Security Components
For the components to connect securely and provide needed access securely, we are deploying some components.
Secret for Pinecone API Key
const pineConeSecret = new secretmanager.Secret(this, 'pineconesecret', {
      secretName: 'pinecone-secret',
      removalPolicy: removalPolicy,
    });
    cdk.Tags.of(pineConeSecret).add('Name', 'pinecone-secret');
    cdk.Tags.of(pineConeSecret).add('Project', 'BedrockPost');
IAM role for Bedrock Knowledgebase
const bedrockRole = new iam.Role(this, 'bedrockRole', {
      assumedBy: new iam.ServicePrincipal('bedrock.amazonaws.com'),
      roleName: 'bedrock-kb-role',
      inlinePolicies: {
        s3policy: new iam.PolicyDocument({
          statements: [s3policy],
        }),
        secretPolicy: new iam.PolicyDocument({
          statements: [secretPolicy],
        }),
        bedrockpolicy: new iam.PolicyDocument({
          statements: [bedrockpolicy],
        }),
      },
    });
IAM role for Action Group Lambda
const actionGrpLambdaRole = new iam.Role(this, 'actionGrpLambdaRole', {
      assumedBy: new iam.ServicePrincipal('lambda.amazonaws.com'),
      roleName: 'actionGrpLambdaRole',
      inlinePolicies: {
        lambdaPolicy: new iam.PolicyDocument({
          statements: [lambdaPolicy],
        }),
      },
    });
IAM role for Bedrock Agent
const bedrockagentRole = new iam.Role(this, 'bedrockagentRole', {
      assumedBy: new iam.ServicePrincipal('bedrock.amazonaws.com'),
      roleName: 'bedrock-agent-role',
      inlinePolicies: {
        bedrockagentPolicy: new iam.PolicyDocument({
          statements: [bedrockagentPolicy],
        }),
      },
    });
Knowledge Base Components
To deploy the Bedrock knowledgebase, we need to deploy the following components
S3 Bucket for Knowledgebase
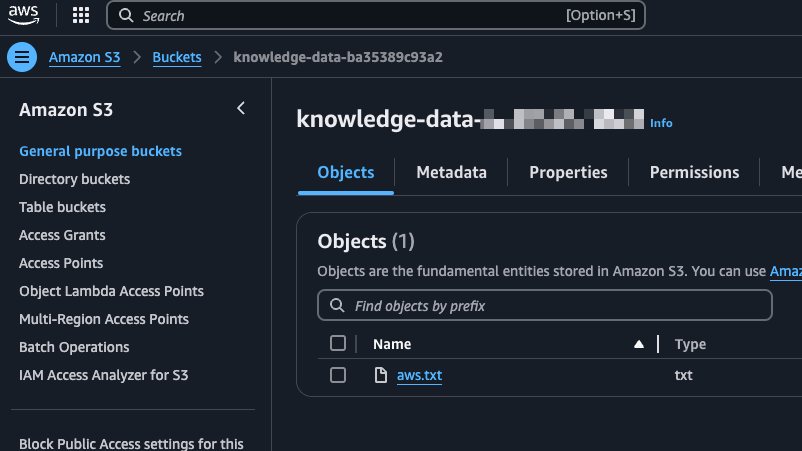
This bucket will be storing the data files for the knowledgebase. We will upload the AWS well architected documentation file to this bucket.
const s3Bucket = new s3.Bucket(this, 'knowledge-data', {
      bucketName: '<Bucket Name>',
      removalPolicy: removalPolicy,
      autoDeleteObjects: true,
    });
Bedrock Knowledgebase
const blog_knowledge_base = new bedrock.CfnKnowledgeBase(this, 'BlogKnowledgeBaseDocs', {
      name: 'blog-kb-docs',
      description: 'Blog knowledge base that contains documents',
      roleArn: bedrockRole.roleArn,
      knowledgeBaseConfiguration: {
        type: 'VECTOR',
        vectorKnowledgeBaseConfiguration: {
          embeddingModelArn: 'arn:aws:bedrock:us-east-1::foundation-model/amazon.titan-embed-text-v2:0',
        },
      },

      storageConfiguration: {
        type: 'PINECONE',
        pineconeConfiguration: {
          connectionString: "<Pinecone Connection String>",
          credentialsSecretArn: pineConeSecret.secretArn,
          fieldMapping: {
            metadataField: 'metadata',
            textField: 'text',
          },
        },
      },

    });
Lets understand each of the parameters used in the above code.
- name – The name of the knowledge base.
- description – A brief description of the knowledge base.
- roleArn – The ARN of the IAM role that grants access to the knowledge base.
- knowledgeBaseConfiguration – The configuration settings for the knowledge base. Here we are specifying the embedding model to be used for the knowledge base. I am using Amazon Titan embedding model
- storageConfiguration – The storage configuration for the knowledge base. Here we are specifying the Pinecone configuration for the knowledge base. We are providing the Pinecone connection string and the credentials secret ARN. This is the secret which we created earlier.
Data source for Knowledgebase
This defines the data source for the Bedrock knowledgebase.
const blogDatasrc = new bedrock.CfnDataSource(this, 'BlogDataSource', {
      name: 'blog-datasource',
      description: 'Blog datasource',
      knowledgeBaseId: blog_knowledge_base.ref,
      dataSourceConfiguration: {
        type: 'S3',
        s3Configuration: {
          bucketArn: s3Bucket.bucketArn,
        },
      },
    });
    blogDatasrc.node.addDependency(blog_knowledge_base);
Lets understand each of the parameters used in the above code.
- name – The name of the data source.
- description – A brief description of the data source.
- knowledgeBaseId – The ID of the knowledge base to which the data source belongs. This is the ID of the knowledge base created earlier.
- dataSourceConfiguration – The configuration settings for the data source. Here we are specifying the S3 configuration for the data source. We are providing the bucket ARN of the S3 bucket created earlier. The well architected documentation file will be uploaded to this bucket.
Action Group Components
As part of this we will deploy the Lambda that the agent will invoke to execute the actions.
Lambda function for Action Group
const actionGrpLambda = new lambda.DockerImageFunction(this, 'actionGrpLambda', {
      code: lambda.DockerImageCode.fromImageAsset('assets/actionGrpLambda'),
      functionName: 'actionGrpLambda',
      role: actionGrpLambdaRole,
      memorySize: 256,
      timeout: cdk.Duration.seconds(30),
      environment: {
        LATITUDE: '',
        LONGITUDE: '',
        WEATHER_API_HOST: 'https://api.open-meteo.com/v1/forecast',
      },
    });
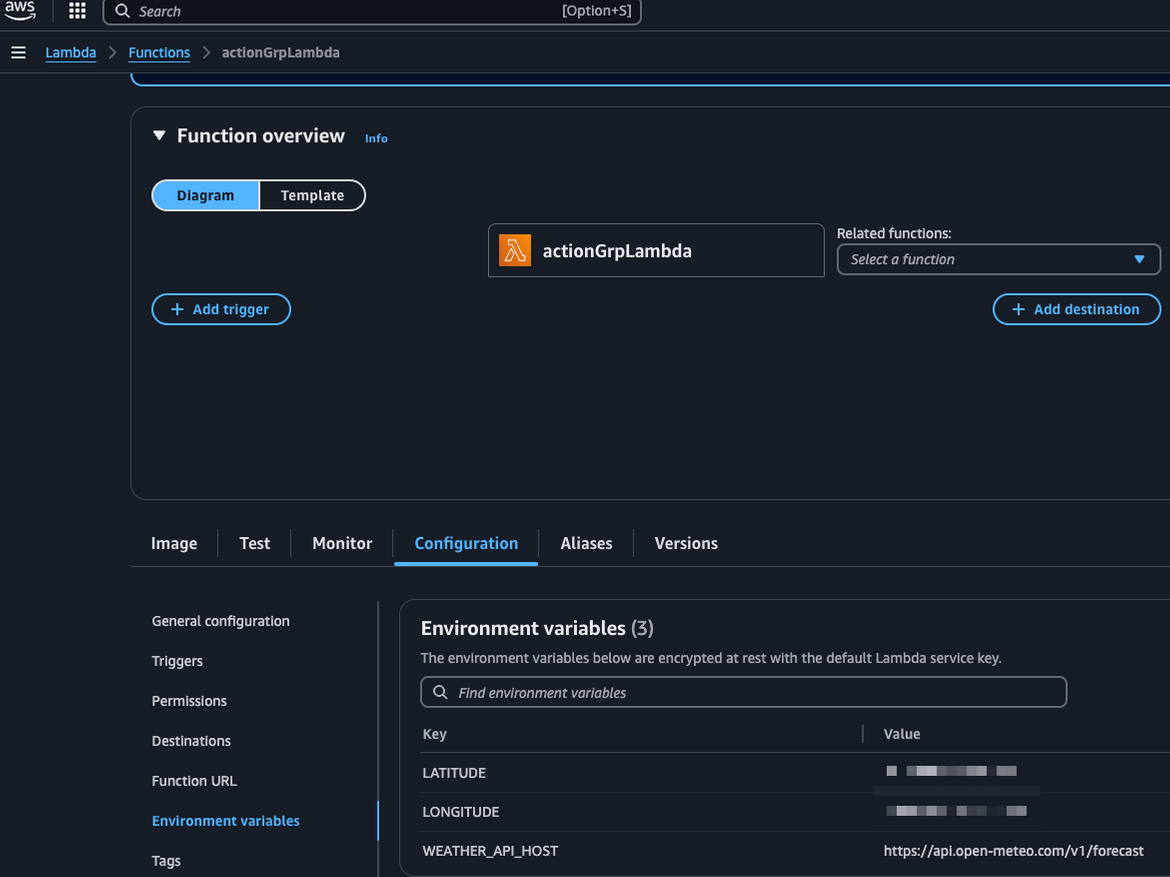
I am passing some environment variables to be used by the Lambda to call the free weather API. The code for the Lambda is placed in the assets folder in the project folder.
Lambda code
The Lambda is written using Python. It provides different condition paths for different tasks. For this example I am using just one task to get the temperature from the weather API.
def lambda_handler(event, context):
    # get the action group used during the invocation of the lambda function
    actionGroup = event.get('actionGroup', '')

    # name of the function that should be invoked
    function = event.get('function', '')

    # parameters to invoke function with
    parameters = event.get('parameters', [])

    # brach out based on input task name from the agent
    if function == 'get_weather_details':
        response = str(get_weather_details())
        responseBody = {'TEXT': {'body': json.dumps(response)}}
    else:
        responseBody = {'TEXT': {'body': 'Invalid function'}}

    action_response = {
        'actionGroup': actionGroup,
        'function': function,
        'functionResponse': {
            'responseBody': responseBody
        }
    }
    # return bedrock agent formatted response
    function_response = {'response': action_response, 'messageVersion': event['messageVersion']}
    return function_response
Bedrock Agent Components
The core component of the solution is the Bedrock agent. This component will be the orchestrator for the whole flow. It will interact with the knowledgebase, action group and other components to provide the needed responses.
Agent Instructions
These instructions shape up the behavior of the agent. It instructs the agent to understand the specific tass needed to be performed.
const agent_instruction = "You are a helpful agent, helping clients retrieve weather information ,\n" +
      "answer questions about AWS Well architected framework. You have access to the AWS well architected framework documentation in a Knowledgebase, and you can Answer questions from this documentation.\n" +
      "You can also use a tool to get the weather details from the weather function. You can use the function get_weather_details to get the weather details from the Open Meteo Weather API.The functions doesnt take any input\n"
Bedrock Agent
This deploys the Bedrock agent
const blogAgent = new bedrock.CfnAgent(this, 'BlogAgent', {
      agentName: 'blog-agent',
      description: 'Blog agent',
      agentResourceRoleArn: bedrockagentRole.roleArn,
      foundationModel: 'anthropic.claude-3-sonnet-20240229-v1:0',
      instruction: agent_instruction,
      autoPrepare: true,
      knowledgeBases: [{
        knowledgeBaseId: blog_knowledge_base.ref,
        description: 'Blog knowledge base',
      }],
      actionGroups: [
        {
          actionGroupName: 'weather-action-group',
          actionGroupExecutor: {
            lambda: actionGrpLambda.functionArn,
          },
          actionGroupState: 'ENABLED',
          functionSchema: {
            functions: [
              {
                name: 'get_weather_details',
                description: 'Get the weather details from the Open Meteo Weather API',
                parameters: {},
                requireConfirmation: "DISABLED",
              }
            ],
          },

        },
      ],

    });
Lets understand each of the parameters used in the above code.
- agentName – The name of the agent.
- description – A brief description of the agent.
- agentResourceRoleArn – The ARN of the IAM role that grants access to the agent. This role provides the needed permissions to the agent to perform the tasks.
- foundationModel – The foundation model to be used by the agent. I am using the Claude3 Sonnet foundation model.
- instruction – The instructions for the agent. This is the text which the agent will use to understand the tasks to be performed. The content for this was defined above
- autoPrepare – A flag that indicates whether the agent should be automatically prepared for use.
- knowledgeBases – The knowledge bases associated with the agent. Here we are associating the knowledge base created earlier with the agent. The agent will use this knowledgebase to answer questions about the AWS well architected documentation.
-
actionGroups – The action groups associated with the agent. Here we are associating the action group created earlier with the agent. The agent will use this action group to perform the tasks. Some of the parameters we define for the agent are:
- actionGroupName – The name of the action group.
- actionGroupExecutor – The executor for the action group. Here we are specifying the Lambda function created earlier as the executor.
- actionGroupState – The state of the action group.
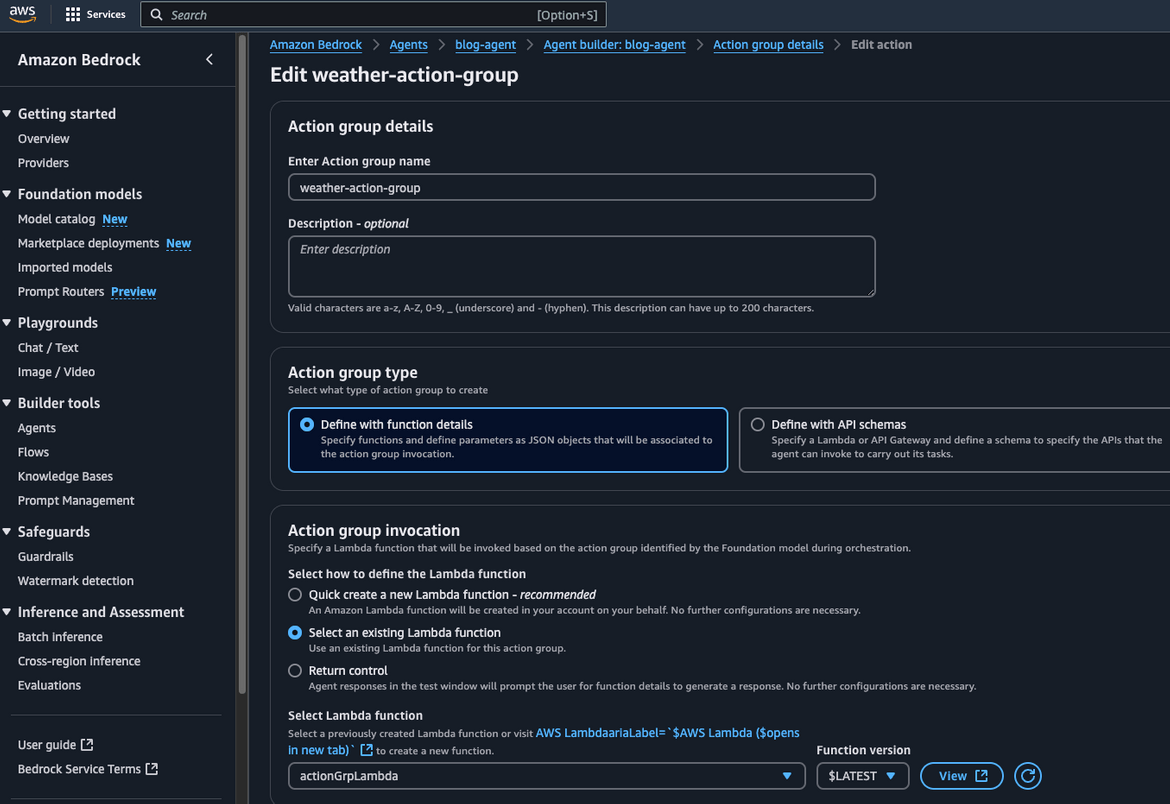
- functionSchema – The schema for the functions in the action group. Here we are defining the function getweatherdetails. This function will be used to get the weather details from the Open Meteo Weather API.
We are also defining the description, parameters, and confirmation settings for the function. We can specify multiple functions in the action group based on how many tasks we want the agent to handle. This function name matches the one from the Action group lambda
That covers all of the components we are defining in the CDK stack. Lets see how to deploy this stack.
Deploy the stack
Pre-requisites
Before starting the deployment, make sure these pre-requisites are installed and configured:
- AWS CLI installed
- AWS CDK installed
- Node.js installed
- Make installed
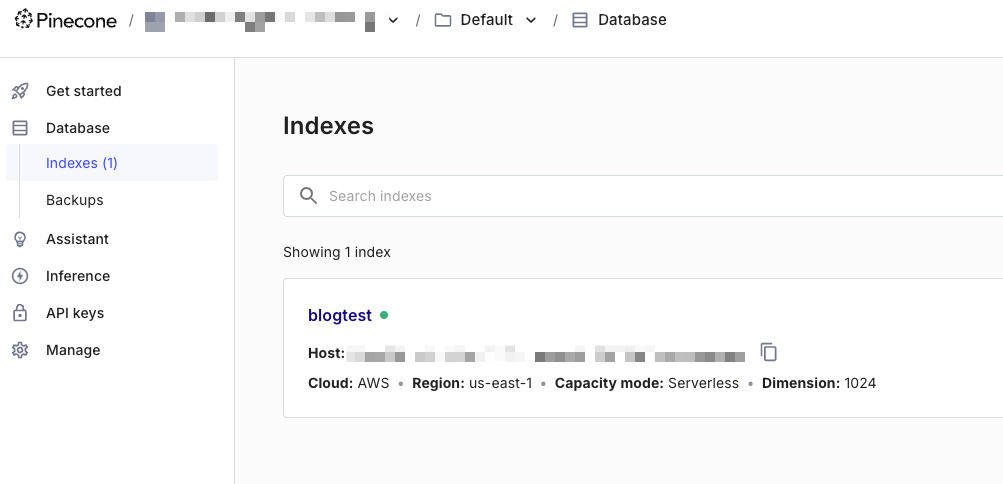
We will need to create a Vector Database which we will use for the Knowledgebase. I am using Pinecone vector database. You can create a free account and get the connection string from the Pinecone console. Register a free Pinecone account at Pinecone. Once logged in to the Pinecone console, create a free tier index
Get the connection string from the Pinecone console. This will be used later for the deployment. Also, create a new API key in the Pinecone console. This will be used to connect to the Pinecone service.
Run the deployment
Lets deploy the stack we defined above. Before deploying the tack, if you are starting a project from scratch and want to use CDK, start a new CDK project. This command initializes a new CDK project in the current directory using TypeScript as the language.
cdk init --language typescriptThis will create a new CDK project in the current directory. Now you can add the components we defined above to the CDK code. The repo I shared has all the code to deploy the stack. You can clone the repo and deploy the stack.
git clone <repo-url>
cd <repo-folder>
npm install
In the repo these are two folders which contain the needed code
- assets – This folder contains the Lambda code for the action group.
- lib – This folder contains the CDK code to deploy the stack.
In the main stack code, update the Pinecone connection string to the one you got from the Pinecone console.
storageConfiguration: {
        type: 'PINECONE',
        pineconeConfiguration: {
          connectionString: "<Pinecone Connection String>",
          credentialsSecretArn: pineConeSecret.secretArn,
          fieldMapping: {
            metadataField: 'metadata',
            textField: 'text',
          },
        },
      },
Lets configure the AWS CLI with a profile, which will be used to deploy the stack.
aws configure --profile <profile-name>Follow the prompts to enter the access key, secret key, region and output format. Once configured, update the details in the Makefile which is part of the repo I shared.
export AWS_PROFILE ?= <update-profile-name>
export AWS_DEFAULT_REGION ?= <update-region>
export AWS_ACCOUNT ?= <update-account-id>
To ease the deploy steps, I have added a Makefile which contains the commands to deploy and destroy the stack. Lets see the commands.
run-bootstrap-bedrock-stack:
	@echo "Running bootstrap"
	@cd agent-bedrock-infrastructure && cdk bootstrap aws://"$(AWS_ACCOUNT)"/"$(AWS_DEFAULT_REGION)" --profile "$(AWS_PROFILE)"

run-deploy-bedrock-stack:
	@echo "Running deploy"
	@make run-bootstrap-bedrock-stack
	@cd agent-bedrock-infrastructure && cdk deploy --profile="$(AWS_PROFILE)" --require-approval never
run-bootstrap-bedrock-stack – This command bootstraps the CDK environment. It creates the required resources in the AWS account to deploy the CDK stack. run-deploy-bedrock-stack – This command deploys the CDK stack to the AWS account. It first runs the bootstrap command and then deploys the stack.
run-destroy-rag-compute:
	@echo "Running destroy"
	@cd agent-bedrock-infrastructure && cdk destroy --profile="$(AWS_PROFILE)" --force
run-destroy-bedrock-stack – This command destroys the CDK stack in the AWS account. It removes all the resources created by the stack.
Lets run the deployment. Run this command to start the deployment.
make run-deploy-bedrock-stack This will start the deployment and take a while to complete. Wait for the deployment to complete. Lets see some of the deployed components on AWS
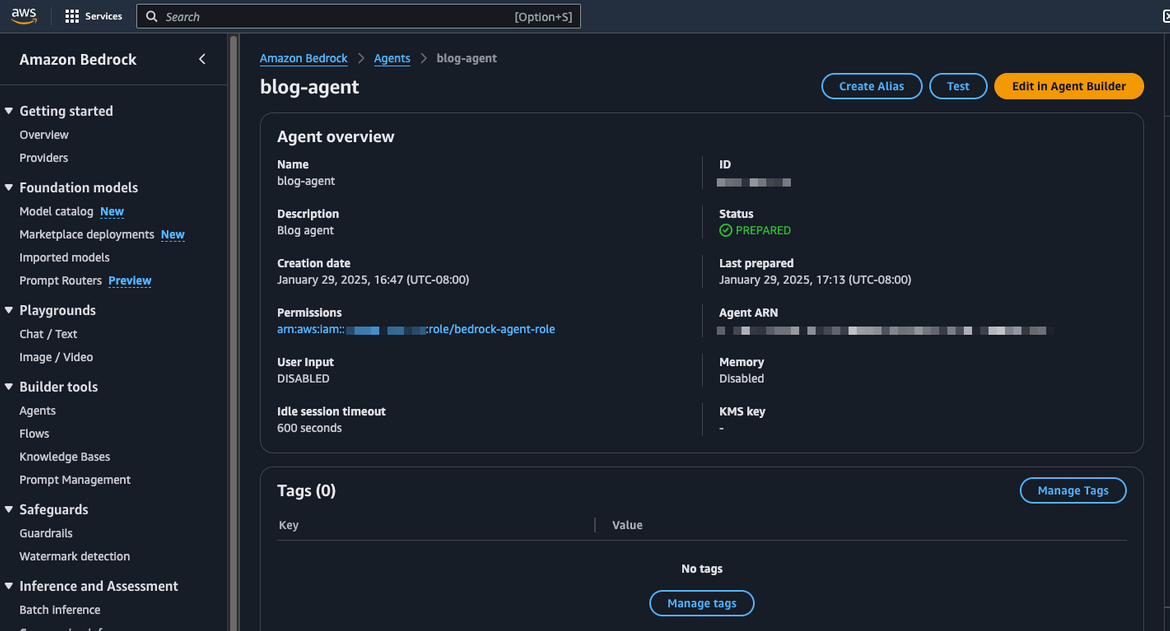
- Bedrock Agent
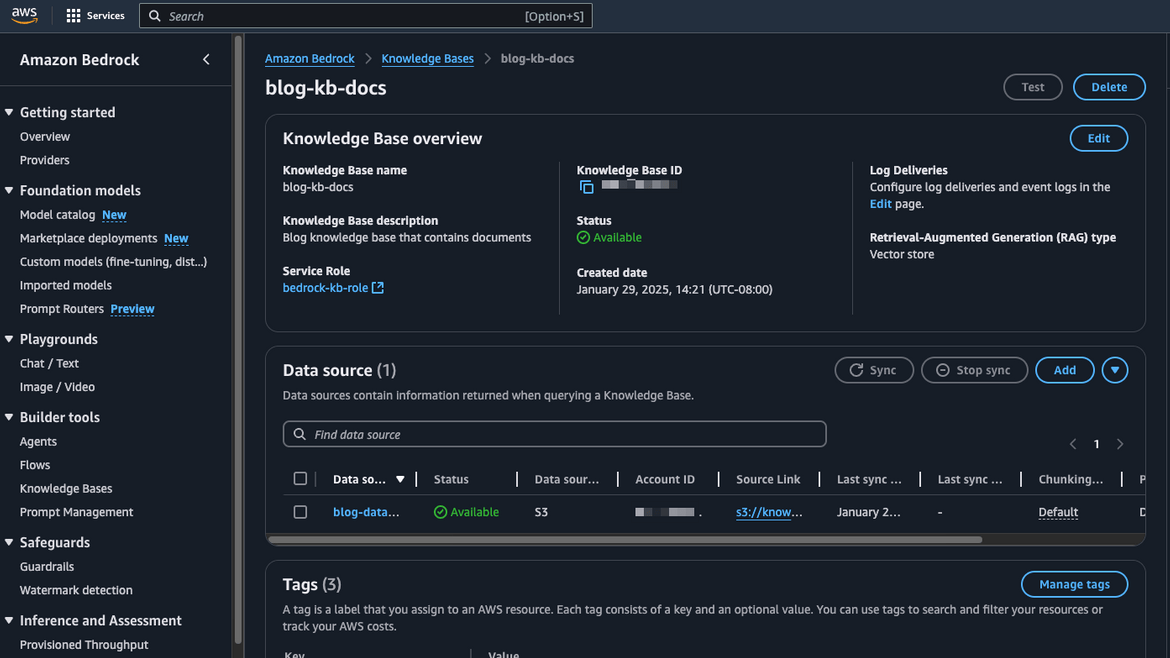
- Bedrock Knowledgebase
- Action Group on the Agent
- Lambda for the Action Group and environment variable for the sample Weather API
For the Knowledgebase to connect to Pinecone, we will need to provide the connection string and the secret. Lets add the secret to the secret manager. The secret must have been created with the CDK stack. Navigate to the secret and add the api key as the secret value. Follow this format to put the value in the secret.
{"apiKey":"api-key-value"}Run the Knowledgebase sync
Now we need to put data in the Knowledgebase, which the Agent will be using as a knowledge source. I have put the sample file which I am using for this post. Its a text file with some content from the AWS well architected documentation. Here is a snippet of content from the aws.txt file.
The AWS Well-Architected Framework helps you understand the pros and cons of decisions you make while building systems on AWS. Using the Framework helps you learn architectural best practices for designing and operating secure, reliable, efficient, cost-effective, and sustainable workloads in the AWS Cloud. It provides a way for you to consistently measure your architectures against best practices and identify areas for improvement. The process for reviewing an architecture is a constructive conversation about architectural decisions, and is not an audit mechanism. We believe that having well-architected systems greatly increases the likelihood of business success.
AWS Solutions Architects have years of experience architecting solutions across a wide variety of business verticals and use cases. We have helped design and review thousands of customers’ architectures on AWS. From this experience, we have identified best practices and core strategies for architecting systems in the cloud.
The AWS Well-Architected Framework documents a set of foundational questions that help you to understand if a specific architecture aligns well with cloud best practices. The framework provides a consistent approach to evaluating systems against the qualities you expect from modern cloud- based systems, and the remediation that would be required to achieve those qualities. As AWS continues to evolve, and we continue to learn more from working with our customers, we will continue to refine the definition of well-architected.
This framework is intended for those in technology roles, such as chief technology officers (CTOs), architects, developers, and operations team members. It describes AWS best practices and strategies to use when designing and operating a cloud workload, and provides links to further implementation details and architectural patterns. For more information, see the AWS Well- Architected homepage.
    Introduction 1
AWS Well-Architected Framework Framework
 AWS also provides a service for reviewing your workloads at no charge. The AWS Well-Architected Tool (AWS WA Tool) is a service in the cloud that provides a consistent process for you to review and measure your architecture using the AWS Well-Architected Framework. The AWS WA Tool provides recommendations for making your workloads more reliable, secure, efficient, and cost- effective.
To help you apply best practices, we have created AWS Well-Architected Labs, which provides you with a repository of code and documentation to give you hands-on experience implementing best practices. We also have teamed up with select AWS Partner Network (APN) Partners, who are members of the AWS Well-Architected Partner program. These AWS Partners have deep AWS knowledge, and can help you review and improve your workloads.
Definitions
Every day, experts at AWS assist customers in architecting systems to take advantage of best practices in the cloud. We work with you on making architectural trade-offs as your designs evolve. As you deploy these systems into live environments, we learn how well these systems perform and the consequences of those trade-offs.
Based on what we have learned, we have created the AWS Well-Architected Framework, which provides a consistent set of best practices for customers and partners to evaluate architectures, and provides a set of questions you can use to evaluate how well an architecture is aligned to AWS best practices.
The AWS Well-Architected Framework is based on six pillars — operational excellence, security, reliability, performance efficiency, cost optimization, and sustainability.
Table 1. The pillars of the AWS Well-Architected Framework
         Name
     Description
      Operational excellence
Lets upload this file to the S3 bucket which is the source of the Knowledgebase.
Now we need to sync the Knowledgebase with the data source. This will index the data and make it available for the agent to use. To do this, navigate to the Knowledgebase in the AWS console and click on the sync button for the specific data source.
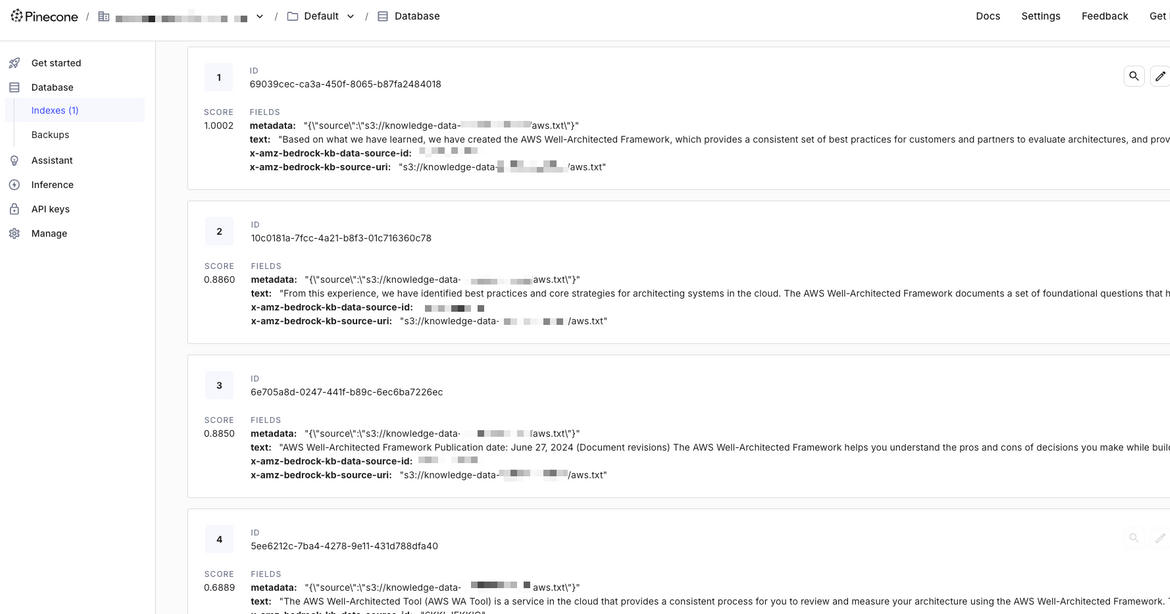
The sync process will run for a while. Once its complete, the data source wll show “Available” status. You can navigate to the Pinecone console to view the embeddings which are created for the data.
The embeddings are created for the data and are available for the agent to use. Now the agent is ready to be used. Lets see how to test the agent.
Testing the AI agent
Navigate to the Agents section in Bedrock. You should see the agent which was created.
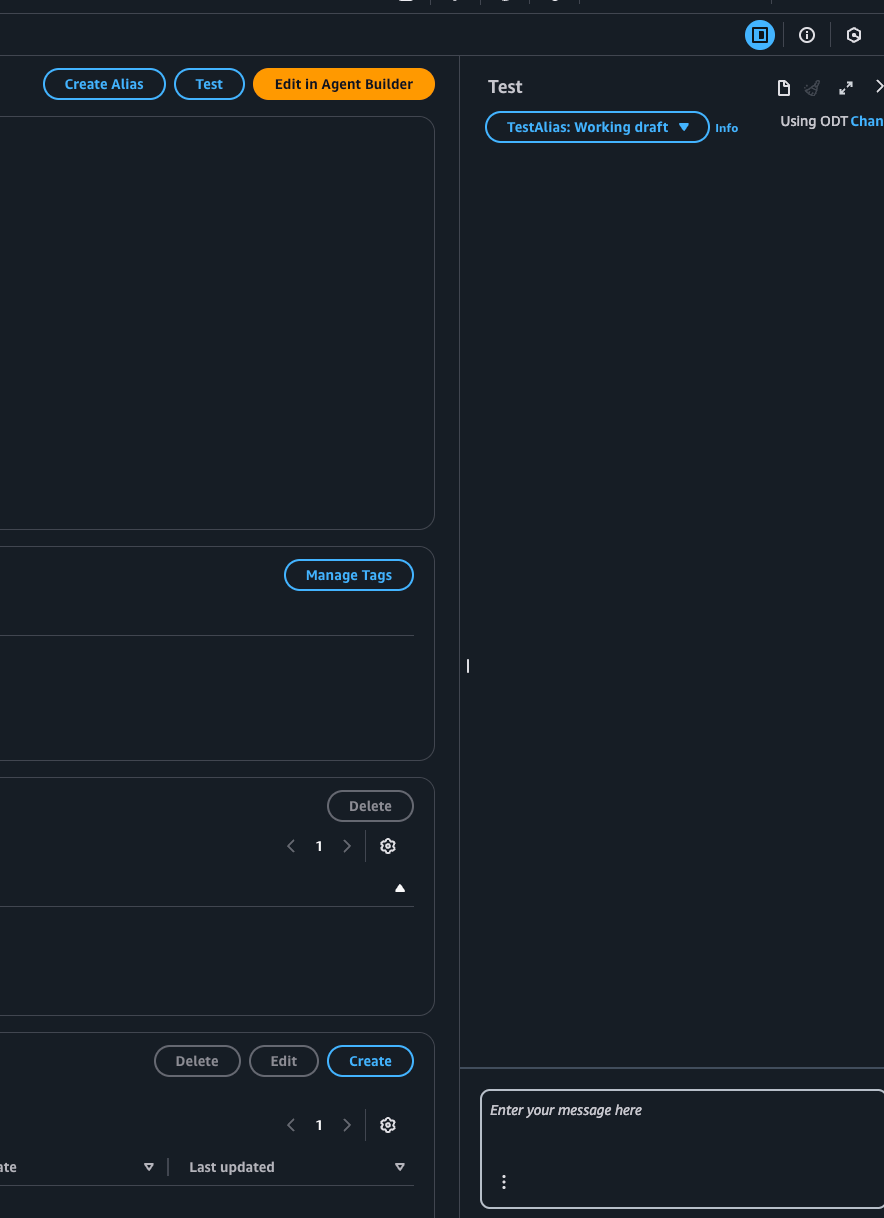
Click on the agent to open it. On the Agent details page, click on the Test button to start the test chat interface. This will open a chat interface where you can interact with the agent.
Lets see how it behaves when we ask the weather. I have hard coded the location in the lambda so for this example it will only return the weather for the location I have specified. You can change the location in the Lambda code to get the weather for a different location or just have the agent dynamically determine the location based on the user input. So now let me ask the agent about the weather.
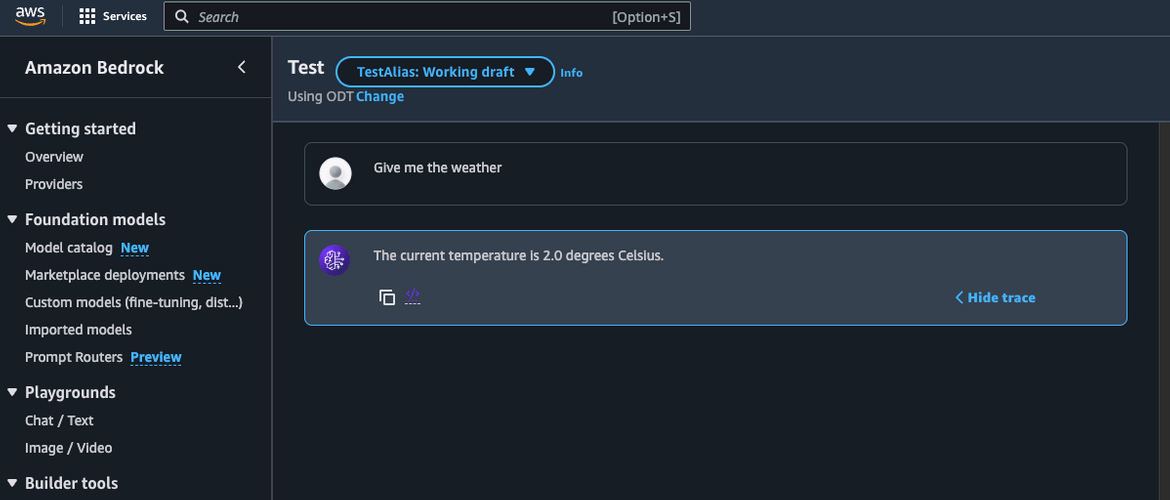
The agent responds with the current temperature for the specified location. Lets check the Lambda logs to see if it triggered the Lambda function to get the weather details. Navigate to the action group lambda which we created earlier. Click on the Monitoring tab and then click on View logs in CloudWatch. This will open the CloudWatch logs for the Lambda function.

We can see that the Lambda was triggered and it provided the response back to the agent. The agent then returned the response to the user.
Now lets ask the agent about the AWS well architected documentation. The agent will use the knowledge base to answer the question.
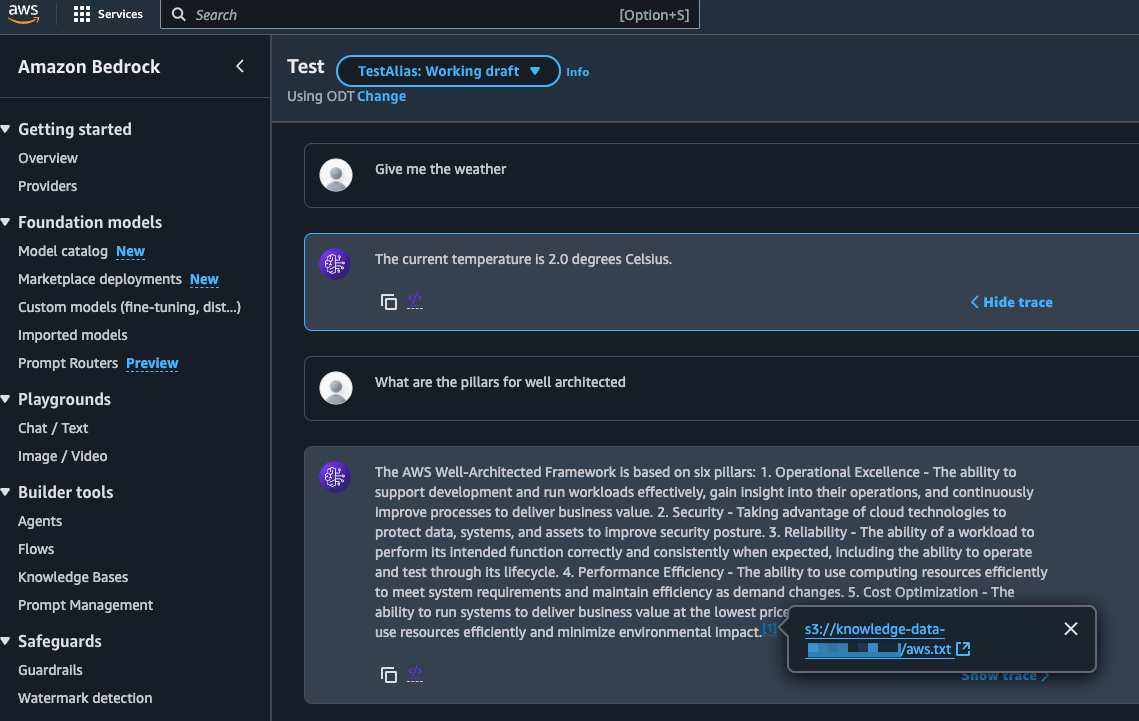 .
The agent responds with the relevant information from the knowledge base. It uses the Bedrock Knowledge Base to retrieve the information and provide a context-aware response. We can also see the citation for the source of the information, which in the current context is the data file we uploaded to the S3 bucket.
So we can see that the agent is able to handle multiple tasks, such as answering questions about the AWS well architected documentation and getting the weather details. It uses the Bedrock Knowledge Base to retrieve relevant information and provide context-aware responses. The agent can be extended to handle more tasks by adding more functions to the action group or by integrating with other AWS services.
Destroy the stack
Some Bedrock services can be quite costly if you are just trying it out for learning. It is a good practice to clean up any resources you no longer need to avoid incurring unexpected charges. To destroy the stack, run the following command in the terminal.
make run-destroy-bedrock-stackThis will remove all the resources created by the stack, including the Bedrock agent, knowledge base, action group, Lambda function, and other components. It will also remove the S3 bucket.
Conclusion
In this blog, we explored the architecture, deployment process, and key components involved in building an AI agent capable of handling diverse tasks. With this setup, you can extend the agent’s functionality by integrating additional models, fine-tuning responses, or connecting it with other AWS services such as Lambda, API Gateway, or Step Functions. The possibilities are endless, and the power of AI agents can be harnessed to automate tasks, provide intelligent insights, and enhance user experiences. Hope you enjoyed this blog and found it useful.
If any issues or any queries, feel free to reach out to me from the Contact page.

