How to deploy a Golang GRPC service on AWS using Terraform and access it from a React frontend
In today’s rapidly evolving tech landscape, seamless and efficient communication between distributed systems has become a critical necessity. gRPC, a high-performance, open-source universal RPC framework, has emerged as a popular choice for enabling communication between microservices due to its speed, efficiency, and flexibility. By leveraging Protocol Buffers for serialization, gRPC ensures robust and efficient data transfer across systems.
This blog post guides you through the process of deploying a gRPC service on AWS using Terraform, a powerful Infrastructure-as-Code (IaC) tool. Additionally, I’ll show how to connect this backend service to a React frontend, creating a full-stack solution that combines modern infrastructure management and development practices.
Whether you’re a backend developer looking to streamline service communication or a frontend developer eager to integrate advanced APIs, this post provides a practical step-by-step approach to achieving your goals. By the end of this tutorial, you’ll understand how to:
- Use Terraform to set up the necessary infrastructure for hosting a gRPC service on AWS.
- Deploy the gRPC service with scalability and reliability in mind.
- Enable secure communication between your React frontend and the gRPC backend.
The whole code for this solution is available on Github Here. If you want to follow along, this can be used to stand up your own infrastructure.
Pre Requisites
Before I start the walkthrough, there are some some pre-requisites which are good to have if you want to follow along or want to try this on your own:
- Basic AWS knowledge
- An AWS account
- AWS CLI installed and configured
- Basic Terraform knowledge
- Basic knowledge of what is GRPC
With that out of the way, lets dive into the details.
What is gRPC?
gRPC is a high-performance, open-source universal RPC (Remote Procedure Call) framework developed by Google. It uses Protocol Buffers (protobuf) as the interface definition language (IDL) for defining services and message types. gRPC provides features like bidirectional streaming, flow control, and authentication, making it an ideal choice for building efficient and scalable microservices.
gRPC supports multiple programming languages, including C++, Java, Python, Go, and JavaScript, making it easy to build cross-platform applications. It uses HTTP/2 as the transport protocol, enabling multiplexing, header compression, and other performance optimizations. gRPC is widely used in modern cloud-native applications, IoT devices, and other distributed systems that require fast and reliable communication.
Why Deploy gRPC on AWS?
Deploying a gRPC service on AWS offers several benefits, including:
- Scalability: AWS provides a range of services like Amazon Elastic Container Service (ECS), AWS Fargate, and Amazon Elastic Kubernetes Service (EKS) that enable you to scale your gRPC services based on demand.
- Reliability: AWS offers high availability and fault tolerance features that ensure your gRPC services are always up and running.
- Security: AWS provides robust security features like Virtual Private Cloud (VPC), AWS Identity and Access Management (IAM), and AWS Key Management Service (KMS) to secure your gRPC services and data.
- Monitoring and Logging: AWS CloudWatch and AWS X-Ray provide monitoring and logging capabilities that help you track the performance and health of your gRPC services.
- Integration: AWS integrates seamlessly with other AWS services like Amazon API Gateway, AWS Lambda, and Amazon DynamoDB, enabling you to build end-to-end serverless applications.
About the Solution
Lets start with going through the whole stack and each component of the solution. Below image shows the overall architecture of the solution.
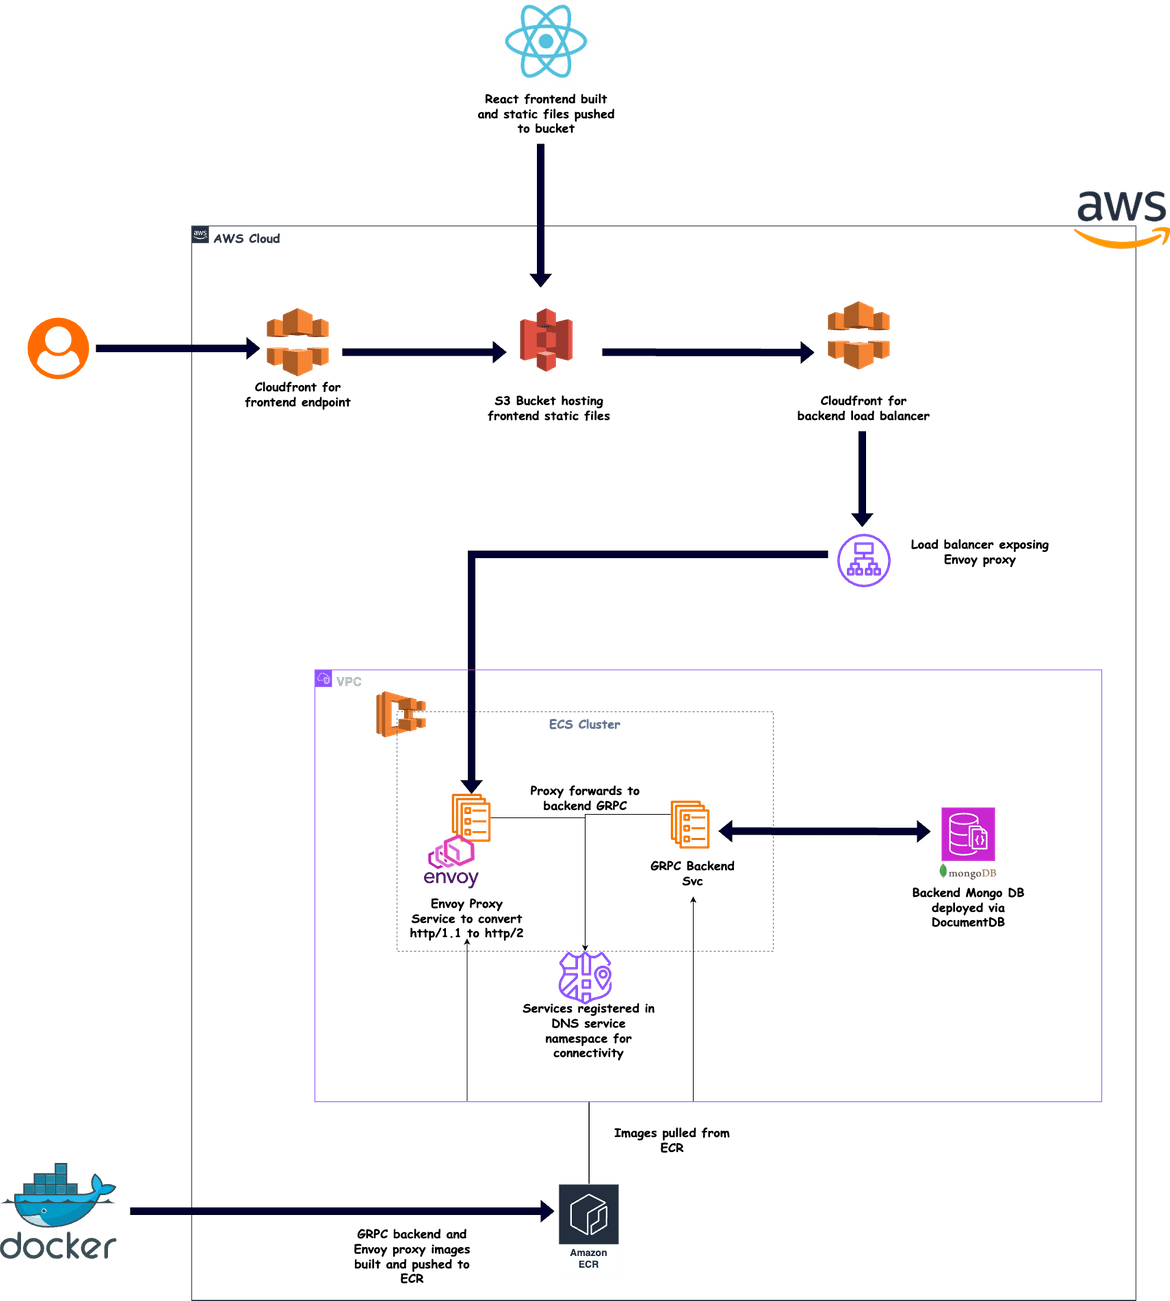
Lets go through each component of the solution:
App Frontend
The frontend of the application is a React application. The app static files are hosted on an S3 bucket on which, website hosting is enabled.
resource "aws_s3_bucket_website_configuration" "app_s3_website" {
  bucket = aws_s3_bucket.app_s3_bucket.id

  index_document {
    suffix = "index.html"
  }

  error_document {
    key = "error.html"
  }

}
The S3 bucket website endpoint is exposed to end user via a Cloudfront distribution. The cloudfront distribution provides an https endpoint to access the app.
resource "aws_cloudfront_distribution" "this" {

  enabled = true

  origin {
    origin_id                = local.s3_origin_id
    domain_name              = local.s3_domain_name
    custom_origin_config {
      http_port              = 80
      https_port             = 443
      origin_protocol_policy = "http-only"
      origin_ssl_protocols   = ["TLSv1"]
    }
  }

  default_cache_behavior {

    target_origin_id = local.s3_origin_id
    allowed_methods  = ["GET", "HEAD"]
    cached_methods   = ["GET", "HEAD"]

    forwarded_values {
      query_string = true

      cookies {
        forward = "all"
      }
    }

    viewer_protocol_policy = "redirect-to-https"
    min_ttl                = 0
    default_ttl            = 0
    max_ttl                = 0
  }

  restrictions {
    geo_restriction {
      restriction_type = "none"
    }
  }

  viewer_certificate {
    cloudfront_default_certificate = true
  }

  price_class = "PriceClass_200"

}
The React app is built to generate the static files for the app. The static files are then uploaded to the S3 bucket. The sample App I built for this post is a simple User list app. It displays a list of users from a MongoDB
database. The app has a Create button, which enables creating new users and saving new user records in the DB.
Backend Endpoint
To expose the backend gRPC service endpoint, the ECS service is exposed via an Application Load Balancer. Since gRPC works with HTTP/2, an Envoy proxy is used to convert the HTTP/1.1 requests to HTTP/2. The load balancer exposes the Envoy proxy ECS service to provide an endpoint which can be accessed from the frontend.
resource "aws_lb" "app_lb" {
  name            = "app-lb"
  subnets         = aws_subnet.app_public.*.id
  security_groups = [aws_security_group.app_lb_sg.id]
}


resource "aws_lb_listener" "app_lb_listener" {
  load_balancer_arn = aws_lb.app_lb.id
  port              = "80"
  protocol          = "HTTP"

  default_action {
    target_group_arn = aws_lb_target_group.app_lb_tg.id
    type             = "forward"
  }
}


resource "aws_lb_target_group" "app_lb_tg" {
  name        = "app-lb-target-group"
  port        = 80
  protocol    = "HTTP"
  vpc_id      = aws_vpc.appvpc.id
  target_type = "ip"
  # protocol_version = "GRPC"
  health_check {
    enabled             = true
    interval            = 30
    path                = "/"
    port                = 8080
    protocol            = "HTTP"
    healthy_threshold   = 3
    unhealthy_threshold = 3
    timeout             = 5
    matcher             = "200,302"
  }
}
Since the frontend is being served on https, we need the backed endpoint exposed on https. To expose an https endpoint, another Cloudfront distribution is added which takes the load balancer as origin.
This Cloudfront distribution endpoint is configured on the Frontend to access the backend gRPC service.
resource "aws_cloudfront_distribution" "backend_lb" {

  enabled = true

  origin {
    origin_id                = local.backend_lb_origin_id
    domain_name              = local.backend_lb_domain_name
    custom_origin_config {
      http_port              = 80
      https_port             = 443
      origin_protocol_policy = "http-only"
      origin_ssl_protocols   = ["TLSv1.2"]
    }
  }

  default_cache_behavior {

    target_origin_id = local.backend_lb_origin_id
    allowed_methods  = ["GET", "HEAD", "POST", "PUT", "PATCH", "DELETE", "OPTIONS"]
    cached_methods   = ["GET", "HEAD", "OPTIONS"]

    forwarded_values {
      query_string = true

      cookies {
        forward = "all"
      }
    }

    viewer_protocol_policy = "redirect-to-https"
    min_ttl                = 0
    default_ttl            = 0
    max_ttl                = 0
  }

  restrictions {
    geo_restriction {
      restriction_type = "none"
    }
  }

  viewer_certificate {
    cloudfront_default_certificate = true
  }

  price_class = "PriceClass_200"

}
Networking
There are different networking components deployed as part of the terraform stack. These are the networking components which are deployed:
- VPC
- Subnets (private and public)
- Route Tables
- Internet Gateway
- NAT Gateway
- Security Groups
ECS Cluster
An ECS cluster is deployed where all of the backend services are deployed. The cluster is enabled with a Fargate capacity provider
resource "aws_ecs_cluster" "app_cluster" {
name = "app-cluster"
setting {
  name  = "containerInsights"
  value = "enabled"
}
}
Backend ECS Services
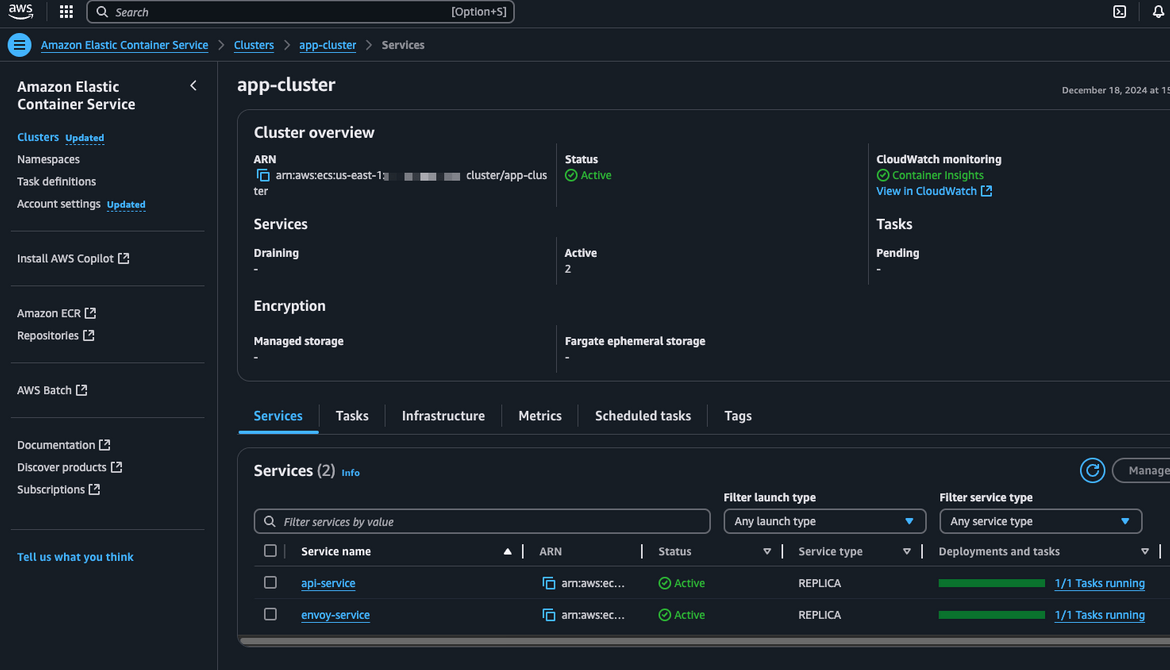
There are two backend services deployed on the ECS cluster. These are the services which are deployed:
- Envoy Proxy: This is the service which exposes the gRPC service to the frontend. The Envoy proxy is used to convert the HTTP/1.1 requests to HTTP/2. A task definition is defined to deploy the service, and the service is exposed via a load balancer.
resource "aws_ecs_service" "envoy_service" {
  name            = "envoy-service"
  cluster         = aws_ecs_cluster.app_cluster.id
  task_definition = aws_ecs_task_definition.envoy_task_def.arn
  # task_definition = aws_ecs_task_definition.rag_api_task_def.arn
  desired_count   = 1
  launch_type     = "FARGATE"

  deployment_maximum_percent         = 200
  deployment_minimum_healthy_percent = 50

  network_configuration {
    assign_public_ip = false
    security_groups = [var.task_sg_id]
    subnets         = var.subnet_ids
  }

  load_balancer {
    target_group_arn = var.target_grp_arn
    container_name   = "envoy-task-container"
    container_port   = 8000
  }

  health_check_grace_period_seconds = 60
  enable_ecs_managed_tags = false
}- gRPC Service: This is the service which is the actual gRPC service. The service is deployed using a task definition and is exposed via the Envoy proxy. This service deployed in a private subnet and is not directly accessible from outside the network.
resource "aws_ecs_service" "api_service" {
  name            = "api-service"
  cluster         = aws_ecs_cluster.app_cluster.id
  task_definition = aws_ecs_task_definition.api_task_def.arn
  # task_definition = aws_ecs_task_definition.rag_api_task_def.arn
  desired_count   = 1
  launch_type     = "FARGATE"

  deployment_maximum_percent         = 200
  deployment_minimum_healthy_percent = 50

  network_configuration {
    assign_public_ip = false
    security_groups = [var.task_sg_id]
    subnets         = var.subnet_ids
  }


  service_registries {
    registry_arn = aws_service_discovery_service.api_discovery.arn
  }
}
Service Discovery Namespace
Since we deployed the gRPC service in a private network, we need a way for the Envoy proxy ECS service to discover the gRPC service. For this, we create a Service discovery namespace and registered the gRPC service.
Then this DNS endpoint is provided in the Envoy config file for the Envoy ECS service to connect to the gRPC service.
resource "aws_service_discovery_private_dns_namespace" "api_dns" {
  name = "api.dns"
  vpc  = var.vpc_id
}

resource "aws_service_discovery_service" "api_discovery" {
  name = "api"
  dns_config {
    namespace_id = aws_service_discovery_private_dns_namespace.api_dns.id
    dns_records {
      ttl  = 10
      type = "A"
    }
  }
  health_check_custom_config {
    failure_threshold = 1
  }
}
Envoy Config
The Envoy proxy has to be configured so tht it can connect to the gRPC ECS service. Since the gRPC service is registered to the discovery service, we can use that DNS endpoint to connect the Envoy service
to the backend gRPC service. This is configured in the envoy config file which is part of the custom Docker image that is built for the Envoy service.
clusters:
    - name: grpc_server
      connect_timeout: 0.25s
      type: logical_dns
      http2_protocol_options: {}
      lb_policy: round_robin
      load_assignment:
        cluster_name: cluster_0
        endpoints:
          - lb_endpoints:
              - endpoint:
                  address:
                    socket_address:
                      address: api.api.dns
                      port_value: 50051
DocumentDB with MongoDB Compatibility
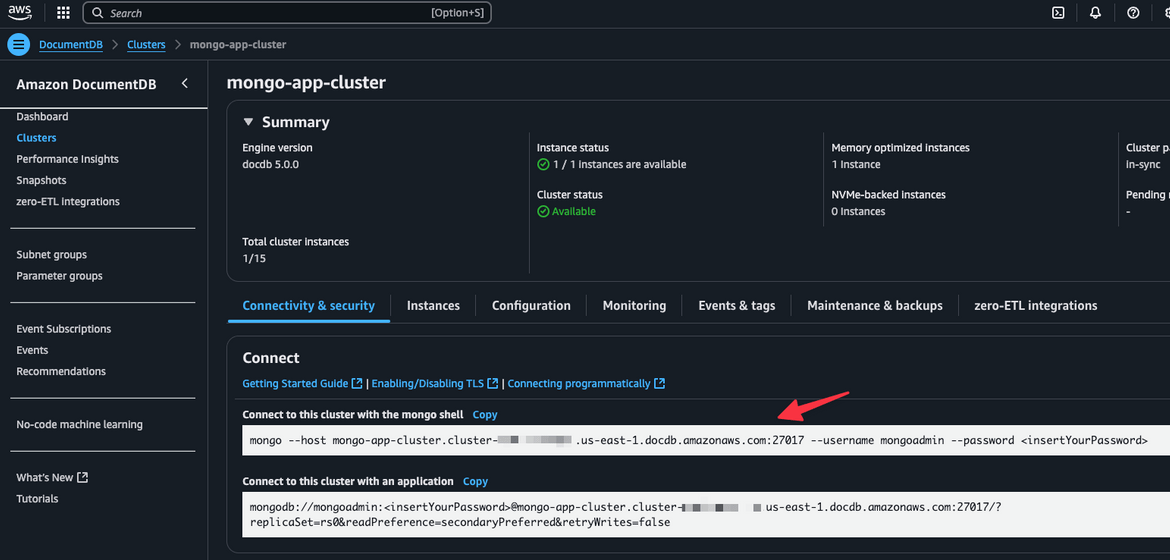
For the database, we are using MongoDB. As part of this stack, a DocumentDB cluster is deployed, with mongoDB compatibility. The DB cluster is deployed in a private subnet and in the same VPC.
The DB endpoint is configured on the gRPC ECS service for the service to connect to the DB.
resource "aws_docdb_cluster_instance" "mongo_instance" {
  count              = 1
  identifier         = "mongo-instance-1"
  cluster_identifier = "${aws_docdb_cluster.mongo_cluster.id}"
  instance_class     = "db.t3.medium"
}

resource "aws_docdb_cluster" "mongo_cluster" {
  skip_final_snapshot     = true
  db_subnet_group_name    = "${aws_docdb_subnet_group.mongo_grp.name}"
  cluster_identifier      = "mongo-app-cluster"
  engine                  = "docdb"
  master_username         = var.mongo_username
  master_password         = "${var.docdb_password}"
  db_cluster_parameter_group_name = "${aws_docdb_cluster_parameter_group.mongo_params.name}"
  vpc_security_group_ids = [var.mongo_sg_id]
}
Build and Push Docker Images
We are deploying two services to the ECS cluster and both of these have custom Docker images built. The Docker images are built and pushed to the ECR repository. The ECS services pull for the ECR repository to run on the ECS cluster.
I have provided Dockerfile for both of the services in the repo.
-
Envoy Proxy Dockerfile
FROM --platform=linux/amd64 envoyproxy/envoy:v1.22.0 COPY envoy.yaml /etc/envoy/envoy.yaml COPY user.pb /tmp/ -
gRPC Service Dockerfile
FROM --platform=linux/amd64 golang
ADD . /go/src/github.com/amlana21/grpc-aws
WORKDIR /app
COPY . .
RUN go mod download
RUN CGO_ENABLED=0 GOOS=linux go build -a -installsuffix cgo -ldflags '-extldflags "-static"' -o main ./src/server
EXPOSE 50051
CMD ["/app/main"]
Now that we have seen all of the components involved, lets see how we can deploy these components.
Deploy the stack
To deploy the stack, we will use Terraform. The Terraform code is available in the repo. The code is organized in a way that it is easy to understand and deploy. Lets first understand the folder structure and the code structure
in the repo. You can have your own structure as needed, but for this post we will follow
Folder Structure and Code Overview
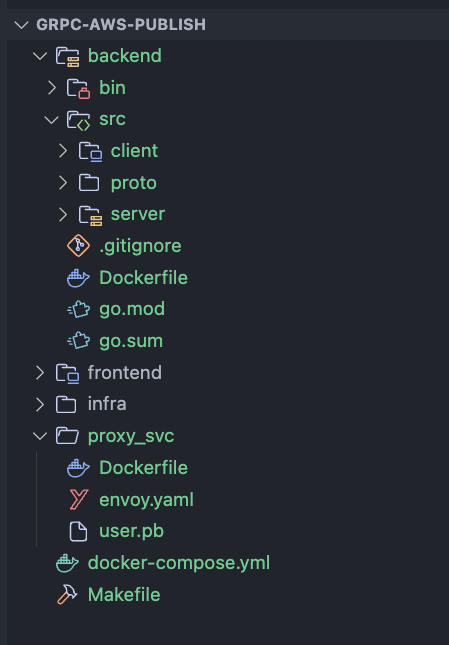
Below is the folder structure of the repo:
- backend: This folder contains the code for the gRPC service. The gRPC service is built using Golang. It contains the Go module for the gRPC service. This folder also contain the proto files needed to generate the gRPC stubs
- frontend: This folder contains the code for the React frontend. The frontend is built using React NextJS.
- infra: This folder contains the Terraform code to deploy the whole stack.
- proxy_svc: This folder contains Dockerfile and the config file needed to build the Envoy proxy service Docker image.
- docker-compose.yml: If you want to test the services locally, this file is used to build the Docker images and run locally
- Makefile: This file contains the commands to build and deploy all the components to AWS. I am not using any CI/CD pipelines for this post. Just deploying everything from local
Lets go through the backend GRPC service code a bit. The backend code is in the backend folder. The service is developed using GoLang. I hae defined a GO module for the service
module github.com/amlana21/grpc-aws

go 1.22.8

require (
	github.com/golang/snappy v0.0.4 // indirect
	github.com/klauspost/compress v1.13.6 // indirect
	github.com/montanaflynn/stats v0.7.1 // indirect
	github.com/xdg-go/pbkdf2 v1.0.0 // indirect
	github.com/xdg-go/scram v1.1.2 // indirect
	github.com/xdg-go/stringprep v1.0.4 // indirect
	github.com/youmark/pkcs8 v0.0.0-20240726163527-a2c0da244d78 // indirect
	go.mongodb.org/mongo-driver v1.17.1 // indirect
	golang.org/x/crypto v0.27.0 // indirect
	golang.org/x/net v0.29.0 // indirect
	golang.org/x/sync v0.8.0 // indirect
	golang.org/x/sys v0.25.0 // indirect
	golang.org/x/text v0.18.0 // indirect
	google.golang.org/genproto/googleapis/rpc v0.0.0-20240903143218-8af14fe29dc1 // indirect
	google.golang.org/grpc v1.68.0 // indirect
	google.golang.org/protobuf v1.35.2 // indirect
)
GRPC services are based on Proto files which define the service and the message types. Below is the proto file for the service. This proto file defines the details for the User message object
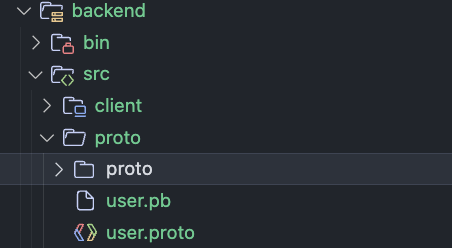
and all the Service endpoints. If you are working on your own GRPC service, create a proto folder in the code folder and put all the proto files in that folder.
syntax = "proto3";

package user;

import "google/protobuf/empty.proto";

option go_package = "github.com/amlana21/grpc-aws/proto";

message User {

string id = 1;
string username = 2;
string email = 3;
string role =4;
}


message UserId {
string id = 1;
}

message UserList {
    repeated User user = 1;
 }


service UserService {
rpc CreateUser(User) returns (UserId);
rpc ListUsers(google.protobuf.Empty) returns (UserList);
}
For this example I am using these two services:
- CreateUser: This service is used to create a new user. The service takes a User object as input and returns the ID of the user created.
- ListUsers: This service is used to list all the users in the DB. The service takes no input and returns a list of all the users in the DB.
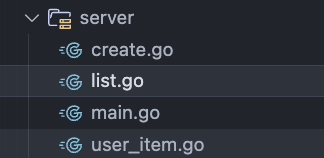
The service is implemented in the main.go file in the server folder. This defines the server and makes all of the services available. Each of the services are defined in
separate go files.
To build the docker image for the service, a Dockerfile is defined in the backend folder. The Dockerfile is used to build the Docker image for the service.
FROM --platform=linux/amd64 golang
ADD . /go/src/github.com/amlana21/grpc-aws
WORKDIR /app
COPY . .
RUN go mod download
RUN CGO_ENABLED=0 GOOS=linux go build -a -installsuffix cgo -ldflags '-extldflags "-static"' -o main ./src/server
EXPOSE 5300
EXPOSE 50051
CMD ["/app/main"]
The dockerfile follows these steps:
- Copy the code to the container
- Install the dependencies
- Build the service to create the binary
- Expose the ports for the service
- Run the service
This service is exposed as an endpoint which is accessed by frontend. The frontend is a react app which sends an API request to the backend service endpoint. Separate
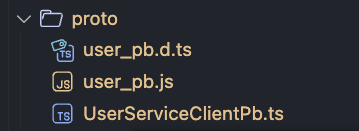
proto Javascript classes are generated for the frontend, which makes it easier to send gRPC requests from the frontend.
import { CreateUserInputType, UserType } from "@/types/usertype";
import { Empty } from "google-protobuf/google/protobuf/empty_pb";

import { UserServiceClient } from "../proto/UserServiceClientPb";
import { UserList,User } from "../proto/user_pb";
const usersClient = new UserServiceClient("<backend_endpoint>");

export async function getUsers(): Promise<User[]> {
  const allUsers:UserList=await usersClient.listUsers(new Empty(), {});
  console.log(allUsers.getUserList());
  const userObject = allUsers.getUserList();
  let userObjArray:User[]= [];
  userObject.forEach((user)=>{
    userObjArray.push(user);
  });
  return userObjArray;
}
The proto classes needed for frontend are generated separately. We will cover tht while we are deploying.
Lets start deploying the service components.
Pre-Requisites
Install Golang, proto, make etc
To ensure you can follow along with the process, make sure to have the following tools installed on your local machine:
- Install and setup Golang. Details can be found here
- Install the protoc compiler. Details can be found here
- Install Go specific plugins for protoc. Details can be found here
- Install make. Details can be found here
- Install AWS CLI. Details can be found here
Proto Generation
First we will generate the proto package files which will be used by the services. The proto files which we defined earlier, need to be converted to files that can be read by the programming languages and frameworks. Lets generate the different files needed.
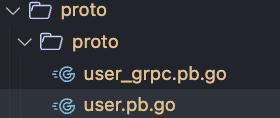
- First we will generate the proto classes for the backend GoLang service. If you are following along, run the below make command to generate the proto files.
make 0-generate-backend-proto This will generate the proto files in the proto folder.
- Next we will generate the proto file needed for envoy proxy to expose the endpoints. Run the below make command to generate the envoy proto files.
make 1-build-backend-proto-envoy This will generate the user.pb file in backend/src/proto folder. Copy the uer.pb file to the proxy_svc folder.

- Next we will generate the proto files for the frontend. Before generating the proto, make sure to install the npm packages in the frontend folder, if you are following along.
cd frontend
npm install
Then run this command to generate the proto files for the frontend. Make sure to run this command from the root of the repo. Before running this command, ensure to copy the user.proto file from the backend/proto folder to the frontend folder.
make 3-gen_frontend_codesThis will generate the frontend proto files in the frontend folder.
Now we have all the needed proto files generated. Lets move to the next step.
Configure AWS CLI
Before we start the deployment, we will need to configure AWS CLI so we can deploy everything. For my example I am using a local AWS profile named grpc-post. You can configure as needed.
aws configure --profile grpc-postAlso if you are following along, make sure to update the Makefile with the correct account number.
Build and push the Docker images
Next we will build the docker images for all of the components. These are the docker images we will build
- Envoy Proxy Docker Image
- Backend GRPC Service Docker Image
Before pushing the image, we will need an ECR repo created. Run the below command to create the ECR repo.
make 0-create-ecr-repo This will create the ECR repo for the images.

To build and push the docker images, run the below make command.
make 1-build-push-envoy-proxy
make 2-build-push-backend
This will build and push the docker images to the ECR repo.

Now that we have the docker images built and pushed, lets move to the next step.
Deploy the Infrastructure and services
Lets deploy all of the services. I am using AWS CLI commands and Terraform CLI to deploy everything. Before running this ensure that the AWS CLI has been configured properly.
Run this command to start the Terraform deployment
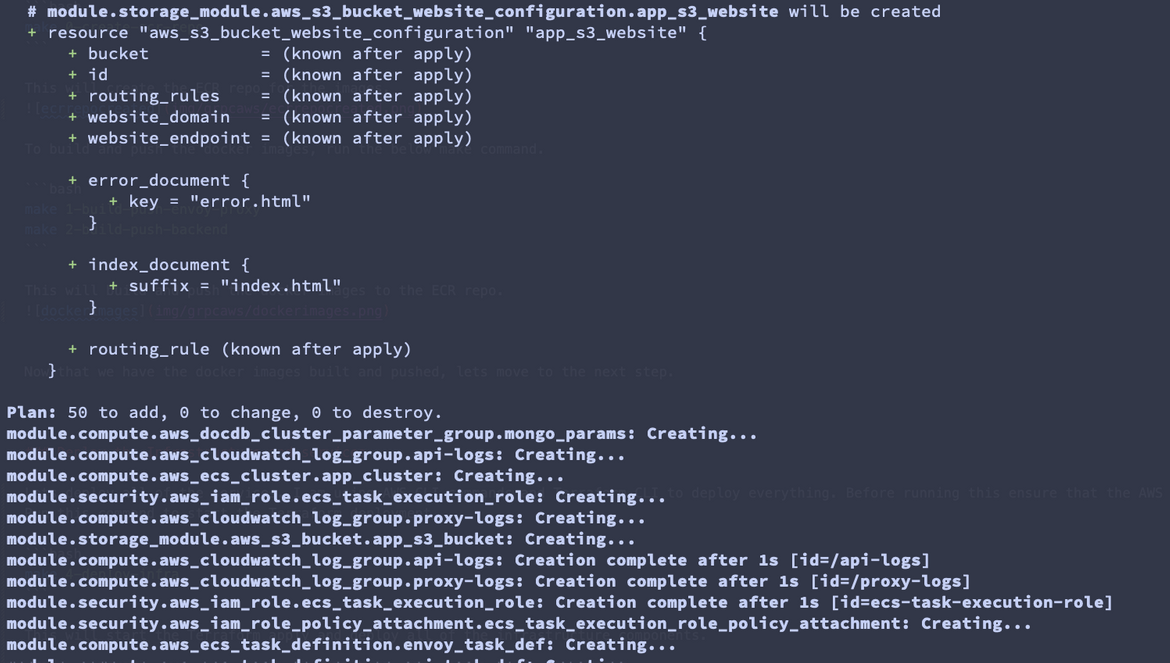
make 4-deploy-infraThis will start the Terraform apply and deploy all of the infrastructure components.
The deployment will take a while as the DocumentDB takes some time to come up. Once it completes, lets see some of the services on AWS and note down some details we need for next step.
- Document DB mongo Cluster: Note down the endpoint from the console
- Cloudfront distributions: Note down the domain endpoint for the backend ALB cloudfront distribution.
Now that we have the services deployed, next we will have to deploy the frontend. Before doing that we will update few values in some of the files:
-
Update the mongo db endpoint in the backend service: The Mongo cluster endpoint which was noted above, needs to be updated in the backend service environment variable. Update the value in the
file infra/compute/services.tf{ "image": "${data.aws_caller_identity.current.account_id}.dkr.ecr.us-east-1.amazonaws.com/grpc-aws:backend", "cpu": 2048, "memory": 4096, "name": "api-task-container", "networkMode": "awsvpc", "portMappings": [ { "containerPort": 50051, "hostPort": 50051 } ], "environment" : [ { "name": "MONGO_URI", "value": "UPDATE_THIS_VALUE" } ], "logConfiguration": { "logDriver": "awslogs", "options": { "awslogs-group": "/api-logs", "awslogs-region": "us-east-1", "awslogs-stream-prefix": "api" } } } -
Update the backend endpoint on frontend: The backend endpoint which was noted above, needs to be updated in the frontend code. Update the value in the file frontend/src/lib/api.ts
import { CreateUserInputType, UserType } from "@/types/usertype";
import { Empty } from "google-protobuf/google/protobuf/empty_pb";
import { UserServiceClient } from "../proto/UserServiceClientPb";
import { UserList,User } from "../proto/user_pb";
const API_URL = "https://UPDATE_THIS_VALUE"; // Replace with your actual API URL
const usersClient = new UserServiceClient(API_URL);
Once both of them are updated, we will redeploy all components to update all of these values. I have provided a make command which run all the commands in order
make deploy-app Once th deployment completes, the app will be accessible via the Cloudfront distribution endpoint. Lets see the app in action.
Testing the gRPC service from Postman
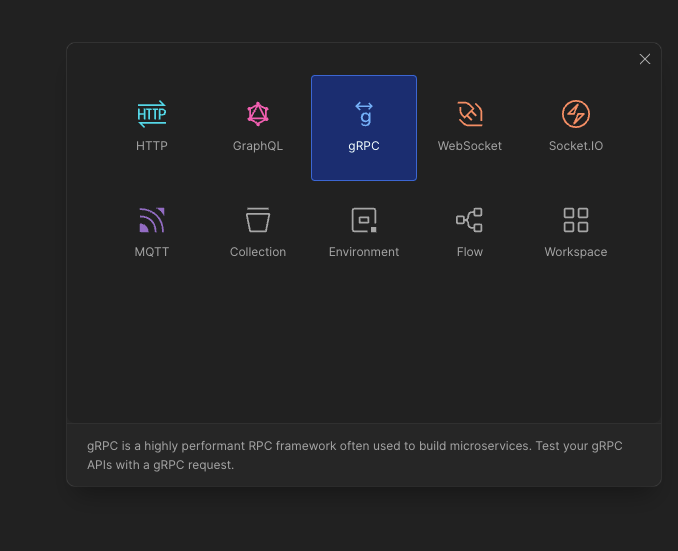
Lets first test the gRPC service from Postman. To test the gRPC service from Postman, first install Postman here.
Then follow these steps to setup a new gRPC request:
- On postman, click on Create new request and select gRPC.
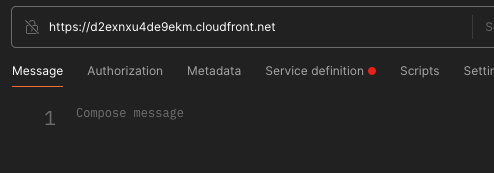
- On the new request enter the Cloudfront endpoint for the backend service.
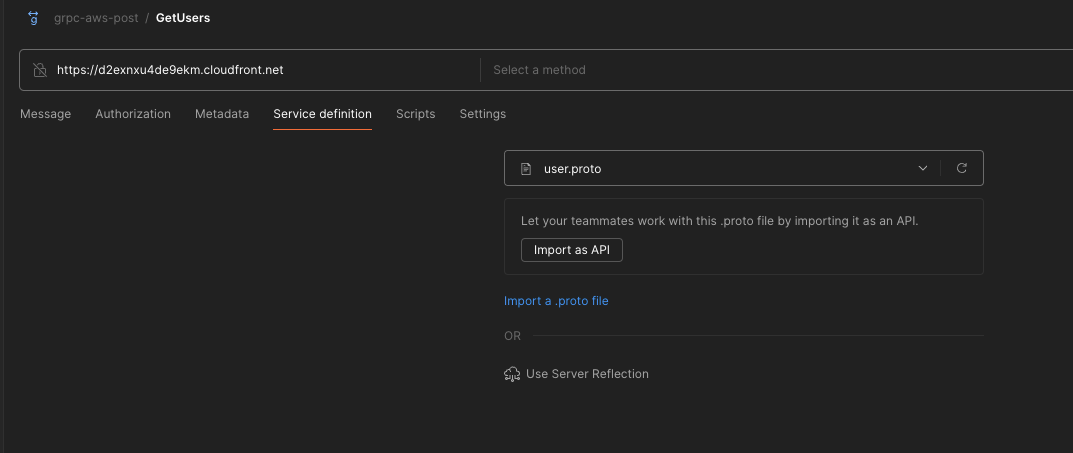
- For the method, Click on the dropdown and import the user.proto file which resides in the backend/src/proto folder.
- Now you will see all the methods in the method dropdown. Select the method you want to test. Here I will test the ListUsers method.
Once you click invoke you will see the response from the service.
Testing the Solution from app
Navigate to Coudfront and get the endpoint for the frontend. This will be the one which has origin as S3 bucket
Lets open this on a browser. The app url will be in this format:
https://<cloudfront_domain>Open this on a browser and it will open the app, with a blank user list.
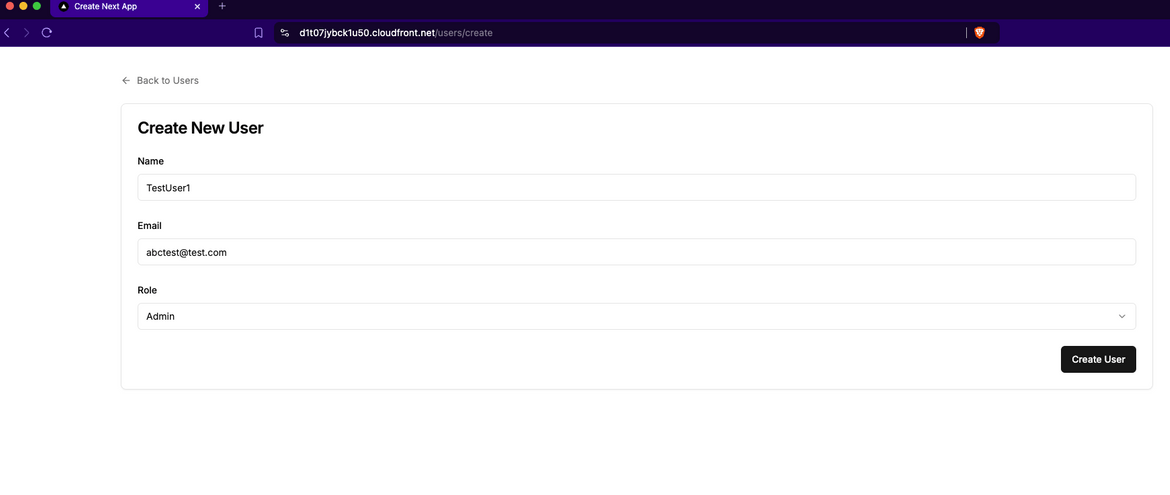
Lets create a new user. Click on the Create button to open the Create page. Enter the details and click on Create User.
It will create the user and navigate back to the User list page. Now you will see a new user in the list.
So you successfully created a new user using the backend gRPC service. Lets see some logs on the backend to see how the service was invoked.
Navigate to AWS console and navigate to the ECS service for backend (api-service). Click on the Logs tab. It will show the logs from the app containers, when
the service was invoked
Now you can create as many users you want and they will show up on the list. On backend these users are saved in the Mongo DB which as deployed as the DocumentDB cluster.
Note: Ensure to delete all the resources once you are done testing as this will incur charges.
make destroy-infraThis will destroy all the resources created.
Conclusion
Deploying a gRPC service on AWS using Terraform and connecting it to a React frontend may initially seem complex, but with the right approach, it becomes a streamlined process. In this tutorial, we explored how to leverage Terraform’s declarative capabilities to provision and manage cloud infrastructure efficiently. We also covered the key steps for deploying a gRPC service and securely integrating it with a modern React frontend. With this foundation in place, you’re well-equipped to take on more complex architectures and implement efficient, scalable microservices powered by gRPC. Happy coding! 🚀
If any issues or any queries, feel free to reach out to me from the Contact page.

