How to Develop, Build & Deploy a REACT app with Authentication using AWS Amplify
Recently I started reading about AWS Amplify and found it very interesting. I was very impressed to see how easily one can deploy a full stack React app (supports more frameworks) using the Amplify framework. So I started learning about it more and how it can be leveraged in real life scenarios.
This post is from my initial learning of the basic framework. The framework itself is vast and lots of options to explore. I took a part of the framework which will enable you to quickly stand up a React app if you want to use Amplify.
The GitHub repo for this post can be found Here
What is Amplify?
Before we dive in to using Amplify, let me explain in brief what ia Amplify. Of course you can find a very detailed explanation on AWS Documentation Here. Let me try to explain in brief here.
Amplify is a framework and a set of tools which will help developers quickly build a full stack app without worrying about provisioning AWS services to support the app. Amplify will take care of provisioning of the AWS services needed by the App. With help of the CLI and few commands a full stack app can be published very easily. Just a few tasks which can be achieved using Amplify when building an App:
- Configure and provision a backend API
- Configure and provision a backend DB
- Publish the front end
- Connect frontend with backend via API
- Handle app authentication
- Perform automated app deployments
These are some of the tasks which can be easily performed with Amplify. There are more tasks which Amplify supports and will help with the app development and deployment.
It also supports multiple frameworks which makes it useful across technologies. This shows all of the supported platforms.

Using Amplify, at high level, developing and deploying a React app boils down to these steps:
- Create the React App
- Using Amplify CLI add Amplify to the app
- Add auth and API from Amplify CLI
- Publish the app from Amplify CLI
- App is live and can be accessed via the URL from Amplify console
Hopefully that gives some idea about Amplify before we dive in to deploying a React app using the same. Amplify is a vast topic with support for various actions. To understand all of the actions and features, you can go through the docs link which I shared above.
Pre-Requisites
If you want to follow along and deploy a similar app, there are few pre-requisites which need to be taken care before we proceed:
- Basic working knowledge of React
-
Some Installations to take care of:
- Install Node JS and NPM (Instructions)
- Amplify CLI (will cover this below)
- An AWS account to run the steps
About the App
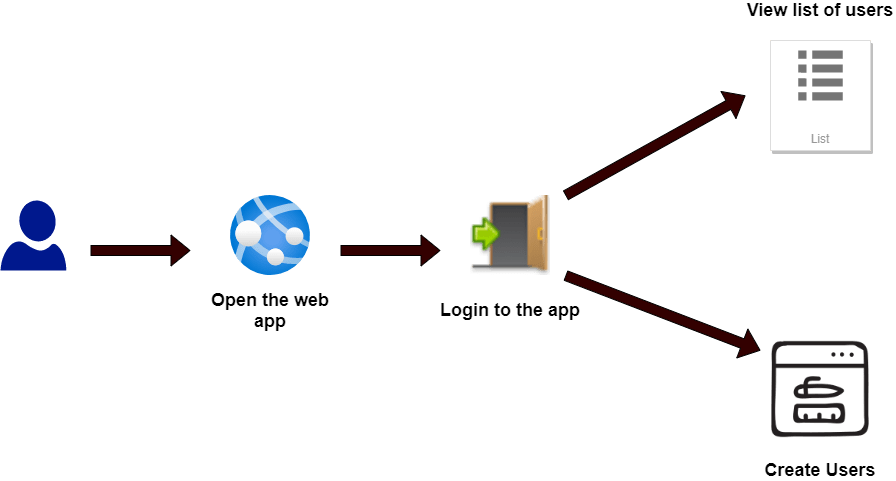
The app which I will be using as a sample here is a simple Full stack React app. Below image will show overall functionality of the app.
At high level this is what user will be able to do on the app:
- Login to the app using credentials
- View a list of users present
- Create a new user via the create form
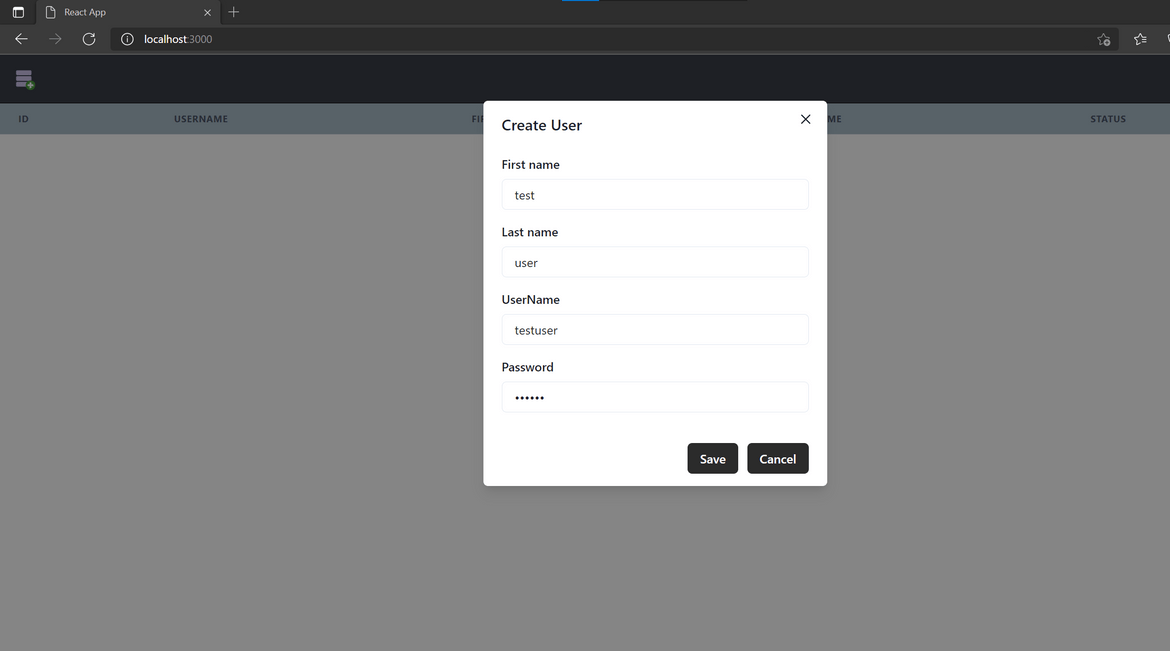
Its a basic user admin app with User list and Create functionalities. Below are some screenshots which will show how the app works.
Now lets start with the steps to build and deploy this app.
CLI Installation
First we need to install the necessary CLI which will be used to perform all the Amplify related tasks. Before installation, make sure you have NPM and NodeJS installed on your system. For instructions, you can follow the steps from the link I specified on the pre-requisites section above.
AWS CLI Install and Configure
First we need to make sure AWS CLI is installed and configured on the system. To install AWS CLI, you can follow the steps from here based on your OS. Once installed, run below commands to configure the CLI (optionally provide a profile name). This config will be used by Amplify to deploy all the components.
aws configure --profile <profile_name>Once it asks for the keys, provide the same. Its a good idea to create a separate IAM user for this purpose and provide the keys here.

Once configured, lets move on to installing the Amplify CLI. Run the below command to install Amplify CLI on the local system:
npm install -g @aws-amplify/cliYou can verify that its installed by running this:
amplify -v That should show the version installed

That completes the installation of the CLI. Optionally you can configure Amplify to use a default credentials to connect to AWS. But I will be providing the AWS CLI profile name while initializing the Amplify project. To pre-configure Amplify, run the below command and follow corresponding steps:
amplify configureNow that we have Amplify CLI installed and configured, we can move on to building and deploying our React app. Here I am discussing two ways in which Amplify can be useful in the React apps. Lets go through each of these.
Build and Deploy App: With Amplify Hosting
This is the first method we will be following to deploy the React app. A high level architecture of the full stack app is shown below.
All of these components will be handled by Amplify in a declarative manner. Let me go through each of the component brielfy:
-
Frontend app:
This is the React app which is hosted and managed on Amplify. This app will be hosted on S3 and served via Cloudfront. The URL endpoint will be generated on the CLI during the build.
-
Cognito:
This is the authentication component of the stack. Amplify handles the creation if user pools when auth is added to the Aplify app. The users added to the user pool can access the application.
-
API Gateway:
This exposes the API endpoints which will be accessed by the frontend to handle data exchanges. This also gets created by the Amplify service based on some declarative commands which we will go through shortly. This will act as a proxy for the backend Lambda and will invoke corresponding Lambda based on API routes.
-
Backend Lambda:
This is a NodeJS Lambda which is the Backend API for the application stack. This will handle all data interactions with the DynamoDB and return back responses to the frontend via API Gateway. This is built as a NodeJS-Express API with different routes for different functions. For this example I have added to routes for the API:
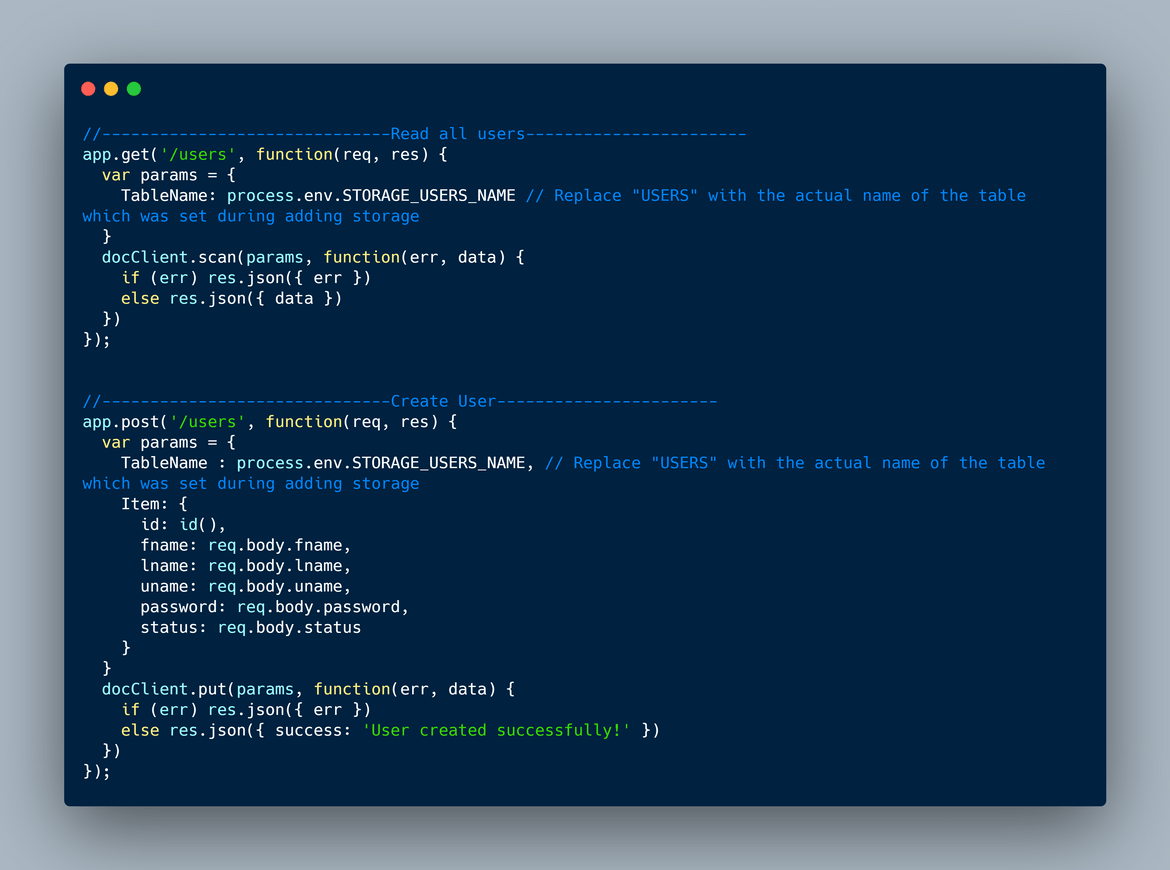
- Create user: A POST request is sent to the /users endpoint with the user data as the JSON body. The user gets created on DynamoDB and it responds back with the data
- Get users: A GET request is sent to the /users endpoint. This triggers the Lambda to send a query to the DynamoDB table and respond back with all the users in DB.
-
DynamoDB for users data:
This is the table storing all of the users data. This table is created by Amplify via the CLI. Primary key info for the table is given to Amplify via the CLI and accordingly the table gets created.
Now that we have an understanding of the components involved, lets move on to building and deploying the app. Before moving along, make sure you have NodeJS and NPM installed on the system where these commands will be executed.
Build the app
To follow along this example you can either build your own React app from scratch or you can use the example app from the Github repo I shared earlier. If you are starting and building your own app, run this command to start with a new React app from scratch.
npx create-react-app my-sample-appThis will create a basic boiler plate app which can be used as a baseline to build the actual app. Here I am demonstrating with the sample app which I built and is available on the Github repo. Lets test the app to confirm its working locally. Navigate to the specific app folder and run below command to start the app locally:
npm startThat should start the app and open a browser with the app opened:
So the app is tested successfully on local. Its not showing any data currently because the backends are not deployed yet. Lets move on to adding Amplify components.
Add Amplify to the app
To be able to deploy the app to Amplify and have Amplify manage the components, first we need to initialize the Amplify project on this app. Lets initialize the Amplify project for this app. Before running the below commands, make sure AWS CLI is configured locally and if any named profile is needed, that is also configured.
Run this command to initialize the Amplify project
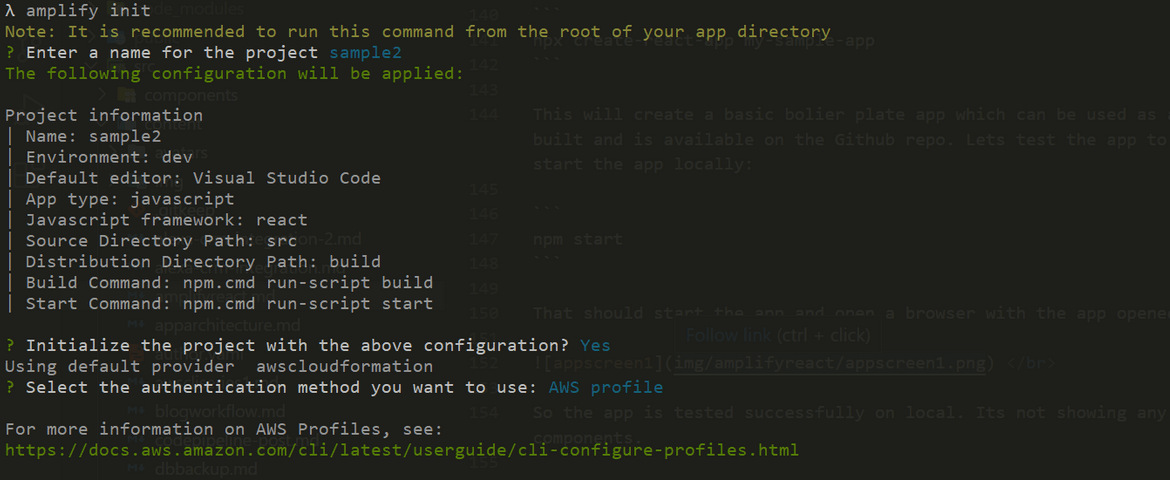
amplify initIt will ask to select other parameters on the CLI to configure the project. I am selecting most of the default parameters here. Can be customized based on need.
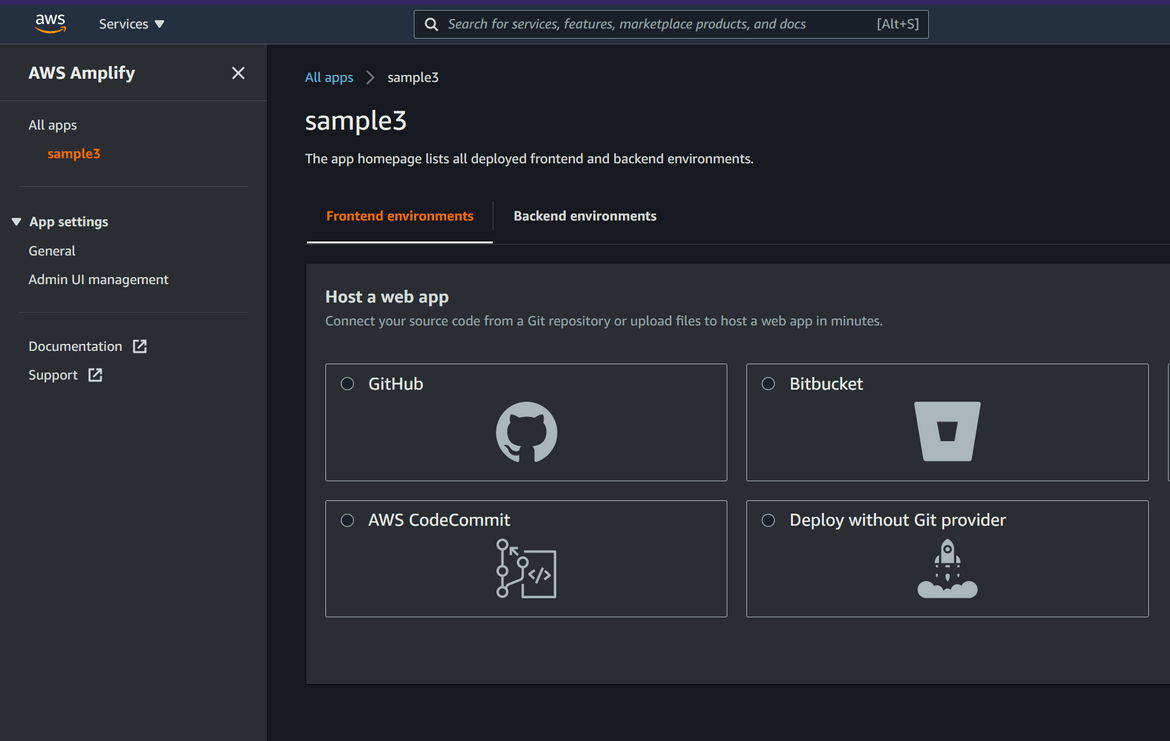
That will inititalize the Amplify project. The project can be checked from the AWS console. Navigate to the Amplify Service page on AWS console and open up the specific project name which was specified on the CLI:
Now we have the project initialized and enabled to be managed by Amplify. Next lets add hosting to the React app so it is accessible from a public URL. Run the below command to add hosting to the app and have it available on an URL.
amplify add hostingIt will ask for the method of hosting. Based on preference it can be hosted on Amplify or it can be hosted on S3 bucket then exposed via Cloudfront. Both of the options are handled by Amplify and we don’t have to setup anything manually. Here I am hosting the app on S3.
This will prepare the app for hosting. Next lets publish the app to actually deploy the application to AWS.
amplify publishThis will start the deploy process. Amplify handles below steps during this process:
- Create the S3 bucket and the Cloudfront distribution
- Built the React app and deploy to the S3 bucket
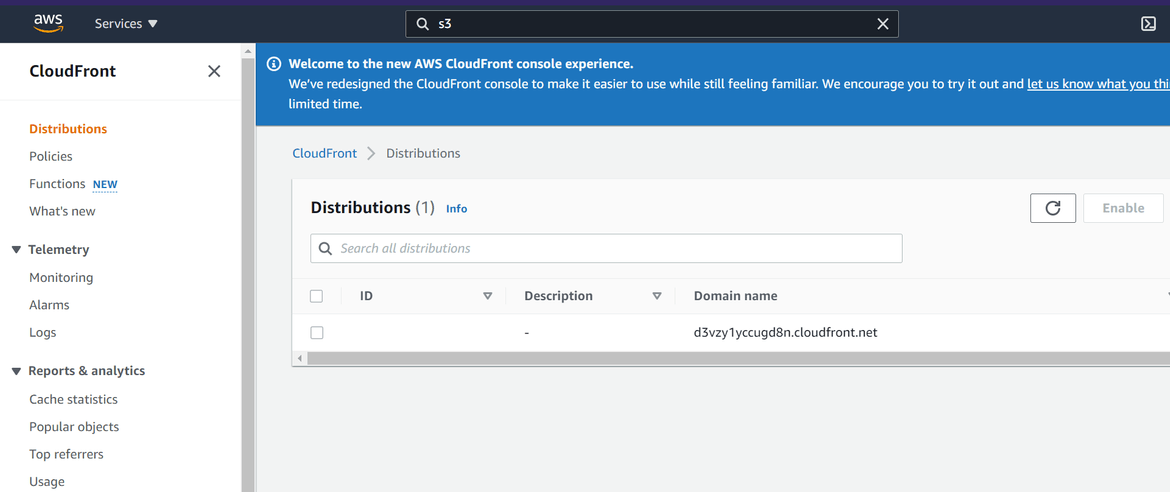
Once it finishes, the Cloudfront endpoint will be shown on CLI and the app can be accessed via that URL.
The app is now accessible on the Cloudfront URL:
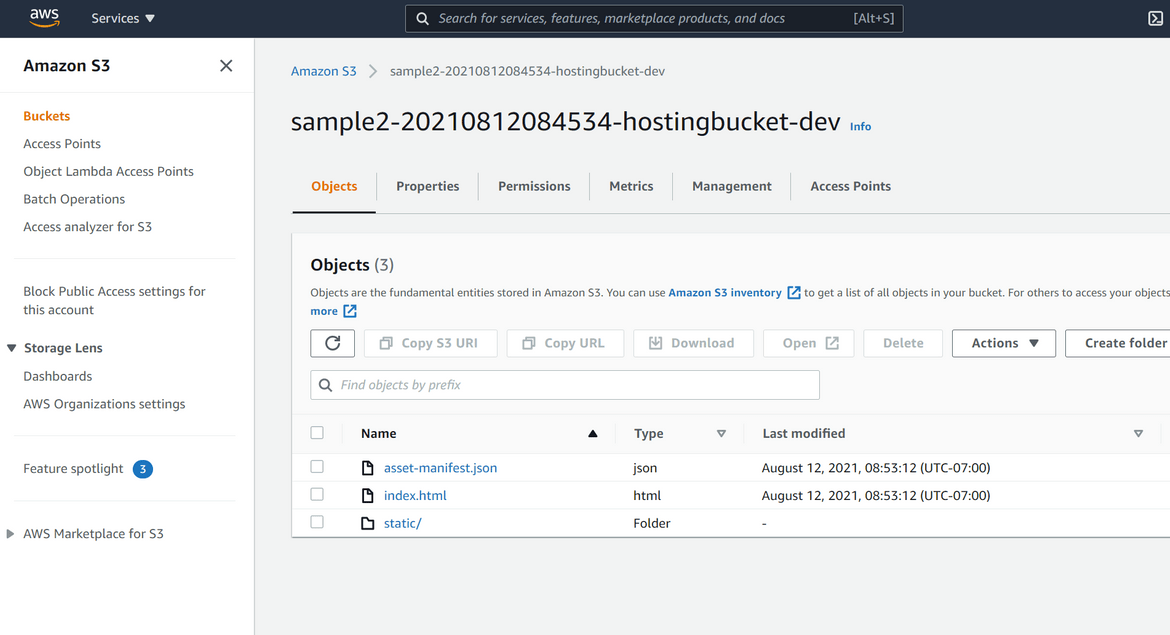
The S3 bucket created by Amplify can be see on the console and it will contain the built files for the React app
With that our app is now live on Cloudfront and accessible publicly. But the app still doesnt work and we have to deploy the other components. Lets move on to adding other components to the app.
Add Storage for the App
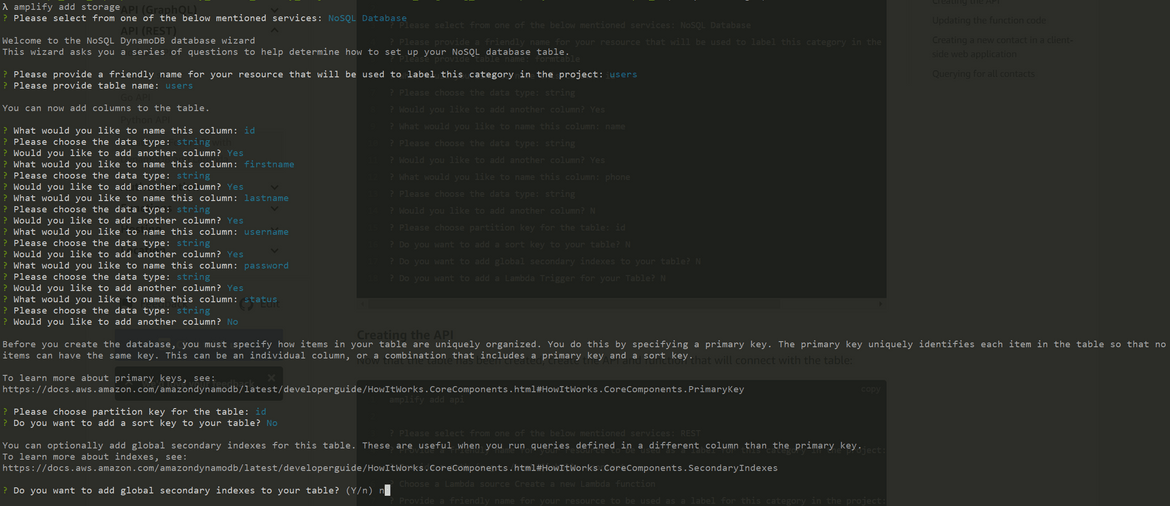
Next lets add the backend table for the app, which will store the user data. We will define a DynamoDB as a backend table with a primary key of ‘id’ column. Since its a NoSQL DB, we don’t need to define a schema but we will still go ahead and specify the columns via Amplify so the API can use them internally. Run below command to start the process for adding a DynamoDB:
amplify add storageThis will ask a series of questions to configure the DynamoDB table.
Once all options are selected, run below command so that Amplify goes ahead and provisions the DynamoDB table on AWS. Whole process of provisioning the DynamoDB table with configured options is handled by Amplify.
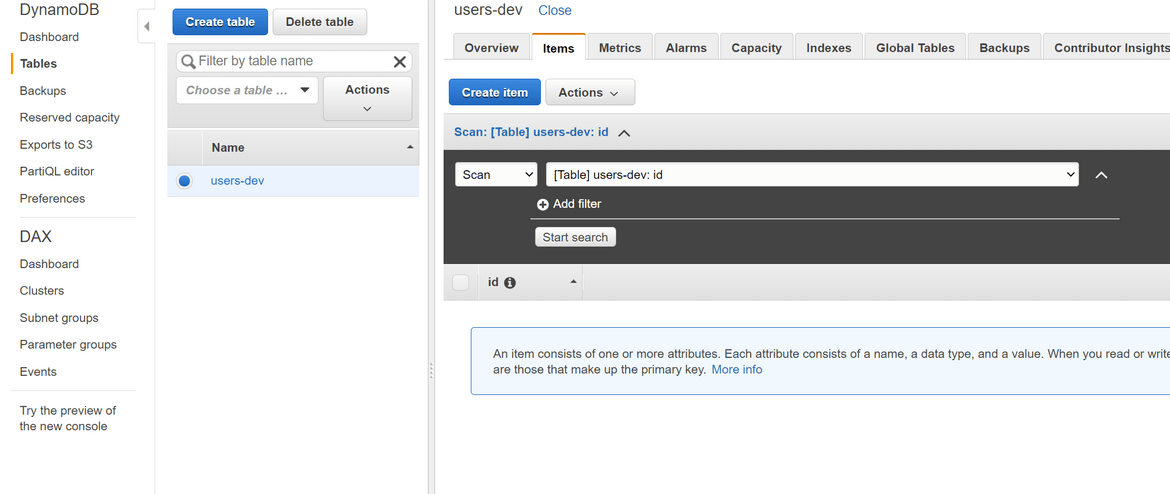
amplify pushYou can verify from AWS console that the table has been created properly.
Now we have our backend table defined to store the user data. Next we will need the API to connect this data to the front end.
Add Backend API for the App
Now lets add the backend API to the app. Here I will be adding a NodeJS-Express API as the backend. Amplify will build a basic version of the API which I will be modifying for my scenario. Amplify handles the creation of below components related to API:
- NodeJS-Express API Lambda
- API Gateway to expose the API endpoints and invoke the Lambda
The basic API Lambda which is generated by Amplify will be edited to add the specific routes for getting and creating user records. I will add below API routes to the Lambda code:
- Get all users
- Create User
Run the below command to generate the Lambda for the API which we will be editing.
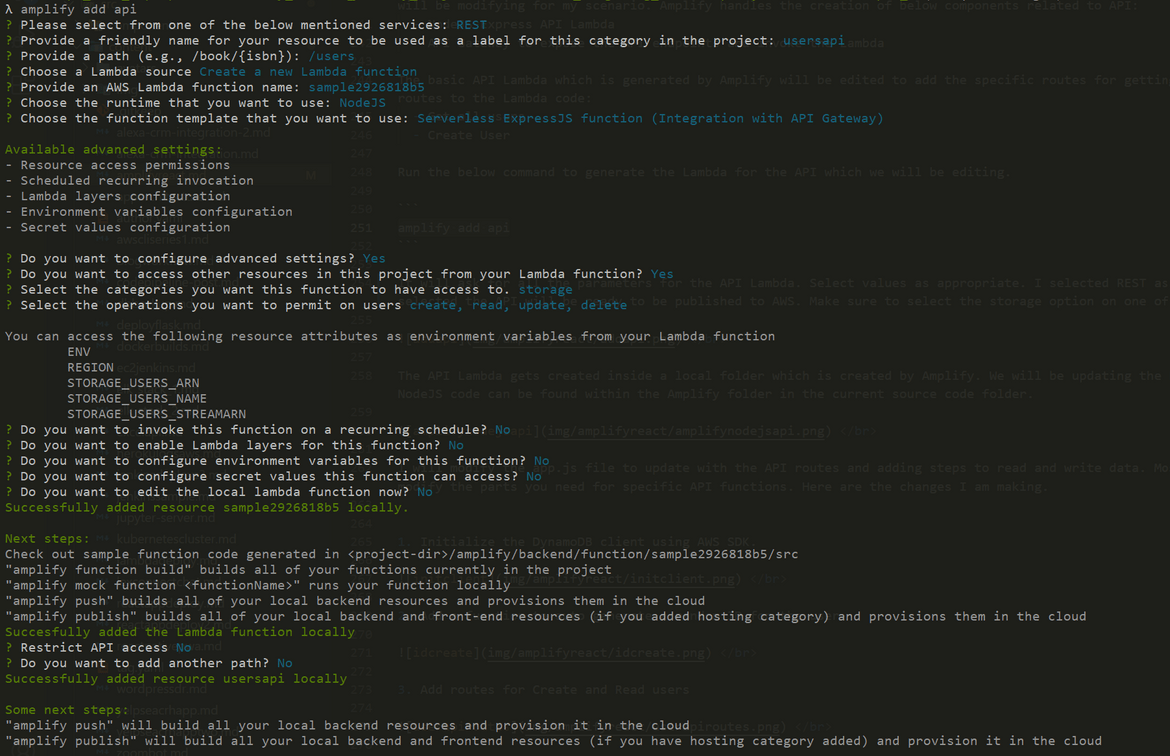
amplify add api It will ask for all the parameters for the API Lambda. Select values as appropriate. I selected REST as the option for API. Once all parameters are selected the API will be ready to be published to AWS. Make sure to select the storage option on one of the parameters asked on the CLI.
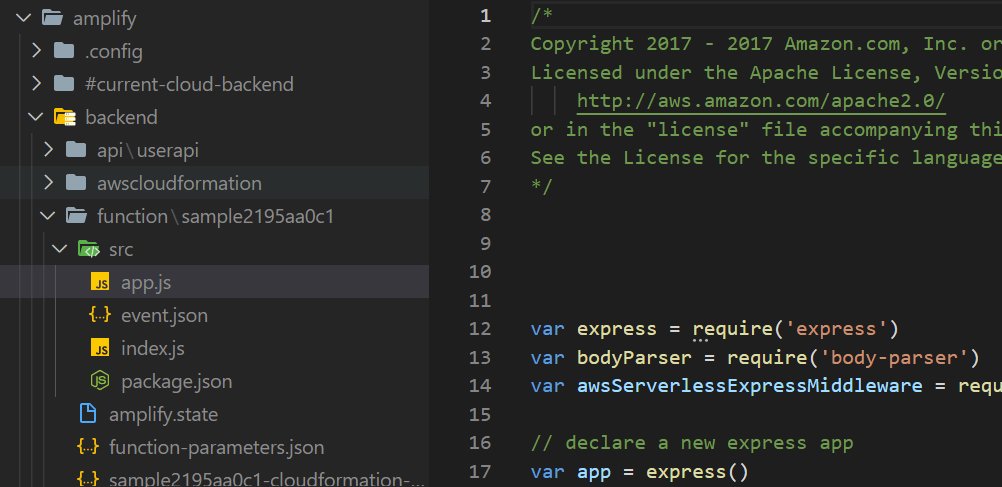
The API Lambda gets created inside a local folder which is created by Amplify. We will be updating the Lambda function to add the specific API routes. The NodeJS code can be found within the Amplify folder in the current source code folder.
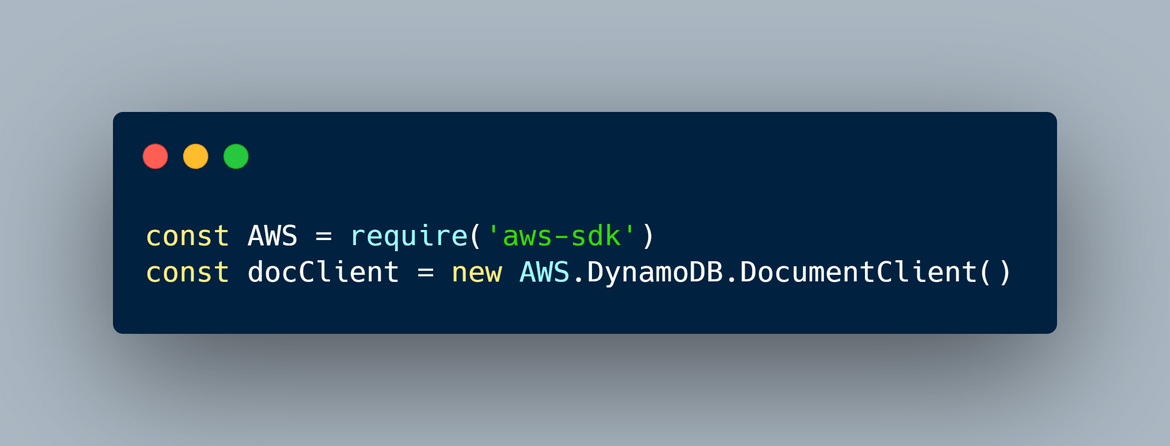
I will modify the app.js file to update with the API routes and adding steps to read and write data. Most of the existing code can be kept intact and just modify the parts you need for specific API functions. Here are the changes I am making.
- Initialize the DynamoDB client using AWS SDK.
- Add a function to auto generate a random ID for the user
- Add routes for Create and Read users
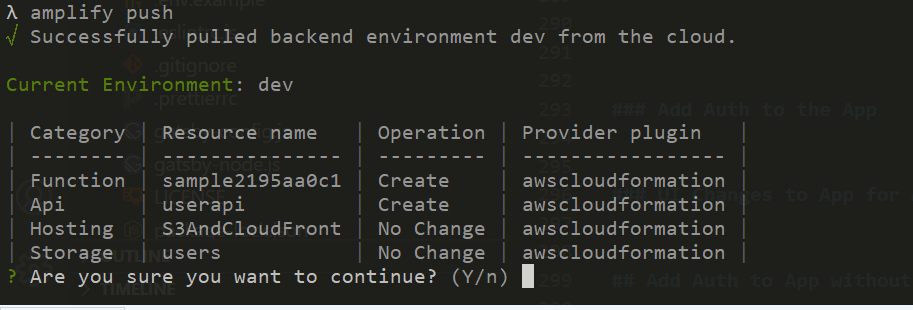
With those changes the API is ready to be deployed. Run the below command to deploy the API and API Gateway to AWS.
amplify pushIt will start the process of deploying the API. Once complete it will show the API endpoint on the CLI.
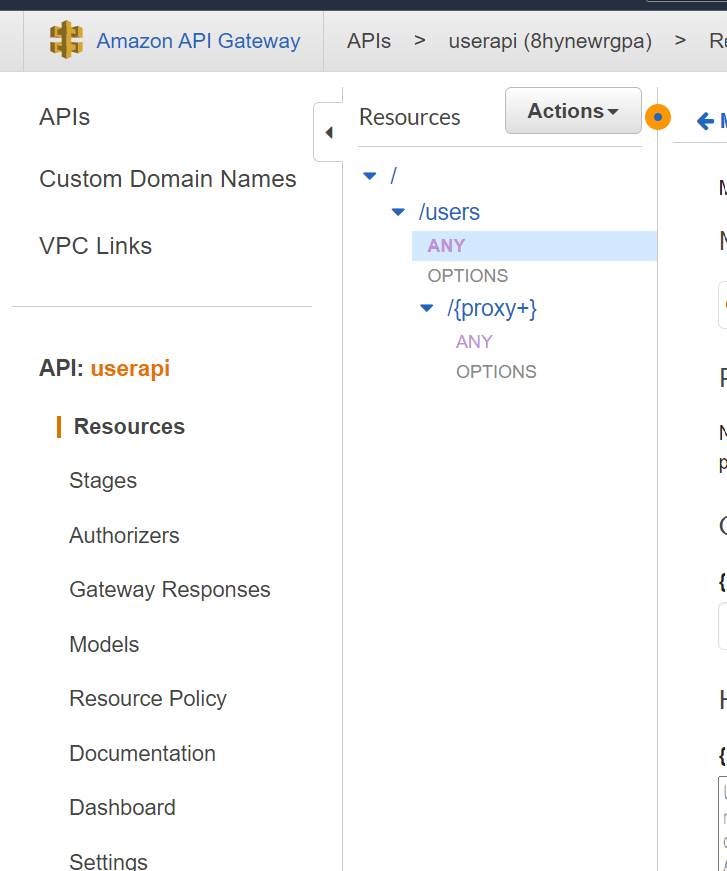
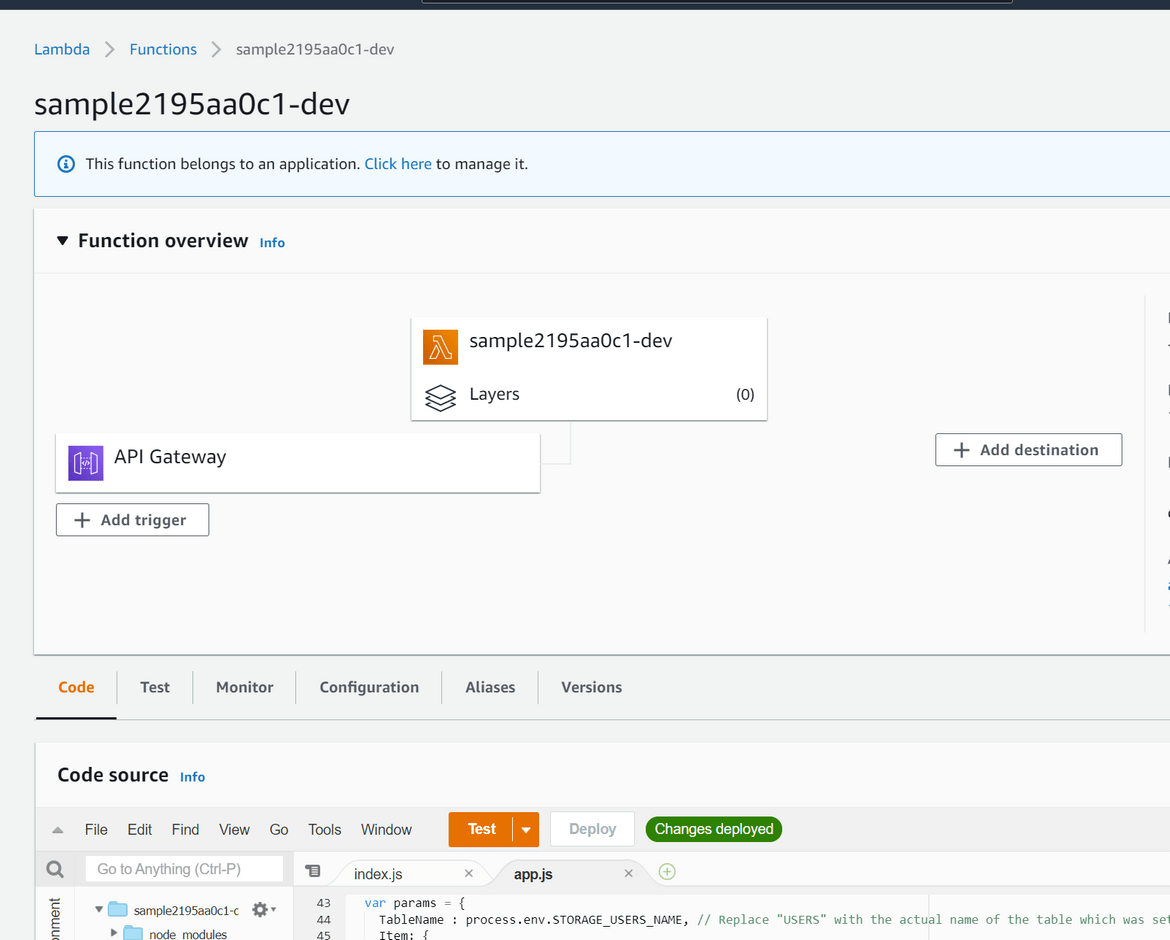
Now the API is deployed. You can verify the API Gateway and Lambda from the AWS console.
The API can be tested on Postman. I am hitting the GET users endpoint on Postman to test its working. It wont return any data now since we havent created any users yet.
Connect Front end to Backend
Now that the API is deployed, lets make changes on the REACT app so it can communicate with the backend API. There are changes to be made in various places of the whole app where the API calls will be sent to get the data and send the data. I will just show one change here to give an idea of the type of changes. Full code can be found on the Github repo. These are the npm packages which are needed to be added to the app:
- @aws-amplify/api-rest
- @aws-amplify/core
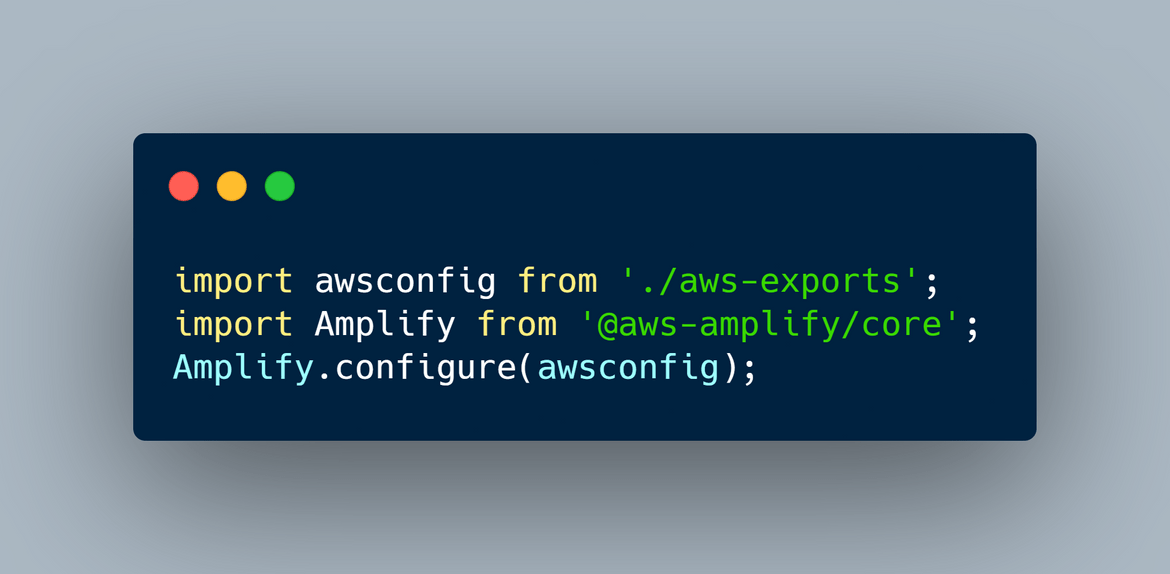
- Import the API details in the React app. When the API and Storage is deployed by Amplify, it generates a file called ‘aws-exports.js’ in the root app folder. This file will contain all the API endpoints, Storage details etc. We need to import these in the React app so the app can connect. Add these statements in ‘index.js’ file for the imports:
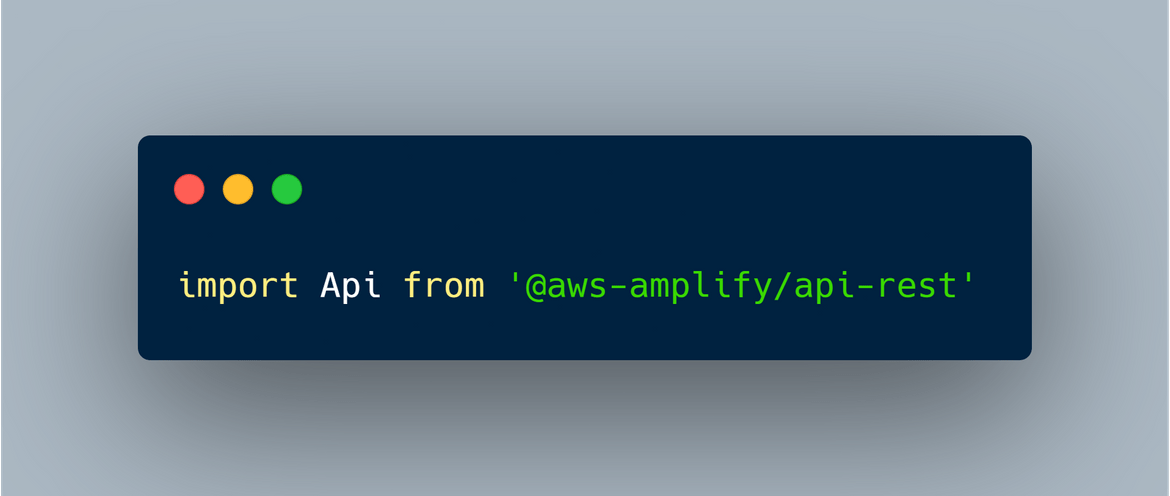
- Add import statements to import the amplify framework. Add this import wherever API will be called in the app
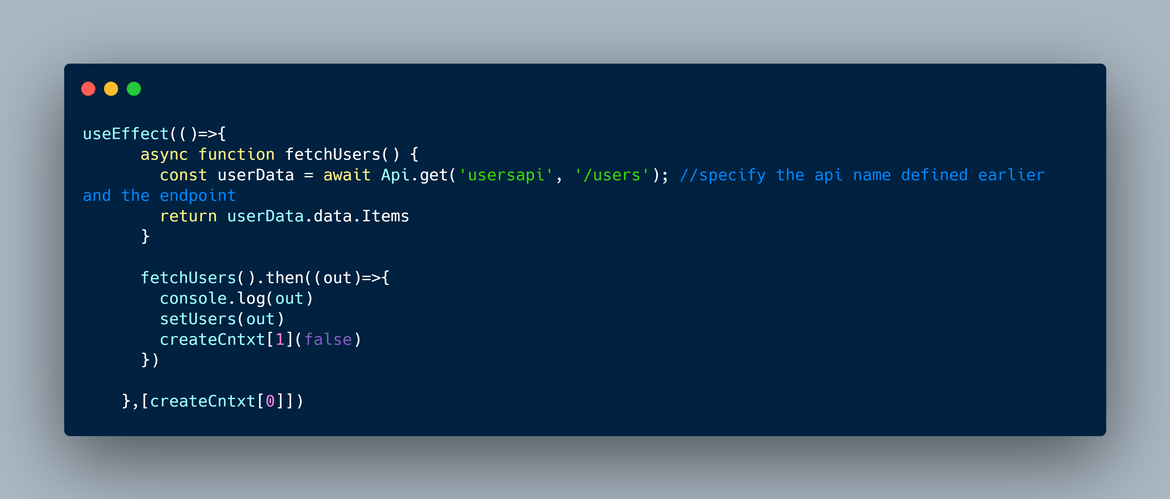
- Add an API call to get all users
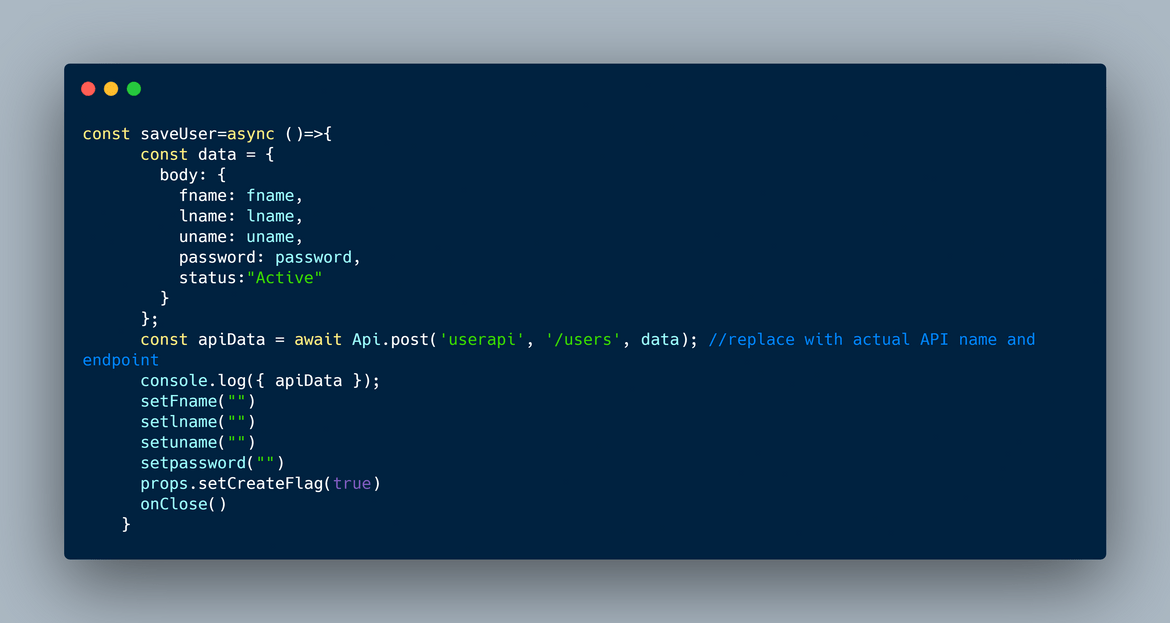
- Add API call to create the user
Now we have connected the frontend to the backend. We can test the app now and verify its working fine. Lets start the app
npm startThat should start the app and open a browser with the app. It will show an empty table since no users created yet.
Lets create an user from the create button.
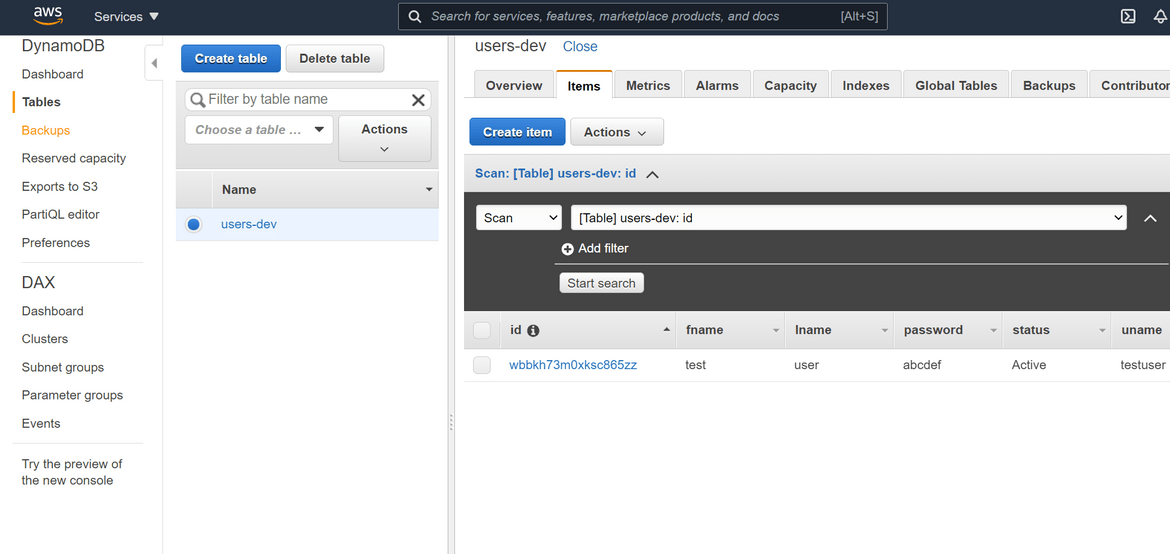
This will create the user and show up on the list. Verify the user is on the list and exist in the DynamoDB table:
You can add multiple users and it will show up on the list. That completes the app deployment. Now all our changes are still local. We need to publish the frontend changes so the deployed frontend is modified and gets the backend access. Run below command to publish the changes to AWS
amplify publishIt will take a while to update and finally complete the deployment. Now if you hit the Cloudfront URL for the app, you should see the user list and be able to create user. The endpoint will be shown on the CLI.
That completes our full stack app deployment and we have fully working frontend, backend and a database. Next we need to secure the app by adding authentication.
Add Auth to the App
Lets move on to add an authentication to the app. User should be able to authenticate themseleves before they can gain access to the app. Here I will use Amplify to create and manage the authentication components. These are the components which will be created by Amplify and managed by Amplify:
- Cognito User pool
- Cognito User pool app client
- Cognito Identity pool
Amplify will handle creating the user pool but we will manually add an user to it for testing. Lets start adding the auth to our app.
Run this command to start adding auth to the app
amplify add authThis will start asking a series of questions to configure Cognito. Select options as needed. Here I am just spinning up a basic Cognito user pool.
Once done, run below command to push the changes to AWS and get the user pool created:
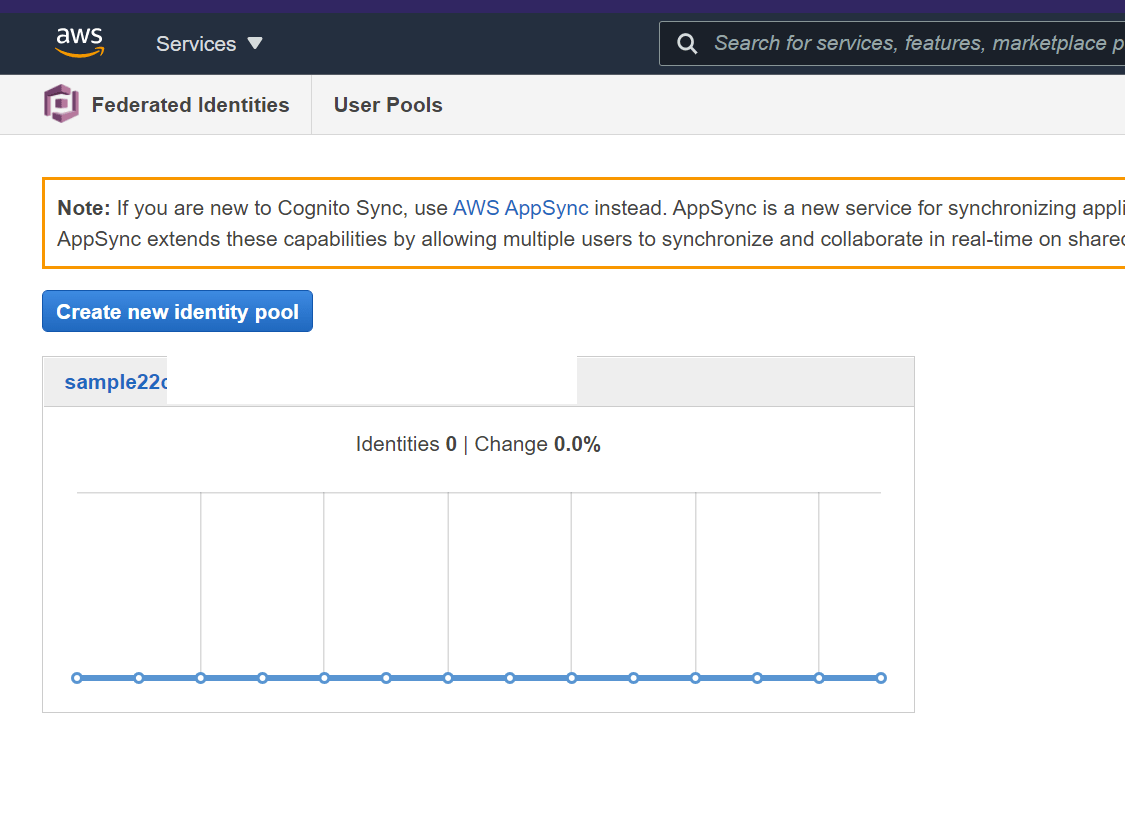
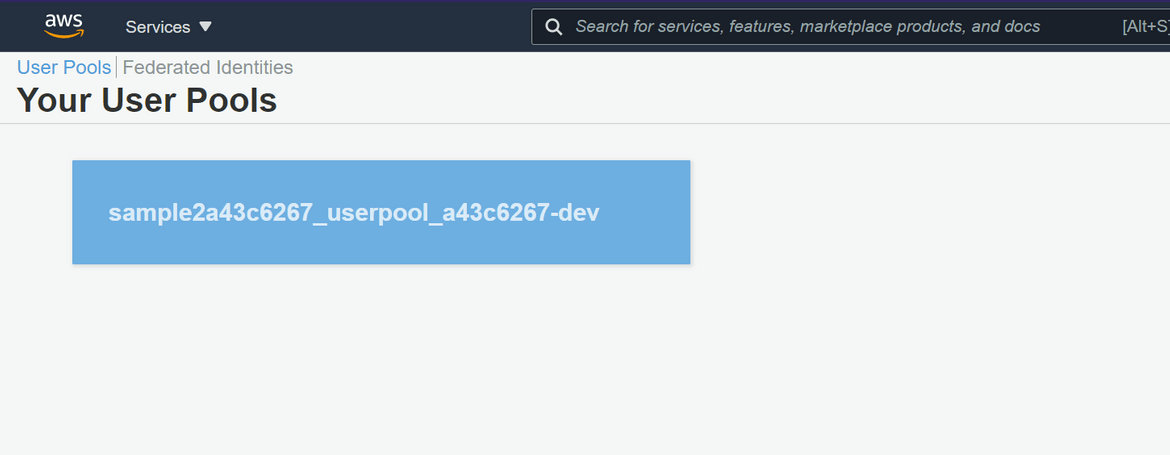
amplify pushIt will take sometime and then complete the creation of the Cognito User pool and Identity pool. Both can be verified from AWS console.
Amplify handles the creation and also managing internally how the API and frontend interacts with the User pool. We don’t have to configure anything explicitly.
Now we have auth defined and managed by Amplify. But the app still is unaware of the Cognito setup. We will need to change the app so that it verifies a Cognito login every time it loads and performs authentication. At high level this will be the flow from the frontend to verify auth
For the above flow to happen, there are some changes need in the app which we will handle next.
UI Changes to App for Auth
Here I am showing the basic change which will be needed to enable the auth login on the app. Based on app complexity other changes will be needed. Here I am just enabling the auth for the whole app.
- In the App.js file, add this import
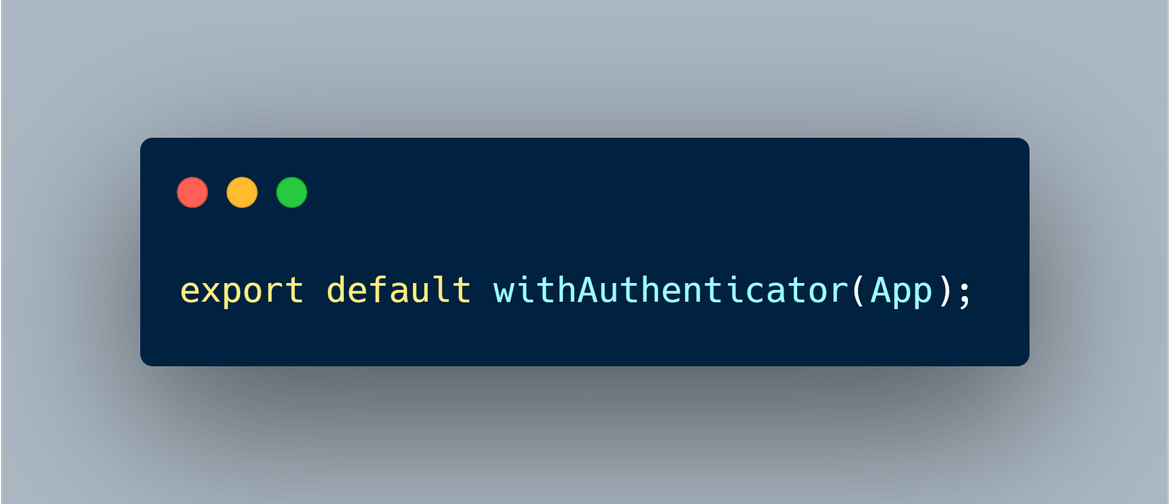
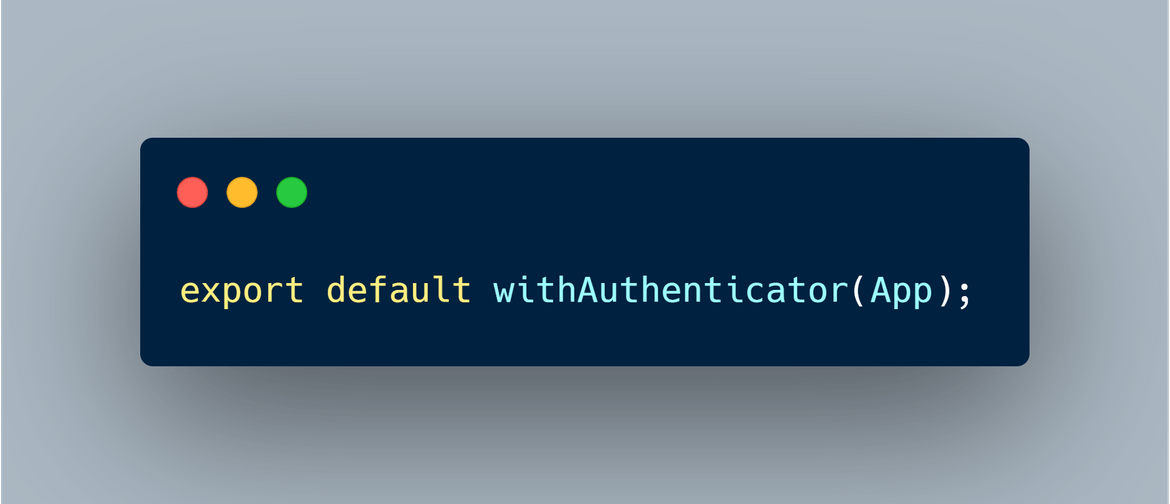
- Wrap the export statemnt for the app in App.js file with the Authenticator component from Amplify
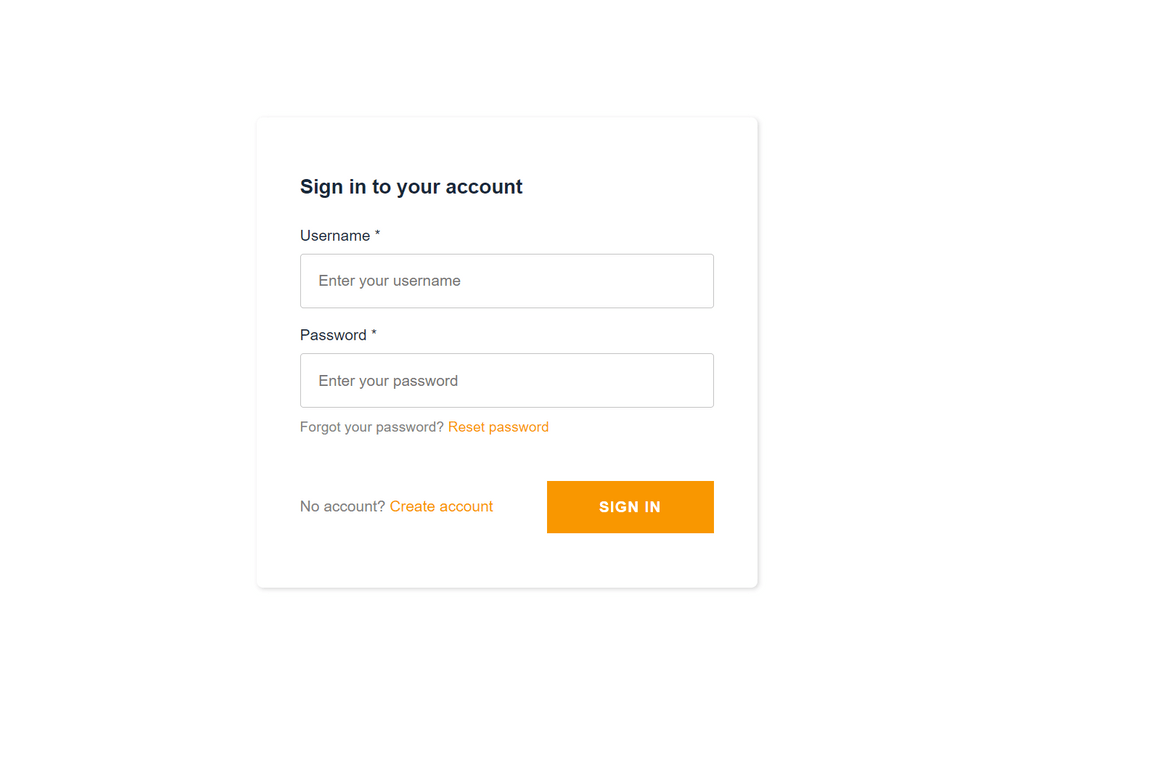
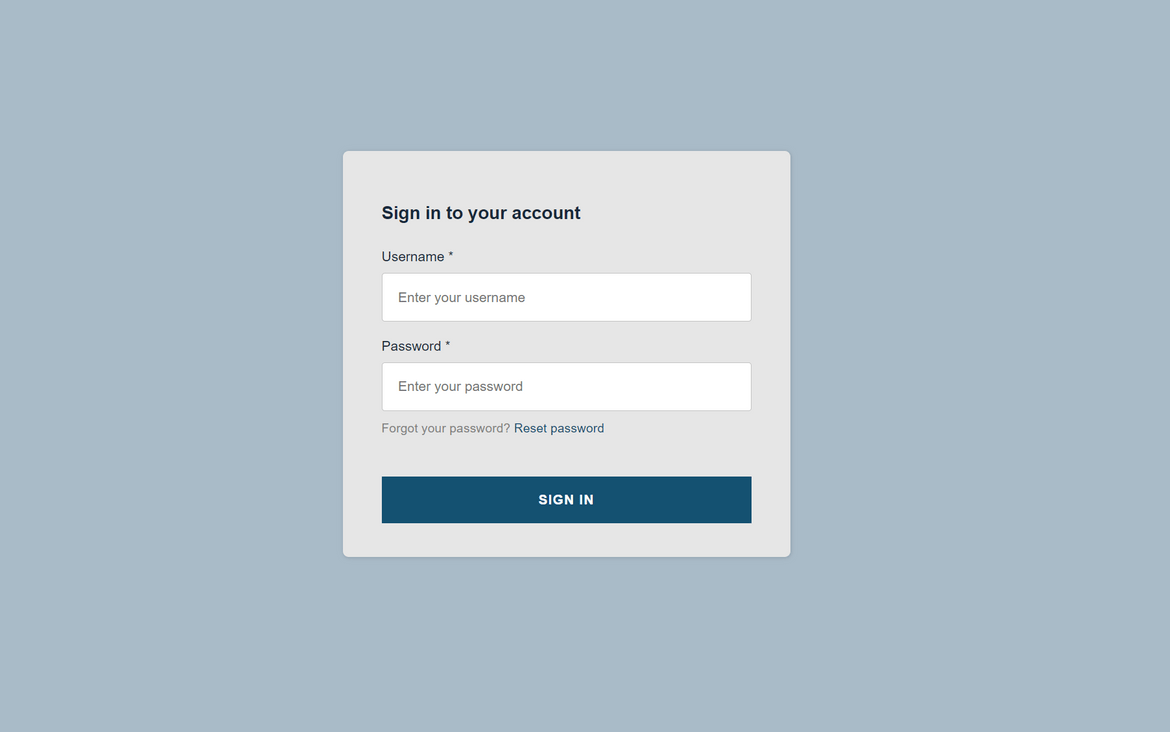
With these changed now every time the app loads, it will validate for an existing session and if nothing is found, it loads the login page.
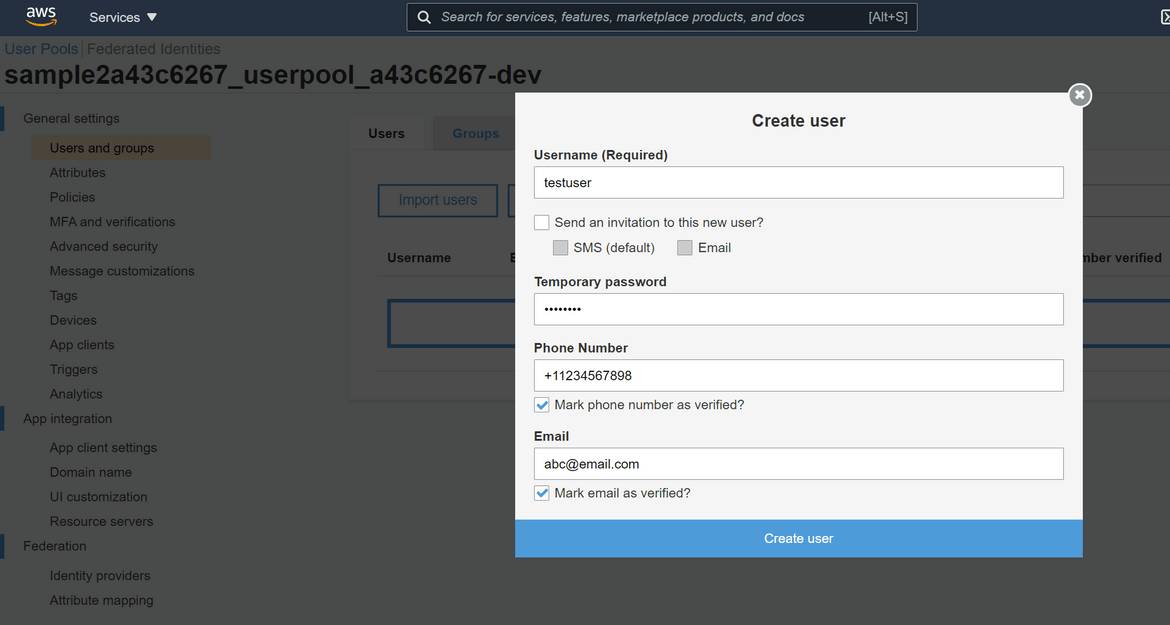
Lets test the login. For this first we will have to create an user in Cognito. Navigate to Cognito on AWS console. Open up the Cognito which was created earlier when we added auth.
Navigate to create users tab and create an user. Provide some default values for this user.
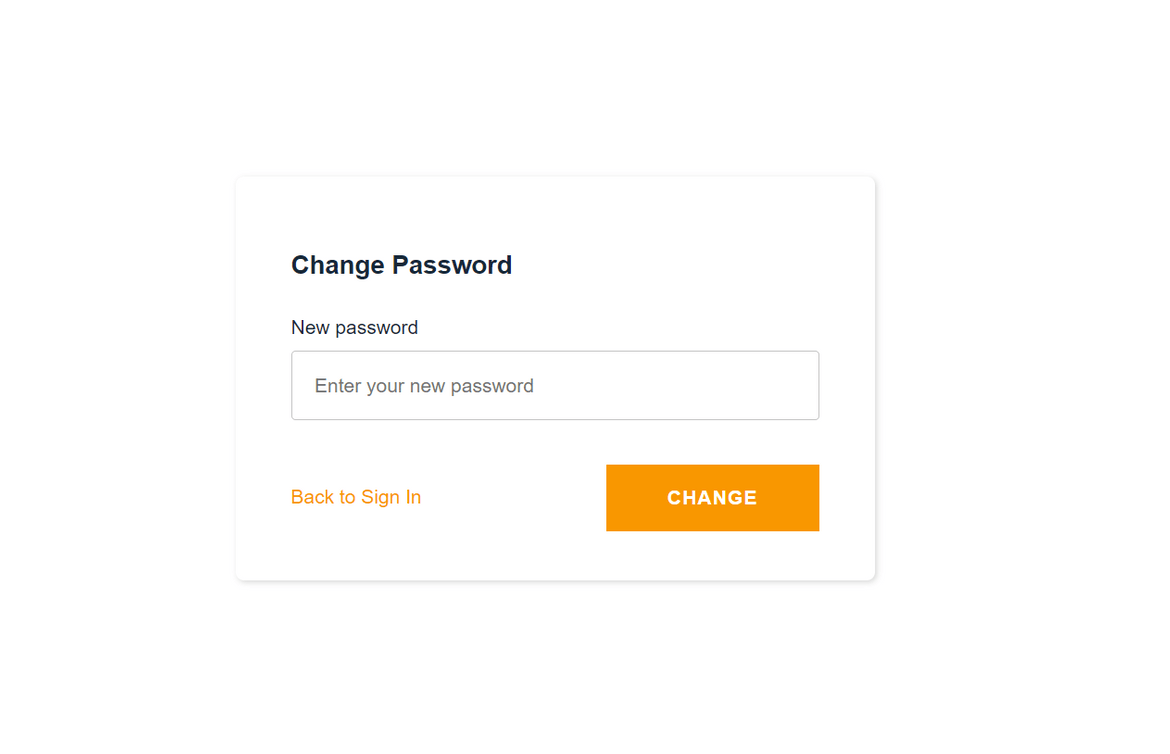
Once user is created, lets test the login. Load the app and it should open up the login page. Provide the credentials created earlier. Since its first time login, it will ask to change password.
Once changed, it should login to the app. In the app perform normal actions since its authenticated now.
To validate that Cognito has been authenticated, open up the browser developer tools by right clicking on the browser. On the tools, navigate to the Application tab and expand the local storage option. It should show all the stored tokens supplied by Cognito during authentication. These are the tokens which can be used for various other authentication flows.
That completes the whole development for the basic full stack React app. Using Amplify we were easily able to add these components to a React app:
- Hosting
- Deploy app
- Storage
- Backend API
- Cognito Auth
Going forward we can use Amplify CLI to manage this app and any changes which we make to the app. To manage changes, just run this command after every change to the app:
amplify publish Bonus Section: Add Auth to App without Amplify Hosting
In this section I will go through a method of adding Cognito auth to React app without using an Amplify project or hosting. I will get the basic boiler plate React and enable Cognito login on it. Here we wont be using Amplify CLI and the service itself. We will be using Amplify framework within the React app to enable the login. To achieve this there are some changes needed on the React app code. These changes can be plugged in to any existing React application to secure it behind login.
Lets start with creating a React app.
npx create-react-app sample-login-appThis will create the basic react app. We wont start the app yet. There are few packages which are needed for the Cognito auth to work. Run below commands to install the packages
npm install @aws-amplify/ui-react
npm install @aws-amplify/core
Once its completed we are ready for the changes. Lets go through the steps:
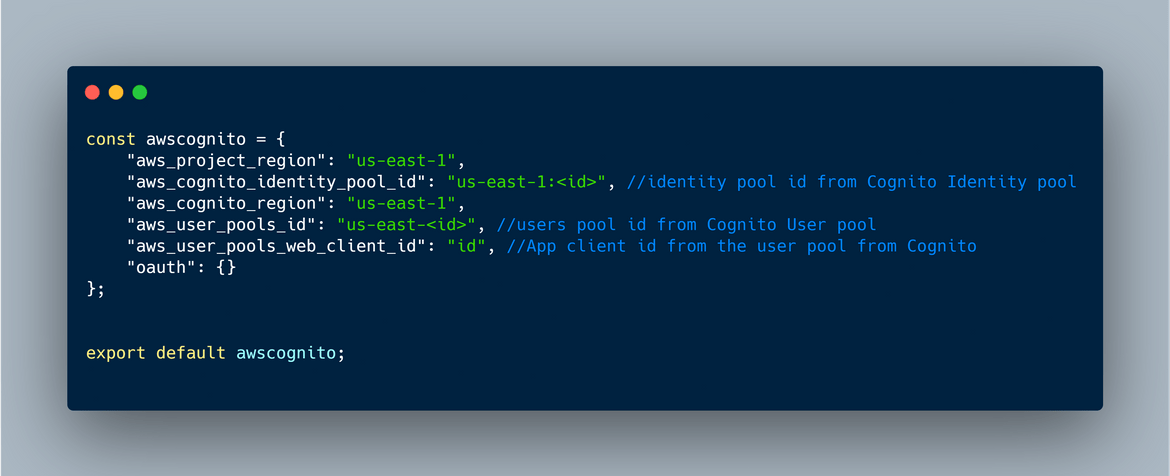
- In the src folder, add a new file called aws-exports.js. In the file add below content. These details can be found from the Cognito screen on AWS console. These are the details the app will use to authenticate with Cognito.
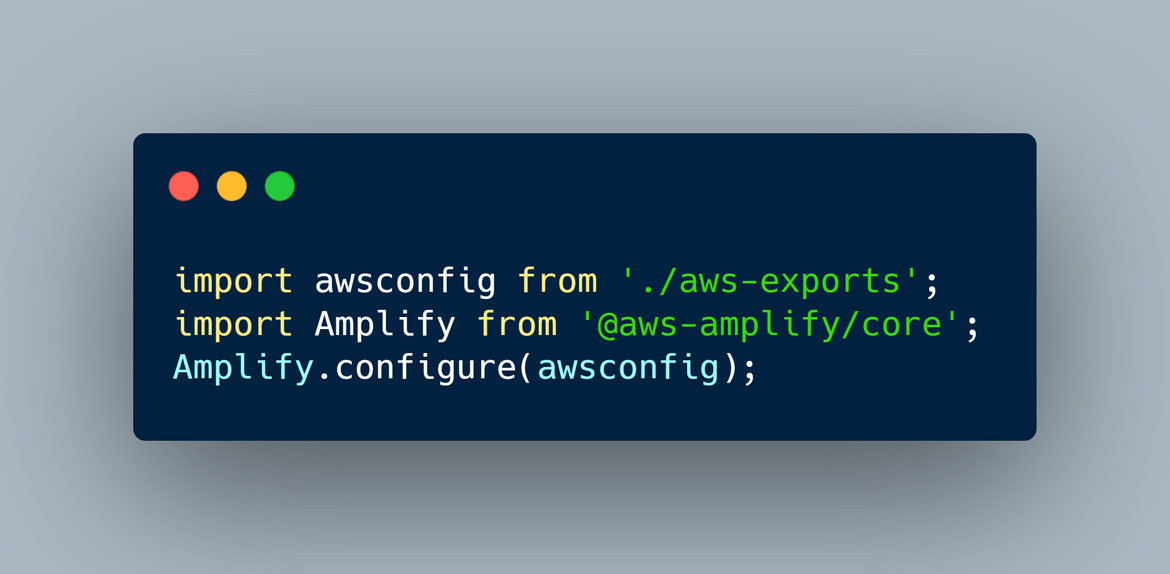
- Open the index.js file and these lines to configure Amplify framework to read the Cognito details
- Open the App.js file and add this import to import the Amplify framework Authenticator
- In the same App.js file, modify the export line to wrap with the Authenticator component
Those should be all the changes needed to have a basic auth enabled on the app. Now lets run the app to validate.
npm start Once the app starts, load the app on browser. It should load the login page.
Go ahead and login using the user credentials from the user created in Cognito. For steps to create user in Cognito, go thorugh earlier sections where I described the same. Once you enter credentials and hit login, it will login to the app
The steps mentioned here will enable a basic login on the app. If you want to customize the ook and feel there options to do the same. For more customization options, refer the docs Here
With this we enabled a basic auth flow on the React app. The Cognito users can login to this app. This is a simple way I learnt with which you can enable Cognito Auth on a React app. Hope this will help someone on their app development.
Conclusion
In this post I went through an overview of using Amplify to build and deploy a React app. Hopefully this post provides and good overview to a beginner who is interested to use Amplify on their apps. Amplify is really simplifies the development and deploy process of a web app and not just React app. You can use this to manage apps on multiple frameworks. Let me know if any issues or any questions. You can reach me from the contact page.
