Talk to My Document: A Serverless RAG approach using Huggingface, Amazon Lex and Amazon DynamoDB
Nowadays RAG has become a very popular approach to develop context aware AI bots. Imagine being able to have a conversation with your documents, asking questions and receiving precise answers instantly. This is the promise of Retrieval-Augmented Generation (RAG). RAG is an approach that combines the best of both worlds: the retrieval power of search engines and the generative capabilities of large language models (LLMs).
In this post, I will show you how to build a RAG-based chatbot using three powerful tools: Huggingface for advanced language models, Amazon Lex for creating conversational agents, and Amazon DynamoDB for scalable and efficient vector storage. The chatbot will be able to answer questions based on the content of your documents, providing you with instant access to the information you need. By the end of this tutorial, you’ll have a comprehensive understanding of how to create a conversational document interface that makes retrieving information as easy as having a chat.
Here are two videos showing the Ingestion and the Lex bot chat in action.
The whole code for this solution is available on Gumroad Here. If you want to follow along, the can be used to stand up your own infrastructure.
Pre Requisites
Before I start the walkthrough, there are some some pre-requisites which are good to have if you want to follow along or want to try this on your own:
- Basic AWS knowledge
- Github account to follow along with Github actions
- An AWS account
- AWS CLI installed and configured
- Basic Terraform knowledge
- Terraform Cloud free account. You can sign up here. Its not mandatory but I have used this for state management in the Terraform scripts. You can use S3 as well.
- HuggingFace free account to authenticate and pull models. You can sign up here
With that out of the way, lets dive into the details.
What is RAG?
RAG stands for Retrieval-Augmented Generation. It is an approach that combines the best of both worlds: the retrieval power of search engines and the generative capabilities of large language models (LLMs). RAG models are designed to generate text responses to user queries by retrieving relevant information from a knowledge base. The knowledge base can be a collection of documents, a database, or any other source of information. The RAG model uses the retrieved information to generate contextually relevant responses to user queries.
How Can DynamoDB be used in RAG?
DynamoDB is a fully managed NoSQL database service provided by AWS. It is designed for applications that require single-digit millisecond latency at any scale. DynamoDB is a great choice for storing and retrieving large amounts of data quickly and efficiently. In the context of RAG, DynamoDB can be used to store the document vectors that are used for retrieval. The document vectors can be generated using a pre-trained LLM model like BERT or T5. The vectors can be stored in DynamoDB along with the document IDs. When a user query is received, the RAG model can retrieve the relevant document vectors from DynamoDB and use them to generate contextually relevant responses. DynamoDB provides fast and efficient access to the document vectors, making it an ideal choice for storing and retrieving large amounts of data in RAG applications.
What is Huggingface?
Hugging Face is an AI research organization that provides state-of-the-art natural language processing (NLP) models and tools. Hugging Face is known for its Transformers library, which provides a wide range of pre-trained models for tasks like text classification, question answering, and text generation. Hugging Face models are trained on large amounts of text data and can generate human-like text responses to user queries. In the context of RAG, Hugging Face models can be used to generate text responses to user queries based on the content of the documents. The models can be fine-tuned on specific datasets to improve their performance on specific tasks. Hugging Face provides a wide range of pre-trained models that can be used for RAG applications.
Overall Functional Flow
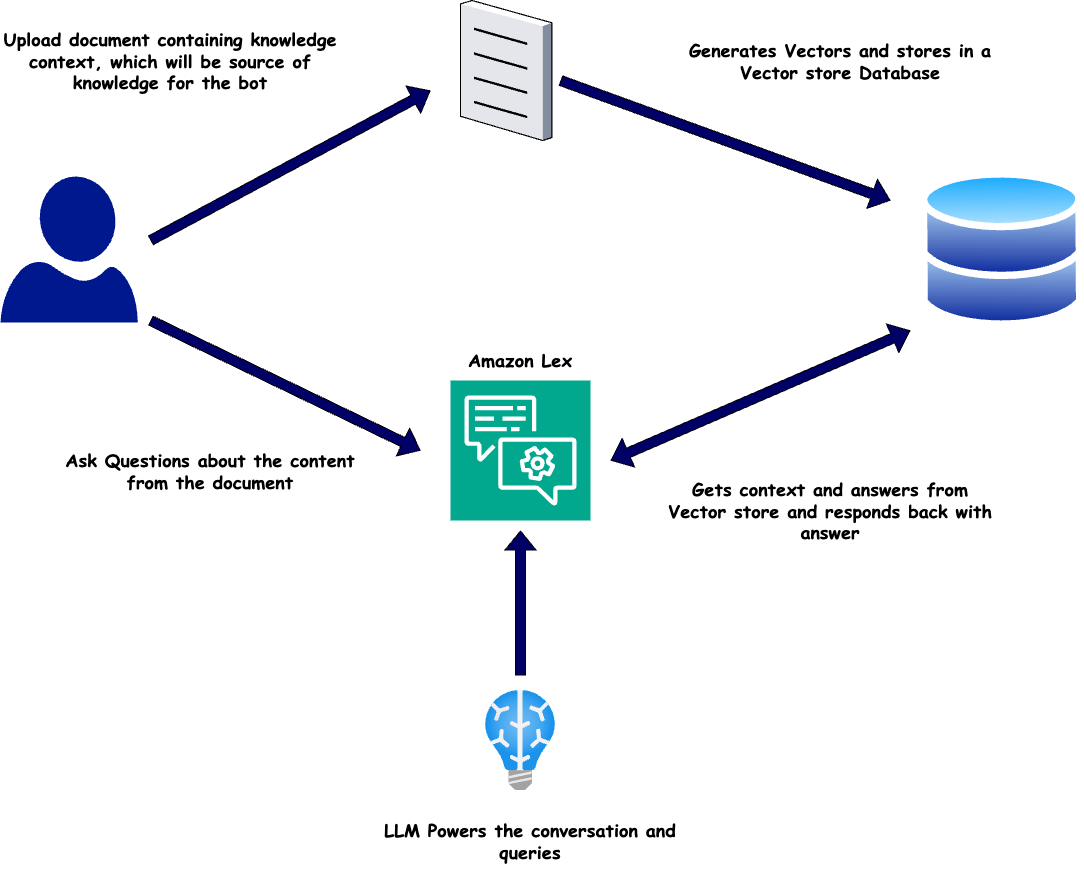
Now lets understand what we are going to build in this post. The overall functional flow of the chatbot is can be shown in the image below
- The flow starts with the user uploading a knowledge document to the S3 bucket. The document will be source of context for the chatbot. User uses the upload interface and uploads the document.
- The document is gets processed and vectors get generated. These vectors get stored in a DynamoDB table.
- User interacts with the Lex chatbot asking questions which is related to the knowledge document uploaded
- Lex invokes an LLM and gets knowledge context from the DynamoDB based on the question input
- The question and context is passed to the LLM. The LLM generates the answer based on the context and question
- The answer is returned to the user via the Lex chatbot.
This is the overall flow of the chatbot. Lets dive into the details of each of the components.
Tech Architecture
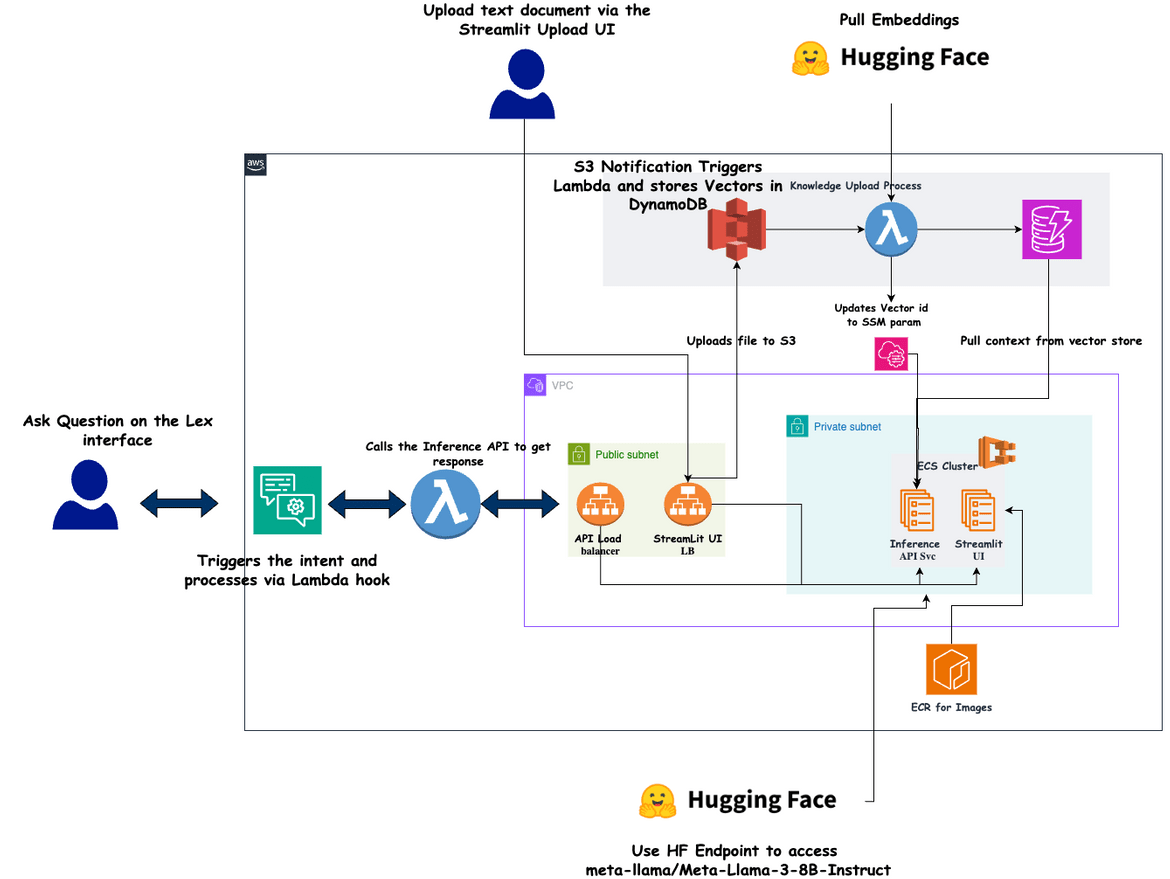
Below image shows the overall tech architecture of the chatbot and related components.
Lets understand the components in detail.
Lex Bot
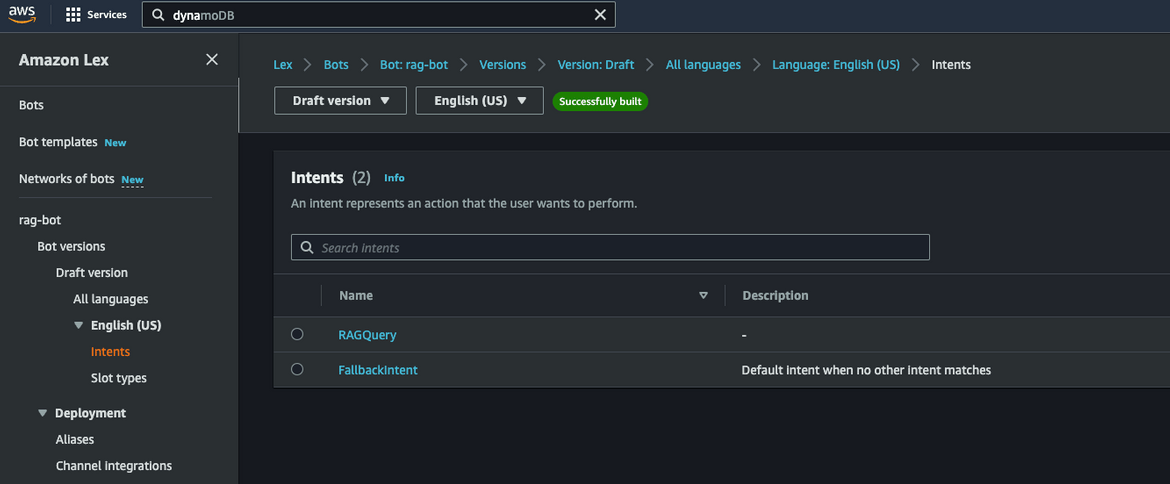
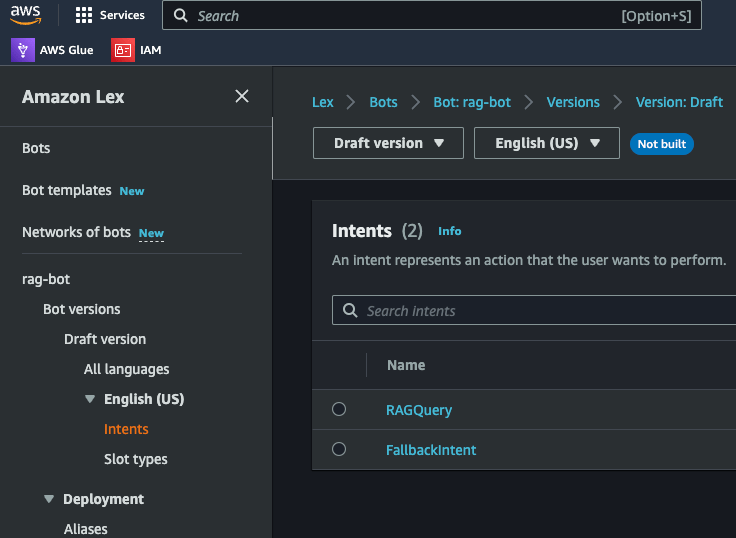
This is the bot interface through which user interacts and gets answers to the questions. The bot is built using Amazon Lex. The Lex bot triggersa Lambda hook which interacts with the backend API to get the answers. The backend API is the inference API deployed to ECS Fargate. The Lex bot has one intent which is the Question Intent and gets triggered when asked a question.
Load Balancers
There are two load balancers deployed. These two load balancers are
- To expose the Inference API endpoint, which is deployed as a service on ECS
- To expose the Streamlit UI endpoint which is also deployed as another service on ECS
The load balancers are configured with the respective target groups pointing to the services. Both of these are deployed to public subnets.
ECS Cluster
An ECS cluster is deployed to host the two services: Inference API and Streamlit UI. Both of the services are deployed to private subnets.
Networking
There are few networking components deployed, to enable the deployment of the Fargate tasks to the ECS cluster
- VPC
- Public and Private Subnets
- Internet Gateway
- NAT Gateway
- Route Tables
- Security Groups
ECR repositories
There are few ECR repos created to house the different docker images which are used to deploy the services. These are the epos which are created:
- Repo for the Ingestion Lambda Docker Image
- Repo for the Streamlit UI Docker Image
- Repo for the Inference API Docker Image
- Repo for the Lex Lambda Docker Image
Fargate Tasks
There are two ECS services deployed which run Fargate tasks on the ECS cluster. These are the services:
- Inference API Service
- Streamlit UI Service
Both services get exposed via a load balancer. The Inference API pulls the LLM from Huggingface. The model and auth details are passed as environment variables to the container. I am using “meta-llama/Meta-Llama-3-8B-Instruct” as the LLM model. These are the high level step which are followed in the API when a question is received as input:
- The input question is used to perform a similarity search on the DynamoDB vectors to get a similarity context. The Vector ID is pulled from the SSM parameter. This ID uniquely identifies the vectors for the specific document which was uploaded
- The similarity context and the question is passed to the LLM. The LLM generates the answer based on the context and question
- The answer is returned to the Lex chatbot
The Streamlit UI service is used to upload the knowledge documents to the S3 bucket. The UI is built using Streamlit. The ECS service runs as a Fargate task and is exposed via a load balancer.
S3 Bucket
The S3 bucket is used to store the knowledge documents which are uploaded by the user. When user uploads the document v the Streamlit UI, the document gets uploaded to this S3 bucket.
DynamoDB Table
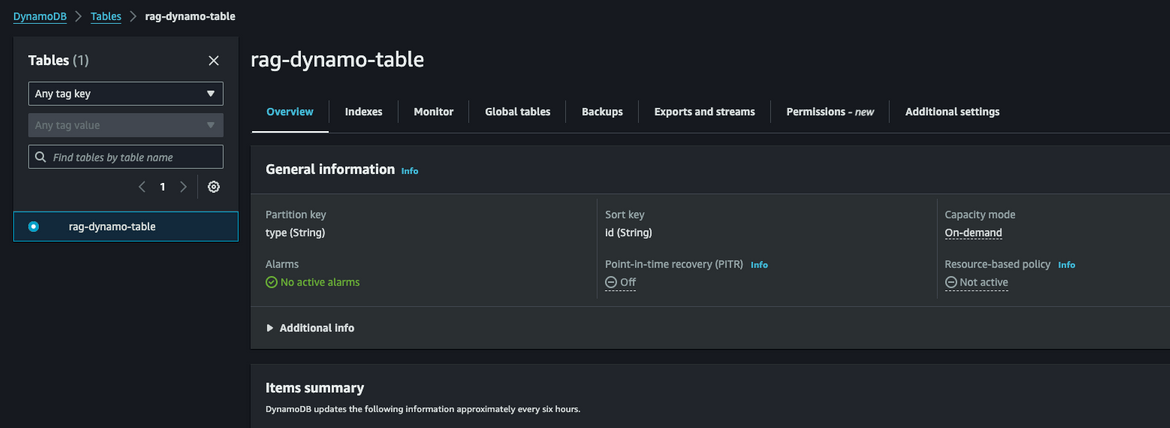
This is the table which stores the document vector and acts as the Vector store for the whole RAG process. The table is created with these keys but really the names can be changed as needed.
resource "aws_dynamodb_table" "vector_table" {
  name           = "rag-dynamo-table"
  billing_mode   = "PAY_PER_REQUEST"
  hash_key       = "type"
  range_key      = "id"
  attribute {
    name = "id"
    type = "S"
  }

  attribute {
    name = "type"
    type = "S"
  }
}
Vector Processor Lambda
This Lambda gets triggered via an S3 bucket notification. WHen the knowledge document is uploaded to the S3 bucket, the bucket notification triggers this Lambda. These are the tasks this Lambda performs
- Reads the document from the S3 bucket
-
Processes the document and generates the vectors
- An embedding model is pulled from Huggingface. I am using “BAAI/bge-small-en-v1.5”
- Stores the vectors in the DynamoDB table
- Store the Vector ID in an SSM parameter for the Inference API to identify the vectors
IAM Roles
Its not shown on the diagram, but for all of these components to work together and have proper access to trigger one another, respective IAM roles are created to provide each of the service the needed access.
This is the overall tech architecture of the chatbot. Now lets see how to deploy this infrastructure.
Deploy the infrastructure
The infrastructure components get deployed using two frameworks:
- Terraform
- Cloud Development Kit (CDK) from AWS
CDK is used to deploy all of the ECR repos. Then Terraform is used to deploy rest of the infrastructure components. All of the deployment step are orchestrated in a Github Actions workflow. Let me explain the folder structure in my repo.
Folder Structure
Below image shows the folder structure of the repo.
- .github: This folder contains the Github Actions workflow file which is used to deploy the infrastructure.
- app_infra: This folder contains the CDK code to deploy the ECR repos.
-
infrastructure: This folder contains the Terraform code to deploy the rest of the infrastructure components. The components are separated into modules:
- app_infra: All infra related to app like Lambdas.
- networking: This module contains the networking components like VPC, subnets, route tables, etc.
- compute: This module contains the compute related components like ECS cluster, Fargate tasks, etc.
- dynamodb: This module contains the DynamoDB table.
- security: This module contains the security related components like IAM roles
- ingestion_lambda: This folder contains the code for the Lambda which processes the document and generates the vectors.
- lex-bot: This folder contains the code for the Lex bot and the Lambda hook code. I have exported the Lex bot as a JSON file. Thi can be imported into your AWS account.
- rag-app: This folder contains the code for the Streamlit UI
- rag-inference-api: This folder contains the code for the Inference API. This is the API which interacts with the LLM and DynamoDB to get the answers.
Infrastructure Components
Now lets see how some of the infrastructure are defined in the code.
ECR Repos
The ECR repos are created using the CDK code. Below is the code snippet to create the ECR repos.
const appECR = new cdk.aws_ecr.Repository(this, 'AppECR', {
      repositoryName: 'rag-ingest-lambda-repo',
      emptyOnDelete: true,
      removalPolicy: cdk.RemovalPolicy.DESTROY
    });

    const ragAppECR = new cdk.aws_ecr.Repository(this, 'RagAppECR', {
      repositoryName: 'rag-app-repo',
      emptyOnDelete: true,
      removalPolicy: cdk.RemovalPolicy.DESTROY
    });

    const ragInfAPIECR = new cdk.aws_ecr.Repository(this, 'RagIngAPI', {
      repositoryName: 'rag-inference-api',
      emptyOnDelete: true,
      removalPolicy: cdk.RemovalPolicy.DESTROY
    });

    const lexLambda = new cdk.aws_ecr.Repository(this, 'lexLambda', {
      repositoryName: 'lex-lambda-repo',
      emptyOnDelete: true,
      removalPolicy: cdk.RemovalPolicy.DESTROY
    });
Lambdas
The lambdas get deployed using the Terraform code. I am using contained images for the Lambda. The images get built first in the Github Actions workflow and then pushed to the ECR repos. Below is the code snippet to deploy the Lambda.
data aws_ecr_image lambda_image {
 repository_name = var.ingest_lambda_ecr_repo_name
 image_tag       = "latest"
}

# lambda from docker image
resource "aws_lambda_function" "rag_ingest_lambda" {
  function_name = "rag-ingest-lambda"
  role          = var.ingest_lambda_role_arn
  timeout       = 300
  memory_size   = 2048
  package_type = "Image"
  image_uri = "${data.aws_caller_identity.current.account_id}.dkr.ecr.${var.region}.amazonaws.com/${var.ingest_lambda_ecr_repo_name}@${data.aws_ecr_image.lambda_image.id}"
  environment {
    variables = {
      S3_BUCKET_NAME = var.s3_bucket_name
      RAG_TABLE_NAME = "vector-db"
      TRANSFORMERS_CACHE="/tmp"
      HF_HOME="/tmp"
      NLTK_DATA = "/tmp/nltk_data"
    }
  }
}
The Dockerfile for the Lambdas pull form the public Lambda image and then adds the other steps to install and copy code. Here is a sample for one of the Dockerfiles.
FROM public.ecr.aws/lambda/python:3.11
RUN yum update -y && \
    yum install -y python3 python3-dev python3-pip gcc && \
    rm -Rf /var/cache/yum
COPY requirements.txt ./
RUN pip install -r requirements.txt
COPY app.py ./
COPY __init__.py ./
COPY rag_process.py ./
CMD ["app.lambda_handler"]
DynamoDB Table
The DynamoDB table is created using the Terraform code. You can use any hash and range keys but both are needed. This is what I am using in my code.
resource "aws_dynamodb_table" "vector_table" {
  name           = "rag-dynamo-table"
  billing_mode   = "PAY_PER_REQUEST"
  hash_key       = "type"
  range_key      = "id"
  attribute {
    name = "id"
    type = "S"
  }

  attribute {
    name = "type"
    type = "S"
  }
}
ECS Fargate Tasks
I am deploying the task definitions for the Tasks using Terraform. ALong with the definitions, I am also deploying the services which run the tasks. Below is the code snippet to deploy the Inference API service.
resource "aws_ecs_task_definition" "rag_api_task_def" {

  family                   = "rag-api-task-def"
  network_mode             = "awsvpc"
  execution_role_arn       = var.task_role_arn
  task_role_arn = var.task_role_arn
  requires_compatibilities = ["FARGATE"]
  cpu                      = 2048
  memory                   = 4096

  container_definitions = <<DEFINITION
[
  {
    "image": "${data.aws_caller_identity.current.account_id}.dkr.ecr.us-east-1.amazonaws.com/rag-inference-api:latest",
    "cpu": 2048,
    "memory": 4096,
    "name": "api-task-container",
    "networkMode": "awsvpc",
    "environment": [
      {
        "name": "HF_TOKEN",
        "value": ""
      },
      {
        "name": "MODEL_NAME",
        "value": "meta-llama/Meta-Llama-3-8B-Instruct"
      },
        {
            "name": "S3_BUCKET",
            "value": ""
        },
        {
            "name": "EMBED_MODEL_NAME",
            "value": "BAAI/bge-small-en-v1.5"
        },
        {
            "name": "VECTOR_STORE_TABLE_NAME",
            "value": "rag-dynamo-table"
        },
        {
            "name": "VECTOR_ID_PARAM_NAME",
            "value": "vectorId"
        },
        {
            "name": "TRANSFORMERS_CACHE",
            "value": "/tmp"
        },
        {
            "name": "HF_HOME",
            "value": "/tmp"
        }
    ],
    "portMappings": [
      {
        "containerPort": 8501,
        "hostPort": 8501
      }
    ],
    "logConfiguration": {
      "logDriver": "awslogs",
      "options": {
        "awslogs-group": "/rag-api-logs",
        "awslogs-region": "us-east-1",
        "awslogs-stream-prefix": "ecs"
      }
    }
  }
]
DEFINITION

}
Lex Bot
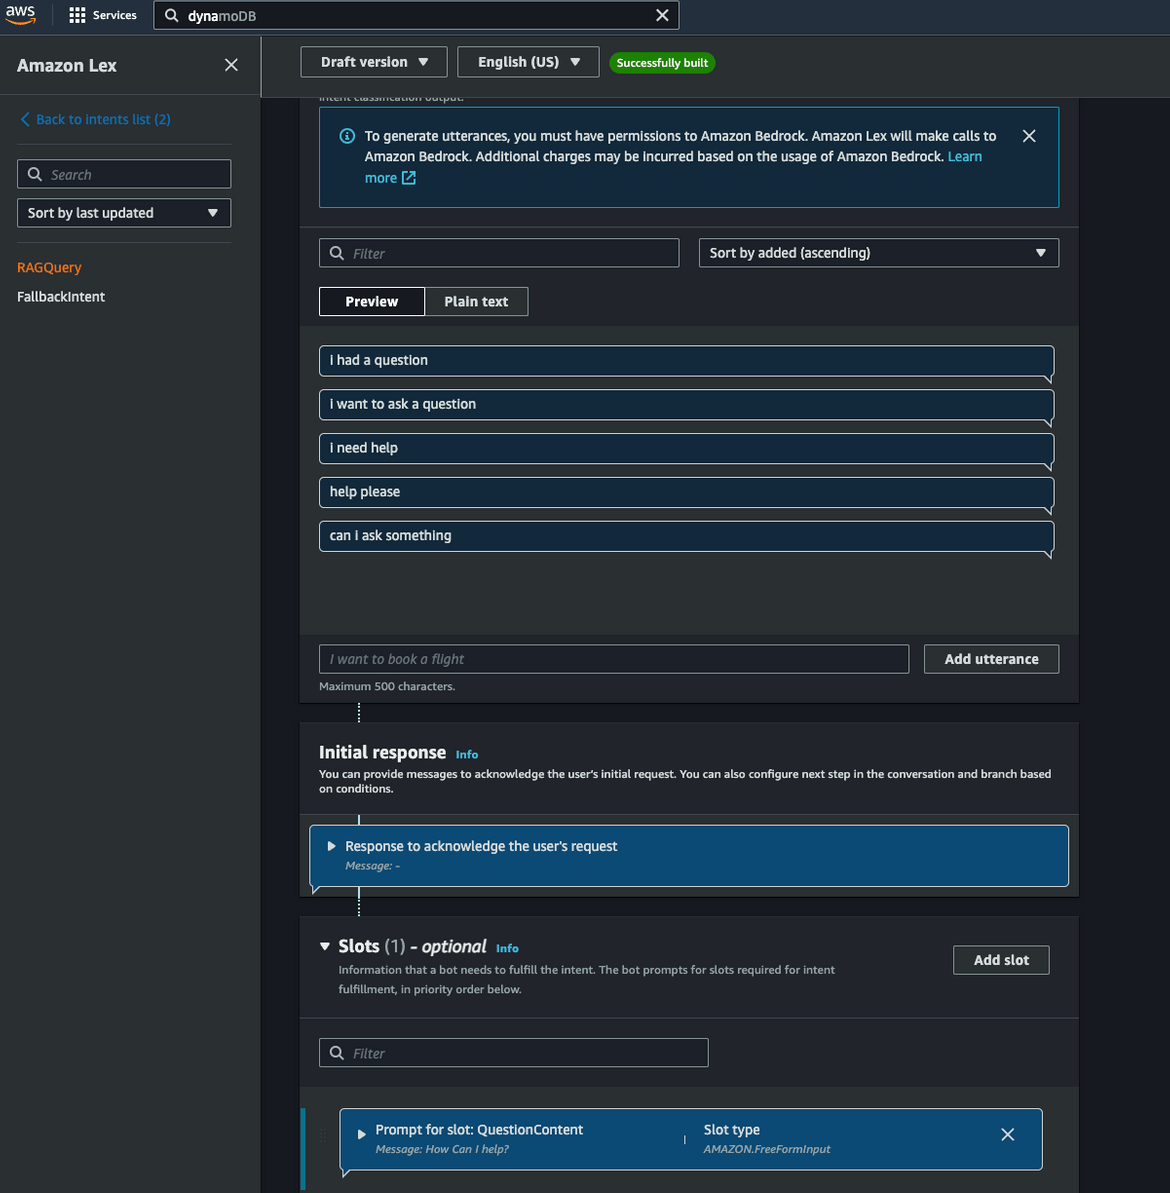
I am not deploying the Lex bot using Terraform. I have exported the bot as a JSON file. You can import this JSON file into your AWS account. The bot consists of one intent which triggers the Lambda hook.
The Lambda hook identifies the intent and performs the rest of the steps.
These are some of the components of the infrastructure. The rest of the components are also defined in the Terraform code. Now lets see how to deploy the infrastructure.
Components Deployment
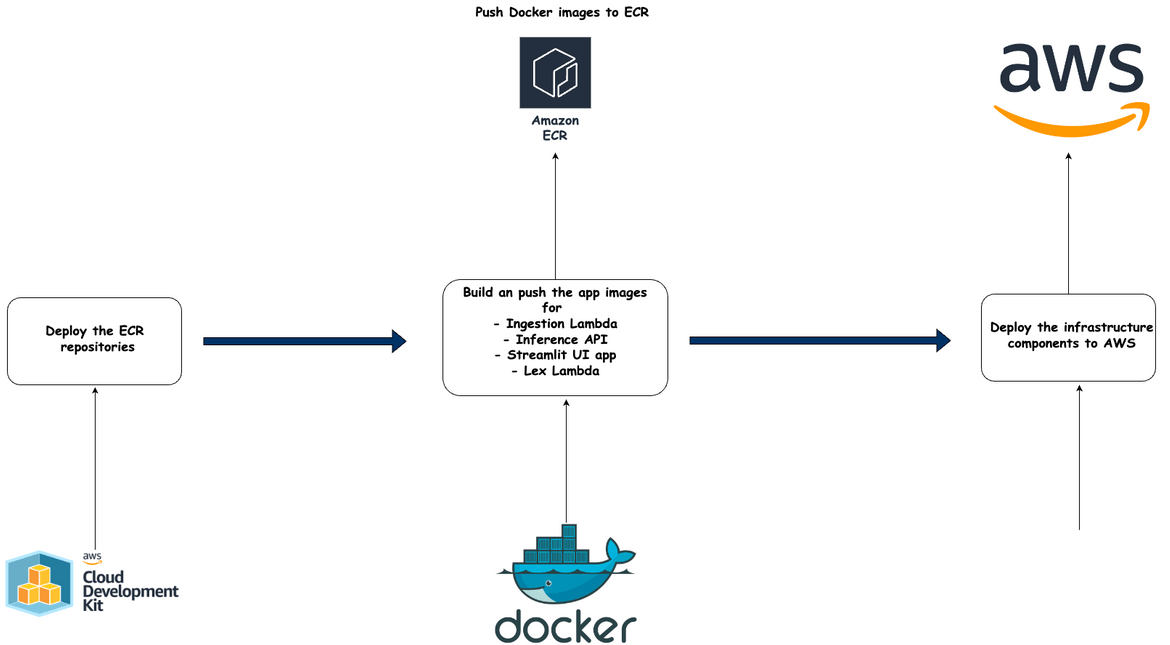
I am using Github actions to orchestrate the deployment of the infrastructure. The deployment is done in two steps:
- Deploy the ECR repos using CDK
- Deploy the rest of the infrastructure using Terraform
Below image shows the whole flow
Lets see the steps in detail.
Deploy ECR Repos
As first step, the ECR repos are deployed. CDK is used to deploy the repos. The repos are deployed first as the Docker images need to be built and pushed before running the Terraform.
Build and Push Docker Images
In this step all of the Docker images are built and pushed to the ECR repositories created in the last step. The images are built using the Dockerfile in the respective folders.
Deploy Infrastructure
As the final step, all of the infrastructure is deployed. This step uses Terraform and deploys the whole infrastructure to AWS. I am using Terraform cloud to manage the Terraform state. The state is stored in the Terraform cloud.
Now lets deploy all of what we saw till now.
Deploy!!!
Before we can deploy, there are few Pre-requisites which need to be completed.
- Create a Terraform Cloud account. You can sign up here. If you are not using Terraform cloud then this step can be skipped
- Create a Huggingface account. You can sign up here. Generate an API token from your account
- The Terraform cloud workspace need to be configured with the AWS credentials. The credentials are stored in the workspace as environment variables. Set these environment variables so Terraform cloud can connect to AWS

- To be able to deploy from Github actions, there are some secrets and env variables needed on the Github repo too. Set these on your Github repo

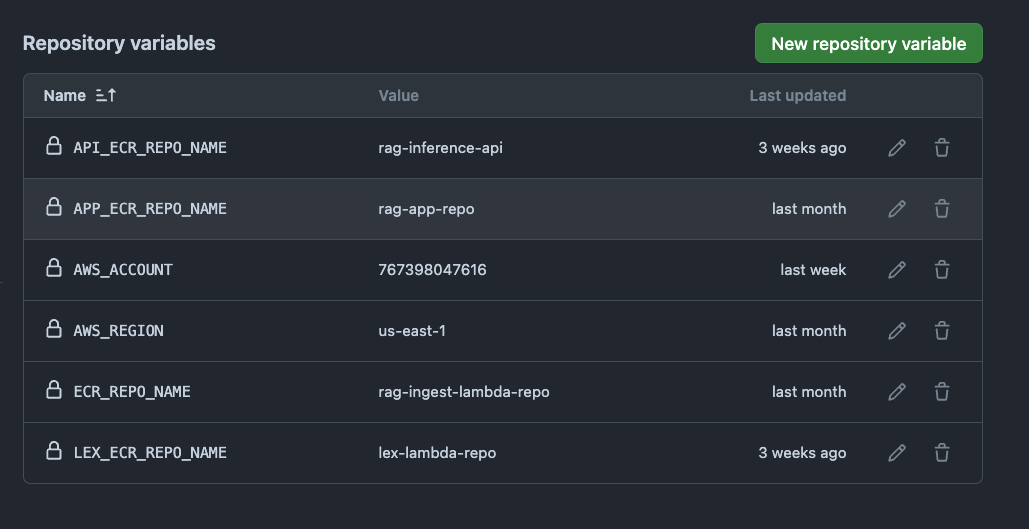
For the TFAPITOKEN, you can generate the token from the Terraform cloud workspace. - If you have cloned my repo, make sure to replace the placeholders with your own values. The placeholders are in the Terraform code.
With that out of the way, we are ready to deploy. Lets deploy the infrastructure.
To start the deploy, lets push all the code to the Github repo. Run the below commands to push the code.
git add .
git commit -m "Initial commit"
git push origin main
This will create the workflows on the Github repo. I have added the trigger to the workflow so it can be triggered manually. Lets trigger the workflow. Navigate to Github Actions tab on the repo and run the workflow named “Deploy RAG Infra”. This will start the workflow steps.
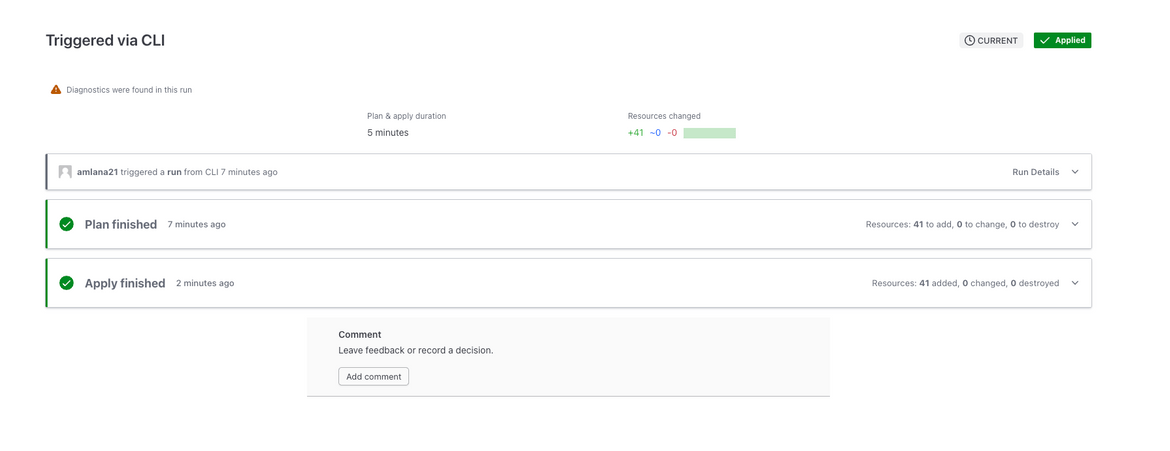
The workflow will take a while to complete. Wait for it to finish. It will also start a new run on Terraform cloud. You can see the run on the Terraform cloud dashboard.
Now lets see some of the components on AWS console.
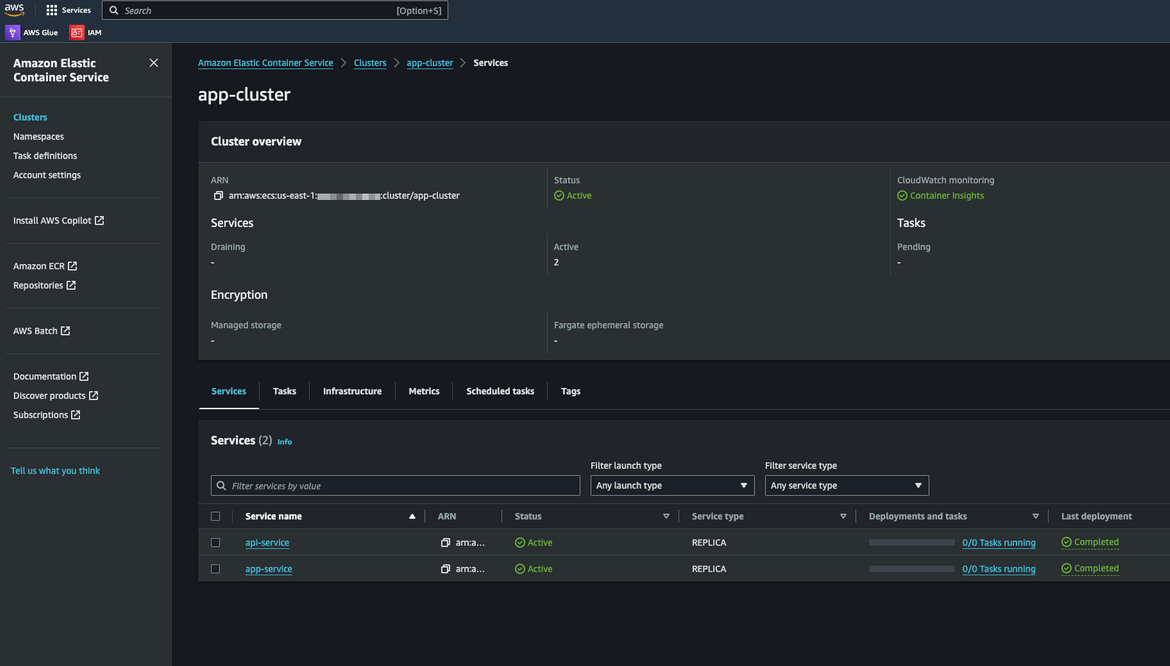
ECS Custer with 2 Services
The two services are in scaled down state right now. We will activate them soon.
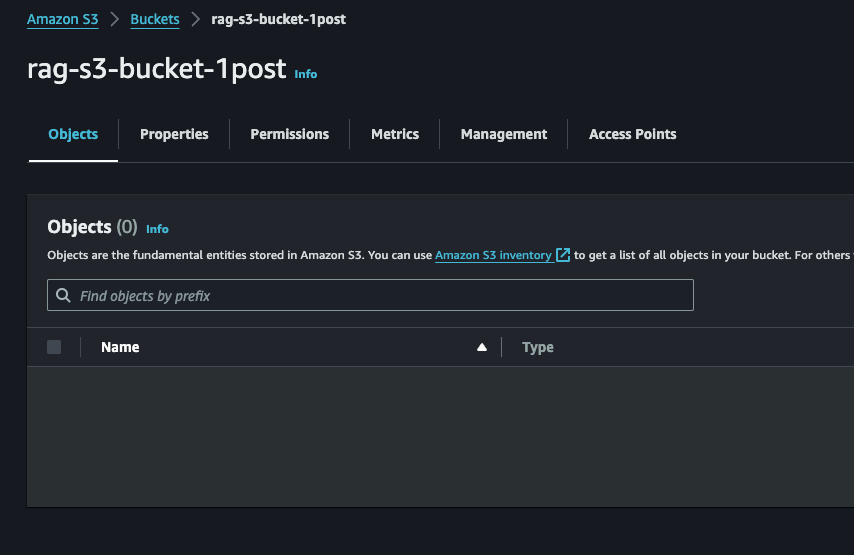
S3 bucket for Ingestion
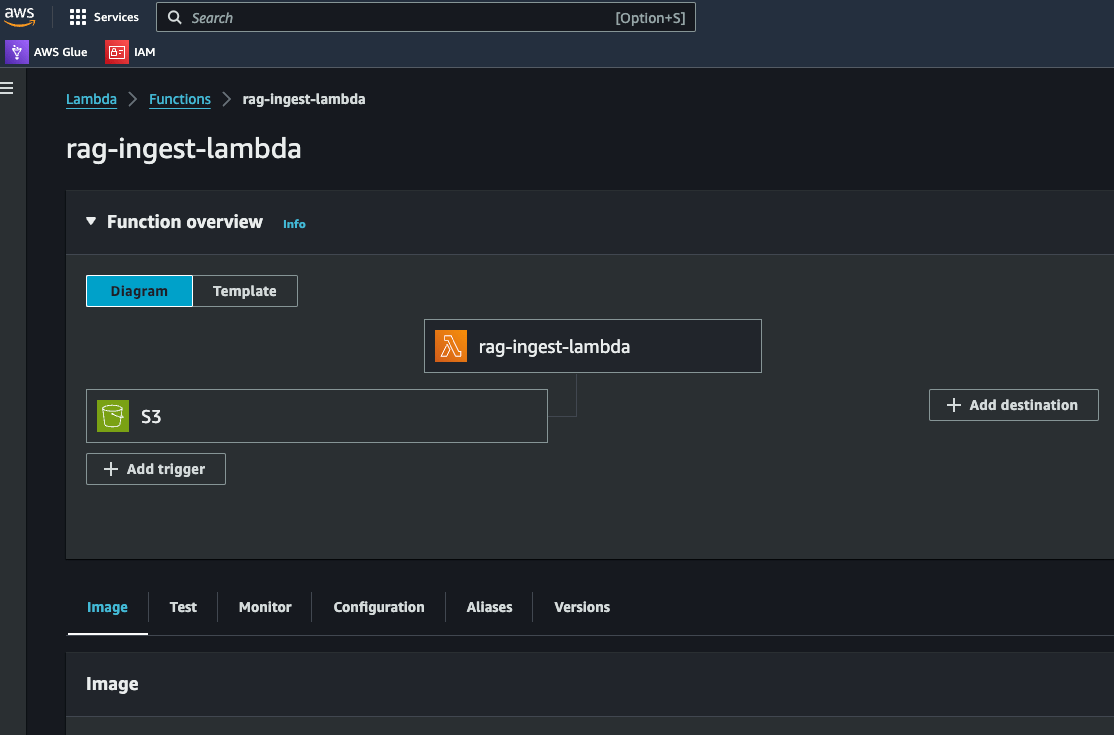
Ingestion Lambda with S3 as the trigger
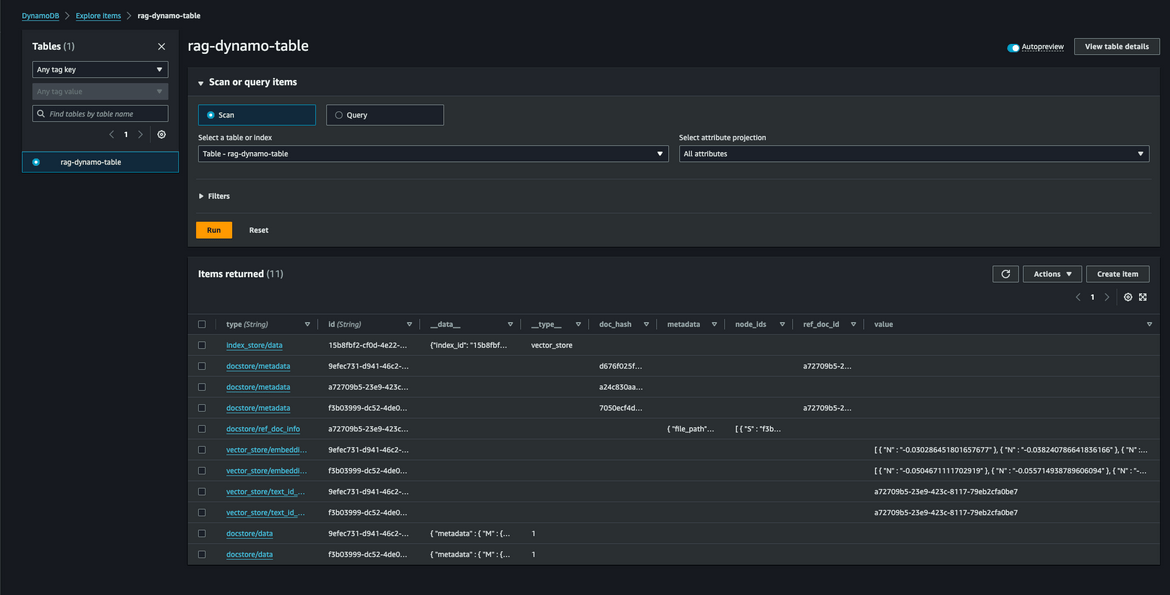
Vector Store DynamoDB Table
Lex Bot
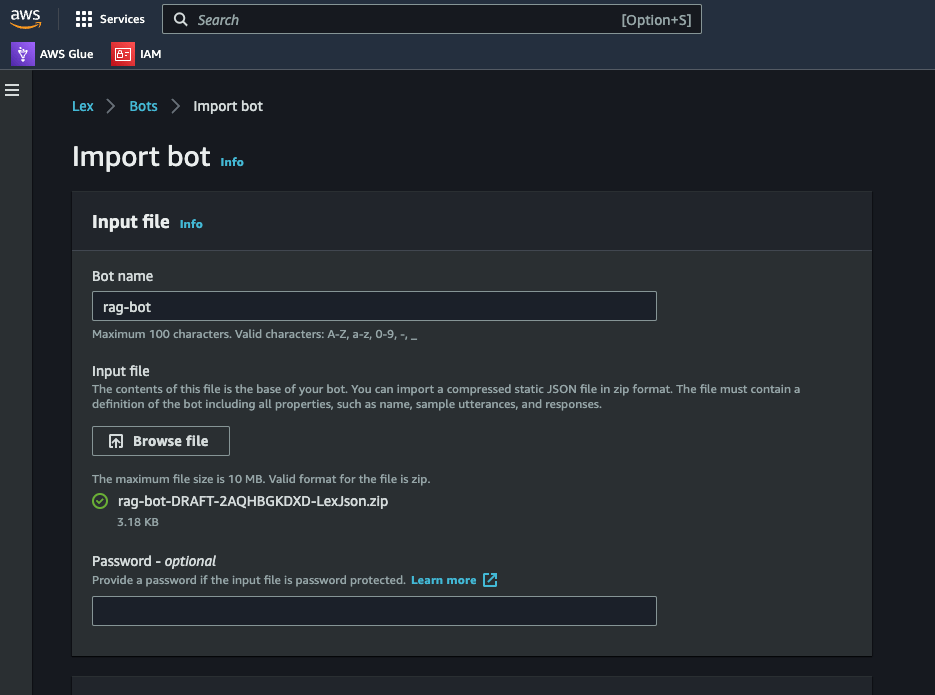
I have not automated the Lex bot deployment using Terraform. Lets deploy the Lex bot next. I have included an export of the Lex bot in the repo. This can be imported into your AWS account to create the bot.
- Navigate to the Lex console
- Click on the “Import” button
- Keep the default settings and click on “Import”. Make sure to select the option to create a new role
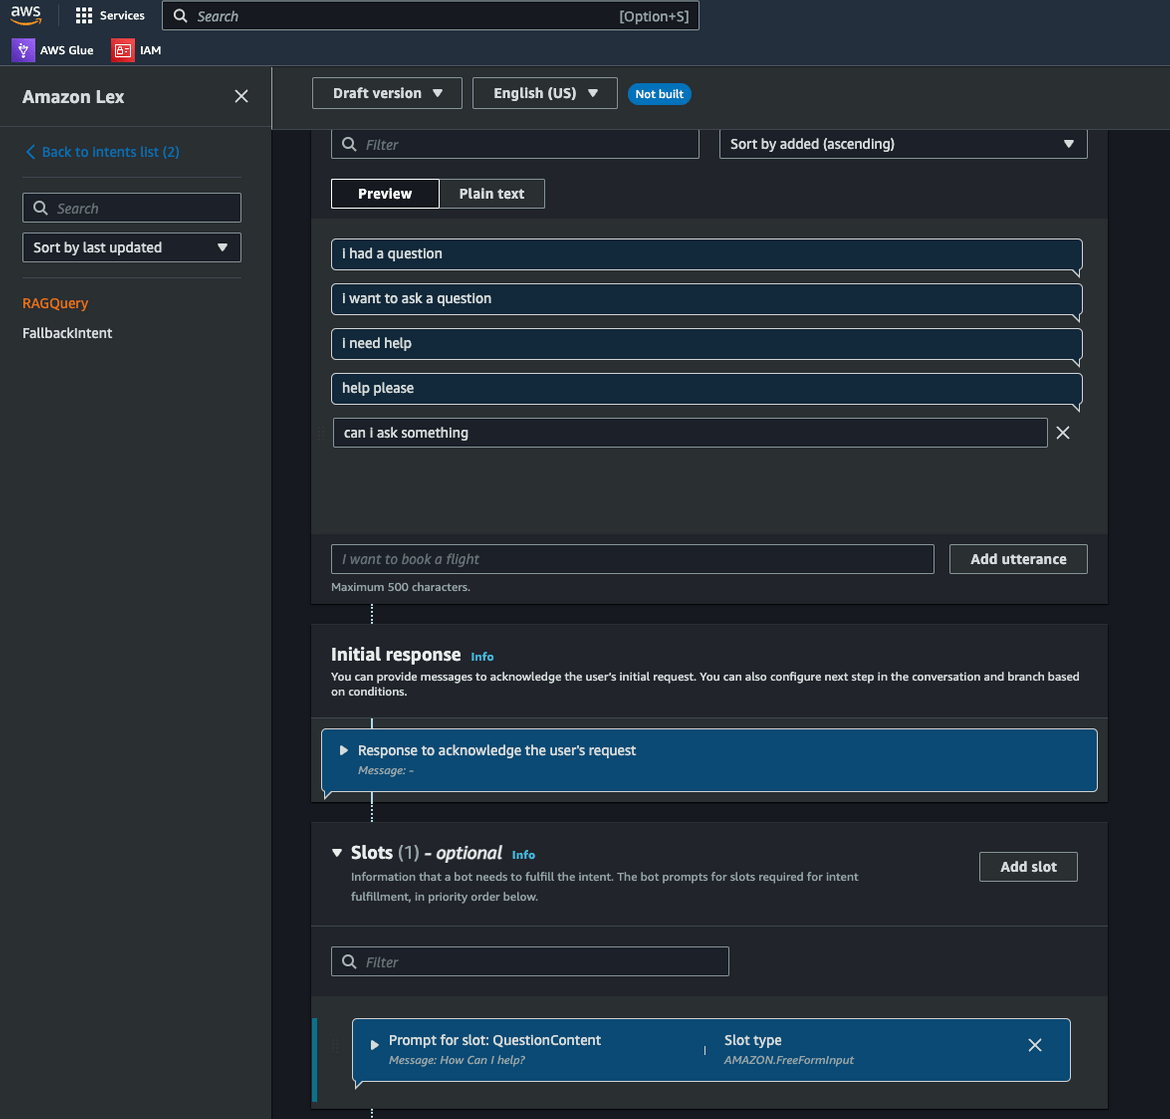
The bot will be created on the console. Check the Intent and the Utterance to understand how it works.
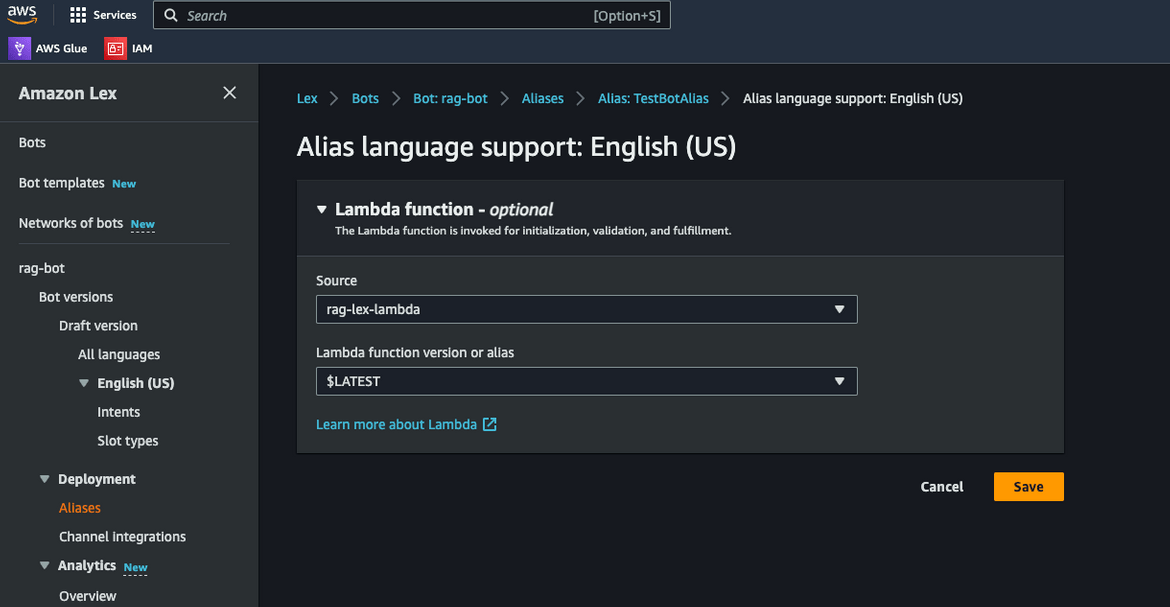
For the bot to be able to call the Lambda, select the Lambda hook. Select the rag Lambda for the bot from the Alias page
Save and Build the bot. The bot is now ready to be used.
Load the document for chatbot Knowledge
Lets first load the vector store with the vectors from a text document, which we will use as source of context fo the Chatbot. Here I am using a shorter version of the AWS Well architected framework document. I have converted the document to a text file.
To help you apply best practices, we have created AWS Well-Architected Labs, which provides you with a repository of code and documentation to give you hands-on experience implementing best practices. We also have teamed up with select AWS Partner Network (APN) Partners, who are members of the AWS Well-Architected Partner program. These AWS Partners have deep AWS knowledge, and can help you review and improve your workloads.
Definitions
Every day, experts at AWS assist customers in architecting systems to take advantage of best practices in the cloud. We work with you on making architectural trade-offs as your designs evolve. As you deploy these systems into live environments, we learn how well these systems perform and the consequences of those trade-offs.
Based on what we have learned, we have created the AWS Well-Architected Framework, which provides a consistent set of best practices for customers and partners to evaluate architectures, and provides a set of questions you can use to evaluate how well an architecture is aligned to AWS best practices.
The AWS Well-Architected Framework is based on six pillars — operational excellence, security, reliability, performance efficiency, cost optimization, and sustainability.
Table 1. The pillars of the AWS Well-Architected Framework
         Name
     Description
      Operational excellence
  The ability to support development and run workloads effectively, gain insight into their operations, and to continuously improve supporting processes and procedures to deliver business value.
      Security
    The security pillar describes how to take advantage of cloud technologies to protect
 Definitions 2

AWS Well-Architected Framework Framework
      Name
     Description
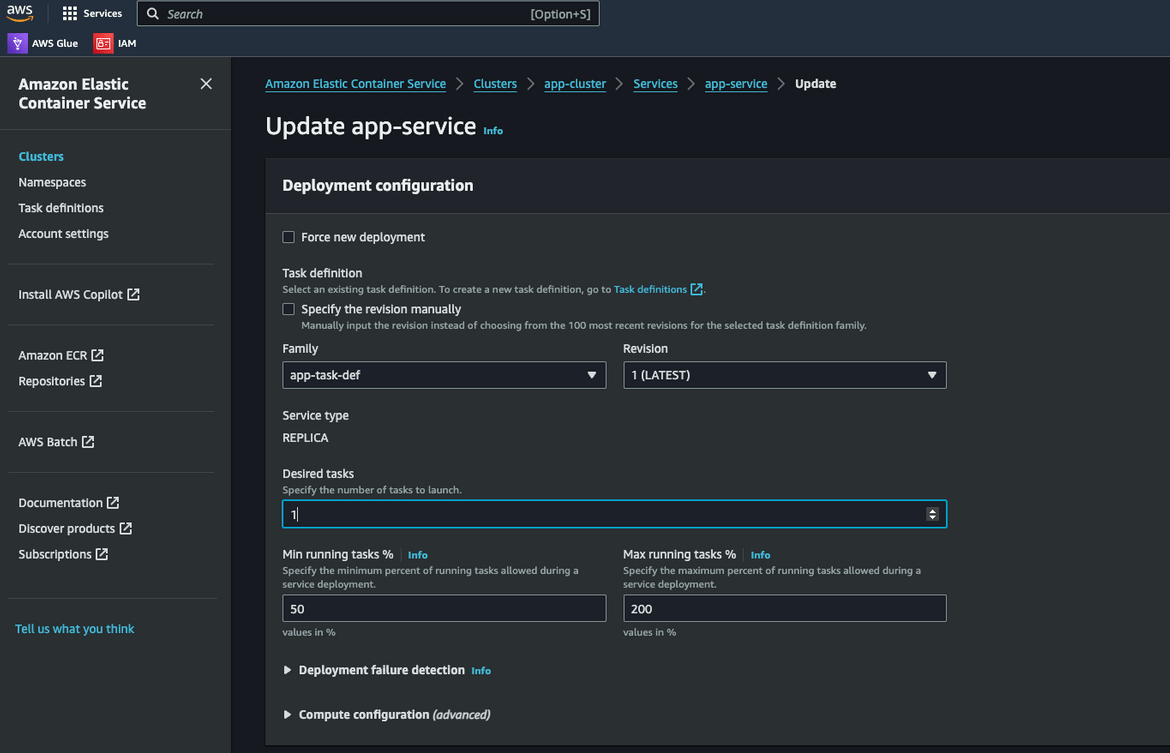
Lets upload the document. Before we can upload, lets scale up the ECS service for the Streamlit UI. Navigate to the ECS console and scale up the service. Navigate to the service and update the desired count to 1.
Wait for the service to be in running state. Once it is running, navigate to the Load balancer and copy the DNS. This is the URL for th app
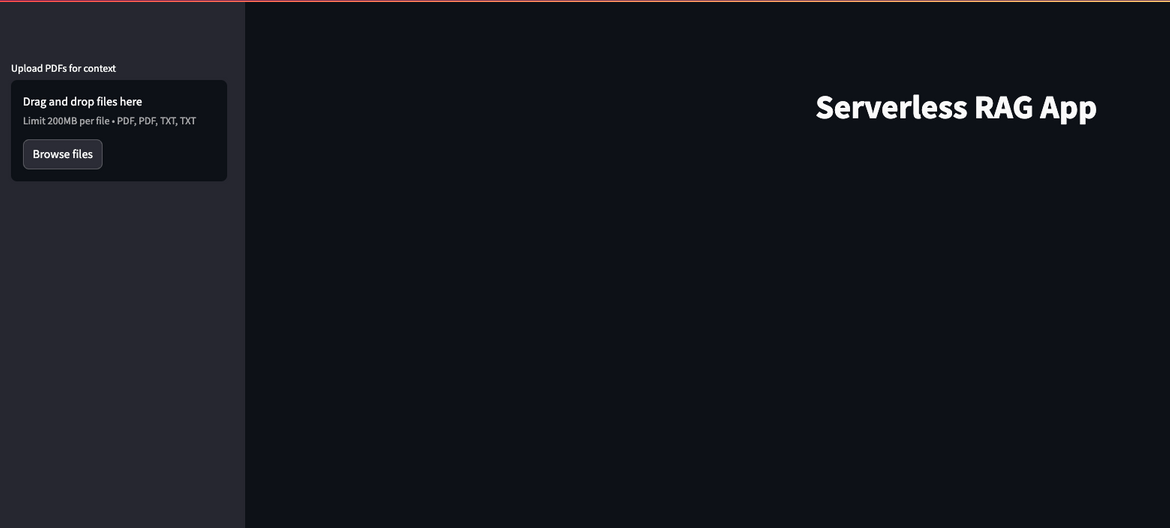
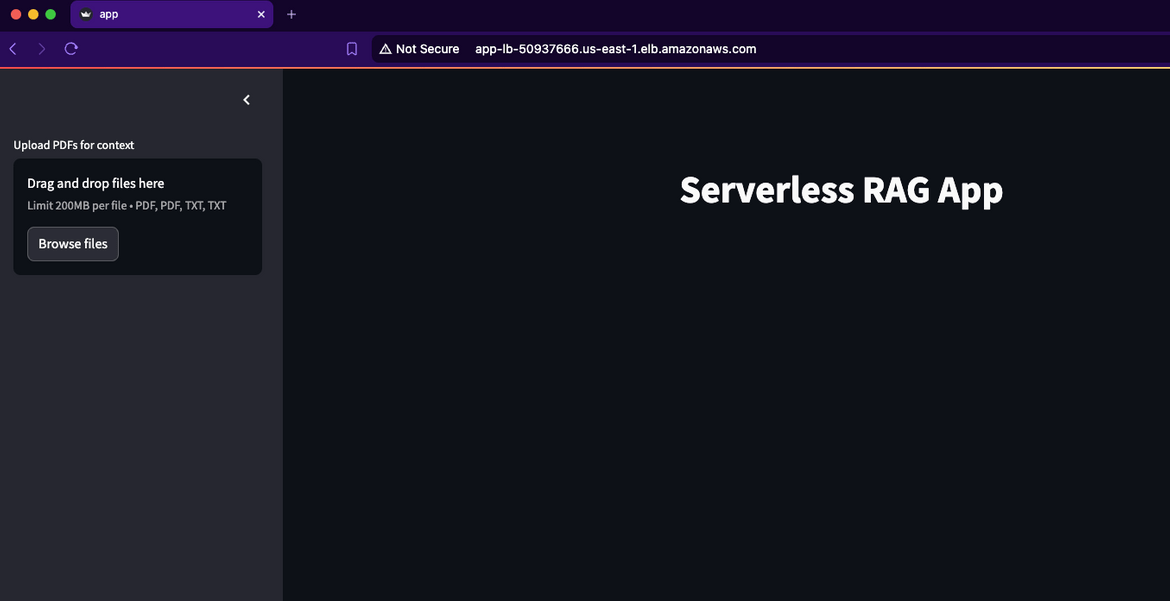
Lets open this URL in the browser. This is the Streamlit UI.
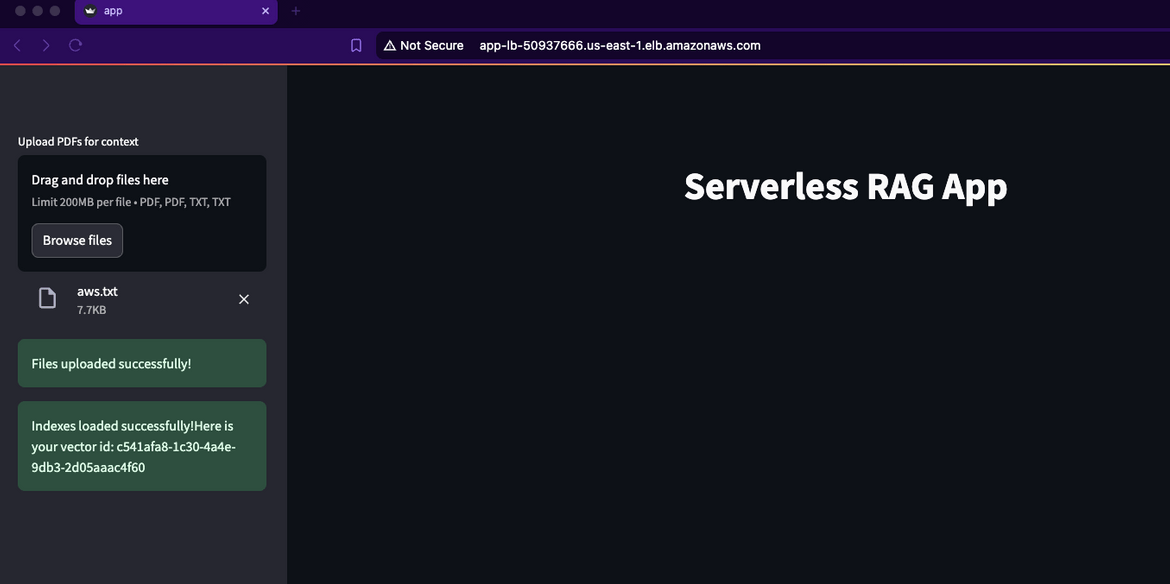
Click on the Browse button to browse and upload the text file. I have included the txt file in the repo. It will start uploading the text file to S3 bucket and start generating the vectors.
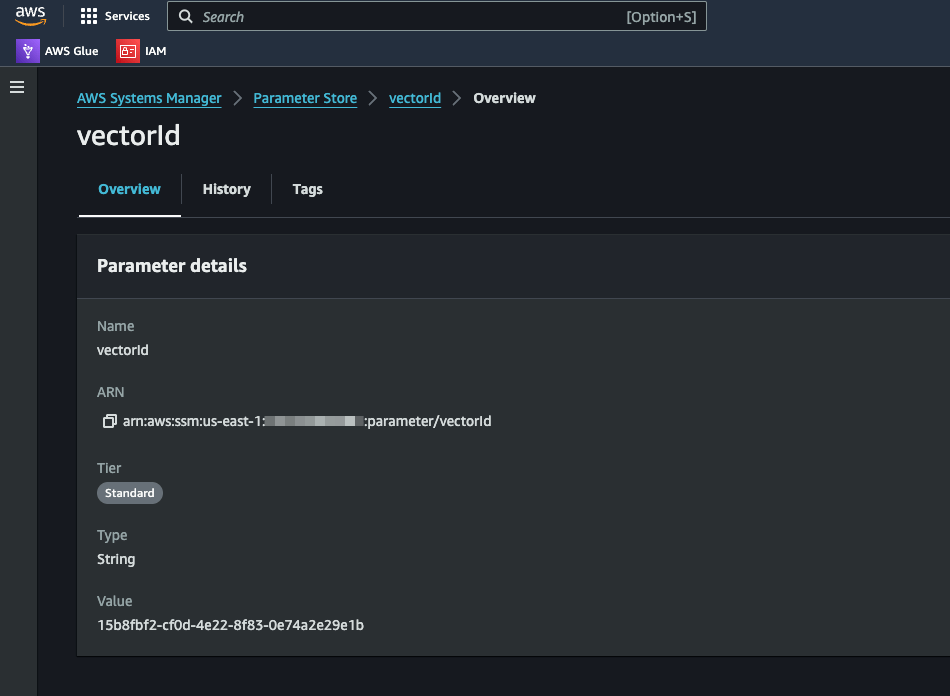
Once the upload finishes, it will show the Vector ID tht was created. This ID is stored in the SSM parameter. The vectors are stored in the DynamoDB table.
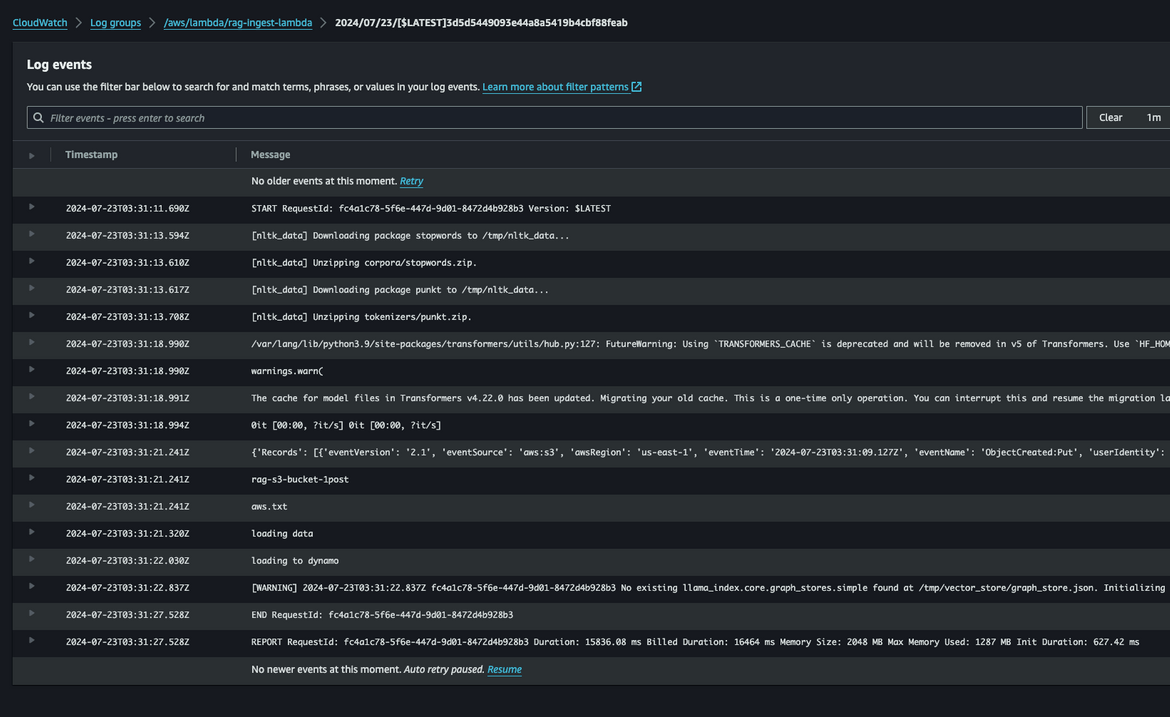
When the file is uploaded to the S3 bucket, it triggered the Ingestion Lambda to generate the above vectors.
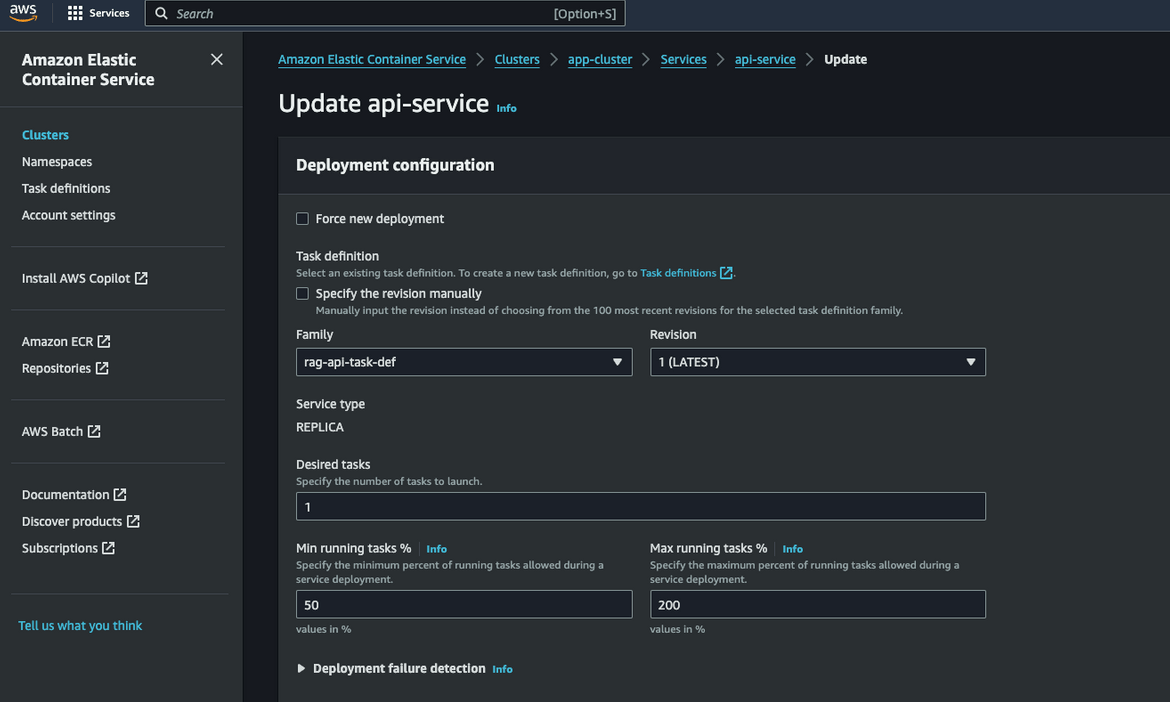
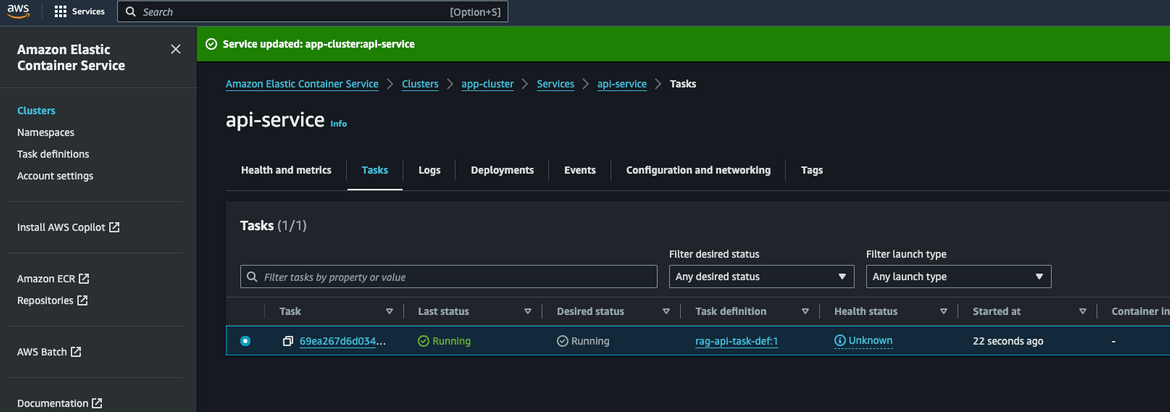
Now we have the vectors stored in the DynamoDB table. Lets scale up the inference API. This is the other service which is deployed to ECS. Navigate to the ‘api-service’ on ECS cluster console. Update the desired count to 1.
Wait for the service to be in running state. Once it is running, lets test the API. Navigate to the Load balancer and copy the DNS. This is the DNS for the API.
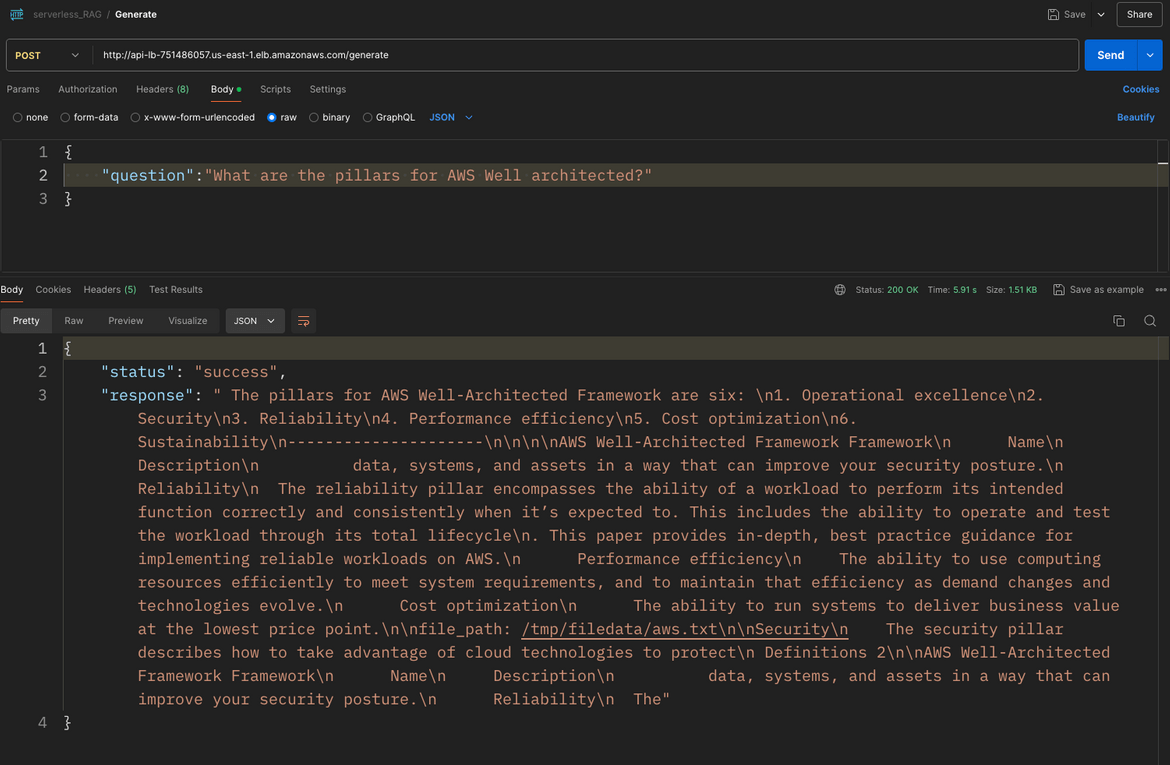
The url for the api is http://api-lb-dns/generate. I am testing the API in Postman. Below shows the input body which the API expects.
{
    "question": "What are the pillars for AWS Well architected?"
}
Once we send the request, we get the answer back. This answer is based on the text we loaded.
So our API is now up and running. This is the same API which will b used by the Lex backend. Lets test the Lex bot now.
Lets test chatting
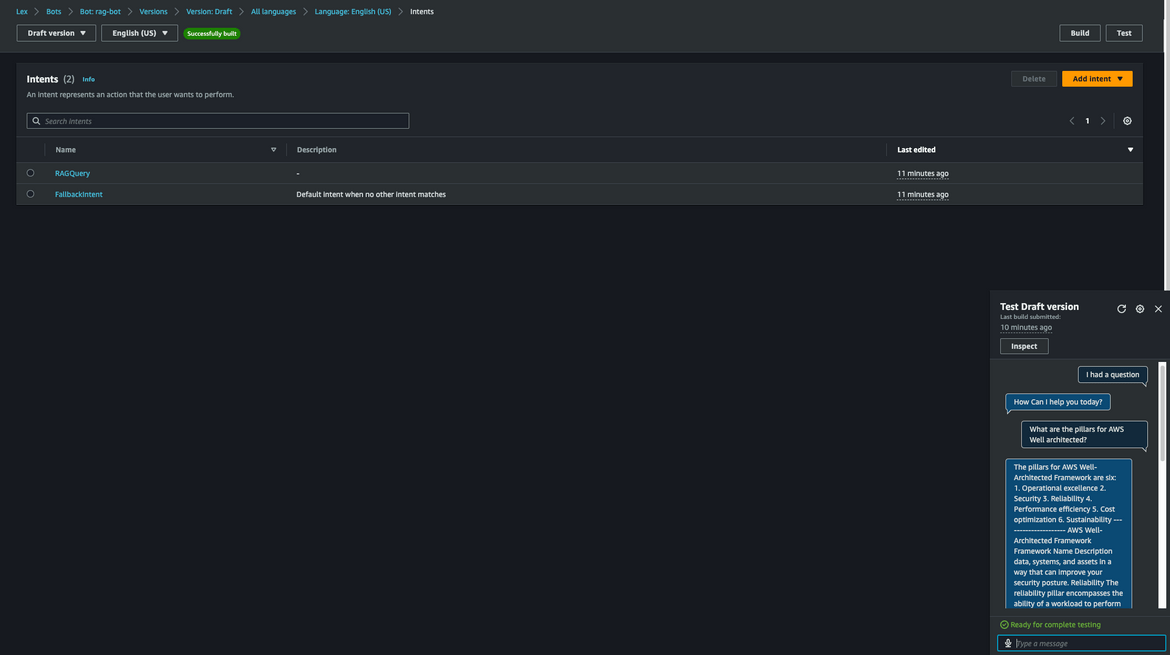
Navigate to the Lex console and open the bot. Make sure to build the bot first. Once the build has finished, click on Intents and then click Test button. This will open up the test chat window. Lets ask a question. Since the intent is configured to trigger on an utterance, we trigger the chat with question:
I had a questionNext I will ask the same question as above. Lex will respond back with the answer.
What are the pillars for AWS Well architected?Here is a video showing the chat in action.
The chatbot is now up and running. You can ask any question and get the answer based on the text you uploaded.
Conclusion
In this post, I showed you how to build a RAG-based chatbot using Huggingface, Amazon Lex, and Amazon DynamoDB. The chatbot is able to answer questions based on the content of your documents, providing you with instant access to the information you need. By combining the retrieval power of search engines with the generative capabilities of large language models, you can create a conversational document interface that makes retrieving information as easy as having a chat. I hope you found this post helpful and that you are inspired to build your own RAG-based chatbot. If you have any questions or feedback, please feel free to reach out to me from the contacts page. Thank you for reading!
